Making Thinking Visible
advertisement
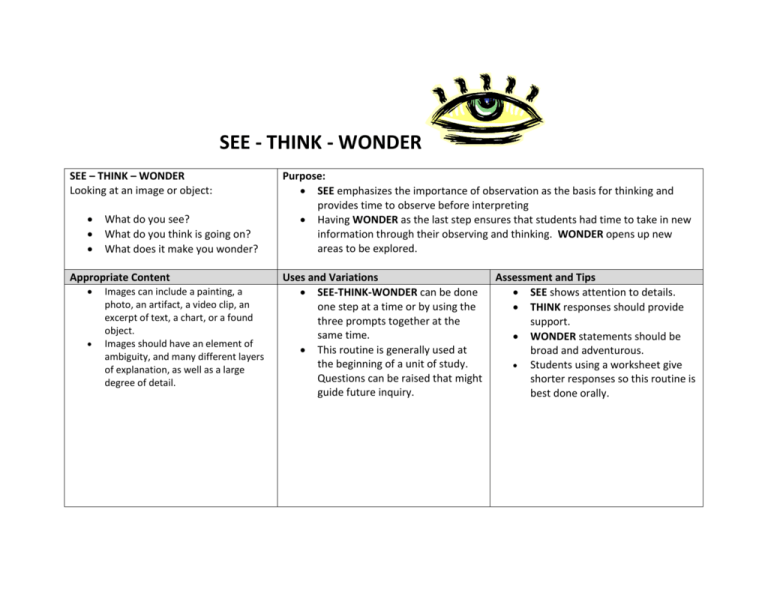
SEE - THINK - WONDER SEE – THINK – WONDER Looking at an image or object: What do you see? What do you think is going on? What does it make you wonder? Appropriate Content Images can include a painting, a photo, an artifact, a video clip, an excerpt of text, a chart, or a found object. Images should have an element of ambiguity, and many different layers of explanation, as well as a large degree of detail. Purpose: SEE emphasizes the importance of observation as the basis for thinking and provides time to observe before interpreting Having WONDER as the last step ensures that students had time to take in new information through their observing and thinking. WONDER opens up new areas to be explored. Uses and Variations SEE-THINK-WONDER can be done one step at a time or by using the three prompts together at the same time. This routine is generally used at the beginning of a unit of study. Questions can be raised that might guide future inquiry. Assessment and Tips SEE shows attention to details. THINK responses should provide support. WONDER statements should be broad and adventurous. Students using a worksheet give shorter responses so this routine is best done orally. The Steps 1. Set Up: Present the image in a way that allows students to see it in as much detail possible. You can project it on the whiteboard or each team can have a copy to look at. Students are given 2 to 3 minutes to observe without any talking or discussion. 2. See: Ask students to state what they noticed. They should only share what they could see and give no interpretations. 3. Think: Ask students what they think is going on in the image. The goal is to build up layers of tentative interpretations. Respond to students’ answers with requests for evidence such as: What do you see that makes you say that? 4. Wonder: Ask students what they are now wondering about based on what they have seen and have been thinking. Wondering is about asking broader questions that push us beyond our interpretations to look at issues and ideas raised by the object. 5. Share the thinking: Students share their thinking at each step along the way before moving on to the next one. The class can begin to build on the group’s thinking and the discussion can become richer because of it. ZOOM IN ZOOM IN Purpose: Look closely at the small bit of image that is revealed: What do you see or notice? What is your hypothesis or interpretation of what this might be, based on what you are seeing? This thinking routine causes students to deal with limited information and it enables them to see that it is helpful to be open-minded and flexible. This routine causes learners to act as detectives and build up meaning, individually and as a group. Reveal more of the image: What new things do you see? How does this change your interpretation? Has the new information answered any of your wonders or changed your previous ideas? Repeat the reveal and questioning process until the whole image has been revealed: What lingering questions remain for you about this image? Appropriate Content Consider whether the image has separate areas that tell a different story and if the parts are as interesting as the whole. Uses and Variations Use an illustration to immerse students in a text and to develop an understanding of the setting or time period. Assessment and Tips There is no set number of reveals to use. The content might be a scene with many people doing different things with the initial reveal showing just one person or activity. Content must be engaging and meaningful to the subject area. In social studies you can use a map. As ZOOM IN progresses, more cartographic information is revealed. Walk yourself through the reveals and determine what type of information is revealed and if it will engage students. The Steps 1. Set up: Display a section of the selected image and invite students to look at it. Allow time for careful observation. You can ask for observations before moving to the next step. Interpretations can be done individually, in small groups, or with the total class. 2. Reveal: Uncover more of the image. Ask students to identify new details. Ask them how these newly observed details affect their previous interpretations. You can ask about their wonderings as well. 3. Repeat: The process is continued. Ask students to discuss their different ideas and reflect on how their thinking changed as a result of the reveals. 4. Share the thinking: Discuss the process of ZOOM IN. Ask students how their interpretations changed over time. Ask them how seeing more influenced their thinking. THINK – PUZZLE – EXPLORE THINK – PUZZLE – EXPLORE Consider the subject or topic just presented: What do you think you know about this topic? What questions or puzzles do you have about this topic? How might you explore the puzzles we have around this topic? Appropriate Content Select complex and rich topics that lead to questions that invite multiple interpretations Subject can be a big idea or an article in the paper, or anything that is relevant to students and is worth understanding at a deeper level. Purpose: THINK-PUZZLE-EXPLORE is a routine that encourages students to connect to their prior knowledge, to be curious, and plan for independent or group inquiry. Teachers can get an idea of students’ understanding of a topic and can develop the setting for deeper inquiry. The routine can also be used at the conclusion of a unit as a reflective tool. Uses and Variations The routine can be taught to parents and used in small groups on field trips. Assessment and Tips THINK identifies misconceptions students have about a topic. PUZZLE lets teachers know about what students are interested in exploring further. EXPLORE is an opportunity to determine students’ ability to plan an inquiry. The Steps 1. Set up: This routine helps shape the study to follow. Plan on some form of documentation. Students in small groups can document their conversation or use sticky notes that can be posted on butcher paper. 2. Ask: What do you think you know about . . . Ask the question and give students time to think. Have students either state their ideas or jot them down. Stating their ideas allows others to build upon them. 3. Ask: What questions or puzzles do you have? Stress the thinking part by asking students to wonder more about the topic with further questions such as: What would be interesting to learn more about? What are you wondering about? Are there things about this topic about which you are curious? 4. Ask: How can we explore these puzzles? Have students select a puzzle from their list. Share and discuss how one would explore the puzzles further. Ask: Whom might you ask? Where could you get more information? What would you key search words be? What could you do other than search for information? How could you find ways to answer your own puzzles? 5. Share the thinking: Thinking can be shared as a whole group. If you share in small groups, have them report out. Students can then choose to work in pairs or small groups to plan the exploration of the puzzle they found most interesting. CHALK TALK CHALK TALK Purpose Looking at the topic or question written on the chart paper: What ideas come to mind when you consider this idea, question, or problem? What connections can you make to others’ responses? What questions arise as you think about the ideas and consider the responses and comments of others? Appropriate Content Appropriate content includes single words or phrases related to a topic of study. Questions generate a richer level of discussion. Content should invite multiple perspectives. This routine asks students to think about ideas, questions, or problems by silently responding in writing both to the prompt and to the thoughts of others. All students can participate in the open-ended and exploratory nature of the routine. Uses and Variations Makes room for all learners to have a voice Makes learning visible by focusing on reactions, connections, and questions CHALK TALK can be used to encourage reflective thinking. Assessment and Tips Look for relevance. Check to see if contributions relate to big ideas and if students can put forth their own ideas. If responses seem limited it may be that the prompt was too narrow. The Steps 1. Set up: Write the prompts on large sheets of chart paper. Place the charts on tables around the room. Put markers on each table. Determine the groups and assign them to one of the charts. 2. Present the CHALK TALK prompt: Ask students to think about their reactions to the prompt. Have them record their ideas and questions. Have learners read and add to each other’s responses with additional comments and questions. 3. Circulate: Provide time for students to circulate and read the responses of another group. Have them add to the prompts and responses. Continue the rotation until all groups have been to all charts. 4. Facilitate: The teacher acts as a facilitator, prompting the groups about the types of responses they can make as they read. They can connect ideas, elaborate on others ideas, or comment on what others have written, or write a question asking for more detail. 5. Share the thinking: Have groups return to their original chart. Have the groups review what was written on their chart. Ask groups the following questions: What themes emerged? Where did they see common issues and reactions? What question or comment surprised them? Debrief. Have groups respond to how their thinking developed through this process. 3 – 2 – 1 BRIDGE 3 – 2 – 1 BRIDGE Thinking about the key concept or topic, identify: INITIAL RESPONSE 3 Words 2 Questions 1 Metaphor/Simile NEW RESPONSE 3 Words 2 Questions 1 Metaphor/Simile BRIDGE Identify how your new responses connect to or shifted from your initial response. Appropriate Content This thinking routine works well when the topic is one where all students have some knowledge. Purpose: This thinking routine activates prior knowledge before beginning the planned learning experience. Starting with words makes the thinking activity accessible. Initial questions and metaphor/simile inform the teacher of the students’ depth of understanding. BRIDGE helps students recognize the learning that has taken place. Uses and Variations Some teachers incorporate this routine as a regular part of their literary circle. 3-2-1 BRIDGE can act as a pretest of students’ current understanding The ending metaphors give insight to the depth of understanding at the end of the study. Assessment and Tips Acts as a short preassessment. Instruction can be built from that point rather repeating what is already known. 3-2-1 BRIDGE can be repeated through the study to let the teacher see how readily students are synthesizing and integrating new information. The Steps 1. Set up: Determine how students will record their responses. They will need to come back to the initial responses after an extended time. 2. Ask for three words: Ask students to generate three words that come to mind when they think of the topic. Instruct students not to overthink. 3. Ask for two questions: Ask students to generate two questions that quickly come to mind. 4. Ask for one metaphor or simile: Ask students to create their own metaphor or simile for the topic. State that metaphors and similes are connections. 5. Provide an instructional period: There is no time limit on this instructional period. The requirement is that the chosen time needs to have moved the students’ thinking beyond their initial understanding. 6. Perform the second 3 – 2 – 1: Repeat the same steps asking students to select the words, questions, and metaphor/simile prompted by the new learning. 7. BRIDGING – Share the thinking: Have students share their initial and new responses with a partner. Have them discuss what they notice about how their thinking has changed. As a whole group, identify some of the new thinking and changes that have taken place. COMPASS POINTS COMPAS POINTS Considering the idea, question, or proposition before you: E = Excitements: What excites you about this idea? What’s the upside? W = Worries: What do you find worrisome about this idea? What’s the downside? PURPOSE Format for students to consider an idea from different angles Issues are explored from multiple perspectives and areas are identified where more information is needed helping students avoid rushing to judgment N = Needs: What else do you need to know or find out about this idea? S = Stance, Steps, or Suggestions: What is your current stance or opinion on the idea? What should your next step be in your evaluation of this idea? What suggestions do you have at this point? Appropriate Content Uses and Variations This routine works well when the idea This routine can be done with the is one for which there are dilemmas or whole class. It can also be done by different points of view students individually. Students can share with others after thinking on their own. Assessment and Tips The teacher can observe how flexible and fluent students are in their thinking as they attempt to take on different parts of the question. The Steps 1. Set up: Frame the issue and present it to students. Use four sheets of chart paper, one for each compass point, and tape them to the walls. Give students sticky notes to write down their ideas. 2. Identify excitements: Ask, What excites you about this idea? What is the upside? Allow students time to think, write, and post their ideas on the E chart. 3. Identify worries: Ask, What worries would you have about this? What are your concerns? What is the downside? Give students time to think and have them post their ideas on the W chart. 4. Identify needs: Ask, What do you need to know and gather more information about to help you better understand the issue? Post ideas on the N chart. 5. Ask for stances, steps, or suggestions. Post ideas on the S chart. 6. Share the thinking: Ask students to review the comments made by others. Ask students if they see any themes that emerge in each category. Spend some time discussing suggestions for moving forward and in developing a plan that can be put into action. THE EXPLANATION GAME THE EXPLANATION GAME Taking a close look at the object you are trying to understand: Name it: Name a feature of the object that you notice. Explain it: What could it be? What role might it serve? Why might it be there? Give reasons: What makes you say that? Why do you think it happened that way? Generate alternatives: What else could it be? What makes you say that? Appropriate Content Content should have various parts and functions that would allow for closer examination. Appropriate content includes science phenomena, historical events, geographical images, or mathematical models. Purpose: This routine involves looking closely at the parts of an object rather than the whole. Students try to build explanations and interpretations. The object should be one that students recognize, but don’t fully understand how it operates or functions. Students are asked to build causal explanations for why something is the way it is. This makes THE EXPLANATION GAME powerful for developing understanding. Uses and Variations Looking at a work of art Thinking like an archaeologist The process of giving reasons is significant to making the culture of your classroom one of hypothesizing. Assessment and Tips Analyze the quality of student explanations. Encourage students to resist the urge to name the object; keep the focus on observations. The Steps 1. Set up: Focus students on the object you want them to understand better. Ask them to look carefully at the object to see all they can possibly see. 2. Name it: Ask students to share with their group the various features they noticed. Students should record all the different parts they can observe. Working in a group helps students to see features they might miss if they are working alone. 3. Explain it: In groups, students take their list of features and begin to explain them. Their goal is to come up with as many explanations as possible. They should document their work. 4. Give reasons: Students generate reasons that describe why the explanations make sense. Students provide evidence to support their explanations. 5. Generate alternatives: Students are required to give alternative explanations beyond the ones they already shared. This continues to keep students focused on the features and why they might be the way they are. Gifted and Talented Education Program Strategies for Making Thinking Visible in Your Classroom Adapted from Making Thinking Visible: How to Promote Engagement, Understanding, and Independence for All Learners by Ron Ritchhart, Mark Church, Karin Morrison
