Using Equations in SolidWorks, Example 2
(Draft 3, 5/15/2006, SolidWorks 2006)
Introduction
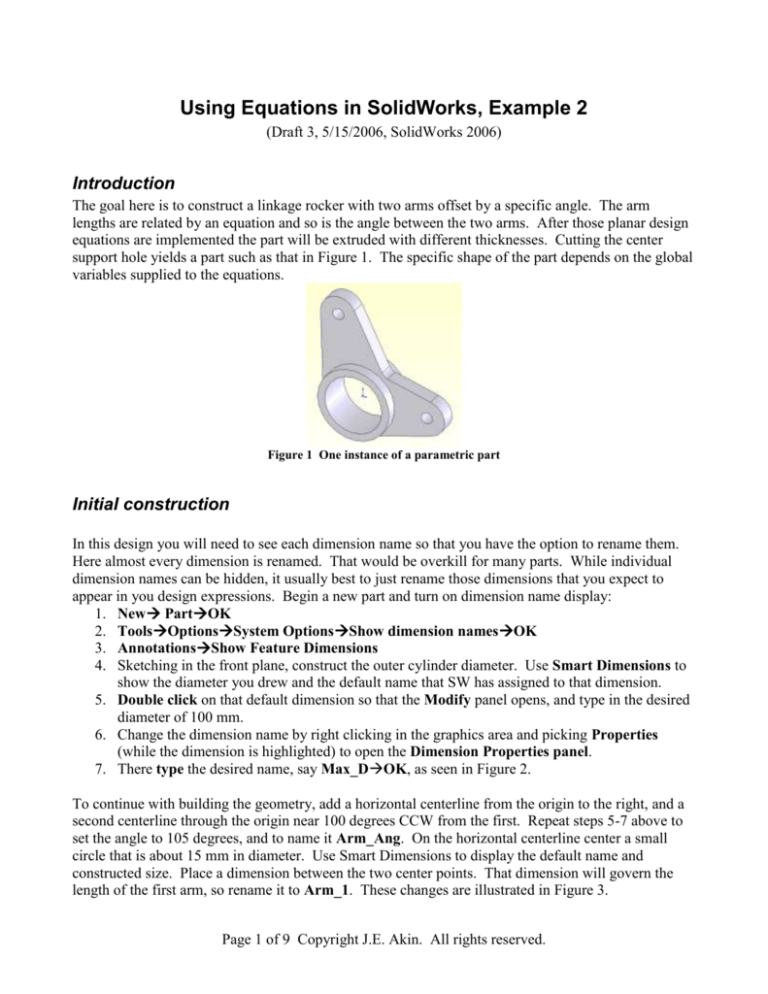
The goal here is to construct a linkage rocker with two arms offset by a specific angle. The arm
lengths are related by an equation and so is the angle between the two arms. After those planar design
equations are implemented the part will be extruded with different thicknesses. Cutting the center
support hole yields a part such as that in Figure 1. The specific shape of the part depends on the global
variables supplied to the equations.
Figure 1 One instance of a parametric part
Initial construction
In this design you will need to see each dimension name so that you have the option to rename them.
Here almost every dimension is renamed. That would be overkill for many parts. While individual
dimension names can be hidden, it usually best to just rename those dimensions that you expect to
appear in you design expressions. Begin a new part and turn on dimension name display:
1. New PartOK
2. ToolsOptionsSystem OptionsShow dimension namesOK
3. AnnotationsShow Feature Dimensions
4. Sketching in the front plane, construct the outer cylinder diameter. Use Smart Dimensions to
show the diameter you drew and the default name that SW has assigned to that dimension.
5. Double click on that default dimension so that the Modify panel opens, and type in the desired
diameter of 100 mm.
6. Change the dimension name by right clicking in the graphics area and picking Properties
(while the dimension is highlighted) to open the Dimension Properties panel.
7. There type the desired name, say Max_DOK, as seen in Figure 2.
To continue with building the geometry, add a horizontal centerline from the origin to the right, and a
second centerline through the origin near 100 degrees CCW from the first. Repeat steps 5-7 above to
set the angle to 105 degrees, and to name it Arm_Ang. On the horizontal centerline center a small
circle that is about 15 mm in diameter. Use Smart Dimensions to display the default name and
constructed size. Place a dimension between the two center points. That dimension will govern the
length of the first arm, so rename it to Arm_1. These changes are illustrated in Figure 3.
Page 1 of 9 Copyright J.E. Akin. All rights reserved.
Figure 2 Specify the outer cylinder diameter size and name
Figure 3 Renaming dimensions related to arms.
The dimension Arm_1 will now be defined in an equation by making it a function of a global design
parameter. There are two ways to start up design equations. Here you begin with the existing Arm_1
dimension, in Figure 3 lower right and top of Figure 4:
1. Double click on the dimension (Arm_1). Rather than change the value (163.5), click on the
down arrow for two available options, Link Value or Add Equation. For versions earlier than
SW 2006, use ToolsEquations to open the equation panel.
Page 2 of 9 Copyright J.E. Akin. All rights reserved.
2. Select the Add Equation option. Since there are currently no equations defined SW jumps to
the Add Equation panel of the Equations panel. The default name (in quotes) of the selected
dimension automatically appears to start the equation.
3. Use the lower calculator panel to add the desired initial length, say = 150 mm, OK (see middle
of Figure 4).
The result appears as the first equation in the Equations panel. In
4. Figure 4 (bottom) the green checkmark indicates that SW could solve the equation. A red
exclamation mark would mean that an equation has failed to solve.
Figure 4 Beginning the design equations process.
One way to insert specific global design variables into the front of equation list is to:
Select the Edit All tab in the Equations panel (
1. Figure 4).
2. That opens the Edit Equations panel and displays all the equations (one here).
Page 3 of 9 Copyright J.E. Akin. All rights reserved.
3. Place the cursor at the very front of the first equation. Type in the name, say “Length”, value,
= 150, and a description of the first global design constant and enter return (Figure 5, top).
4. Picking OK places the Equations icon in the Feature Manager.
Figure 5 Inserting a global design variable in front of an equation
To use the global variable “Length” in the second equations use:
1. Feature Manager Equations Edit Equation (Figure 6 top left)
2. Select the second equation, replace 150 with “Length”, OK
3. The revised expression appears in the Equations panel (Figure 6).
4. Rebuild, verify that the equation symbol, , appears before the dimension value (Figure 7).
Figure 6 Linking the second equation to a design parameter
Figure 7 Dimension Arm_1 is governed by an equation
Page 4 of 9 Copyright J.E. Akin. All rights reserved.
The angle between the two arms (currently under construction) is to also depend on the distance
between the hole centers on the horizontal arm (Arm_1). Add this as the third equation:
1. Feature ManagerEquationsAdd Equation to open the Add Equation panel.
2. In Add Equation, initialize the equation by clicking on the Arm_Ang dimension.
3. Then the name “Arm_Ang@Sketch1” appears in the Add Equation panel, Figure 8.
Figure 8 Clicking a dimension brings its name into an equation
For this equation you wish to use VBA logic to set the angle to be either 90 degrees for Length less
than 110 mm, or 104 degrees when Length is greater than or equal to 110 mm. The one ‘line if-thenelse’ of the VBA immediate if statement, iif (note the two i’s in the name), does that. Its syntax is
iif ( logical_expression, result_if_true, result_if_false).
The actual expression is seen in Figure 9, along with a user comment. Hitting OK places the third
equation in the Equations panel. However, this new equation does not take effect until the part is
rebuilt. Then the angle assumes the desired value, and the equation symbol appears in front of the
dimension value to indicate that it depends on an expression. Those two changes are displayed in
Figure 10. (See the appendix for other VBA equation examples.)
The remainder of the final geometry construction (found in Figure 11) begins by locating another drill
hole on the second centerline at Arm_Ang. The design intent calls for this hole to move with the
second centerline and to be the same size as the first drill hole:
Page 5 of 9 Copyright J.E. Akin. All rights reserved.
Figure 9 A new equation tied to parametric constant “Length”
Figure 10 Equation 3 activated via a Rebuild
1. Check that the center of the hole is coincident with the centerline. If not, enforce that relation
with RelationsUpper_circle_centerUpper_centerlinecoincidentOK.
2. Change the name of the drill hole dimension (D1, Figure 10) to Drill_D.
3. For the second drill hole, click on its dimension, and select the Link Value option at the down
arrow in the numerical value box. Double click on the first Drill_D to link their name and
value. Note that a red chain symbol appears at both dimensions to show that they are linked.
4. Use Smart Dimensions to place a radial dimension from the origin to the center of the second
drill hole, and name it Arm_2.
5. Use Add Equation to set Arm_2 = 1.25 * Length. Verify that the equation symbol appears
before its numerical value.
6. Cap each arm end with an almost closed arc of radius 25 and name it End_R. When you create
the second one use the Link Value pull down to tie them together.
Page 6 of 9 Copyright J.E. Akin. All rights reserved.
7. From each arm end arc draw two lines tangent to both the arc and the Max_D circle. If
needed, use Relations to enforce the tangency. Trim off the extra parts of the End_R arc ends.
8. Where the two tangent lines cross, add a fillet, name its dimension Fillet, and use Add
Equation to set its value to half the radius End_R. See Figure 11 for the starting sketch.
Figure 11 Original configuration of the sketch
To see the effect of the global variable Length:
1. Right click on Equations in the Feature Manager and select Edit Equation.
2. Change the Length value from 120 to 95. Rebuild. The new sketch appears in Figure 12.
Figure 12 Second sketch configuration
Page 7 of 9 Copyright J.E. Akin. All rights reserved.
Continuing on to form the solid part from this sketch:
1. FeaturesBossMid-planeSelect contours.
2. Pick the region inside Max_D and assign an extrusion length of 50.
3. BossMid-planeSelect contours.
4. Pick the regions outside Max_D and assign an extrusion length of 20. (Figure 13)
5. Cut a hole of 90, centered on the origin, and the parts are finished (see Figure 14).
Figure 13 Extruded parametric sketch
Figure 14 Two finished parametric solids
Page 8 of 9 Copyright J.E. Akin. All rights reserved.
Closure
This relatively simple set of parts should illustrate the potential power of parametric designs.
Review the appendix to see other examples of logic operations that can be utilized in the SolidWorks
equations.
References
1. TriAxial Design and Analysis, ”Adding Logic to Equations: How VBA can be utilized to do
amazing things”, SW Tips & Tricks, v. 4-07, July 2004.
2. TriAxial Design and Analysis, ”Links, Equations, and Design Tables”, SW Tips & Tricks, v. 202, April 2000.
3. W.E. Howard, J.C. Musto, “Use of Parametric Modeling Techniques”, in Introduction to Solid
Modeling Using SolidWorks, McGraw Hill, 2006.
4. M. Spens, Automating SolidWorks 2004 using Macros, SDC Publications, 2004.
5. SDRC, Exploring IDEAS Design, v. II, Structural Dynamics Research Corp., 1996.
Appendix: Example of valid VBA equations
Page 9 of 9 Copyright J.E. Akin. All rights reserved.
