Building a DC Motor
advertisement
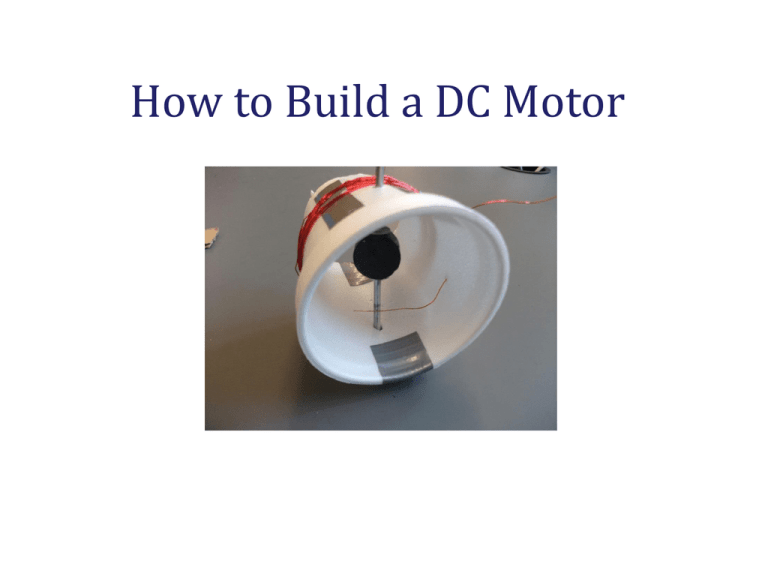
How to Build a DC Motor What you need • • • • • • Duct Tape White Out Sandpaper Nickel Scissors DC Motor Kit Contents of the Kit • • • • • • Foam Cup Plastic Lid 6-meter wire 8-inch wire Rotor Putty About the Rotor The rotor is the part of the motor that does the spinning. The rotor has already been fabricated for you since it can take some time for the glue to dry. Glue was applied to the head of each nail. Then the nails were pressed onto the craft magnets. Since the nails are made of iron, the magnetic force does a great job keeping the nails in place while the glue dries. Step 1: Cut off bottom of cup. The foam cup will be the structure of the motor. You will need to modify it in a few ways. First, cut off the bottom inch or so of the cup. Both the top and the bottom will be used later in the construction, so try to make one clean cut all the way around. If you accidentally mangle your cup, please ask your TA for a replacement. Step 2: Make holes for the rotor. Make a mark on the cup that is about halfway between the two ends of the cup. Use the nail to punch a hole through this mark from the outside. This hole will be on the top of your motor. Hold your cup so that the top of the motor (as defined by the hole) is horizontal. Use the nail to punch a second hole in the cup such that the rotor will be vertical when inserted into the holes. This second hole will be a little bit closer to the drinking end of the cup as seen in the top photo. Make sure the rotor can spin with ease (like a top). If the fit is too snug, the motor will not work. You will need to wiggle the rotor around to widen the holes a bit. Top – 1st hole Bottom – 2nd Hole Step 3: Wind the coil. Remove the rotor from the cup. Before you unwrap the wire, shave the insulation off of the last inch or so of both ends of your long wire using the sandpaper. Wrap your long wire around the cup, leaving about six inches of wire loose at the beginning and end of the coil. Begin unwrapping the wire at the end labeled with a star (★). You want your coil to be close to the holes that you have just punched, but you do not want the wire to cover the holes at all. Use tape to secure the wire to the cup every few turns. Otherwise, the coil is likely to unravel or cover the holes. This coil will be the electromagnet that will drive the rotor. All motors have an electromagnet somewhere. You have just completed the bulk of the “stator”, the part of the motor that does not rotate. Step 4: Construct the base. You will now make the base of the motor using the bottom of the cup. Cut out a rounded section from the base so that when the cup is placed on this support, the rotor is vertical (or close to it). This may take a bit of tinkering to get it right. That’s what makes this fun, though, right? Do not attach the motor to the base quite yet. Step 5: Connect the nickel. Heads Tails Before you attach the rest of the motor to the base, there is one very important thing you need to add. Shave the insulation off of the last inch or so of one end of the short wire using the sandpaper. Shave about two inches of insulation off the other end. This wire will sometimes be referred to as the nickel wire. (It is still made of copper.) Create a good electrical connection between the nickel and the short wire. You can tape the wire to Monticello, but make sure to the keep Thomas Jefferson uncovered. You can and should check this with an ohmmeter. Then, tape the nickel to the inside of the base with the wire underneath still in good electrical contact. Leave as much of Thomas Jefferson uncovered as possible. The rotor will need to be able to make electrical contact to the nickel. Step 6: Attach the base. Now you can attach the base with some duct tape. Things should look something like this. The bottom of the rotor should be in contact with the nickel. If you move the rotor up and down you should be able to hear it “clink” on the nickel. In addition to checking for the “clink”, check that the rotor spins with ease (like a top). Step 7: Quality Control Warning: You are about to connect the battery to your motor’s coil of wire. If you leave the battery connected, the wire will get hot, and you can burn yourself. Please do not leave the coil connected directly to the battery for more than 2 seconds. Briefly (for no more than 2 seconds) connect your battery across your coil to make sure that your rotor can rotate under the influence of a magnetic field. *** Read and complete Step 1.1 in the Lab Manual *** You should notice that connecting the battery across the coil could never result in a spinning rotor. A constant magnetic field will not spin a bar magnet. We need to moderate the current in some way if we are to keep the rotor spinning. Step 7: Still Quality Control To moderate the current, you will make the rotor part of the circuit. As the rotor spins, you will make it so that the circuit is broken and completed at just the right times to keep the rotor spinning. First, make sure you understand how this could happen. Connect one end of the coil to the battery. Connect the nickel wire to the other terminal of the battery. Then touch the free end of the coil to the bottom nail of the rotor. This should complete a circuit, turn on the current in the coils, and exert a torque on the rotor. Do you see this happen? (Do not leave this connected for more than 2 seconds!) What we want is for the electrical connection to be broken just as the magnet is lining up with the field. This will allow it to keep spinning. Then, when the rotor gets just past where the magnet is lined up the opposite way, we want the circuit to be completed again so that a torque is once again exerted on the rotor. This takes just a little bit of MacGyvering. Step 8: Apply white out to rotor. Apply a thin but solid coat of white out to one half of the bottom nail of the rotor. Please take a look at the rotor of one of the sample motors so that you know what half of the nail to cover. When the rotor lies flat on the table, you should see a view like the one to the right. The dotted line is added for effect. This half of the nail is not modified. This half of the nail is coated in white out. Step 9: Situating the brush Poke one end of the coil through the outside of the cup. Adjust it so that it makes firm contact with the bottom nail. Getting the wire in the right place works best when you take the rotor out first. Next, adjust the wire so that it is clearly too far toward the small opening. Finally, put the rotor back in place. The wire is often pressed up against the nail perfectly. If not, just try again. This is called a “brush.” In a motor a brush is an electrical contact between the rotor and the stator. You will find some kind of brush in most (but not all) motors. When the brush is in contact with the nail, a current will flow in the circuit. When the brush contacts the white out (an insulator) the circuit will be broken. The bottom nail, due to the way that it moderates the current flow in the circuit, could be called the “commutator.” Step 10: Life Warning: You are about to connect the motor to the battery. If the motor works and the rotor keeps spinning, you may leave the battery connected safely. This is because the current will be turning on and off. However, if the rotor stops, do not leave the battery connected. Connect one terminal of the battery to the coil wire and one end of the supply to the nickel wire. Give the rotor a little spin. Does it work? As the motor runs, the brush and the nail tend to get a little oxidized (or burnt). This can cause the motor to slow down after it runs for awhile. With this in mind, it might not be wise to allow your motor to run for more than ten or fifteen seconds at a time. If at any point you feel like you need to reinvigorate your motor, you can use the sandpaper to clean off the nail and the brush. Step 11: Make it a fan. There are still two items in the kit that you haven’t used, which would be unacceptable to MacGyver. The putty and the lid will become the fan blade. 1 3 2 4 5 Done! Take the lid and cut it into three slivers (2). Take the middle sliver and poke a hole in the middle of it with a nail (3). Then make cuts along the (imaginary) dashed lines seen above (4). After that, fold upward along the (imaginary) dotted lines seen in the top-right photo (5). Finally, attach the blade to the top of the rotor using the hole you poked and the putty. Enjoy the cool breeze!
