Arduino-BOT Lecture #4
advertisement

Arduino-BOT Lecture #4
EGR 120 – Introduction to Engineering
1
Navigating the Arduino-BOT with whiskers
References:
1) Arduino-BOT Lectures #1-5 - http://faculty.tcc.edu/PGordy/Egr120/
2) Robotics with the Board of Education Shield for Arduino web tutorials http://learn.parallax.com/ShieldRobot
3) Board of Education Shield for Arduino documentation http://www.parallax.com/Portals/0/Downloads/docs/prod/robo/35000-BOEShield-v1.2.pdf
4) Arduino web site (software, microcontrollers, examples, and more) - http://www.arduino.cc/
Arduino-BOT Lecture #4 EGR 120 – Introduction to Engineering
Tactile Navigation with the Arduino-BOT
(Wall following using whiskers)
Tactile navigation, or navigation by touch, is used in a variety of robotic applications,
including:
• Detecting when a robotic arm encounters an object
• Counting objects on a production line
• Aligning objects in an industrial process
• Detecting walls as a robot navigates its way around a course
In Team Assignment #4, each team will:
• Build tactile switches, called whiskers, onto your Arduino-BOT and test them
• Program the Arduino-BOT to detect when the whiskers encounter an obstacle
• Navigate a course by reacting when a whisker encounters a wall
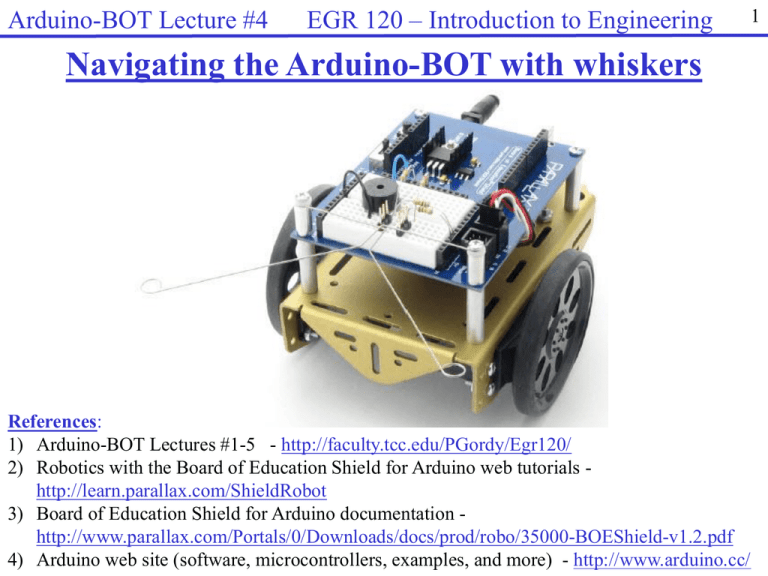
Whiskers give the Arduino-BOT the ability to sense the world around it through touch,
much like the antennae on an ant or the whiskers on a cat.
2
Arduino-BOT Lecture #4
Whiskers
EGR 120 – Introduction to Engineering
3
Arduino-BOT Lecture #4
EGR 120 – Introduction to Engineering
Adding whiskers to the Arduino-BOT
If your Arduino-BOT is not already equipped
with whiskers, gather the parts listed and follow
the instructions on the following slides.
4
Arduino-BOT Lecture #4
EGR 120 – Introduction to Engineering
Adding whiskers to the BOE-BOT
Instructions for adding whiskers to your Arduino-BOT are shown below.
5
Arduino-BOT Lecture #4
Building the Whiskers (continued)
EGR 120 – Introduction to Engineering
6
Arduino-BOT Lecture #4
EGR 120 – Introduction to Engineering
How the whisker circuit works
The whiskers work as follows:
• The whiskers are connected to standoffs on the Arduino-BOT which are connected to
ground.
• When no whisker is pressed, the digital input receives a HIGH voltage (5V) through the
two resistors.
• When the Arduino-BOT runs into a wall, the whisker touches a “header” on the
breadboard which will make a connection to a point in the circuit below and essentially
closes a switch. This provides a LOW (0V) digital input.
7
Arduino-BOT Lecture #4
EGR 120 – Introduction to Engineering
8
Deciding what to do when a whisker is pressed
Since we want the Arduino-BOT to do one thing when a whisker is pressed and
another thing when the whisker is not pressed, we need to be able to make
decisions in our code. A little more background in C++ is needed.
Decision structures in C++
C++ supports various types of decision structures which allows the program to
branch and perform different tasks based on some sort of logical test. A
common type of decision structure is the if structure (also the if-else
structure).
Arduino-BOT Lecture #4
EGR 120 – Introduction to Engineering
if structure
The if structure has the following
form and executes statements when
the conditional statement is true.
No statements are executed when
the conditional statement is false.
Logical
Test
if (conditional statement)
{
// execute these statements if true
}
Example:
if (a > b)
{
Serial.print("a is greater than b");
}
F
T
Do this if true
Other examples of conditional statements:
a>b
a >= b +c
a<0
a + b <= c + 3
a == b
a != 0
9
Arduino-BOT Lecture #4
if – else structure
The if – else structure has the
following form and executes
one set of statements when the
conditional statement is true and
another set of statements
conditional statement is false.
Logical
Test
F
T
Do this if true
Do this if false
EGR 120 – Introduction to Engineering
if (conditional statement)
{
// execute these statements if true
}
else
{
// execute these statements if false
}
Example:
if (a > b)
{
Serial.print("a is greater than b");
}
else
{
Serial.print(“a is not greater than b");
}
10
Arduino-BOT Lecture #4
EGR 120 – Introduction to Engineering
11
Adding a whisker test circuit
It is good to add a whisker test circuit so that we can be sure that the whiskers are
working before we attempt to navigate using whiskers.
Test Circuit Operation:
• Press left whisker – light LED on pin 8
• Press right whisker – light LED on pin 2
• Press both whiskers – light both LEDs
• No whiskers pressed – neither LED lit
Additional Parts Needed:
• Two 220 resistors
(red-red-brown)
• Two LEDs
Arduino-BOT Lecture #4
Whisker test circuit program
It is nice to have a test circuit,
so that we can tell if the
whiskers are working
properly. An easy solution is
to add two LED (with series
resistors) so that one LED
lights when the left whisker
hits a wall and the other LED
lights when the right whisker
hits a wall. Note that the
program below uses and if –
else decision structure.
EGR 120 – Introduction to Engineering
12
Arduino-BOT Lecture #4
EGR 120 – Introduction to Engineering
More on functions in C++
Our Arduino programs so far have included two key functions: setup( ) and loop( ).
Programs can also have additional functions.
Functions are particularly useful when you are likely to repeat sections of code.
Example:
• Use a function named pitch( ) to
sound a tone using the buzzer on
pin 4 at a specified frequency for
1 second.
• Call the function two times from
setup( ).
13
Arduino-BOT Lecture #4
Example – Using a function
to blink an LED on pin 12 N
times
EGR 120 – Introduction to Engineering
14
Arduino-BOT Lecture #4
EGR 120 – Introduction to Engineering
15
Sample whisker navigation program
Several methods could be used to navigate a track using whiskers.
One approach
• If neither whisker is pressed, go straight
• If the left whisker runs into an obstacle, back up a little bit and turn right 60º
• If the right whisker runs into an obstacle, back up a little bit and turn left 60º
• If both whiskers run into obstacles, back up a little bit and turn 120º
(See illustration on the following slide)
Using functions
Additionally, functions can be very useful with this method.
Functions can be written to:
• Go forward
• Turn left
• Turn right
• Backup
Arduino-BOT Lecture #4
EGR 120 – Introduction to Engineering
Whisker Navigation Program - Illustration
Right
Whisker
Finish
Right whisker hits
wall. Back up a little
and turn left.
Left whisker hits
wall. Back up a little
and turn right.
Start
16
Arduino-BOT Lecture #4
EGR 120 – Introduction to Engineering
Sample whisker navigation program
The following whisker navigation
program can be downloaded from the
course Blackboard site. Discuss the
program in class.
17
Arduino-BOT Lecture #4
EGR 120 – Introduction to Engineering
18
Modifying the whisker navigation program
The whisker navigation program provided may not work correctly at first.
Some things to adjust include:
• Adjust the values of Pulse Width to match your Arduino-BOT’s max speed
• Adjust how far the Arduino-BOT backs up in the backward( ) function
• Adjust how much the Arduino-BOT turns (left or right) when whiskers are hit
in the forward( ), turnRight( ), and turnLeft( ) functions.
• The Arduino-BOT can sometimes get stuck in a corner as it backs up and
turns left and then backs up and turns right. If you avoid making the amount
that it turns left and right the same then it can often work its way out of a
corner (for example, turn right 40 degrees and turn left 30 degrees).
18


