if - CENG449
advertisement

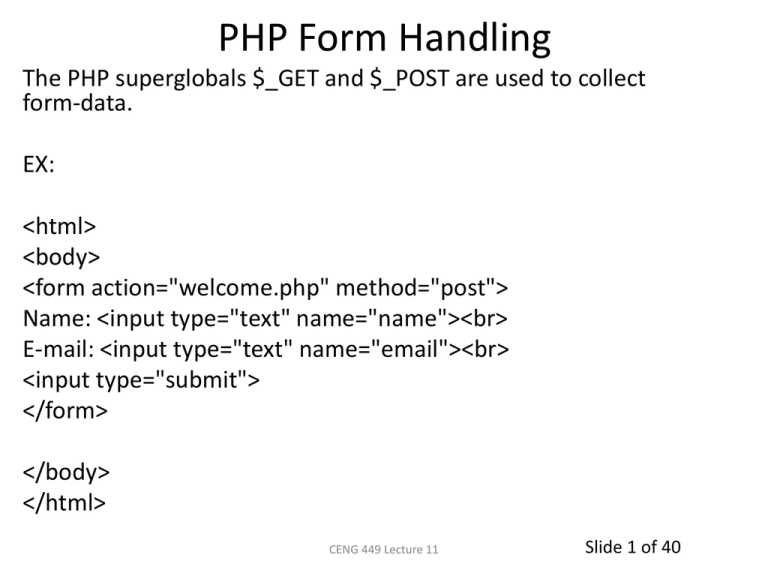
PHP Form Handling
The PHP superglobals $_GET and $_POST are used to collect
form-data.
EX:
<html>
<body>
<form action="welcome.php" method="post">
Name: <input type="text" name="name"><br>
E-mail: <input type="text" name="email"><br>
<input type="submit">
</form>
</body>
</html>
CENG 449 Lecture 11
Slide 1 of 40
welcome.php
<html>
<body>
<?php
$name=$_POST["name"];
$email=$_POST["email"];
echo "Your name is ".$name."<br/>";
echo "Your email is ".$email."<br/>";
?>
</body>
</html>
CENG 449 Lecture 11
Slide 2 of 40
welcome.php
<html>
<body>
<?php
if(isset($_POST["name"]) && isset($_POST["email"])
{
$name=$_POST["name"];
$email=$_POST["email"];
echo "Your name is ".$name."<br/>";
echo "Your email is ".$email."<br/>";
}
?>
</body>
</html>
CENG 449 Lecture 11
Slide 3 of 40
<html>
<body>
<form action="welcome.php" method= "get">
Name: <input type="text" name="name"><br>
E-mail: <input type="text" name="email"><br>
<input type="submit">
</form>
</body>
</html>
CENG 449 Lecture 11
Slide 4 of 40
<html>
<body>
<?php
$name=$_GET["name"];
$email=$_GET["email"];
echo "Your name is ".$name."<br/>";
echo "Your email is ".$email."<br/>";
?>
</body>
</html>
CENG 449 Lecture 11
Slide 5 of 40
GET vs. POST
Both GET and POST create an array (e.g. array( key => value, key2
=> value2, key3 => value3, ...)). This array holds key/value pairs,
where keys are the names of the form controls and values are the
input data from the user.
Both GET and POST are treated as $_GET and $_POST. These are
superglobals, which means that they are always accessible,
regardless of scope - and you can access them from any function,
class or file without having to do anything special.
$_GET is an array of variables passed to the current script via the
URL parameters.
$_POST is an array of variables passed to the current script via the
HTTP POST method.
CENG 449 Lecture 11
Slide 6 of 40
When to use GET?
Information sent from a form with the GET method is visible
to everyone (all variable names and values are displayed in
the URL). GET also has limits on the amount of information to
send. The limitation is about 2000 characters. However,
because the variables are displayed in the URL, it is possible
to bookmark the page. This can be useful in some cases.
GET may be used for sending non-sensitive data.
Note: GET should NEVER be used for sending passwords or
other sensitive information!
CENG 449 Lecture 11
Slide 7 of 40
When to use POST?
Information sent from a form with the POST method is
invisible to others (all names/values are embedded within
the body of the HTTP request) and has no limits on the
amount of information to send.
Moreover POST supports advanced functionality such as
support for multi-part binary input while uploading files to
server.
However, because the variables are not displayed in the URL,
it is not possible to bookmark the page.
Note Developers prefer POST for sending form data.
CENG 449 Lecture 11
Slide 8 of 40
What is the $_SERVER["PHP_SELF"] variable?
The $_SERVER["PHP_SELF"] is a super global variable
that returns the filename of the currently executing
script.
So, the $_SERVER["PHP_SELF"] sends the submitted
form data to the page itself, instead of jumping to a
different page. This way, the user will get error
messages on the same page as the form.
CENG 449 Lecture 11
Slide 9 of 40
What is the htmlspecialchars() function?
The htmlspecialchars() function converts special characters
to HTML entities. This means that it will replace HTML
characters like < and > with &lt; and &gt;. This prevents
attackers from exploiting the code by injecting HTML or
Javascript code (Cross-site Scripting attacks) in forms.
See:
http://www.w3schools.com/php/php_form_validation.asp
for an example
CENG 449 Lecture 11
Slide 10 of 40
<html>
<body>
<form method="post" action="<?php echo htmlspecialchars($_SERVER["PHP_SELF"]);?>">
<p>First name: <input type="text" name="firstname" /></p>
<p>Last name: <input type="text" name="lastname" /></p>
<input type="submit" name="submit" value="Submit" />
</form>
</html>
<?php
if(isset($_POST['firstname']) && isset($_POST['lastname']))
{
echo("First name: " . $_POST['firstname'] . "<br />\n");
echo("Last name: " . $_POST['lastname'] . "<br />\n");
}
?>
CENG 449 Lecture 11
Slide 11 of 40
CENG 449 Lecture 11
Slide 12 of 40
<?php
if(isset($_POST['firstname']) && isset($_POST['lastname']))
{
echo("First name: " . $_POST['firstname'] . "<br />\n");
echo("Last name: " . $_POST['lastname'] . "<br />\n");
}
?>
<html>
<body>
<form method="post" action="<?php echo htmlspecialchars($_SERVER["PHP_SELF"]);?>">
<p>First name: <input type="text" name="firstname" /></p>
<p>Last name: <input type="text" name="lastname" /></p>
<input type="submit" name="submit" value="Submit" />
</form>
</html>
CENG 449 Lecture 11
Slide 13 of 40
Secure input data
To prevent hackers entering your system, use the following approach while inputting the data
from user
<?php
// define variables and set to empty values
$name = $email = $gender = $comment = $website = "";
if ($_SERVER["REQUEST_METHOD"] == "POST") {
$name = test_input($_POST["name"]);
$email = test_input($_POST["email"]);
$website = test_input($_POST["website"]);
$comment = test_input($_POST["comment"]);
$gender = test_input($_POST["gender"]);
}
function test_input($data) {
$data = trim($data); // avoids the blank spaces at the beginning and at the end
$data = stripslashes($data); // stripes slashes
$data = htmlspecialchars($data); // convers special characters such as &lt
return $data;
}
?>
Slide 14 of 40
CENG 449 Lecture 11
Select Forms:
<html>
<body>
<h4>Art Supply Order Form</h4>
<form action="process.php" method="post">
<select name="item">
<option>Paint</option>
<option>Brushes</option>
<option>Erasers</option>
</select>
Quantity: <input name="quantity" type="text" />
<input type="submit" />
</form>
</body>
</html>
CENG 449 Lecture 11
Slide 15 of 40
process.php
<html>
<body>
<?php
$quantity = $_POST['quantity'];
$item = $_POST['item'];
echo "You ordered ". $quantity . " " . $item . ".<br />";
echo "Thank you for ordering!";
?>
</body>
</html>
CENG 449 Lecture 11
Slide 16 of 40
CENG 449 Lecture 11
Slide 17 of 40
<html>
<body>
<h3>PHP HTML Form radio button Example</h3>
<form name="infoForm" method="POST" action=“example.php">
Enter Your Full Name :
<input name="FullName" type="text" placeholder="Fullname"><br/><br/>
You are :
<input name="YourGender" type="radio" value="male" > Male
<input name="YourGender" type="radio" value="female" > Female
<br/>
<br/>
<input name="BtnSubmit" type="submit" value="Submit">
</form>
</body>
</html>
CENG 449 Lecture 11
Slide 18 of 40
example.php
<html>
<body>
<?php
if(isset($_POST['BtnSubmit']))
{
echo "<h3>Your form data as bellow</h3>";
echo "</br>Your Name: {$_POST['FullName']}";
echo "</br>Your are: {$_POST['YourGender']}";
echo "<hr>";
}
?>
</body>
</html>
CENG 449 Lecture 11
Slide 19 of 40
CENG 449 Lecture 11
Slide 20 of 40
Checkbox example:
<html>
<body>
<h3>PHP HTML Form checkbox Example</h3>
<form action="process.php" method="post">
<input type="checkbox" name="gender" value="Male">Male</input>
<input type="checkbox" name="gender" value="Female">Female</input>
<input type="submit" name="submit" value="Submit"/>
</form>
</body>
</html>
CENG 449 Lecture 11
Slide 21 of 40
process.php
<html>
<body>
<?php
if (isset($_POST['gender']))
{
echo "Your gender is ";
echo $_POST['gender']; // Displays value of checked checkbox.
}
?>
</body>
</html>
CENG 449 Lecture 11
Slide 22 of 40
CENG 449 Lecture 11
Slide 23 of 40
<html>
<body>
<h3>PHP HTML Form button Example</h3>
<form name="infoForm" method="POST" action="process.php">
Enter Your Name :
<input name="FullName" type="text" placeholder="Name"><br/><br/>
Enter Your SurName :
<input name="SurName" type="text" placeholder="Surname"><br/><br/>
<input type="submit" name="save" value="Save">
<input type="submit" name="clear" value="Clear">
<input type="submit" name="update" value="Update">
</form>
</body>
</html>
CENG 449 Lecture 11
Slide 24 of 40
process.php
<html>
<body>
<?php
if (isset($_POST['save']))
{
echo "Save button is pressed! <br /> ";
}
if (isset($_POST['clear']))
{
echo "Clear button is pressed! <br /> ";
}
if (isset($_POST['update']))
{
echo "Update button is pressed! <br /> ";
}
?>
</body>
</html>
CENG 449 Lecture 11
Slide 25 of 40
CENG 449 Lecture 11
Slide 26 of 40
Mulltiple Selection CheckBox:
<!DOCTYPE html>
<html>
<body>
<p> Please select your book types: </p>
<form name="form1" action="process.php" method="POST">
<input type="checkbox" name="book[]" value="Drama"> Drama <br/>
<input type="checkbox" name="book[]" value="Action and Adventure"> Action and Adventure <br/>
<input type="checkbox" name="book[]" value="Romance"> Romance <br/>
<input type="checkbox" name="book[]" value="Mystery"> Mystery <br/>
<input type="checkbox" name="book[]" value="Horror"> Horror <br/>
<input type="checkbox" name="book[]" value="Guide"> Guide <br/>
<input type="checkbox" name="book[]" value="Science"> Science <br/>
<input type="checkbox" name="book[]" value="History"> History <br/>
<input type="submit" value="SUBMIT">
</form>
</body>
</html>
CENG 449 Lecture 11
Slide 27 of 40
<?php
$bookArray=$_POST['book'];
echo "Your selected books are <br/>";
foreach ($bookArray as $aBook)
{
echo "$aBook <br>";
}
?>
CENG 449 Lecture 11
Slide 28 of 40
CENG 449 Lecture 11
Slide 29 of 40
PHP and MySQL
MySQL works very well in combination of various
programming languages like PERL, C, C++, JAVA and PHP. Out
of these languages, PHP is the most popular one because of
its web application development capabilities.
PHP provides various functions to access MySQL database
and to manipulate data records inside MySQL database. You
would require to call PHP functions in the same way you call
any other PHP function.
The PHP functions for use with MySQL have the following
general format:
mysql_function(value,value,...);
CENG 449 Lecture 11
Slide 30 of 40
Following example shows a generic syntax of PHP to call any MySQL
function.
<html>
<head>
<title>PHP with MySQL</title>
</head>
<body>
<?php
$retval = mysql_function(value, [value,...]);
if( !$retval )
{
die ( "Error: a related error message" );
}
// Otherwise MySQL or PHP Statements
?>
</body>
</html>
CENG 449 Lecture 11
Slide 31 of 40
MySQL Connection using PHP Script:
connection mysql_connect(server,user,passwd,new_link,client_flag);
<html>
<head>
<title>Connecting MySQL Server</title>
</head>
<body>
<?php
$dbhost = 'localhost:3036';
$dbuser = 'guest';
$dbpass = 'guest123';
$conn = mysql_connect($dbhost, $dbuser, $dbpass);
if(! $conn )
{
die('Could not connect: ' . mysql_error());
}
echo 'Connected successfully';
mysql_close($conn);
?>
</body>
</html>
CENG 449 Lecture 11
Slide 32 of 40
<html>
<body>
Adding data to MySQL Database
<h3>PHP HTML Form radio button Example</h3>
<form name="infoForm" method="POST" action= " process.php">
Enter Your Full Name :
<input name="FullName" type="text" placeholder="Fullname"><br/><br/>
Enter Your Student Number :
<input name="stNumber" type="text" placeholder="Student
Number"><br/><br/>
You are :
<input name="YourGender" type="radio" value="male" > Male
<input name="YourGender" type="radio" value="female" > Female
<br/>
<input name="FullName" type="text" placeholder="Fullname"><br/><br/>
<input name="BtnSubmit" type="submit" value="Submit">
</form>
</body>
</html>
CENG 449 Lecture 11
Slide 33 of 40
CENG 449 Lecture 11
Slide 34 of 40
<?php
$stFullName=$_POST['Fullname']; $stNumber=$_POST['stNumber']; $stGender=$_POST['YourGender'];
$dbhost = "localhost"; $dbuser = "root"; $dbpass = "";
$conn = mysql_connect($dbhost, $dbuser, $dbpass);
if(! $conn ) {
die('Could not connect: ' . mysql_error()); }
echo 'Connected successfully';
$sql = "INSERT INTO studentInfoTable (stFullName,stNumber, stGender) VALUES
('$stFullName','$stNumber','$stGender')";
mysql_select_db('studentInfo');
$retval = mysql_query( $sql, $conn );
if(! $retval )
{
die('Could not enter data: ' . mysql_error());
}
echo "Entered data successfully\n";
mysql_close($conn);
?>
CENG 449 Lecture 11
Slide 35 of 40
<html>
<body>
<h3>User Data Form</h3>
<form name="infoForm" method="POST" action= " process.php">
Enter Your Name :
<input name="FullName" type="text" placeholder="Name"><br/>
Enter Your SurName :
<input name="FullName" type="text" placeholder="Surname"><br/>
Enter Your Student Number :
<input name="stNumber" type="text" placeholder="Student Number"><br/>
You are :
<input name="YourGender" type="radio" value="male" > Male
<input name="YourGender" type="radio" value="female" > Female
<br/>
<input name="BtnSubmit" type="submit" value="Submit"> <br/><br/>
</form>
</body>
</html>
CENG 449 Lecture 11
Slide 36 of 40
<?php
$stName=$_POST['Name']; $stSurname=$_POST['Surname']; $stFullName=$Name." ".$Surname;
$stNumber=$_POST['stNumber']; $stGender=$_POST['YourGender'];
$dbhost = "localhost"; $dbuser = "root"; $dbpass = "";
$conn = mysql_connect($dbhost, $dbuser, $dbpass);
if(! $conn )
{
die('Could not connect: ' . mysql_error());
}
echo 'Connected successfully';
$sql = "INSERT INTO studentInfoTable (stName, stSurname,stFullName,stNumber, stGender) VALUES
('$stName','$stSurname','$stFullName','$stNumber','$stGender')";
mysql_select_db('studentInfo');
$retval = mysql_query( $sql, $conn );
if(! $retval )
{
die('Could not enter data: ' . mysql_error());
}
echo "Entered data successfully\n";
mysql_close($conn);
?>
CENG 449 Lecture 11
Slide 37 of 40
<html>
<body>
Search data in database
<h3>User Data Form</h3>
<form name="infoForm" method="POST" action= " process.php">
Enter Name to be Searhed :
<input name=“Name" type="text" placeholder="Name"><br/>
<input name="BtnSubmit" type="submit" value="Submit">
<br/>
</form>
</body>
</html>
CENG 449 Lecture 11
Slide 38 of 40
<?php
$stName=$_POST['Name'];
$dbhost = "localhost";
$dbuser = "root";
$dbpass = "";
$conn = mysql_connect($dbhost, $dbuser, $dbpass);
if(! $conn )
{
die('Could not connect: ' . mysql_error());
}
echo 'Connected successfully';
mysql_select_db('studentInfo');
$sql = "SELECT * FROM studentInfoTable WHERE stName='$stName'";
$retval = mysql_query( $sql, $conn );
if(! $retval )
{
die('Could not get data: ' . mysql_error());
}
while($row = mysql_fetch_array($retval)
{
echo "$row['stName'] $row['stSurname'] <br> ";
}
echo "Fetched data successfully\n";
mysql_close($conn);
?>
CENG 449 Lecture 11
Slide 39 of 40
CENG 449 Lecture 11
Slide 40 of 40


