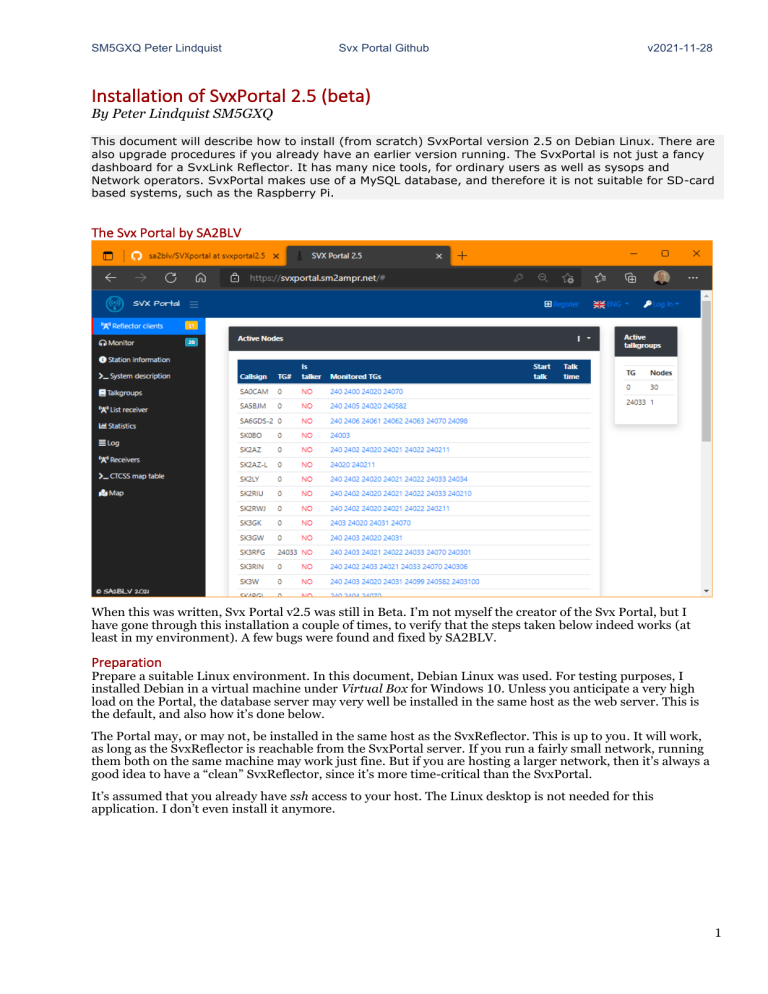
SM5GXQ Peter Lindquist Svx Portal Github v2021-11-28 Installation of SvxPortal 2.5 (beta) By Peter Lindquist SM5GXQ This document will describe how to install (from scratch) SvxPortal version 2.5 on Debian Linux. There are also upgrade procedures if you already have an earlier version running. The SvxPortal is not just a fancy dashboard for a SvxLink Reflector. It has many nice tools, for ordinary users as well as sysops and Network operators. SvxPortal makes use of a MySQL database, and therefore it is not suitable for SD-card based systems, such as the Raspberry Pi. The Svx Portal by SA2BLV When this was written, Svx Portal v2.5 was still in Beta. I’m not myself the creator of the Svx Portal, but I have gone through this installation a couple of times, to verify that the steps taken below indeed works (at least in my environment). A few bugs were found and fixed by SA2BLV. Preparation Prepare a suitable Linux environment. In this document, Debian Linux was used. For testing purposes, I installed Debian in a virtual machine under Virtual Box for Windows 10. Unless you anticipate a very high load on the Portal, the database server may very well be installed in the same host as the web server. This is the default, and also how it’s done below. The Portal may, or may not, be installed in the same host as the SvxReflector. This is up to you. It will work, as long as the SvxReflector is reachable from the SvxPortal server. If you run a fairly small network, running them both on the same machine may work just fine. But if you are hosting a larger network, then it’s always a good idea to have a “clean” SvxReflector, since it’s more time-critical than the SvxPortal. It’s assumed that you already have ssh access to your host. The Linux desktop is not needed for this application. I don’t even install it anymore. 1 SM5GXQ Peter Lindquist Svx Portal Github v2021-11-28 Prerequisites • • • • • php5 or larger MySQL Apache2 or ngnx crontab screen Always start with: sudo apt update sudo apt upgrade Install the MySQL database server MySql cannot be directly installed with apt, so first you need to import a MySQL repo to apt. Go to https://dev.mysql.com/downloads/repo/apt/ and find out which is the latest version. Now run: (replace x.x.x-x with the actual version) sudo apt install gnupg wget https://dev.mysql.com/get/mysql-apt-config_x.x.x-x_all.deb sudo dpkg -i mysql-apt-config_x.x.x-x_all.deb Just stick with the defaults, unless otherwise stated below. Then run: sudo apt update sudo apt install mysql-server mysql-client libmysqlclient-dev Enter a root password. This will be used later to access the database. Select Legacy authentication. Install the Apache2 web server First run: sudo apt install apache2 apache2-doc apache2-utils libexpat1 ssl-cert Now run this to install php: sudo apt install libapache2-mod-php php php-common php-curl php-dev php-gd php-pear php-imagick php-mysql php-ps php-xsl Mcrypt must be installed by hand. To build and install mcrypt, some dependencies must first be installed: sudo apt install gcc make autoconf libc-dev pkg-config libmcrypt-dev php-pear php-dev Then run: sudo pecl channel-update pecl.php.net sudo pecl update-channels sudo pecl install mcrypt Now run this to install phpMyAdmin: sudo apt install phpmyadmin When prompted for database setup, choose No. Some of the features will not be available, but we will not need those. If you choose Yes, this setup will try to create a special user account for testing the database from phpMyAdmin. The installation of Apache has created a directory /var/www/html, which needs to be removed now: sudo rm -rf /var/www/html 2 SM5GXQ Peter Lindquist Svx Portal Github v2021-11-28 Install SvxPortal Run: cd /var/www Now download the SvxPortal files from Github: sudo wget https://github.com/sa2blv/SVXportal/archive/refs/heads/svxportal2.5.zip Extract the files: sudo unzip svxportal2.5.zip Now rename the new folder back to html again: sudo mv SVXportal-svxportal2.5 html If you wish, you can now assign your own user access to these files, so you don’t need to use sudo each time you edit them. Create MySQL user and database Run: mysql -u root -p When prompted, enter the root password for MySQL that you already configured. Now you see a prompt: mysql: Enter the following commands: (replace ‘Password’ with a real password!) CREATE DATABASE Svxportal; CREATE USER 'Svxportal'@'localhost' IDENTIFIED WITH mysql_native_password BY 'Password'; GRANT SELECT, INSERT, UPDATE, DELETE, CREATE, INDEX, DROP, ALTER, CREATE TEMPORARY TABLES, LOCK TABLES ON Svxportal.* TO 'Svxportal'@'localhost'; Now exit mysql with: quit Initial setup of SvxPortal In your web browser, now enter the following url: (replace “yoururl” with the actual url) http://yoururl/install.php Enter: • • • • MySQL Server: MySQL Username: MySQL Password: MySQL DB: • Reflector_proxyserver URL: http://yoururl/reflector_proxy (replace with actual public url) • • • IceCast server URL: Svx recording folder: Reflector address: 127.0.0.1 (if the db is on the same machine) Svxportal Password (replace with actual password) Svxportal http://yoururl:8000/live (replace with actual public url) /var/www/htmlsvxrecording http://reflector:8080/status (replace with actual url) NB: It’s important that you always use a public url. For testing purposes, you can use the host’s name, but in that case the Portal will not function when accessed from the “outside”. If the Svx Reflector is on the same LAN (or the same host), then you may use the local hostname as Reflector Address. The clients will only access the portal web, including the Reflector Proxy. It’s the Portal itself that gets the json data from the Reflector. In this instruction, I don’t deal with the IceCast stuff at all. You may wish to setup live monitoring on your portal (you will need one instance of SvxLink and DarkIce for each talk group). If not needed, then the entire Monitoring menu may be disabled in the database. Enable the web server in svxreflector.conf file (on the Reflector machine). The port must match the above. 3 SM5GXQ Peter Lindquist Svx Portal Github v2021-11-28 [GLOBAL] #CFG_DIR=svxreflector.d TIMESTAMP_FORMAT="%c" LISTEN_PORT=5300 #SQL_TIMEOUT=600 #SQL_TIMEOUT_BLOCKTIME=60 #CODECS=OPUS TG_FOR_V1_CLIENTS=999 #RANDOM_QSY_RANGE=12399:100 HTTP_SRV_PORT=8080 Don’t forget to restart the svxreflector: sudo systemctl restart svxreflector Now click the Continue button. If everything is ok, then you will see another form. If something fails, you will know… First, copy the contents of the Stage 1 box. Then create/edit a new file: /var/www/html/config.php . Paste the contents into this file and save it. Now, in the same manner, put the Stage 2 contents into the file: /var/www/html/reflector_proxy/config.php Click the Self test button. This will verify Database access and that the Proxy is setup correctly and also that it can get json data from the Reflector. Install Screen: sudo apt install screen Run the background processes: screen screen -d -m bash -c -d -m bash -c 'cd /var/www/html; watch -n 20 php station_heartbeat.php;' 'cd /var/www/html; watch -n 1 php logdeamon.php;' These must also be added to crontab. There, each line must be preceded with @reboot. On subsequent reboots, they will start automatically from now on. If you like, you can peek into each Screen and se if it’s working properly. Use the command screen -x to view the screens currently running. Then use screen -x nbr to attach to a screen. Exit a Screen with CTRL-A D. NB: CTRL-C will terminate the process. Admin interface Click the Admin interface button. Login with: • • (remember to change this password or replace with a personal admin account) Username: Password: Svxportal svxportal Now go to the Settings tab. Use External documentation page: Yes External Documentation Page: http://yoururl/system_description/SystemDescription.htm Change other settings as desired. The Admin Interface can also be reached via the Portal’s start page. Login first. More settings are available, when using phpMyAdmin (see below). 4 SM5GXQ Peter Lindquist Svx Portal Github v2021-11-28 Languages Only a few languages are supported. The Portal will try to find out which language a user wants to use. But the user can also manually select a language to display. The Svx Portal makes use of gettext to get the translation from the language files configured for each locale. To be sure, add the following packages: sudo apt install locales gettext php-php-gettext On Debian, we must manually add the locales we need. This is done by editing the file: /etc/locale.gen Paste the following lines: (and save the changes; sudo is needed!) uk_UA sv_SE nb_NO it_IT de_DE fr_FR tr_TR UTF-8 UTF-8 UTF-8 UTF-8 UTF-8 UTF-8 UTF-8 Then run: sudo locale-gen locale -a This should display all the locales you added. A reboot is always a good idea after this operation. NB: If you have translation enabled in your browser, this will mess up the languages completely. So disable it for the portal’s url. View the Svx Portal Click the Back button. You should now see the SvxPortal start page! Generate some radio traffic and verify that it shows up on the different pages. Tips Many functions of the Svx Portal depends on the file node_info.json being setup and referenced correctly at each node. When logged in at the Svx Portal, each node sysop may make use of a tool to create a correct json file. As an example, nodes without node_info.json will not appear on the List receivers page, and they will not appear on the Map. In the Admin Interface, each node and each talk group may/should be edited and assigned a static colour. They will of course work without this but will have dynamically assigned colours each time. This applies to the Receiver list, the Map and the Statistics page. Only managed talk groups will be listed on the Talkgroups page. The Svx Portal Admin should also encourage the node sysops to self-register and create their own accounts on the Svx Portal. The Admin can then assign them write access to information regarding their own node(s). The info about each node can also be viewed, simply by clicking the node callsign at the Portal’s start page. If logged in, each sysop will see the My stations menu item. There they can create and maintain information regarding their own nodes. Request Repeater Login will not work under the current version of the Svx Reflector. The Svx Portal Admin may use phpMyAdmin to view and manipulate the database directly. Just enter the following into your web browser: http://yoururl/phpmyadmin Use the database root credentials that you created when MySQL was installed. 5


