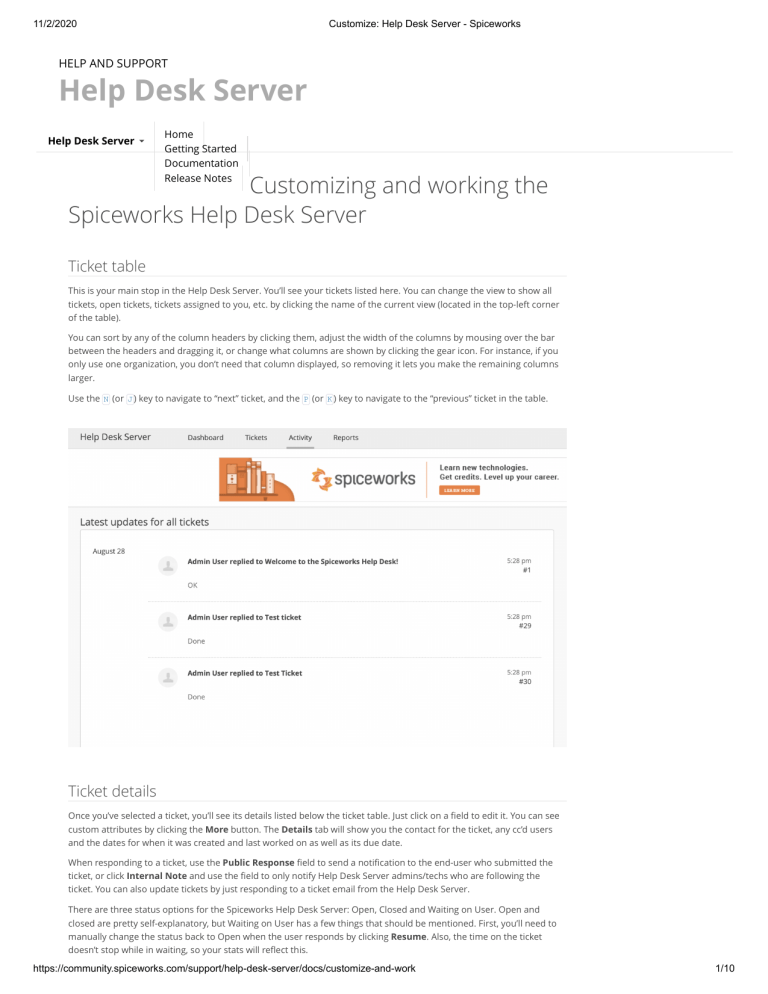
11/2/2020 Customize: Help Desk Server - Spiceworks HELP AND SUPPORT Help Desk Server Help Desk Server Home Getting Started Documentation Release Notes Customizing and working the Spiceworks Help Desk Server Ticket table This is your main stop in the Help Desk Server. You’ll see your tickets listed here. You can change the view to show all tickets, open tickets, tickets assigned to you, etc. by clicking the name of the current view (located in the top-left corner of the table). You can sort by any of the column headers by clicking them, adjust the width of the columns by mousing over the bar between the headers and dragging it, or change what columns are shown by clicking the gear icon. For instance, if you only use one organization, you don’t need that column displayed, so removing it lets you make the remaining columns larger. Use the N (or J ) key to navigate to “next” ticket, and the P (or K ) key to navigate to the “previous” ticket in the table. Ticket details Once you’ve selected a ticket, you’ll see its details listed below the ticket table. Just click on a field to edit it. You can see custom attributes by clicking the More button. The Details tab will show you the contact for the ticket, any cc’d users and the dates for when it was created and last worked on as well as its due date. When responding to a ticket, use the Public Response field to send a notification to the end-user who submitted the ticket, or click Internal Note and use the field to only notify Help Desk Server admins/techs who are following the ticket. You can also update tickets by just responding to a ticket email from the Help Desk Server. There are three status options for the Spiceworks Help Desk Server: Open, Closed and Waiting on User. Open and closed are pretty self-explanatory, but Waiting on User has a few things that should be mentioned. First, you’ll need to manually change the status back to Open when the user responds by clicking Resume. Also, the time on the ticket doesn’t stop while in waiting, so your stats will reflect this. https://community.spiceworks.com/support/help-desk-server/docs/customize-and-work 1/10 11/2/2020 Customize: Help Desk Server - Spiceworks You can also merge tickets from this area. Click the arrow next to Close and select Merge into another ticket. Now choose a ticket from the list or use the text box to search for the one you want. Change ticket’s organization If you’ve had a ticket submitted for one organization and need to change it to another (or, more likely, you accidentally created it for the wrong organization), it’s easy to change the organization. Just click the arrow next to the organization name in the ticket details pane and select the new one. This will also let you merge tickets across organizations. Just change the organizations to match, then merge away! Categories You can use categories to organize your tickets, but you already know what categories are. You can edit the categories available to you by clicking Settings and choosing the appropriate organization (each organization has its own settings). Now scroll down until you see Ticket Categories. Add a new one by clicking + Category. Edit the name of, or delete, a category by clicking Edit next to the entry (to delete it, you’ll then click the Remove link in the bottom-right of the popup). You can also choose to allow your end-users to select the category themselves or make this selection mandatory. These options are in the user portal settings on this same page. https://community.spiceworks.com/support/help-desk-server/docs/customize-and-work 2/10 11/2/2020 Customize: Help Desk Server - Spiceworks Custom attributes Spiceworks can keep track of plenty by default, but maybe there are some additional attributes you want to keep track of. You can use custom attributes for this. Just click Settings and choose the organization. Now scroll down to find the Custom Attributes section. Click the + Custom Attribute link to open a pop-up. Enter a name, choose the appropriate type, and, if you’re making a list type attribute, enter the values. When entering list values, you can enter something like “Please select…” as the first value so a reasonable choice is not accidentaly left there because the field was overlooked. You can also choose to display the attribute on the portal for your users to fill in, and whether or not it’s required of them to do so. Custom attributes in the user portal Custom attributes in the user portal are displayed with the most recently created attribute at the top of the list. So, if you want to change the order, you’ll need to re-create your attributes starting with the attribute you want at the bottom of the list. https://community.spiceworks.com/support/help-desk-server/docs/customize-and-work 3/10 11/2/2020 Customize: Help Desk Server - Spiceworks Email footer If you’d like to customize the footer on the emails that the Spiceworks Help Desk Server sends to users, you can find the setting to add/edit this by clicking Settings, selecting the organization and then clicking Edit next to General. Enter the footer you’d like to have and then click Save. Activity tab The activity tab basically gives you a timeline of everything that has happened in your Spiceworks Help Desk Server. Just click the tab and there it is. Not really much else to say about this. There aren’t any settings to customize what shows or anything. It is what it is. https://community.spiceworks.com/support/help-desk-server/docs/customize-and-work 4/10 11/2/2020 Customize: Help Desk Server - Spiceworks Notifications You might be wondering who gets notified for what and when. Here is who gets notified by default: The admin who performs an action never gets notified (by email) of the action they just took. Anyone else linked with the ticket (end-users, cc’d users, etc.) will be notified. If multiple actions are taken in a short time, the notifications will be condensed to a single email. Actions taken on unassigned tickets notify all admins. Actions taken on assigned tickets will only notify the assignee. If the assignee performed the action, no notification will go out. The end-user who submitted the ticket will only be notified when comments are added. Spiceworks Help Desk Server Techs are only notified about tickets that are assigned to them. You can configure who gets notified for what actions under the Notifications settings for each Organization in your Help Desk Server. https://community.spiceworks.com/support/help-desk-server/docs/customize-and-work 5/10 11/2/2020 Customize: Help Desk Server - Spiceworks Dashboard Click the dashboard tab to see a bunch of charts and graphs showing you some stats about your Help Desk Server. You can choose the organization you want to view (or all) and the amount of time (today, 7 days, 30 days). You can see the following graphs/charts: Ticket history & ticket churn: Both showing the number of open and closed tickets per day, shown in different manners. Average first response time & average ticket close time: See how long it’s taking your team to respond to and finish tickets. Keep these low for happy users. Category breakdown: See what the problem area is. Top 5 ticket creators: See who the problems follow. Reports Use the reports tab to export data about tickets or labor for a set time period. Click Create Report. Choose the variables from the drop-down options. Click Run. You’ll receive an email when your report is ready. Use the link in the email or refresh the table and click Ready in the status for the report to download the report as either a CSV or JSON file. Ticket rules Ticket rules can be your best friend. You can automate a lot of your work by setting these up. To start setting these up click Settings and then Ticket Rules. You can create a single rule that applies to all organizations so the setting is not located within each organization. Then click + Add Rule to get started. When creating rules, you need to start with what you’re wanting to accomplish. With ticket rules in the Help Desk Server, you have the option to assign tickets or set the category, due date, priority or status (or any combination). So choose the appropriate one under Take the following actions:. If you need to add additional actions, click the link below the listing. Now you need to enter the conditions that will trigger this to happen. Are there multiple conditions that you’re going to enter? Do you want all of these conditions to be met or should any one of them trigger the rule? Select the appropriate entry beside Match. You can trigger rules based on the category the end-user selects in the user portal (if you’ve allowed this), the organization the ticket is submitted from, or you can look for key words in the description or summary. For example, say you’ve got a C-level employee who tends to have problems with his trackpad often (darn batteries) and gets super angry when he has to wait to use it again. You can set up a rule like the following: https://community.spiceworks.com/support/help-desk-server/docs/customize-and-work 6/10 11/2/2020 Customize: Help Desk Server - Spiceworks This will take any email that is from the C-level (based on his email signature) and contains “trackpad” in the description, and assign it to a specific, fast person and set the priority to high. Ignore emails If you have regular emails that are received by your Help Desk Server and are tired of them creating tickets, you can use the ignore settings to prevent this from happening. Just enter a regex that matches a unique identifier for the email in the appropriate field for subject, body, or full text. Just make sure it’s unique to the problem email; you don’t want actual tickets being ignored! Tickets Anywhere Tickets Anywhere commands allow you to work your tickets from anywhere. Just add the command(s) to your email response to the ticket and Spiceworks will take care of the rest. Note that these only work from admin/tech email addresses, so any end-users who are too smart for their own good won’t be able to change their ticket up with tickets anywhere commands. Add time worked to a ticket: #worked 10m #add 2h to fordp@hgttg.com #add 2h 30m Set ticket priority: #priority high #priority low Close a ticket: #close Set due date: #due 3 weeks from today #due tomorrow @5pm #due July 15, 2013 at noon #due 3 businessdays from today @ noon https://community.spiceworks.com/support/help-desk-server/docs/customize-and-work 7/10 11/2/2020 Customize: Help Desk Server - Spiceworks Assign the ticket: #assign to Ford #assign ford@hgttg.com CC a user (user must exist in your people inventory): #cc Ford #cc joe@hisemail.com Make the comment private (i.e. add a private note): #private (this will apply to the entire email) Accept a ticket: #accept #assign to me Create a ticket for someone else: #created by user_email Set custom attributes: #set attribute name=attribute value (ex: #set Floor Number=13 ) Categorize the ticket: #category maintenance Reopen a closed ticket: #reopen Unassign a ticket: #unassign Ticket Deletion Individual Ticket Delete To remove a ticket from your help desk you can Close and then Delete the ticket. Once a ticket has been deleted using this method, it becomes an archived ticket (i.e. it is “soft deleted”). Archived tickets cannot be “un-deleted”, but may be referenced in previously run reports you’ve initiated in the Reports tab. If you need to permanently remove ticket objects from the help desk you’ll need to delete the associated organization or delete your full Help Desk Server account. Bulk Ticket Delete Delete a large number of tickets at once instead of deleting them one-by-one. This feature deletes tickets en masse using a range of ticket ID numbers. https://community.spiceworks.com/support/help-desk-server/docs/customize-and-work 8/10 11/2/2020 Customize: Help Desk Server - Spiceworks This can be useful for cleaning up a large influx of automated or unwanted tickets. For example: a failed or mistaken ticket import that you want to undo your help desk received a large number of unwanted emails creating ticket spam Below are some important limitations of bulk ticket deletion: Delete users associated with the tickets to be deleted is turned on by default. Note: Any deleted ticket creators will remain referenced in other tickets, but can no longer be referenced in the future (unless they create new tickets). This matches the behavior of deleting an individual user. Bulk ticket deletion does not delete any admin/tech users. If the creator of a ticket is an admin/tech that ticket won’t be deleted. Tickets will be “soft deleted” meaning the related records are hidden but are not permanently deleted. To permanently delete ticket information you must delete the organization entirely. These limitations were put in place intentionally to prevent deletion of important members of your Help Desk Server account. How do I use it? Start by creating a backup - use the Reports feature of Help Desk Server to run a JSON export of your tickets before you delete them. This JSON export would allow you to later re-import any tickets and users you deleted by accident. Let’s take the example of undoing a ticket import. Find the starting ticket number and the ending ticket number for the tickets created by the ticket import. In this example, we’ll use ticket numbers 568212 and 651922 for those values, respectively. Leave Delete users associated with the tickets to be deleted option enabled, as these ticket creators likely came from the ticket import. When you attempt to bulk delete tickets you will see a confirmation modal which details everything you’re deleting. This modal includes a count of the users that will be deleted, as well. Related documentation Getting Started with Help Desk Server Feedback form placeholder | Delete this region to remove feedback form from page. https://community.spiceworks.com/support/help-desk-server/docs/customize-and-work 9/10 11/2/2020 Did this article help you? Customize: Help Desk Server - Spiceworks Yes No https://community.spiceworks.com/support/help-desk-server/docs/customize-and-work × 10/10


