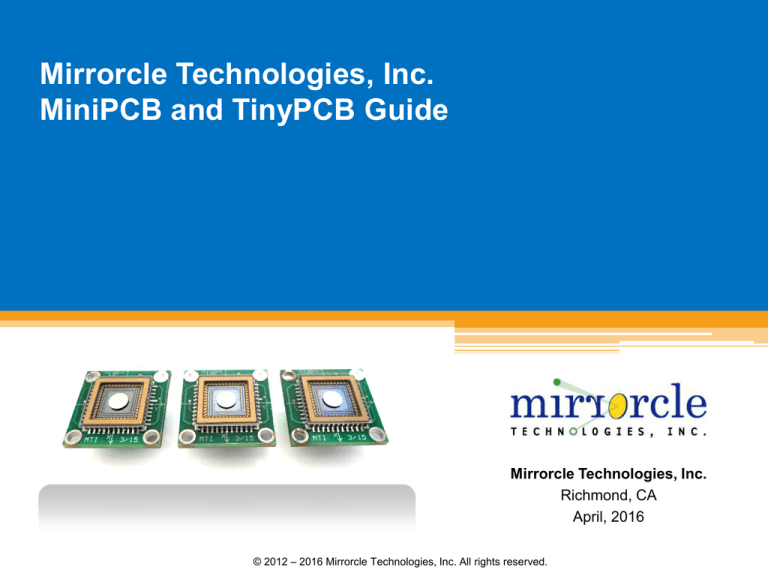
Mirrorcle Technologies, Inc.
MiniPCB and TinyPCB Guide
Mirrorcle Technologies, Inc.
Richmond, CA
April, 2016
© 2012 – 2016 Mirrorcle Technologies, Inc. All rights reserved.
Overview
2
Mirrorcle Technologies Inc. (“MTI”) MEMS mirror devices are available in the following
standard ceramic packages:
DIP24 (multiple cavity sizes)
LCC20, LCC28
Prototyping with above packages without sockets, connectors, and PCBs can be
challenging and time consuming. Therefore, to enable fast and easy prototyping, we
offer two connectorized (PCB) configurations:
MiniPCB – a small PCB with a ZIF socket for the specific package type (where devices are
exchangeable), a connector, and a few discrete components for device protection. MiniPCB
configuration is available for DIP24 packages and all TinyPCB based packages.
TinyPCB – a small PCB with the MEMS package directly soldered (device not exchangeable),
a connector, and a few discrete components for device protection. TinyPCB is available with
LCC20, LCC28 and LCC48 MEMS packages.
LCC20 Ceramic
Package
Ceramic on
TinyPCB
TinyPCB
Mounted in MiniPCB
© 2012 - 2016 Mirrorcle Technologies, Inc. All rights reserved.
MiniPCB and TinyPCB Circuit
3
Input
Connector
RC Low-Pass Filter
R = 56kΩ
C = 680pF
MEMS Device
LPF cutoff ~ 4.2kHz
Schematic refers to a single channel – there are 4 such circuits.
© 2012 - 2016 Mirrorcle Technologies, Inc. All rights reserved.
Package Outline Dimensions
4
DIP24
~15.2mm x 30.5mm
LCC20 ~8.9mm x 8.9mm
LCC28 ~11.4mm x 11.4mm
LCC48 ~12.7mm x 12.7mm (available only in
tinyPCB configuration)
Detailed datasheet for each package available at:
www.mirrorcletech.com/support.html
© 2012 - 2016 Mirrorcle Technologies, Inc. All rights reserved.
MiniPCBs – Overview
DIP24 – MiniPCB DIP24 5.x
6
20.95mm
13.95mm
Y-axis
10-Pin connector
(see connector page)
X-axis
PCB Dimensions: 66.04mm x 25.40mm x 1.57mm
ZIF Socket Height: ~12.5mm
*ZIF socket lock extends 14mm from edge of MiniPCB
Easiest Handling:
Device in DIP24 can be handled with gloved hands.
Socket operation does not require a tool.
© 2012 - 2016 Mirrorcle Technologies, Inc. All rights reserved.
Pin 1
Bill of Materials –MiniPCB DIP24
7
Item # Qty
1
2
3
4
4
4
1
1
Ref Des
R1, R2, R3, R4
C1, C2, C3, C4
CON1
CON2
Digikey Part No.
P56.0KHCT-ND
445-11182-1-ND
1175-1628-ND
A300-ND
Description
RES 56.0K OHM 1/10W 1% 0603 SMD
CAP CER 680PF 250V 10% CH 0603
BOX HEADER, 0.050 10 POS
24 PIN ZIF SOCKET
© 2012 - 2016 Mirrorcle Technologies, Inc. All rights reserved.
Package
0603
0603
Header
Socket
Type
smt
smt
thru-hole
thru-hole
TinyPCB – MiniPCB TinyPCB 5.x
8
20.95mm
13.95mm
Y-axis
10-Pin connector
(see connector page)
X-axis
PCB Dimensions: 66.04mm x 25.40mm x 1.57mm
10-Pin Female Connector Height: ~4.4mm
© 2012 - 2016 Mirrorcle Technologies, Inc. All rights reserved.
Pin 1
Bill of Materials –MiniPCB TinyPCB
9
Item # Qty
Ref Des
Digikey Part No.
1
2
3
4 R1, R2, R3, R4
4 C1, C2, C3, C4
1 CON1
P56.0KHCT-ND
445-11182-1-ND
1175-1628-ND
4
1 CON2
609-3706-1-ND
Description
RES 56.0K OHM 1/10W 1% 0603 SMD
CAP CER 680PF 250V 10% CH 0603
BOX HEADER, 0.050 10 POS
Receptacle 10 Position 0.050" (1.27mm)
© 2012 - 2016 Mirrorcle Technologies, Inc. All rights reserved.
Package
Type
0603
0603
Header
smt
smt
thru-hole
Socket
smt
Connector Pinout – 5.x
10
Input: 10 - Pin Header
Pin
Name
9
7
5
3
1
10
8
6
4
2
1
2
3
4
5
6
7
8
9
10
Description
HV_A (X+)
GND
HV_B (X-)
GND
HV_C (Y-)
GND
HV_D (Y+)
GND
N/C
GND
MEMS Channel X+
Ground
MEMS Channel XGround
MEMS Channel YGround
MEMS Channel Y+
Ground
No Connection
Ground
Connector Part No.
Pins
Mating Cables and Sockets
Digikey ID: 1175-1628-ND
10
Cable: SAM8219-ND
© 2012 - 2016 Mirrorcle Technologies, Inc. All rights reserved.
MiniPCBs – Device Handling
Mounting TinyPCB-based MEMS Mirrors - 1
12
STEP 4 (TinyPCB MEMS Mount): On the MEMS Mount PCB’s 10-pin header J6, a white dot
indicates the header’s pin 1.
On the MEMS TinyPCB’s backside 10-pin header, pin 1 is also marked by a small dot.
Carefully insert the MEMS device TinyPCB into the socket such that pin 1 from the TinyPCB and pin 1
from the MEMS Mount PCB mate, and then gently push down. Take care not to touch the protective
window covering the device.
Note that labels “^UP^” on the TinyPCB and on the MEMS Mount PCB indicate the side which will be
“up” when mounted in an optical breadboard, and the labels should also match.
PIN #1
UP
UP
TinyPCB MEMS Mount 5.x
Note: When handling devices, disable the MEMS driver (red
LED on Controller’s front panel should be OFF) or unplug the
HVOut cable from the USB MEMS Controller.
© 2012 - 2016 Mirrorcle Technologies, Inc. All rights reserved.
PIN #1
TinyPCB 3.x
Mounting TinyPCB-based MEMS Mirrors - 2
13
STEP 4 (TinyPCB MEMS Mount) Continued:
Carefully remove the TinyPCB-based MEMS mirror from the
antistatic foam box. Always wear clean lab gloves and
observe electrostatic discharge (ESD) protection procedures
when handling devices.
Use one hand to hold the MEMS Mount to prevent it from
moving during the plugging in procedure. Hold the TinyPCB
along the edges with correct pin 1 orientation and
alignment (shown in previous slide).
Once the connector is properly aligned, push into the socket
to fully plug in the TinyPCB’s connector. Check the alignment
of the 10 pin connector to ensure the pins are not offset –
this may cause shorting of ground to one of the MEMS
driving channels.
© 2012 - 2016 Mirrorcle Technologies, Inc. All rights reserved.
Mounting DIP24-based MEMS Mirrors - 1
14
STEP 4 (DIP24 MEMS Mount):
For the DIP24 MEMS Mount, pin 1 is shown in the photos below, and pin 13 matches with the
ZIF socket’s lever (socket is used opposite a “standard” ZIF configuration).
On the MEMS mirror’s DIP24 package, a gold marker indicates pin #1. Take care not to touch
the protective window covering the device. See figures in the following page for more details.
Prior to inserting the device into the ZIF socket, raise the lever on the ZIF socket to the up
position. Carefully insert the DIP24 into the ZIF socket, mating pin 1 locations, and gently
lower the ZIF lever to the down position (CAUTION: do not allow the lever to snap down!).
PIN #1
DIP24 MEMS Mount
DIP24 Package
Note: When handling devices, disable the MEMS driver (red LED on Controller’s front
panel should be OFF) or unplug the HVOut cable from the USB MEMS Controller.
© 2012 - 2016 Mirrorcle Technologies, Inc. All rights reserved.
Mounting DIP24-based MEMS Mirrors - 2
15
STEP 4 (DIP24 MEMS Mount) Continued:
Always wear clean lab gloves and observe electrostatic
discharge (ESD) protection procedures when handling
devices. Open the lever on the ZIF socket such that it is 90°
from the PCB surface.
Turn lever to
open socket
Hold the package only on its sides, not in any areas near the
device cavity and the device itself. Place it into the ZIF
socket.
While holding the package against the MiniPCB, (to prevent
it from falling out when the ZIF lever is released), slowly lock
the package into the socket by moving the lever on the ZIF
package to the close position using two fingers
© 2012 - 2016 Mirrorcle Technologies, Inc. All rights reserved.
TinyPCBs - Overview
Axes Orientation and Labels
X+ and Y+ mirror rotation is defined by
the rule of (right-hand) thumb, based on
the x and y axes as shown in each
diagram.
Typically, MirrorcleTech MEMS mirrors
are mounted so that X-axis driving
provides laser beam sweep in the
horizontal plane.
Y+ rotation
X+ rotation
© 2012 - 2016 Mirrorcle Technologies, Inc. All rights reserved.
LCC20 – TinyPCB LCC20 3.x
18
Pin 1
1.91mm (4x)
1.91mm (4x)
4 mounting holes
2.36mm diameter
y
LCC 20 Package with
MEMS located at
center of the PCB
10-Pin connector
(see last page)
View from back
Pin 1
x
PCB Dimensions: 20mm x 13mm
PCB Thickness: 1.57mm
LCC Thickness: ~1.65mm*
*Without window
View from front
© 2012 - 2016 Mirrorcle Technologies, Inc. All rights reserved.
LCC28 – TinyPCB LCC28 3.x
19
1.91mm (4x)
Pin 1
1.91mm (4x)
4 mounting holes
2.36mm diameter
y
10-Pin connector
(see last page)
View from back
x
LCC 28 Package with
MEMS located at
center of the PCB
Pin 1
PCB Dimensions: 20 mm x 20mm
PCB Thickness: 1.57mm
LCC Thickness: ~1.65mm*
*Without window
View from front
© 2012 - 2016 Mirrorcle Technologies, Inc. All rights reserved.
LCC48 – TinyPCB LCC48 3.x
20
1.91mm (4x)
Pin 1
1.91mm (4x)
4 mounting holes
2.36mm diameter
y
x
LCC 48 Package with
MEMS located at
center of the PCB
View from back
10-Pin connector
(see last page)
Pin 1
PCB Dimensions: 20 mm x 20mm
PCB Thickness: 1.57mm
LCC Thickness: ~1.65mm*
*Without window
© 2012 - 2016 Mirrorcle Technologies, Inc. All rights reserved.
View from front
Bill of Materials - TinyPCB
21
Item # Qty
Ref Des
Digikey Part No.
Description
Package
Type
Notes
1
4 R1, R2, R3, R4 P56.0KHCT-ND
RES 56.0K OHM 1/10W 1% 0603 SMD 0603
smt
backside
2
4 C1, C2, C3, C4 445-11182-1-ND
CAP CER 680PF 250V 10% CH 0603 0603
smt
backside
3
1 CON1
BOX HEADER, 0.050 10 POS
Header
thru-hole
backside
4
1 MEMS Package LCC Package
LCC20, LCC28, LCC48
LCC
smt
1175-1628-ND
© 2012 - 2016 Mirrorcle Technologies, Inc. All rights reserved.
Connector Pinout – 3.x TinyPCB
22
Input: 10 - Pin Header
Pin
Name
1
2
3
4
5
6
7
8
9
10
Description
HV_A (X+)
GND
HV_B (X-)
GND
HV_C (Y-)
GND
HV_D (Y+)
GND
N/C
GND
MEMS Channel X+
Ground
MEMS Channel XGround
MEMS Channel YGround
MEMS Channel Y+
Ground
No Connection
Ground
Connector Part No.
Pins
Mating Cables and Sockets
Digikey ID: 1175-1629-ND
10
Cable: SAM8219-ND
© 2012 - 2016 Mirrorcle Technologies, Inc. All rights reserved.


