Section DTW-A52-802-202
R
Equipment Issue 2
030-101584 Rev. A, March 2006
DTWA528-02I2 Series 2-Slot Universal Data Mounting
CONTENTS
1.
2.
3.
4.
5.
6.
7.
PAGE #
GENERAL . . . . . . . . . . . . . . . . . . . . . . . . . . . . . . . . . . .
OPTIONS & FEATURES . . . . . . . . . . . . . . . . . . . . . . .
INSTALLATION . . . . . . . . . . . . . . . . . . . . . . . . . . . . . .
TROUBLESHOOTING . . . . . . . . . . . . . . . . . . . . . . . .
CUSTOMER & TECHNICAL SERVICES . . . . . . . .
WARRANTY & REPAIRS . . . . . . . . . . . . . . . . . . . . . .
SPECIFICATIONS . . . . . . . . . . . . . . . . . . . . . . . . . . . .
1.
GENERAL
1.1
Document Purpose
1
2
3
6
6
6
6
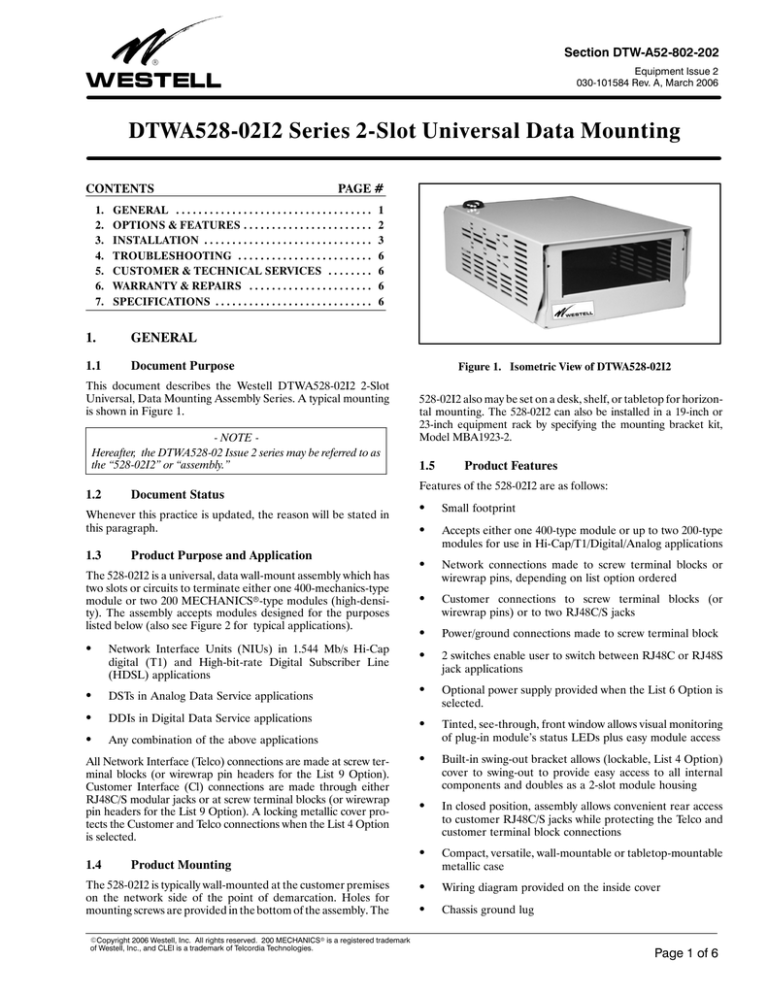
This document describes the Westell DTWA528-02I2 2-Slot
Universal, Data Mounting Assembly Series. A typical mounting
is shown in Figure 1.
- NOTE Hereafter, the DTWA528-02 Issue 2 series may be referred to as
the “528-02I2” or “assembly.”
1.2
Document Status
Whenever this practice is updated, the reason will be stated in
this paragraph.
1.3
Product Purpose and Application
The 528-02I2 is a universal, data wall-mount assembly which has
two slots or circuits to terminate either one 400-mechanics-type
module or two 200 MECHANICSr-type modules (high-density). The assembly accepts modules designed for the purposes
listed below (also see Figure 2 for typical applications).
S
Network Interface Units (NIUs) in 1.544 Mb/s Hi-Cap
digital (T1) and High-bit-rate Digital Subscriber Line
(HDSL) applications
S
DSTs in Analog Data Service applications
S
DDIs in Digital Data Service applications
S
Any combination of the above applications
All Network Interface (Telco) connections are made at screw terminal blocks (or wirewrap pin headers for the List 9 Option).
Customer Interface (Cl) connections are made through either
RJ48C/S modular jacks or at screw terminal blocks (or wirewrap
pin headers for the List 9 Option). A locking metallic cover protects the Customer and Telco connections when the List 4 Option
is selected.
1.4
Product Mounting
The 528-02I2 is typically wall-mounted at the customer premises
on the network side of the point of demarcation. Holes for
mounting screws are provided in the bottom of the assembly. The
ECopyright 2006 Westell, Inc. All rights reserved. 200 MECHANICSr is a registered trademark
of Westell, Inc., and CLEI is a trademark of Telcordia Technologies.
Figure 1. Isometric View of DTWA528-02I2
528-02I2 also may be set on a desk, shelf, or tabletop for horizontal mounting. The 528-02I2 can also be installed in a 19-inch or
23-inch equipment rack by specifying the mounting bracket kit,
Model MBA1923-2.
1.5
Product Features
Features of the 528-02I2 are as follows:
S
Small footprint
S
Accepts either one 400-type module or up to two 200-type
modules for use in Hi-Cap/T1/Digital/Analog applications
S
Network connections made to screw terminal blocks or
wirewrap pins, depending on list option ordered
S
Customer connections to screw terminal blocks (or
wirewrap pins) or to two RJ48C/S jacks
S
Power/ground connections made to screw terminal block
S
2 switches enable user to switch between RJ48C or RJ48S
jack applications
S
Optional power supply provided when the List 6 Option is
selected.
S
Tinted, see-through, front window allows visual monitoring
of plug-in module’s status LEDs plus easy module access
S
Built-in swing-out bracket allows (lockable, List 4 Option)
cover to swing-out to provide easy access to all internal
components and doubles as a 2-slot module housing
S
In closed position, assembly allows convenient rear access
to customer RJ48C/S jacks while protecting the Telco and
customer terminal block connections
S
Compact, versatile, wall-mountable or tabletop-mountable
metallic case
S
Wiring diagram provided on the inside cover
S
Chassis ground lug
Page 1 of 6
Section DTW-A52-802-202
030-101584 Rev. A
Central Office
R
528-02I2
Cross
Connect
Telco #1
IOR
Test
Equipment
ILR
NIU
#1
TB1
ILR
RJ48C
CPE#1
CPE
TB2 / J1
Figure 2a. 528-02I2 Configured as a Single NIU Mounting, Using a Standard 400- or 200-MECHANICS NIU
528-02I2
Central Office
Telco #2
HTU-C
Cross
Connect
Telco #1
HTU-C
Test
Equipment
HTU-R
TB3
HTU-R
TB1
RJ48C
CPE#2
CPE
TB4 / J2
RJ48C
CPE#1
CPE
TB2 / J1
Figure 2b. 528-02I2 Configured as a Dual Mounting, Using two HDSL 200-MECHANICS Units
528-02I2
Central Office
Cross
Connect
Telco #1
ISQ
Test
Equipment
DST
#1
TB1
RJ48S
CPE#1
CPE
TB2 / J1
Figure 2c. 528-02I2 Configured as a Single DST or DDI Mounting, Using a Standard 400- or 200-MECHANICS DST or DDI Modules
CPE = Cust. Premises Equipment
ISQ = Intelligent ETO
ILR = Intelligent Line Repeater
IOR = Intelligent Office Repeater
NIU = Network Interface Unit
Figure 2. 528-02I2 Applications
S
Cable ties (provided)
S
S
S
NEBS Level 3 certified
2.
UL 60950 listed by an NRTL
OPTIONS & FEATURES
- List 9 WIREWRAP PIN NOTE The 528-02I2, List 6 provides wirewrap pin connectors inside the unit for
Network and Customer connections, instead of screw terminals. Substitute the term “wirewrap pin header” for “screw terminal block” when referencing the 528-02I2, List 9.
TB1 and TB3 - Telco/Network Connections
TB1 and TB3 are 4-position screw terminal blocks for terminating the Telco/Network connections. The four positions are T, R,
T1 and R1, as shown in Table 2. TB1 is used to interface with circuit/module #1 and TB3 is used to interface with circuit/module
#2. If a 400-type module (twice the width of 200-type modules)
is used, it is inserted into slot/circuit #1 (top slot when assembly
is in the closed position) and interfaces with TB1.
2.2
TB2 and TB4, or J1 and J2 RJ48C/S Jacks Customer Premises Equipment Connections
Customer Premises Equipment (CPE) connections to the assembly can be made to the 4-position screw terminal blocks TB2
and TB4 or to jacks J1 and J2 (either RJ48C or RJ48S-type modular jacks). Setting Switches S1 and S2 selects the correct
2
S1/S2 Position
Certified to CAN/CSA-C22.2 No. 60950
The 528-02I2 contains various features, switches, and terminal
blocks, as shown in Figure 3 and Figure 4 and described below,
to option the unit for proper operation.
2.1
configuration to be used, either RJ48C or RJ48S. Table 3 lists CI
connections.
T1, Hi-Cap, NIU, HDSL
RJ48S
Analog Data Services, DST Module, Digital
Data Service, DDI Module, IDSL (ISDN DSL)
Table 1.
2.3
Application Type
RJ48C
S1/S2 Positions for Typical Applications/Modules
S1 and S2 Slide Switches
The 528-02I2 contains two slide switches, S1 and S2, to provision
the J1 and J2 customer RJ48 jacks for use in an RJ48C or an
RJ48S configuration. If the customer application requires
RJ48C jacks, set S1 and S2 to the RJ48C position. If the customer
application requires RJ48S jacks, set S1 and S2 to the RJ48S
position. If a 400-type module (twice the width of 200-type modules) is used in the assembly, it is inserted into the top slot (when
in the closed position) and interfaces with J1 and S1.
2.4
TB5 - Power and Ground Connections
TB5 is a 4-position screw terminal block for power and ground
connections to the assembly. The four positions are +PWR,
FRAME GND, CIRCUIT GND and -PWR, as listed in Table 4.
The +PWR position is used to connect the positive terminal
from the Model WPS4802 (115 VAC to 48 VDC), or equivalent
power supply. FRAME GND is available as an option to connect
to Earth ground as stated in Paragraph 2.5. CIRCUIT GND must
be connected to an earth ground regardless of the power source.
Use an insulated wire of 24 AWG or greater (see Figure 7). The
-PWR position is used to connect the negative terminal from the
WPS4802 (or equivalent 48 volt power supply).
Section DTW-A52-802-202
030-101584 Rev. A
R
Wall-Mount Keyhole
(Total of 4)
RJ48C/S Switch
Ckt 1
Network Side
Terminal Block*
Power/Ground
Terminal Block
Shorting Bar/
Ground Jumper
RJ48C/S Switch
Ckt 2
Customer Side
Terminal Block*
* List 9 contains
wirewrap pin headers
instead of screw
terminals.
Figure 3. Top View of 528-02I2 Interior (Cover Open for Visual Clarity), Typical Wall-Mounted Position
2.5
Card Guides
For Modules
S
Exterior Frame Ground Lug on Rear of Assembly
(Preferred Method). A frame ground lug, labeled FRAME
GND, is provided on the rear of the metal housing. This
lug should be used to connect the metal housing to earth
ground.
S
Interior TB5 Frame Ground Screw Terminal (Inside
Assembly). A frame ground screw terminal, labeled TB5,
located inside the assembly can be used as an optional
method for earth grounding the metal housing (Figure 3
and Figure 8) when local power is supplied.
S
Optional Interior TB5 Removable Ground Strap. The
528-02I2 features a factory-assembled, pre-installed,
ground strap for applications requiring frame ground to be
connected to circuit ground. The strap is connected across
TB5’s FRAME GND and CIRCUIT GND terminals. On
some units, this optional strap is provided, but not
factory-installed.
2 56-pin Card
Edge Connectors
Ribbon Cable
CKT 1
Hinged Cover,
Opens For
Access
To Wiring
RJ48S
RJ48C
S1, RJ48C/S
Switch, CKT1
Network
Terminal Block*
J2,
Customer
RJ Jack,
RearAccessible
CKT 2
RJ48S
See-through
Module
Window
RJ48C
S2, JR48C/S
Switch, CKT2
Customer
Terminal Block*
Frame Ground Connections
The metal housing can be connected to earth ground by using
one of the methods below. On some units, this optional strap is
provided in the parts bag, and on the DTMA528-02L4 it is factory installed.
Wiring Label
Power/Ground
Terminal Strip
* The List 9 Option contains wire-wrap pins in place of screw terminals.
Figure 4. 528-02I2 Interior, Cover Open, Typical Tabletop Mount Position
3.
INSTALLATION
The assembly should be installed by authorized, trained personnel only. In accordance with UL60950, this assembly is suitable
for mounting on concrete or other noncombustible surfaces only
and is for use in restricted access locations only. Installation consists of inspecting the assembly for damage, selecting the
mounting site or location, gathering all necessary tools and hardware, mounting the assembly, making all grounding and power
connections, performing the installer connections for network
3
Section DTW-A52-802-202
Ground Lug
030-101584 Rev. A
Lock
R
S
Drill and drill bits (to drill holes for mounting screws/bolts)
S
Mounting hardware (four screws or bolts)
3.3
Mounting the Assembly to a Wall
R
J1
RJ48C/S
Connector
J2
RJ48C/S
Connector
1.
Loosen the top-cover screw or, if key lockable, insert the key
and rotate the key lock to unlock the cover.
2.
Using the mounting screw keyholes in the assembly’s base
plate as a template, carefully lift the assembly to the desired
mounting position on the wall and mark the four screw hole
locations for the assembly (see Figure 3). Note that each of
the mounting holes are key-hole slotted to allow the assembly to be mounted so the Customer Interface connections
face either left, right, or down.
3.
Drill the four holes in the mounting surface.
4.
Lift the assembly and place the 528-02I2 base plate on the
wall, aligning the holes in the base plate with the drilled
holes in the mounting surface.
5.
Insert the first mounting screw into the top left hole in the
base plate, and tighten or drive the screw until approximately ¼-inch remains.
6.
Insert the remaining three screws and fasten until approximately ¼-inch remains.
7.
Carefully align, position, and hold the chassis in its final
position and finish driving the screws. Tighten all screws.
Cable
Access Hole
Figure 5. Rear View of 528-02I2
and customer wiring and installing the plug-in module(s) into the
assembly.
- INSPECTION NOTE Visually inspect the equipment for signs of damage at the time of delivery.
If the equipment has been damaged in transit, immediately report the extent of the damage to the transportation company and to Westell (see Part
5 for telephone number).
CAUTION - STATIC-SENSITIVE
This product and the plug-in product installed inside the assembly
may contain static-sensitive components! Proper electrostatic
discharge procedures must be followed to maintain personal and
equipment safety. Do not store units near magnetic, electromagnetic
or electrostatic fields.
- PRECAUTIONARY STATEMENT Never install telephone wiring during a lightning storm.
Never install telephone jacks in wet locations unless the jack is
specifically designed for wet locations.
Never touch uninsulated telephone wires/terminals unless the
telephone line is disconnected at the network interface.
Use caution when installing or modifying telephone lines.
For use in restricted access locations only.
3.1
Selecting the Mounting Location & Application
The 528-02I2 should be wall-mounted in accordance with local
practices. The installation site should provide adequate lighting
and equipment access. The distance from the cable entry point
should be consistent with local installation practices. Allow adequate clearance to accommodate the motion required by the
key-hole slots (¼-inch) when locating the assembly for installation. Also ensure that adequate clearance (approximately 2
inches) is available for opening the cover/door and for inserting
and removing the module(s), which slide(s) into place inside the
cover.
3.2
Gathering the Mounting Tools and Hardware
The tools required to mount the assembly include:
S
S
4
Flat-blade screw driver (to adjust the terminal block screws
and to adjust the mounting screws and ground lug)
Wire strippers (for signal, power, and ground wires)
- NOTE The 528-02I2 optionally may be set on a table, shelf, or desk.
For desktop installations, four self-adhesive rubber feet are provided and
are to be installed on the bottom of the assembly to help prevent marring
the desktop surface.
- CAUTION Never apply power until all installer connections are complete.
3.4
Connecting Telco/Network Interface Cables
Telco or network interface connections to the assembly are made
to one or both screw terminal blocks, TB1 and TB3, using
shielded twisted pair cable (22-24 AWG minimum) of a length
consistent with local installation practices. If only one module is
used in the unit, insert it into the top (upper) slot or position and
use TB1 for the network connections. Telco/network connection
pin numbers are listed in Table 2.
- LIST 9 WIREWRAP PIN NOTE The List 9 Option provides wirewrap pin connectors inside the unit for
Network and Customer connections, instead of screw terminals. Substitute the term “wirewrap pin header” for “screw terminal block” when referencing the 528-02I2, List 9.
Card Edge Connector
Telco
e co TB1/TB3
/ 3
P iti
Position
Function
Pin #
Receive from Network
7
Receive from Network
13
R
Transmit to Network
41
T1
47
R1
Transmit to Network
Table 2.
Telco Interface Connections
T
Section DTW-A52-802-202
030-101584 Rev. A
R
TYPICAL FOR BOTH
CIRCUITS
RCV FROM
FAC
T
7
R
13
FACILITY
CONNECTIONS
T1
XMT TO
FAC
R1
41
47
25 17 35
7
8
2
1
5
CKT#1
OR
CKT#2
OR
CKT#3
OR
CKT#4
15
RJ48S
OR
2
1
5
4
RJ48C OR X
J1--J4
55
49
2 11 27
FRAME GND
LUG
5
T1
15
R1
55
T
R
49
XMIT TO
CPE
CUSTOMER
CONNECTIONS
RCV FROM
CPE
SWITCH TO CONFIGURE RJ48 JACK FROM”C” TO ”S”
ESD JACK
(GRN) FRAME GND
(BLK) + PWR
CKT GND
LED 1
(RED) -- PWR
CPE=Customer Premise Equipment. NET=Network equipment.
Circuit #1 = the top slot when the table-top mounted unit
is in the closed position (or left-most slot when wall mounted
unit is open).
-- For 2--Wire HDSL/DS1,
Use Facility T and R
CKT#1
CKT#2
-- For 2--Wire HDSL/DS0,
Use Facility T1 and R1
SLOT POSITIONS
Figure 6. 528-02I2 Functional Wiring Diagram
Card Edge Connector
Function
Pin #
CI Connector Position/Pin
TB2
TB4
RJ48C
J1/J2
RJ48S
J1/J2
Receive from CPE
55
T
5
2
Receive from CPE
49
R
4
1
Transmit to CPE
5
T1
2
7
Transmit to CPE
15
R1
1
8
Table 3.
3.5
TB5
FRAME GND
CKT GND
Chassis
Ground
Lug
Function
TB5 Terminal Block Label
-PWR
Earth Ground
FRAME GROUND*
Lightning Ground Return
CIRCUIT GND*
+48V Ext. Power In
+PWR
*Note: For applications requiring chassis ground to be connected to circuit ground, an optional ground strap is
provided for installation between the FRAME GND and CIRCUIT GND terminals on TB5.
Table 4.
Power and Ground Connections
Connecting Power and Ground
The module(s) in the 528-02I2 can be span/line powered or locally powered with an external -48 VDC power source. Local power
and ground connections to the assembly are made to TB5. See
Table 4 for power and ground connections. For applications
where -48 V bulk power is not readily available, Westell offers a
wall-mounted (plug-in) power supply, Model WPS4802 (115
VAC to 48 VDC), that can be ordered as the List 6 Option for use
with the 528-02I2.
-PWR
To Ground Window (e.g., cold water pipe)
To
Lightning
Return
* See note at the
end of Table 4.
Figure 7. Grounding with Span Power
Connecting Customer Interface Cables
-48V Ext. Power In
Optional*
Ground
Strap
+PWR
Customer Interface Connections
Make customer connections to J1 and J2 (the RJ48C/S jacks) or
to one or both screw terminal blocks, TB2 and TB4, using
shielded twisted pair cable (22-24 AWG minimum) of a length
consistent with local installation practices. If only one module is
used in the assembly, insert it into the top (upper) slot or position
and use connector J1 or TB2 for customer connections. See
Table 3 for pin numbers and lead designations.
3.6
Mounting
Local
Power Supply
Mounting
TB5
GND
FRAME GND
+PWR
Chassis
Ground
Lug
Optional*
Ground
Strap
CKT GND
-PWR
To Ground Window(e.g., cold water pipe)
+
--
To Lightning
Return Ground
* See note at the
end of Table 4.
Figure 8. Grounding with Local Power
3.7
Securing Cables
After the assembly has been mounted and all wire connections
have been made, use the four cable ties provided to secure all
wires/cables.
3.8
Installing Modules
When all wiring is completed and secured, the module(s) may be
installed inside the assembly cover. Refer to the appropriate
practice for optioning and testing information for each module.
When testing is complete and the circuit is functioning correctly,
close and re-lock the cover (List 4 Option).
5
Section DTW-A52-802-202
030-101584 Rev. A
governing the sale of the product. Any attempt to repair or
modify the equipment by anyone other than an authorized Westell representative will void the warranty.
- CAUTION Use care when installing and removing modules - do not force into
place. If a module resists insertion, remove it and check for debris in
or near the connector and mounting slot. Gently re-insert the module.
4.
6.2
TROUBLESHOOTING
CUSTOMER & TECHNICAL SERVICES
5.1
Customer Service & Technical Assistance
Westell, Inc.
ATTN: R.G.M. Department
880 Enterprise St.
Suite D
Aurora, IL 60504-7940
Replacements will be shipped in the fastest manner consistent
with the urgency of the situation. Westell will continue to repair
or replace faulty equipment beyond the warranty period for a
nominal charge. Contact Westell for details.
If technical or customer assistance is required, contact Westell by
calling or using one of the following options:
Voice: (800) 377-8766
email: global_support@westell.com
7.
SPECIFICATIONS
To order assemblies, call a telephone number shown in Paragraph 5.1 and please specify the assembly ordering information
shown in Table 6. The electrical and physical specifications are
shown in Table 5.
Visit the Westell World Wide Web site at http://www.Westell.com
for additional information about Westell.
5.2
Repair and Return
Westell will repair or replace any defective Westell equipment
without cost during the warranty period if the unit is defective for
any reason other than abuse, improper use, or improper installation. Before returning the defective equipment, first request a
Return Material Authorization (RMA) number from Westell.
Once an RMA number is obtained, return the defective unit,
freight prepaid, and a brief description of the problem, to:
If trouble is encountered, verify all installer connections to the
assembly and check that the CO power fuse is not blown. Also
verify all module connections and option switch settings, and
verify the modules are making a positive connection with the
shelf connector. If trouble persists, replace the suspect assembly
and repeat procedures outlined. These procedures are not designed to effect repairs or modifications. Procedures beyond
those outlined herein or repairs made beyond replacing a faulty
assembly are not recommended and may void the warranty.
5.
R
Part Numbers
Physical Feature
This equipment is identified by a model number and an issue
number. Each time a change is made to the product which
changes the form, fit, or function of the product, the issue number is incremented or advanced by one. Be sure to indicate the
issue number as well as the model number when making inquiries
about the equipment.
U.S.
Height
Metric
3.25 in.
8.3 cm
Width (including door)
5.75 in.
14.6 cm
Depth
9.25 in.
23.5 cm
Weight (empty, approx.)
3.1 lb.
1.4 Kg
Operating Temp.
--40°F to 149°F
--40° to 65°C
0 to 95% (non-condensing)
(incl. ground lug)
6.
WARRANTY & REPAIRS
Humidity
6.1
Warranty
Input Power
-42 to -56 VDC, or simplex line power
Output power to plug-ins
-42 to -56 VDC, or simplex line power
Electrical Feature
Westell warrants this product to be free of defects at the time of
shipment. Westell also warrants this product to be fully functional for the time period specified by the terms and conditions
NEBS Level 3 and UL60950 certification by an NRTL
Table 5.
FAC
Connections
Model Number
CLEI Code
Wire
Wrap
Description
CPE
Connections
Screw
Term
RJ48C/S
Screw
Term
DTWA528--02I2
VAM7ZB0ARA
X
X
X
DTWA528--02I2L4
VAM72B0ARA
X
X
X
DTWA528--02I2L6
X
X
X
DTWA528--02I2L4--6
X
X
X
DTWA528--02I2L4--9
Locking
Cover
Power
X
WPS--4802
X
WPS--4802
X
X
X
DTWA528--02I2L4--6--9
X
X
X
WPS--4802
DTWA528--02I2L4--7--9
X
X
X
A90--204100
*
6
VAM74B0ARA
Specifications
CLEI is a trademark of Telcordia Technologies.
Table 6.
Ordering and Option Information


