CPO Science Link Teacher`s Guide
advertisement
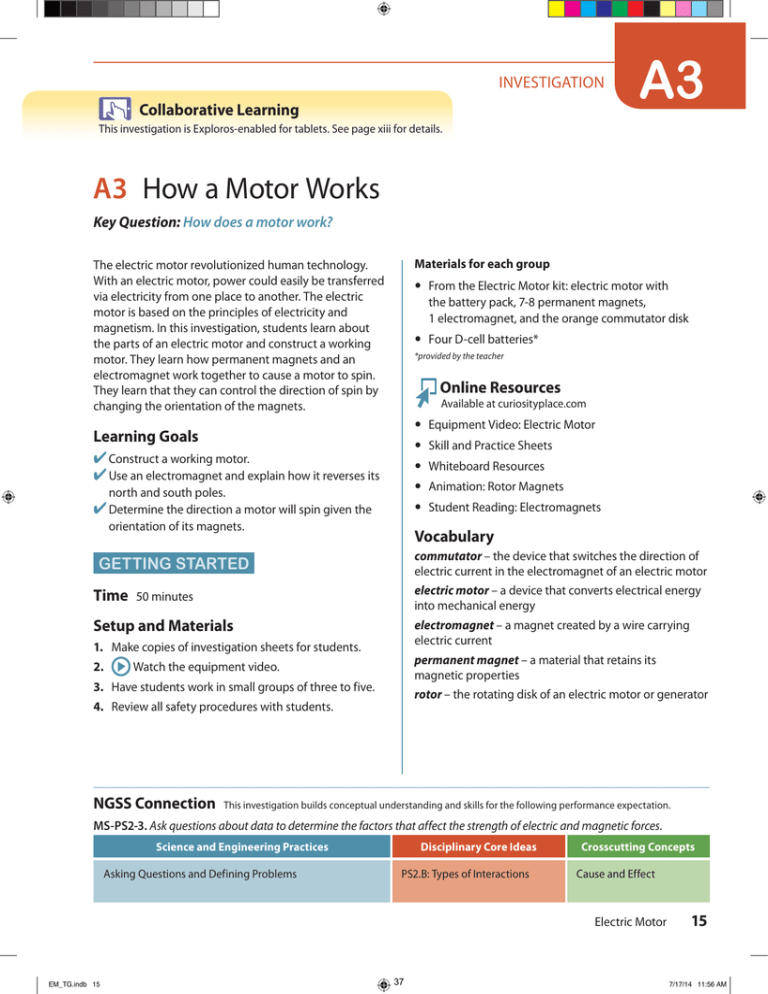
INVESTIGATION Collaborative Learning A3 This investigation is Exploros-enabled for tablets. See page xiii for details. A3 How a Motor Works Key Question: How does a motor work? Materials for each group The electric motor revolutionized human technology. With an electric motor, power could easily be transferred via electricity from one place to another. The electric motor is based on the principles of electricity and magnetism. In this investigation, students learn about the parts of an electric motor and construct a working motor. They learn how permanent magnets and an electromagnet work together to cause a motor to spin. They learn that they can control the direction of spin by changing the orientation of the magnets. yy F rom the Electric Motor kit: electric motor with the battery pack, 7-8 permanent magnets, 1 electromagnet, and the orange commutator disk yy Four D-cell batteries* *provided by the teacher Online Resources Available at curiosityplace.com yy Equipment Video: Electric Motor Learning Goals ✔✔Construct a working motor. ✔✔Use an electromagnet and explain how it reverses its yy Skill and Practice Sheets yy Whiteboard Resources yy Animation: Rotor Magnets north and south poles. ✔✔Determine the direction a motor will spin given the orientation of its magnets. yy Student Reading: Electromagnets Vocabulary commutator – the device that switches the direction of electric current in the electromagnet of an electric motor GETTING STARTED Time 50 minutes electric motor – a device that converts electrical energy into mechanical energy Setup and Materials electromagnet – a magnet created by a wire carrying electric current 1. Make copies of investigation sheets for students. 2. permanent magnet – a material that retains its magnetic properties Watch the equipment video. 3. Have students work in small groups of three to five. rotor – the rotating disk of an electric motor or generator 4. Review all safety procedures with students. NGSS Connection This investigation builds conceptual understanding and skills for the following performance expectation. MS-PS2-3. Ask questions about data to determine the factors that affect the strength of electric and magnetic forces. Science and Engineering Practices Asking Questions and Defining Problems Disciplinary Core Ideas PS2.B: Types of Interactions EM_TG.indb 15 Crosscutting Concepts Cause and Effect Electric Motor 37 15 7/17/14 11:56 AM How a Motor Works BACKGROUND Electric motors convert electrical energy into mechanical energy. Permanent magnets and electromagnets work together to make electric motors. The secret to making an electric motor work is in the ability of an electromagnet to reverse its north and south poles. In this investigation, students first try to make the rotor spin by manually flipping permanent magnets near the rotor magnets. Next, students see how an electromagnet can be used instead. Just as with the finger magnet, the electromagnet must switch from north to south as each rotor magnet passes by to keep the rotor turning. The device that makes this happen is called a commutator. As the rotor spins, the commutator, which is a plastic disk, reverses the direction of the current in the electromagnet (when the dark and clear segments of the disk interact with the photogate on the electromagnet). This reversing of current makes the electromagnet’s side facing the disk change from north to south, and then back again. The electromagnet attracts and repels the magnets in the rotor, and the motor turns. The three things you need to make a motor are 1) a rotating part, called a rotor, with magnets that have alternating polarity; 2) one or more electromagnets; and 3) a commutator that switches the direction of current in the electromagnets back and forth in the correct sequence to keep the rotor spinning. The three main parts of an electric motor 1 Rotor Electromagnet Current N 2 Fixed magnets on a rotor A commercial electric motor that runs on batteries doesn’t look quite like the spinning disk motor used in the investigation. However, the same three mechanisms are still there. The difference is in the arrangement of the electromagnets and permanent magnets. This illustration shows a small battery-powered electric motor and what it looks like inside with one end of the motor case removed. The permanent magnets are on the outside, and they stay fixed in place. The electromagnets are in the rotor, and they turn. The rotating part of the motor, including the electromagnets, is called the armature. The armature in the illustration has three electromagnets, corresponding to the three coils. The wires from each of the three coils attach to three metal plates (the commutator) at the end of the armature. As the rotor spins, the three plates come into contact with positive and negative brushes. Electric current flows through the brushes into the coils. As the motor turns, the plates rotate past the brushes, reversing the positive and negative connections to the coils, which make the electromagnets’ magnetic poles switch positions. The turning electromagnets with alternating poles are thus attracted and repelled by the permanent magnets, and the motor turns. Motors that run on AC electricity are easier to make because the current switches direction all by itself. Almost all household, industrial, and power tool motors are AC motors. These motors use electromagnets for both the rotating and fixed magnets. 3 Commutator Switches the direction of current in the electromagnet at the right time 16 EM_TG.indb 16 38 7/17/14 11:56 AM A3 5E LESSON PLAN Engage Explain Ask students, “When do you think the first electric car was built?” They may think that current designs of electric and hybrid cars are a brand new green technology. Explain to students that the original electric cars were the horseless carriages of the 1800s. Electric motor technology has been around for over 200 years! Revisit the Key Question to give students an opportunity to reflect on their learning experience and verbalize understandings about the science concepts explored in the investigation. Curiosityplace.com resources, including student readings, videos, animations, and whiteboard resources, as well as readings from your current science textbook, are other tools to facilitate student communication about new ideas. Animation Rotor Magnets Ask students, “Can you name something other than a car that has a motor?” List answers on the board. From the variety of answers, point out how many different places in our lives we use electric motors. Elaborate Electric motors transform electrical energy into mechanical energy. Have students draw all the transformations of energy that take place in their electric motors. Then have them think up and draw a type of work the electric motor could do with the mechanical energy from the output. Explore Have students complete Investigation A3, How a Motor Works. Students learn about the parts of an electric motor. In particular, they learn how permanent magnets and an electromagnet work together to cause a motor to spin. They learn that they can control the direction of spin by changing the orientation of the magnets. Evaluate yy D uring the investigation, use the checkpoint questions as opportunities for ongoing assessment. yy A fter completing the investigation, have students answer the assessment questions on the Evaluate student sheet to check understanding of the concepts presented. EM_TG.indb 17 Electric Motor 39 17 7/17/14 11:56 AM How a Motor Works Explore INVESTIGATION A3 Name ____________________________________________ Date ________________________ A3 How a Motor Works Materials: ✔ 7-8 ceramic magnets How does a motor work? Did you know that magnets are important parts of electric motors? In this investigation, you will be using permanent magnets and an electromagnet to build a simple motor and learn how magnets work in a motor. A permanent magnet is a type of magnet that always has its magnetic properties. An electromagnet is a device that is magnetic when electricity is flowing through it. from the Electric Motor kit the battery pack, an electromagnet, and the orange commutator disk Take your electric motor apart and set it up like the picture shows. 1. First, uncover the rotor. Then, take out all the magnets. A3 a. Describe how you got the rotor to spin in one direction. What did you have to do with the magnet in your hand to get the rotor to spin? I flipped the magnet over each time another magnet passed by. My magnet attracted the magnets in the rotor. What is an electromagnet? Electromagnets are devices that become magnets when electricity flows through them. An electromagnet is usually made with a coil of wire wrapped around a steel or iron core. Electricity flows through the coil of wire. This causes the steel pin to become magnetized with a north and south pole. One difference between an electromagnet and a permanent magnet is that an electromagnet can reverse its north and south poles. This is done by changing the direction of the electric current in the electromagnet. If you know the direction the current flows, you can tell which end of the electromagnet is the north pole. 2. Now, place six of the magnets in the rotor so they are evenly spaced. Alternate the orientation of the north and south poles as shown in the picture. The north pole is at the top of the steel pin when the current is going counter-clockwise around the pin. The north pole is on the bottom of the pin when the current is going clockwise. 3. Put another magnet in your hand. Bring it close to the motor so that it repels a magnet in the rotor. What happens? I held my magnet so that the north pole was pointing toward a magnet in the rotor with its north pole facing outwards. The result was that the rotor turned clockwise, but stopped when the next magnet (with its south pole facing out) jumped out of the rotor and stuck to the magnet in my hand. Copyright © CPO Science Can be duplicated for classroom use INVESTIGATION 4. Try to make the rotor spin by using your magnet to “push and pull” on the rotor magnets. It may take some time to perfect your technique because the magnets in the rotor easily jump out of the rotor and stick to the magnet in your hand. ✔ Electric Motor with ✔ 4 D-cell batteries Looking inside the electric motor Explore 1 of 7 A3 How a Motor Works Electric Motor Look at the electromagnet that comes with the electric motor. You will see a coil of copper wire wrapped around a thick steel pin. The north and south pole of this pin switches when the current going through the electromagnet changes direction. The electromagnet that comes with the electric motor has a light-beam switch. Blocking the light beam causes the current to change direction in the coil of wire. The little green lights tell you where the north pole is located on the electromagnet. Copyright © CPO Science Can be duplicated for classroom use 2 of 7 A3 How a Motor Works Electric Motor Guiding the INVESTIGATION Guiding the INVESTIGATION Looking inside the electric motor What is an electromagnet? Circulate among the groups, making sure that each student is an active participant in the investigation. If students have trouble making the disk spin, suggest that they hold the magnet slightly above the rotor magnets and push downward until the rotor magnet is repelled. Then they must quickly pull the magnet backward as the rotor spins. Otherwise they may pull the next magnet right out of the motor. The secret is to keep reversing the magnet in their fingers to push and pull each magnet in the rotor as it passes by. With a little practice, each student should be able to spin the rotor. Another technique is to stack two magnets together in your hand for a stronger magnet. Turning a motor using magnets is fun and helps students see how the motor works. But if the only way to turn a motor was to stand there and flip magnets all day, it wouldn’t be a great invention. With an electromagnet, the north and south poles can be switched with electricity. Electromagnets involve a connection between electricity and magnetism. They are a type of magnet created when there is electric current flowing in a wire. Electromagnets are a temporary magnet, and their magnetic field only exists when the electric current is flowing. Their poles can be reversed, back and forth between north and south, by reversing the direction of their current. 18 EM_TG.indb 18 40 7/17/14 11:56 AM A3 Explore INVESTIGATION A3 Explore 1. Take the magnets out of the rotor. Place the orange commutator disk on the rotor and gently secure it with the nut. The orange disk has three black spaces and three clear spaces around the edge. A3 INVESTIGATION 3. Slide the electromagnet back in place toward the center of the rotor and gently tighten down the thumbnuts to make electrical contact. 2. Place the electromagnet on the electric motor. Slide it toward the center of the rotor and gently tighten down the thumb-nuts to hold it in place and make electrical contact. 3. Connect the battery pack with the red wire in the red socket and the black wire in the black socket. 4. Hold down the RUN button and slowly rotate the rotor with your hand. a. What do you notice about the position of the north and south poles of the electromagnet as you spin the rotor? The poles of the electromagnet switch positions. b. When is the north pole of the electromagnet closest to the rotor? When is the south pole of the electromagnet closest to the rotor? The north pole is closest to the rotor when a clear section is under the light beam switch. The south pole is closest to the rotor when a black section is under light beam switch. This happens independently of which way the rotor is turning. 4. Hold down the RUN button. The rotor will start spinning! You may need to give the rotor a little push at first. Now, you have a working electric motor! Working with the electromagnet 1. Now, take off the orange disk and put the six magnets back in place as shown below. You will need to loosen the thumbscrews on the electromagnet and slide it back before removing the disk. Analyzing the motor’s motion Now, you will analyze the motor’s motion. Hold down the RUN button and slowly turn the rotor by hand. Watch the green light on the electromagnet as the alternating black and clear sections of the rotor pass under it. 2. Replace the disk on the rotor like the picture shows. Make sure that the boundary lines between the black and clear sections are positioned at the centers of your six magnets. a. What do you notice? How do the poles of the electromagnet change compared to the poles of the permanent magnet in the rotor? The poles keep switching. When the south pole of a permanent magnet is close to the electromagnet, the north pole of the electromagnet is closest to the rotor. The opposite occurs when the north pole of a permanent magnet in the rotor is close to the electromagnet. Copyright © CPO Science Can be duplicated for classroom use 3 of 7 A3 How a Motor Works Electric Motor Copyright © CPO Science Can be duplicated for classroom use SCIENCE AND LANGUAGE TEACHING TIP Commutator – (from Latin mutare meaning “to If the electric motor doesn’t work properly, try the following troubleshooting procedures: Commutator shares its origin with two other words that should be familiar to students: mutate and commute. Ask students to think about what happens when something mutates. Steer students toward using the word change to describe mutations. Then ask, “What does it mean when someone commutes to and from work?” A commuter travels from home to work and then back again home. “Commutator” combines meanings from both of these words. The commutator changes the direction of current altogether, like a commuter travels to work and back again, or a mutation changes something completely. 1. Check the batteries. Is one of the green lights on when the RUN button is held down? Sometimes the battery holders are tight and prevent the batteries from touching in the center. Rolling the battery around usually works to fix this problem. change altogether”) 2. Check that the electromagnet is not touching the rotor. If it is, slide it back a little. 3. Check that the thumb nuts on the electromagnet are making a good connection to the circuit board. 4. Check that the commutator disk is lined up so the edges from clear to black are aligned with the centers of the four magnets in the motor. EM_TG.indb 19 A3 How a Motor Works Electric Motor 4 of 7 Electric Motor 41 19 7/17/14 11:56 AM How a Motor Works Explore INVESTIGATION A3 b. How do you think the electromagnet, the permanent magnets, and the disk work together to make the rotor spin? Write down your ideas as a short paragraph or as a series of steps. The poles of the electromagnet switch every time a black/clear boundary passes the light beam on the electromagnet. The switch of the pole is such that the next permanent magnet in the rotor is attracted (or pulled) toward the electromagnet. The orientation of the magnets relative to the sections indicates whether the rotor will spin clockwise or counterclockwise. For example: (1) The clear section of the disk is under the beam and the north pole of the electromagnet is closest to the rotor; (2) This north pole is attracting the outward facing south pole of the next permanent magnet in the rotor; (3) The south pole of this permanent magnet reaches the beam of the electromagnet at the same time as the boundary from clear to black; (4) The poles of the electromagnet switch—now the south pole of the electromagnet is closest to the rotor; and (5) The permanent magnet under the beam is repelled and the next magnet in the rotor (with the north pole facing out) is attracted to the electromagnet. Explore INVESTIGATION A3 c. Look at the following pictures and determine where the north pole is when the disk is in each position. Circle the picture that shows the correct location of the north and south poles for each disk position. Be sure to use the electric motor to see if your answer is correct. When the black section is under the electromagnet, the south pole of the electromagnet is closest to the rotor. The permanent magnet nearest the electromagnet is being repelled and the next permanent magnet in the rotor (with the north pole facing out) is being attracted. When the clear section is under the electromagnet, the north pole is closest to the rotor. The permanent magnet nearest the electromagnet is being attracted. Copyright © CPO Science Can be duplicated for classroom use 5 of 7 A3 How a Motor Works Electric Motor Copyright © CPO Science Can be duplicated for classroom use A3 How a Motor Works Electric Motor 6 of 7 STEM CONNECTION Hybrid Cars Electric motors are quiet, produce no emissions, and are able to generate powerful forces very quickly. Despite these advantages, electric cars have not been widely accepted in the marketplace. Their biggest drawback is battery weight: one kilogram of gasoline yields more than 30 times the energy stored in one kilogram of batteries. In order to store enough energy to be practical, electric cars are heavy and have a range of only 50 to 100 Conventional miles before the car batteries need to be recharged. Conventional car Hybrid c Gas tank Gas tank High-powered engine Batteries Hybrid car Gas tank Hybrid cars combine the advantages of gasoline and electrical power. In the most promising hybrids on the market today, a small, efficient gasoline engine is combined with a battery-powered The Gas tank electric motor.High-powered engine two power sources work together to achieve good performance and excellent fuel efficiency. Batteries Small high-efficiency engine Electric motor 20 EM_TG.indb 20 42 7/17/14 11:56 AM Small h A3 Explore INVESTIGATION A3 d. Suppose you have a rotor with magnets like the ones in the picture to the right. The electromagnet has a north pole facing in towards the rotor. Which way will it turn? Circle the correct direction. Evaluate INVESTIGATION A3 Name ____________________________________________ Date ________________________ 1. What is the difference between a permanent magnet and an electromagnet? It will spin clockwise. e. How can you make your motor spin the other way? Explain your procedure. The motor will spin the other way if all of the permanent magnets (shown in the diagram) are flipped. For example, all the magnets with the north pole facing out would be flipped to have the south pole facing out, and all the magnets with the south pole facing out would be flipped to have the north pole facing out. The north and south poles in a permanent magnet are fixed and don’t change positions. The poles for an electromagnet are created when electricity is flowing. The orientation of the poles depends on the direction that the current is flowing, so they can be easily reversed. 2. Electric motors are everywhere. List at least 5 things you own or use that contain electric motors. How many electric motors have you used today? Common objects that have motors are: cars, blenders, hair dryers, food processors, and fans. Today, I have used two objects that have electric motors—a car and a fan. 3. Would the motor at right spin? Why or why not? No, the setup would not spin because the permanent magnets all have their north poles facing outward. This setup would spin if the orientation of the magnets alternated. 4. Examine the two motor designs at right. Which one will spin faster? Explain your answer. Disk B will spin the fastest because there are more opportunities for the poles to switch. Each time the poles of the electromagnet are switched is an opportunity for the disk to be pulled around. In these terms, disk B gets “pulled” six times for each rotation, while disk A gets pulled two times. Copyright © CPO Science Can be duplicated for classroom use 7 of 7 A3 How a Motor Works Electric Motor Ordinary car engines are built with extra power capacity to provide rapid acceleration when passing or starting. Cruising at constant speed requires less than 15 percent of a typical engine’s maximum power. Fuel efficiency suffers because large engines are inefficient at the low power levels used for 95 percent of driving. Conventional engine designs are a compromise between the high power needed for acceleration and the low power needed for normal driving. In a hybrid car, the small, high-performance gasoline engine is used for normal driving. The electric motor supplies extra power for fast starts and rapid acceleration. The gas engine can be relatively powerful while producing ultra-low levels of emissions. One EM_A3_TG.indd 21 A3 How a Motor Works Electric Motor STEM CONNECTION (continued from previous page) Copyright © CPO Science Can be duplicated for classroom use hybrid model has an engine that weighs a mere 124 pounds yet produces 67 horsepower. Hybrid cars do not need to be “plugged in” overnight to be recharged like pure electric cars. The gasoline engine includes an electric generator that continuously recharges the batteries while you are driving. One of the most innovative developments in hybrid technology is regenerative braking. Conventional braking systems dissipate a car’s kinetic energy through friction, resulting in heat. In a hybrid car, however, the electric motor also works as a generator. Regenerative braking uses some of the car’s kinetic energy to turn the motor into a generator that charges the batteries during slowing or stopping. This process recycles kinetic energy that would otherwise be lost. Electric Motor 21 7/17/14 3:21 PM How a Motor Works Evaluate INVESTIGATION A3 Notes and Reflections 5. Magnetically levitated (also called “maglev”) trains use electromagnets to lift a train a few inches above the track and to pull it forward. Research maglev trains and find out where they are in use today. In an effort to reduce traffic, the U.S. government is supporting research on the development of the first maglev train for the country. Maglev trains are much faster than traditional rail systems because they travel on air, held off the track by a magnetic field. By “floating” the train on a powerful magnetic field, the friction between wheels and rails is eliminated. Maglev trains achieve high speeds using less power than a normal train. The first commercially operated maglev train is in China and runs between the city of Shanghai and the Pudong Airport. The train travels the 30 km (19 mile) distance in 7 minutes 20 seconds, reaching a speed of 431 km/h (268 mph). A3 How a Motor Works Electric Motor Copyright © CPO Science Can be duplicated for classroom use WRAPPING UP Have your students reflect on what they learned from the investigation by answering the following questions: 1. What are the important parts of an electric motor? 2. What is an electromagnet? 3. How can you control the direction that a motor spins? 22 EM_TG.indb 22 44 7/17/14 11:56 AM
