AC TO DC POWER CONVERTER SCITSONGAID SNOITCURTSNI
advertisement

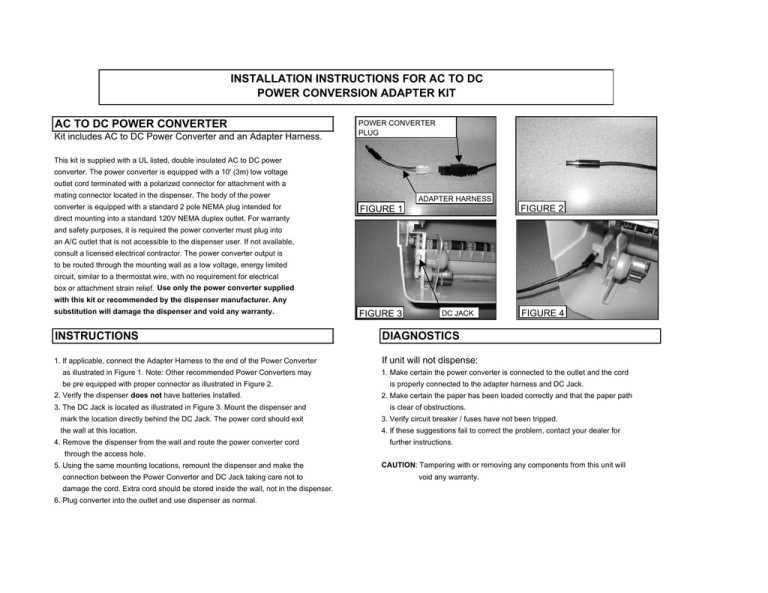
INSTALLATION INSTRUCTIONS FOR AC TO DC POWER CONVERSION ADAPTER KIT AC TO DC POWER CONVERTER Kit includes AC to DC Power Converter and an Adapter Harness. POWER CONVERTER PLUG This kit is supplied with a UL listed, double insulated AC to DC power converter. The power converter is equipped with a 10' (3m) low voltage outlet cord terminated with a polarized connector for attachment with a mating connector located in the dispenser. The body of the power converter is equipped with a standard 2 pole NEMA plug intended for ADAPTER HARNESS FIGURE 2 FIGURE 1 direct mounting into a standard 120V NEMA duplex outlet. For warranty and safety purposes, it is required the power converter must plug into an A/C outlet that is not accessible to the dispenser user. If not available, consult a licensed electrical contractor. The power converter output is to be routed through the mounting wall as a low voltage, energy limited circuit, similar to a thermostat wire, with no requirement for electrical box or attachment strain relief. Use only the power converter supplied with this kit or recommended by the dispenser manufacturer. Any substitution will damage the dispenser and void any warranty. INSTRUCTIONS 1. If applicable, connect the Adapter Harness to the end of the Power Converter as illustrated in Figure 1. Note: Other recommended Power Converters may be pre equipped with proper connector as illustrated in Figure 2. 2. Verify the dispenser does not have batteries installed. 3. The DC Jack is located as illustrated in Figure 3. Mount the dispenser and FIGURE 3 DC JACK FIGURE 4 DIAGNOSTICS If unit will not dispense: 1. Make certain the power converter is connected to the outlet and the cord is properly connected to the adapter harness and DC Jack. 2. Make certain the paper has been loaded correctly and that the paper path is clear of obstructions. mark the location directly behind the DC Jack. The power cord should exit 3. Verify circuit breaker / fuses have not been tripped. the wall at this location. 4. If these suggestions fail to correct the problem, contact your dealer for 4. Remove the dispenser from the wall and route the power converter cord further instructions. through the access hole. 5. Using the same mounting locations, remount the dispenser and make the connection between the Power Converter and DC Jack taking care not to damage the cord. Extra cord should be stored inside the wall, not in the dispenser. 6. Plug converter into the outlet and use dispenser as normal. CAUTION: Tampering with or removing any components from this unit will void any warranty.

