CIVE1400: Fluid Mechanics Rectangular Weir Lab First Year
advertisement

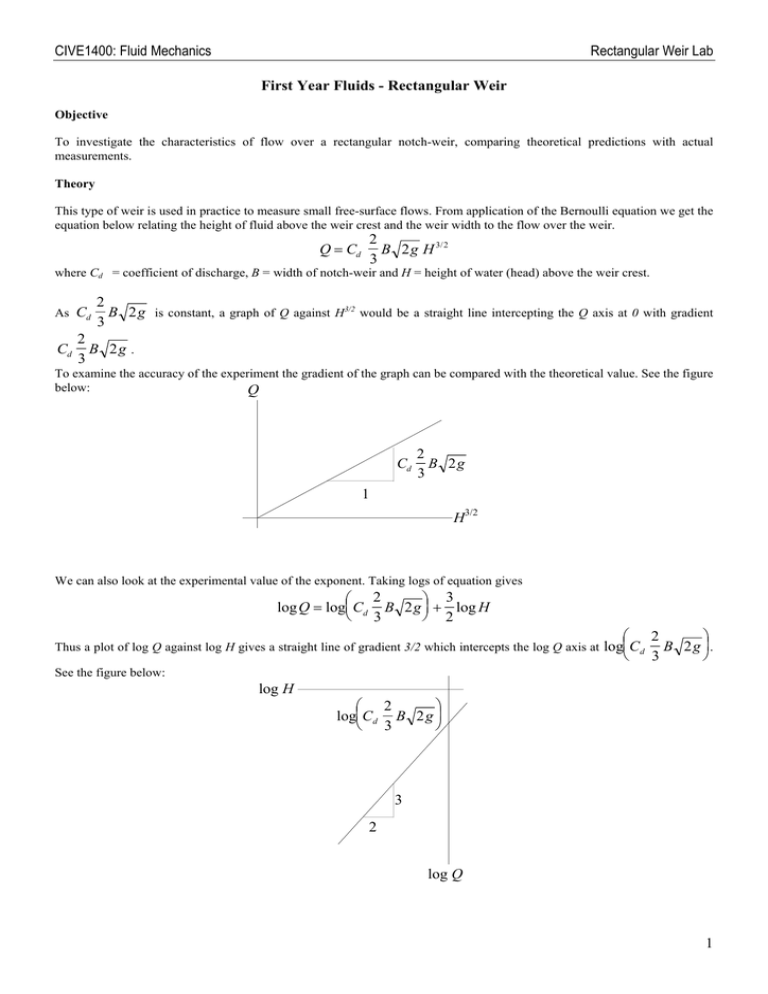
CIVE1400: Fluid Mechanics Rectangular Weir Lab First Year Fluids - Rectangular Weir Objective To investigate the characteristics of flow over a rectangular notch-weir, comparing theoretical predictions with actual measurements. Theory This type of weir is used in practice to measure small free-surface flows. From application of the Bernoulli equation we get the equation below relating the height of fluid above the weir crest and the weir width to the flow over the weir. Q = Cd 2 B 2 g H 3/ 2 3 where Cd = coefficient of discharge, B = width of notch-weir and H = height of water (head) above the weir crest. As Cd Cd 2 B 2 g is constant, a graph of Q against H3/2 would be a straight line intercepting the Q axis at 0 with gradient 3 2 B 2g . 3 To examine the accuracy of the experiment the gradient of the graph can be compared with the theoretical value. See the figure below: Q Cd 2 B 2g 3 1 H3/2 We can also look at the experimental value of the exponent. Taking logs of equation gives 2 3 log Q = log Cd B 2 g + log H 3 2 Thus a plot of log Q against log H gives a straight line of gradient 3/2 which intercepts the log Q axis at log Cd 2 B 2 g . 3 See the figure below: log H 2 log Cd B 2 g 3 3 2 log Q 1 CIVE1400: Fluid Mechanics Rectangular Weir Lab Setting up the Apparatus 1) Ensure that the hydraulics bench is level. 2) Screw the rectangular weir plate to the weir carrier using the plastic thumb nuts. 3) Screw the delivery nozzle to the water inlet. 4) Insert the stilling baffle in its grooves with the baffle towards the water inlet. 5) Move the vernier gauge to a position directly over the weir. Place the needle point on the crest of the weir and set the gauge to zero. Take extreme care not to damage the weir plate with the point. 6) To record water level measurements, position the gauge about half way between the weir plate and the stilling baffle. Method 1) Position the gauge needle at the suggested height of 0.060m. 2) Turn on the power at the wall socket. 3) At the bench control panel, turn on the pump and open the red valve to turn on the water supply. When the water supply is not in use, THE PUMP MUST BE SWITCHED OFF, otherwise it will burn out. 4) Adjust the flow rate until the water level is fairly near the point of the needle. Wait at least 30 seconds as the levels take a long time to stabilise. Move the needle out of the water and lower it again until it just touches the surface. On the results table, replace the suggested H value with the revised reading from the vernier. 5) Measure the flow by dropping the ball plug and measuring volume increase with time using the upper volume indicator on the side of the bench. Start the stopwatch when the level reaches zero. 6) Repeat this procedure taking flow measurements for other values of H. 2 CIVE1400: Fluid Mechanics Results H (m) Rectangular Weir Lab Notch Width B (m) = 0.060 Volume (m3) 0.025 0.055 0.025 0.050 0.020 0.045 0.020 0.040 0.015 0.035 0.015 0.030 0.010 0.025 0.010 0.020 0.005 0.015 0.005 0.010 0.005 g= Time (seconds) Q (m3/s) average value of Cd = log Q log H H3/2 Cd Analysis 1) Find an average value of Cd for the range of the test. 2) Draw a graph of Q against H 3/2 and find the gradient of the curve. 3) Calculate the theoretical gradient of Q against H 3/2 . 4) Draw a graph of log Q against log H and find the gradient of the curve. 5) On the graph of log Q against log H , find the point where the curve crosses the y - axis. 6) Calculate the theoretical gradient of log Q against log H. 7) Calculate the theoretical intercept. 10) Compare the experimental with the theoretical in the form of a percentage error and summarise the results below: experimental theoretical % error gradient of Q against H 3/2 gradient of log Q against log H log Q intercept 8) Make some critical assessment of the apparatus discussing any problems encountered: 9) What are the likely sources of error and of what magnitude are these errors? 3
