E3X - Digi-Key Corporation
advertisement
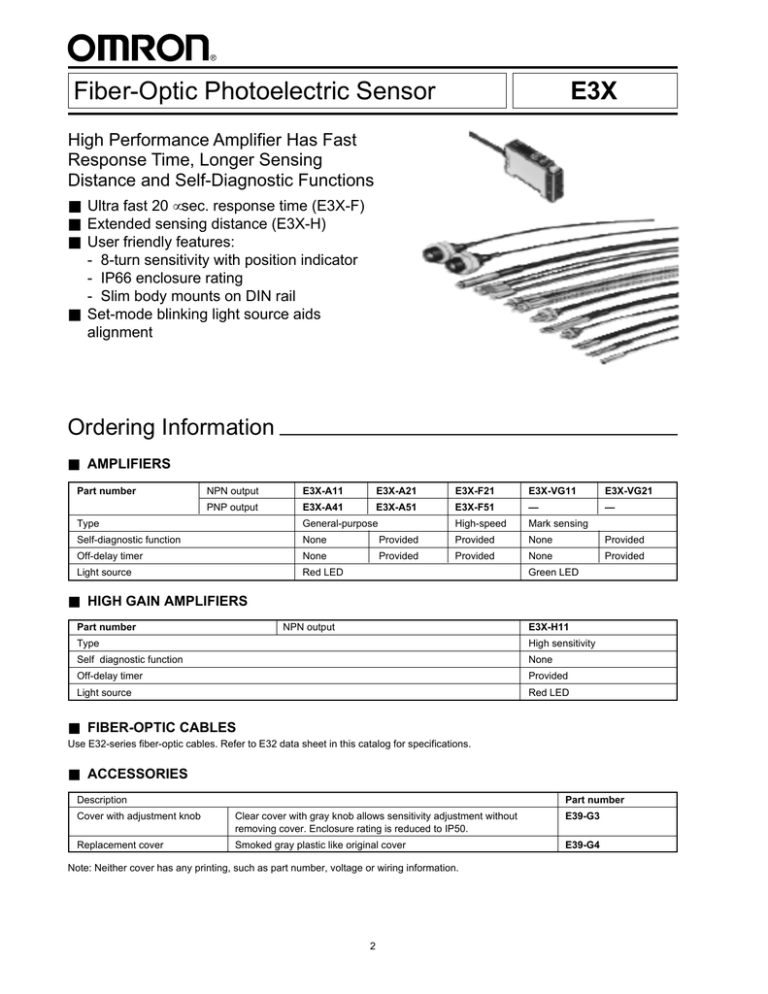
E3X E3X Fiber-Optic Photoelectric Sensor E3X High Performance Amplifier Has Fast Response Time, Longer Sensing Distance and Self-Diagnostic Functions ■ Ultra fast 20 µsec. response time (E3X-F) ■ Extended sensing distance (E3X-H) ■ User friendly features: - 8-turn sensitivity with position indicator - IP66 enclosure rating - Slim body mounts on DIN rail ■ Set-mode blinking light source aids alignment Ordering Information ■ AMPLIFIERS Part number NPN output E3X-A11 E3X-A21 E3X-F21 E3X-VG11 E3X-VG21 PNP output E3X-A41 E3X-A51 E3X-F51 — — High-speed Mark sensing Type General-purpose Self-diagnostic function None Provided Provided None Provided Off-delay timer None Provided Provided None Provided Light source Red LED Green LED ■ HIGH GAIN AMPLIFIERS Part number NPN output E3X-H11 Type High sensitivity Self diagnostic function None Off-delay timer Provided Light source Red LED ■ FIBER-OPTIC CABLES Use E32-series fiber-optic cables. Refer to E32 data sheet in this catalog for specifications. ■ ACCESSORIES Description Part number Cover with adjustment knob Clear cover with gray knob allows sensitivity adjustment without removing cover. Enclosure rating is reduced to IP50. E39-G3 Replacement cover Smoked gray plastic like original cover E39-G4 Note: Neither cover has any printing, such as part number, voltage or wiring information. 2 2 E3X E3X Specifications Part number NPN PNP E3X-A11 E3X-A41 E3X-A21 E3X-A51 E3X-F21 E3X-F51 E3X-VG11 — 10-30 VDC 10% ripple max. Supply voltage 10-30 VDC 10% ripple max. 12-24 VDC±10% 10% ripple max. Current consumption 35 mA max. 40 mA max. Required fiber optic cables All E32-series Light source Pulse-modulated red LED (660 nm) Operation mode Light-ON, Dark-ON or SET modes (switch selectable) Sensitivity 8-turn potentiometer with clutch and indicator Mutual interference protection Control output DC solidstate Type E3X-VG21 — Pulse-modulated green LED (565 nm) Not provided NPN — open collector PNP — open collector Max. load 100 mA, 30 VDC max. Max. ON-state voltage drop 1 VDC max. at 100 mA 100 mA, 40 VDC max. Response time 200 µs max. Timing functions — OFF-delay, 0.01 to 0.1 sec, adjustable; switch selectable — OFF-delay, 0.01 to 0.1 sec, adjustable; switch selectable Alarm output — 50 mA, 30 VDC max. — 50 mA, 40 VDC max. — Light OFF: 1.5 V max. — Light OFF: 1.5 V max. Check input Input voltage Circuit protection Light received (red LED) and output stability (green LED) Case Heat-resistant ABS Cover Polycarbonate Mounting Connections 200 µs max. Output short circuit protection, DC power reverse polarity protection Indicators Materials ON: 20 µs max. OFF: 30 µs max. DIN rail track, or on flat surface through holes in bracket (provided) Prewired 3 conductor cable, 2 m (6.5 ft) Enclosure rating IEC IP66 (with cover on) Ambient Operating -25° to 55°C with no ice buildup (-13° to 131°F) temperature Storage -40° to 70°C (-40° to 158°F) Weight 5 conductor cable, 2 m (6.5 ft) 3 conductor cable, 2 m (6.5 ft) 5 conductor cable, 2 m (6.5 ft) 100 g (3.5 oz.) with 2 m cable 3 3 E3X E3X ■ HIGH GAIN AMPLIFIER Part number E3X-H11 Supply voltage 10 - 30 VDC 10% ripple max. Current consumption 35 mA max. Required fiber optic cables All E32 series Light source Pulse modulated Red LED (660 nm) Operation mode Light ON, Dark ON Sensitivity Control output 8 turn potentiometer DC solidstate Type NPN - Open collector Max. load 100 mA, 30 VDC Max. ON-state voltage drop 1 VDC max. at 100 mA Response time 1 m sec max. Timing functions OFF DELAY 40 ms Fixed Switch selectable Circuit protection Output short-circuit protection, DC power reverse polarity protection Indicators Light received (Red LED) and output stability (Green LED) Materials Case Heat resistant ABS Cover Polycarbonate Mounting Connections DIN rail track, or on flat surface through holes in bracket (provided) Prewired 3 conductor cable 2 m (6.5 ft) IEC IP66 (with cover on) Operating -25° to -55°C with no icing build-up (-13° to 131°F) Storage -40° to 70°C (-40° to 158°F) Weight Enclosure ratings Ambient temperature 100g (3.5 oz) with 2 m cable 4 4 E3X E3X Nomenclature E3X-H11 Stable Operation Indicator (Green Indicator) E3X-A11/-A41 E3X-VG11 Light Reception Indicator (Red Indicator) Stable Operation Indicator (Green Indicator) Sensitivity Indicator Light Reception Indicator (Red Indicator) Sensitivity Indicator The position of the indicator can be checked. Sensitivity adjustment can be checked visually. 8-turn Sensitivity Adjuster 8-turn Sensitivity Adjuster Hysteresis Adjuster Timer Switch Mode Selector SET: The light source flashes. Set to this mode to adjust the light axis. L-ON: Output transistor is ON when light is received. D-ON: Output transistor is ON when light is not received. ON: Mode Selector Timer function is ON. SET: The light source flashes. Set to this mode to adjust the light axis. L-ON: Output transistor is ON when light is received. D-ON: Output transistor is ON when light is not received. OFF: Timer function is OFF. Light Reception Monitoring Terminal Monitoring is used with the E39-VX Beam Checker Note: Light Reception Monitoring Terminal Monitoring is used with the E39-VX Beam Checker Set the mode selector to L-ON or D-ON after the light axis is adjusted. E3X-A21/-A51 E3X-F21/-F51 E3X-VG21 Stable Operation Indicator (Green Indicator) Light Reception Indicator (Red Indicator) Sensitivity Indicator Timer Sensitivity Adjuster Timer Switch Mode Selector SET: The light source flashes. Set to this mode to adjust the light axis. L-ON: Output transistor is ON when light is received. D-ON: Output transistor is ON when light is not received. ON: Timer function is ON. OFF: Timer function is OFF. Light Reception Monitoring Terminal Monitoring is used with the E39-VX Beam Checker 5 5 E3X E3X Operation ■ OUTPUT CIRCUITS Type Model Mode switch Output transistor NPN E3X-H11 E3X-A11 E3X-VG11 Light ON ON when light is received. Output circuit Light (red) Brown Stability (green) Load Main circuit Black 100 mA max. ZD Blue E3X-A21 E3X-VG21 E3X-F21 Dark ON ON when light is not received. Light ON ON when light is received. ZD: VZ = 39 V Light (red) Brown Stability (green) Load (relay) Main circuit Load (relay) Black Control output Z Orange Selfdiagnosis output Pink Externalcheck input Z 10 K Blue PNP E3X-A41 Dark ON ON when light is not received. Light ON ON when light is received. ZD (Zener diode): VZ = 39 V Light (red) Brown Stability (green) ZD Main circuit Black 100 mA max. Load Blue E3X-A51 E3X-F51 Dark ON ON when light is not received. Light ON ON when light is received. ZD: VZ = 39 V Brown Light (red) 10 K Stability (green) Self-diagnosis output Orange Main circuit Externalcheck input Pink Z Z Black Control output Load (relay) Load (relay) Blue Dark ON ON when light is not received. ZD (Zener diode): VZ = 39 V 6 6 E3X E3X ■ TIMING CHARTS Type Model Mode switch Output transistor NPN E3X-H11 E3X-A11 E3X-VG11 Light ON ON when light is received. Timing circuit Light received Light not received Light indicator (Red) ON OFF Output transistor ON OFF Operate release Load (relay) Dark ON ON when light is not received. Light received Light not received Light indicator (Red) ON OFF Output transistor ON OFF Operate release Load (relay) E3X-A21 E3X-VG21 E3X-F21 Light ON ON when light is received. (Between brown and black) (Between brown and black) Light received Light not received T Light indicator (Red) ON OFF Output transistor ON OFF Operate release Load (relay) Dark ON ON when light is not received. (Between brown and black) Light received Light not received Light indicator (Red) ON OFF Output transistor ON OFF T Operate release Load (relay) (Between brown and black) 7 7 E3X E3X Type Model Mode switch Output transistor PNP E3X-A41 Light ON ON when light is received. Timing chart Light received Light not received Light indicator (Red) ON OFF Output transistor ON OFF Operate release Load (relay) Dark ON ON when light is not received. Light received Light not received Light indicator (Red) ON OFF Output transistor ON OFF Operate release Load (relay) E3X-A51 E3X-F51 Light ON ON when light is received. (Between blue and black) (Between blue and black) Light received Light not received T Light indicator (Red) ON OFF Output transistor ON OFF Operate release Load (relay) Dark ON ON when light is not received. (Between blue and black) Light received Light not received Light indicator (Red) ON OFF Output transistor ON OFF T Operate release Load (relay) 8 8 (Between blue and black) E3X E3X ■ ADJUSTING SENSITIVITY E3X-H11/-A❏❏/-F❏❏/-VG❏❏ Using a sensing object, set the Sensitivity Adjust so that the indicators operate as described in the following table: Sensing method Detection Light Through-beam Indicators OFF Green: light ON Red: light OFF With sensing object ON Detection —with sensing object— 1 Green: light ON Red: light ON Without sensing object Reflective Detection Detection —with/o sensing object— 1 ON Green: light ON Red: light ON With sensing object OFF Detection Single —with sensing object— 1 Green: light ON Red: light OFF Without sensing object Detection of the difference in color or shade Detection —without sensing object— 2 ON Color that has a high reflective ratio Green: light ON Red: light ON OFF Detection —color high reflection— 3 Color that has a low reflective ratio Retroreflective OFF Detection —color low reflection— 3 With sensing object Green: light ON Red: light OFF Green: light ON Red: light OFF Reflecting plate ON Detection —with sensing object— 4 Without sensing object Note: 1. Reflecting plate Green: light ON Red: light ON If the indicators operate as described in the table, the E3X can operate in stable condition within the rated temperature range. 2. Even when the green indicator is OFF, the E3X will operate stably if the operating temperature change since the initial settings is within ± 10°C. 9 9 E3X E3X ■ LIGHT AXIS ADJUSTMENT WITH FLASHING FUNCTION E3X-A❏❏/-F❏❏/-VG❏❏ 2. Adjust the light axis by moving the fiber with the light flashing. 1. Set the mode selector to SET. Improper Light Axis Proper Light Axis Flashing Light ON with no flashing Light axis adjusted Mode Selector 3. Set the mode selector to L-ON or D-ON after the light axis is adjusted. ■ SELF-DIAGNOSTIC FUNCTION With this function, the E3X checks changes in environment conditions (especially a change in the ambient temperature) and self-diagnoses the resistance against the changes. The result is shown by the indicators or an output signal. Stable Operation Indicator (Green Indicator) Displays ● Stable Operation Indicator: Changes in environmental conditions (changes in the ambient temperature, the operating voltage, or the volume of dust) are checked and the resistance against them are self-diagnosed. The result is shown via the indicator. Light Reception Indicator (Red Indicator) ● Light Reception Indicator: The amount of light received is shown by this indicator. Output: ● The resistance against changes in environmental conditions is shown by the indicator and the result is output. Amount of light 1.2 Operating level x 1.2 1 Operating level 0.8 Control output (L, ON) ON OFF Self-diagnostic output* ON Operating level x 0.8 0.3 s min. 0.3 s min. OFF Red Indicator Green Tip of the fiber connected to the light source side in the SET mode Green Flashing light ON Green Flashing *If the self-diagnostic output is ON when the sensing object is moving at low speed, use the E3X with an ON-delay timer circuit. 10 10 E3X E3X ■ VARIABLE HYSTERESIS FUNCTION (E3X-H11) Detection of Plate Level Differences Refer to the following when using the hysteresis adjuster. (If detection is impossible with the hysteresis value set to maximum) Reflection of light Reflection of light Reflection of light ON ON OFF OFF Large hysteresis differential A ON A Unstable B Unstable Detecting operation is not stable because zone B is within the hysteresis differential range. Set both the sensitivity adjuster and hysteresis adjuster to maximum. B OFF Reduce the hysteresis value with the hysteresis adjuster so that zone A will be ON. s SENS min max min Sensitivity adjuster Locate the head in zone A and turn the sensitivity adjuster counterclockwise slowly until the stable operation indicator and light reception indicator are OFF (i.e., position E as shown in the illustration). (E) max B Hysteresis differential adjuster A (example) s 1 SENS min NO S L max Locate the head in zone B and turn the hysteresis adjuster counterclockwise slowly and make sure that the light reception indicator is lit. min max NO Set the hysteresis adjuster to maximum. S YES S Locate the head in zone A and turn the sensitivity adjuster clockwise until the stable operation indicator and light reception indicator are OFF (i.e., position F as shown in the illustration.) L L Set the hysteresis adjuster to the point where the light reception indicator is lit (i.e., position E as shown in the illustration.) The light reception indicator is lit when the head is located in zone B and the light reception indicator is OFF when the head is located in zone A. YES Detection is possible S L (H) min min L YES S OFF A ON B OFF Reduce the sensitivity of the E3X with the sensitivity adjuster and turn off zone B. 1 Decide the position of the fiber head and that of the sensing object in zone A. When the head is located in zone B, light reception indicator is lit. ON Small hysteresis differential max NO S L Locate the head in zone A and turn the sensitivity adjuster counterclockwise until the light reception indicator and stable operation indicator are OFF (i.e., position O as shown in the illustration). max (F) (G) s 1 SENS min max (E) (G) s 1 SENS min max 11 11 E3X E3X ■ EXTERNAL DIAGNOSTIC INPUT FUNCTION With this function, light projection can be stopped when desired. The operation of the sensor can be checked with this function before the E3X is placed into actual operation. E3X-F❏❏/-VG❏❏ No light is emitted from the projection fiber head when selfdiagnostic input is ON. E3X-A❏❏ Light is emitted from the projection fiber head when the selfdiagnostic inputs is ON. The sensor, however, will not operate. NPN Type Light projection stops Brown (+V) Pink (externalcheck input) External-diagnostic input (between blue and pink) Short Open LED for light projection ON OFF Indicator ON OFF ON Blue (0 V) Brown (+V) Light Pink (externalcheck input) By short-circuiting the pink and blue cords, light projection can be stopped (with a short-circuit current of 0.2 mA max.). OFF Blue (0 V) PNP Type Brown (+V) External-diagnostic input (between blue and pink) ON Light projection stops Pink (externalcheck input) Short Open LED for light projection ON OFF Indicator ON OFF Blue (0 V) Brown (+V) OFF By short-circuiting the brown and pink cords, light projection can be stopped (with a short-circuit current of 0.2 mA max.). Light Pink (externalcheck input) Blue (0 V) ■ SPECIAL FIBER UNITS The following special accessories are available (order separately). Contact your OMRON representative for the details. Appearance L Fiber Units with Special Length of Stainless Steel Tube Fiber with different lengths of stainless steel tubes are available. Applicable Models E32-TC200F (tube with 0.9 dia.) E32-TC200B/DC200F (tube with 1.2 dia.) E32-DC200B (tube with 2.5 dia.) The length can be ordered in increments of 10 mm between 10 mm min. and 120 mm max. Tolerance: ±1.0 mm if L is 40 mm or less and ±2.0 if L is more than 40 mm. (Note that standard Fiber Units have a 90-mm or 40-mm long stainless steel tube.) 12 12 E3X E3X Fiber Units with 90° Bend in Stainless Steel Tube Stainless Steel Tube with a 90° Bend at the Base Applicable Models E32-TC200B/TC200F/DC200F Appearance Stainless Steel Tube with a 90 ° Bend at the Tip Length 2 Length R 1 R Bending radius l 1 (±1) Bending radius l 2 (±1) R 5.0 10.0 mm 15.0 mm R 5.0 5.0 mm 10.0 mm R 7.5 12.5 mm 17.5 mm R 7.5 7.5 mm 17.5 mm R 10.0 15.0 mm 20.0 mm R 10.0 10.0 mm 20.0 mm R 12.5 17.5 mm 22.5 mm R 12.5 12.5 mm 22.5 mm The length overall is 120 mm max. Note: If larger l 1 is required, use the E39-F11 Sleeve Bender. The length overall is 120 mm max. Note: If larger l 2 is required, use the E39-F11 Sleeve Bender. Sensing Distance for Tubes with 90° Bends Model E32-TC200B E32-TC200F E32-DC200F Amplifier Bending radius Standard R 5.0 R 7.5 R 10.0 E3X-H11 400 mm 260 mm 330 mm 360 mm R 12.5 400 mm E3X-A❏❏ 180 mm 110 mm 140 mm 160 mm 180 mm E3X-H11 100 mm 55 mm 100 mm 100 mm 100 mm E3X-A❏❏ 50 mm 30 mm 50 mm 50 mm 50 mm E3X-H11 36 mm 30 mm 36 mm 36 mm 36 mm E3X-A❏❏ 18 mm 10 mm 18 mm 18 mm 18 mm Fiber Unit with Longer Fiber Applicable Models Appearance E32-TC200/-DC200 E32-TC200B/-DC200B E32-TC200E/-DC200E E32-TC200F/-DC200F E32-TC200A l Length The length can be ordered in increments of 1 m between 6 m min. and 20 m max. (2 m and 5 m fiber length types are standard for E32-TC200, E32-DC200.) 13 13 E3X E3X Fiber Length vs. Sensing Distance Through-beam Fiber Unit Reflective Fiber Unit (Based on the sensing distance using a fiber length of 2 m as 100%) (Based on the sensing distance using a fiber length of 2 m as 100%) 100 Sensing distance (%) Sensing distance (%) 100 80 60 40 20 0 2 5 10 20 30 80 60 40 20 0 40 2 5 Fiber length (m) 100 Sensing distance (mm) Sensing distance (mm) 160 120 80 40 20 30 20 E3X-A❏❏, E32-DC200 (Typical) 200 10 15 Fiber length (m) E3X-A❏❏, E32-TC200 (Typical) 0 2 5 10 80 60 40 20 40 0 2 5 Fiber length (m) 10 15 20 Fiber length (m) Dimensions Unit: mm (inch) ■ AMPLIFIER E3X-H11 E3X-A❏❏ E3X-F❏❏ E3X-VG❏❏ 15.8 Light reception indicator 9 Stable operation indicator 4 59 Two, 2.4 dia. 30 8 25 12.5 8.4 Cable: 2-m polyvinyl chloride-covered cable (4-mm dia., 5 cores*) Weight: Approx. 100 g *The cables for the E3X-A11, E3X-A41, and E3X-VG11 models have 3 cores. 3.9 22.5 13 6 3.2 dia. Mounting bracket (removable) 3.4 22.5 14 14 6 16 37 2 16 E3X E3X Unit: mm (inch) ■ REFLECTOR Reflector (Small) E39-R3 Reflector E39-R1 11 Adhesive tape 40.3 34 20 7.5 7 Two 3.5 dia. Note: Mounting bracket is attached. 0.2 59.9 34.8 52 25.4 34 38 1.6 8 19.3 1.2 Two, M3 2.7 2.6 Installation ■ CONNECTIONS Connection with S3D2 Sensor Controller Connection with S3D8 Sensor Controller Blue Black Black Brown Blue 0 V Brown 0V +12 V 7 8 9 10 11 12 IN 1 +12 V IN 1 IN 2 NORM INV 4 5 6 1 2 3 Note: A maximum of two E3X Optical Fiber Photoelectric Sensors can be connected. Note: A maximum of eight E3X Optical Fiber Photoelectric Sensors can be connected. Power supply voltage Output Functions NPN input PNP input 100 to 240 VAC Relay AND, OR S3D2-AK-US S3D2-AKB-US AND, OR, and timer S3D2-CK-US S3D2-CKB-US Flip-flop S3D2-BK-US --- AND, OR, and timer S3D2-CC-US S3D2-CCB-US Transistor 15 15 E3X E3X Precautions ■ FIBER UNITS Tightening Force The tightening force applied to the Fiber Unit should be as follows: Fiber Connection and Disconnection The E3X amplifier has a lever lock. Connect or disconnect the fibers to or from the E3X amplifier using the following procedures: Screw-mounting Model 1. Connection Spring mounting clip Lever lock Toothed washers Insertion mark Fiber Nuts (attachment) Insert the fibers into the E3X amplifier and press the lever lock until the amplifier clicks to lock the fibers. The fibers will have insertion marks when they are cut with the E39-F4 (Fiber Cutter). The portion from the tips to the insertion mark should be inserted to the E3X. Column Model Retaining screw (M 3 max.) Clamping torque 3 kgf • cm max. 2. Disconnection Raise the lock lever to unlock the fibers before pulling them out. Fiber Insertion Fiber units If the portion from the tip to the insertion mark of the fibers are not inserted into the amplifier unit, the sensing distance will be reduced. Clamping torque M3/M4 screw 8 kgf • cm max. (0.78 N • m) M6 screw 10 kgf • cm max. (0.98 N • m) 2-mm dia. column 3 kgf • cm max. (0.29 N • m) 3-mm dia. column 3 kgf • cm max. (0.29 N • m) E32-D14L 10 kgf • cm max. (0.98 N • m) E32-T12F 8 kgf • cm max. (0.78 N • m) E32-D12F 8 kgf • cm max. (0.78 N • m) E32-T16 5 kgf • cm max. (0.49 N • m) E32-R21 6 kgf • cm max. (0.59 N • m) E32-M21 Up to 5 mm to the tip: 5 kgf • cm max. (0.49 N • m) Up to 5 mm from the tip: 8 kgf • cm max. (0.78 N • m) E32-L25A 8 kgf • cm max. (0.78 N • m) Locked Use a proper-sized spanner. 16 16 Unlocked E3X E3X Connection ■ AMPLIFIER UNITS Do not pull or press the Fiber Units. The Fiber Units have a withstand force of 1 kg or 3 kg (pay utmost attention because the fibers are thin). Mounting 1. Do not bend the Fiber Units beyond the permissible bending radius. 2. Mount the front part on the mounting bracket (sold together) or a DIN rail. Press the back part onto the mounting bracket or the DIN rail. Do not bend the edge of the Fiber Units. 40 mm max. Correct Amplifier Fiber unit Din rail Removal By pulling back the lock (yellow) on the bottom with a flat blade screwdriver, the amplifier can be removed with ease. 20 mm max. Incorrect In the case of side mounting, attach the mounting bracket on the amplifier first, and secure the amplifier with M3 screws and washers. The diameter of the washers should be 6 mm max. Do not apply excess force on the Fiber Units. Correct Fiber unit Nylon wireholder Washers (6 dia. max.) Others When power is off: The moment power is turned off, the E3X could output a pulse signal which could affect the operation of the devices connected to it. This will happen more often if power is supplied to the E3X from an external power supply, thus affecting the connected timer and counter. Use a built-in power supply as much as possible to avoid this. Metal holder Incorrect The Fiber Head could be broken by excessive vibration. To prevent this, the following is effective: If power is supplied to a photoelectric sensor through a cord that is wired together with other power lines in the same duct, the cord will be influenced by the power lines and malfunctioning of the photoelectric sensor or damage could result. Wire the cord separately or use a sealed cord to supply power to the photoelectric sensor. A one-turn loop can absorb vibrations If the case of the cord is extended, use a wire with 0.3 mm2 max.. The total length of the cord should be 100 m max. Tape Power line Power supply: If a standard switching regulator is used as a power supply, the frame ground (FG) terminal and the ground (G) terminal must be grounded, or otherwise the E3X can malfunction, influenced by the switching noise of the power supply. The supplied voltage must be within the rated voltage range. Unregulated full- or half-wave rectifiers must not be used as power supplies. Do not use a hammer to hit the amplifier when mounting or the amplifier will loose watertightness. 17 17 E3X E3X OMRON ELECTRONICS LLC OMRON ON-LINE OMRON CANADA, INC. One East Commerce Drive Schaumburg, IL 60173 Global - http://www.omron.com USA - http://www.omron.com/oei Canada - http://www.omron.com/oci 885 Milner Avenue Scarborough, Ontario M1B 5V8 1-800-55-OMRON Cat. No. CEDSAX4 18 11/01 Specifications subject to change without notice. 416-286-6465 Printed in the U.S.A.
