Mecho®/5
An Installation Guide
Optional
Optional
Optional
Special
Order
Optional
Optional
Optional
MechoSystems
Corporate Headquarters
42-03 35th Street
Long Island City, NY 11101
T:+1 (718) 729-2020
F:+1 (718) 729-2941
E: marketing@mechoshade.com
W: mechosystems.com
Copyright © 2011 MechoShade Systems, Inc. All
rights reserved. All trademarks herein are owned by
MechoShade Systems, Inc. No part of this document
may be reproduced or otherwise used without the
express written consent of MechoShade Systems, Inc.
Page 2
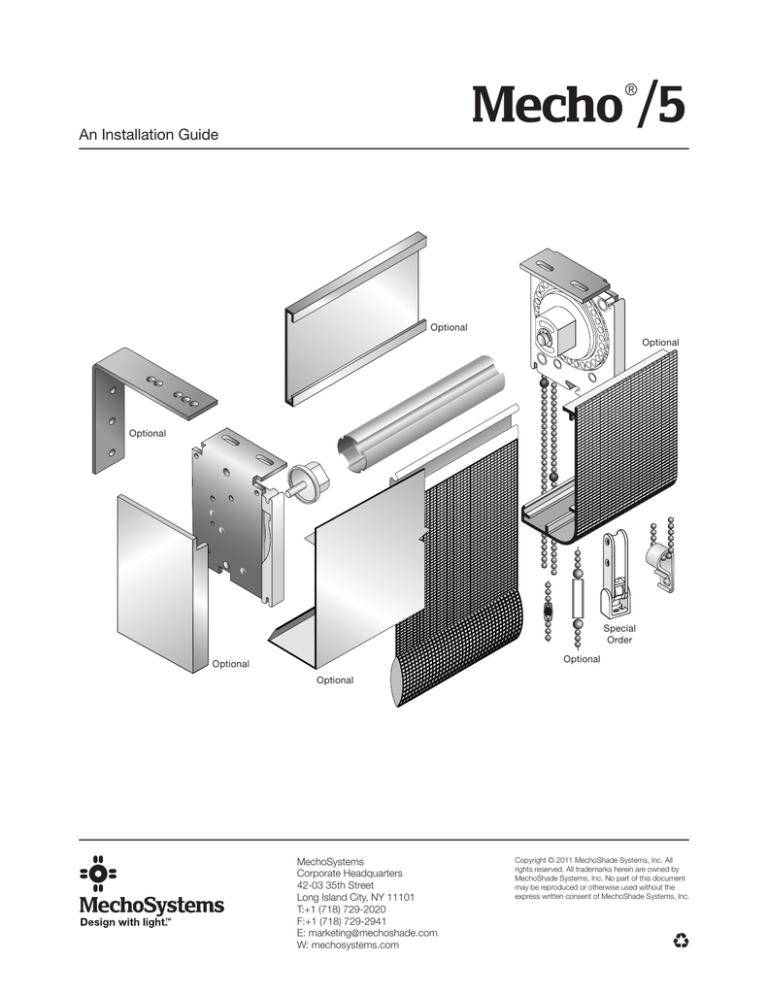
Mecho®/5 Sun Screens
Overrunning clutch operated system, requires no adjustment, utilizing rust
resistant components in conjunction with Delrin™ Sprocket and Housing.
Operated via a 90 lb. test stainless steel chain.
The Roller Tube consists of extruded aluminum tube with SnapLoc® Spline
mounting system, to facilitate ease of ShadeCloth removal and reinstallation.
10
2
1) MechoShade Band with SnapLoc Spline
®
2) Inte rchangeable Jamb or Ceiling-Mounted Drive
11
and Idle-End Brackets plus optional Wall Brackets
9
3
3) 1-1/4”; 1-1/2”; 1-7/8”; 2-1/8” SnapLoc® Tubes
4
4) Stainless Steel Chain with Bead Stop
5) Standard Chain Retainer
8
2
6) Spring-Tensioned Chain Retainer* (Optional)
7) Heavy-Duty Shock Absorber (Optional)
8) Idle End Plugs with Shaft Pins
9) Regular Roll SnapLoc® Fascia (Optional)
12
10) Reverse Roll SnapLoc Fascia (Optional)
®
9
11) Wall Brackets (Optional)
7
1
12) End Caps (Optional)
5
= Standard
= Optional
*Recommended for Public use and Shades weighing over 10 lbs.
Installation of Brackets
MechoShade® Brackets are universal for ceiling or jamb mounting**. Wall brackets
(as shown) are required for Wall Mounting. They are optional and must be ordered.
Brackets must be securely installed for hand-chain operation with an estimated
pull-force of not less than 30 lbs. with a 2X Safety Factor.
Fascia Options
Regular Fascia
Ceiling Mounted
6
Wall Mounted
Lamb Mounted
Install Drive-End bracket on the appropriate side for either right or left hand operation.
Insure that chain splice is positioned properly (next to the stop bead): Regular Roll
Shades, fabric is toward the window, or for Reverse Roll Shades, fabric is toward
the room.
Ceiling mounted shades. Place brackets on the ceiling so that they are square
to the window and properly aligned and level to each other.
Reverse Roll Fascia
Wall mounted shades. For wall mount conditions, optional wall-mount angles are
required. These angles are attached to the top flange of the Mecho/5 brackets. Secure
the Mecho Brackets to the wall brackets via the threaded holes in the wall bracket at
the top bracket,screws provided. Brackets must be level. Locate the brackets at the
appropriate site on the wall. Mount both brackets to the wall, level and aligned.
Jamb mounted shades. Screw directly through the bracket into the jamb via the
holes provided. Check to see that the bracket is square to the window and properly
aligned and level to each other.
**Remove (drill) two rivets from the bracket to facilitate round-head counter-sunk mounting screws.
Extended Fascia
Page 3
1. Install the Drive-End Bracket on appropriate side for right or left hand operation
and for the type of mounting desired as shown on the illustration #1 on the right; i.e.
Regular roll (fig. A) or Reverse roll (fig. B). It is required that you attach the bracket to a
secure mounting surface using the appropriate type of fastener for that surface taking
into consideration the size and weight of the shade you are mounting.
2. M
easure the ordered shade opening size (back of bracket to back of bracket)
to determine the position of the Idle-End Bracket (fig. 2).
3. Mount the Idle-End Bracket for the type of mounting desired (fig. 3).
1. Mount Drive-End Bracket.
2. Measure ordered shade opening
(Back-of-bracket to back-of-bracket.)
4. Installation of the Shade & Tube. Make sure the shadecloth (fabric) is tightly wound
up around the tube and that the shadecloth is wound in the proper direction around
the tube: Regular Roll shades, unroll towards the window (fig. A), Reverse Roll
shades unroll towards the room, away from the window (fig. B).
To install the tube:
Slide OPEN END of the shade tube over the shaft on the Drive-End Bracket. Hold
tube flush to the face of the bracket. Swing the Idle-End of the shade tube under
the Idle-End bracket. Lift the shade tube up, and pull forward so that you can slide
the end plug pin into the vertical slot in the Idle-End bracket bearing block.
A
3. Mount the Idle-End Bracket.
B
4. M
ount the Shade Tube into the
Drive-End Bracket and then onto
the Idle-End Bracket.
Regular Roll
Reverse Roll (No Fascia)
Leveling Shades
Shimming the Tube & Fabric for Minor Adjustments
If the shade does not track straight, it may be necessary to shim the shade tube. Unroll
the shade fully and affix a small piece of duct tape to the shade tube to build up the
diameter. Always place the shim on the side opposite to the shade fabric’s telescoping
direction. If the shade can not be shimmed with duct tape, it will be necessary to use
the plastic shims. Note: Shims can not be used if the brackets are jamb mounted. If not
level, one of the brackets must be repositioned. One or more shim should be inserted
between the bracket and the ceiling or wall mount angle to level the shade tube. After
using the plastic shims, it may be necessary to perform minor shimming using duct
tape. Shim the tube at the end opposite the direction that the shade is tracking,
telescoping towards.
Shim on Tube
Setting the Limit Beads
Upper Stop Position
To set the upper stop position, first put the shade in the desired
“open/full up” position. Then place a stop bead over the bead
of the chain directly below the bracket. For Regular Roll, this
would be the chain on the window side, and for Reverse Roll,
this would be the chain on the room side. Squeeze stop bead
closed with pliers. Make sure that the chain splice is located
on the window side chain when the shade is in the open/
full up position.
Upper
Limit
Bead
Stop
Position
Top Limit Bead Position for Regular and Reverse
Roll Shades.
Upper
Limit
Bead
Stop
Position
Page 4
Lower Stop Position
To set the lower stop position, first put the shade in the desired “closed/full down” position.
Then place a Stop Bead over the bead directly below the bracket. For Regular Roll, this
would be with the chain on the room side, and for Reverse Roll, this would be with the
chain on the window side. Then squeeze the Stop Bead closed with pliers.
Intermediate Stops
Intermediate stop beads are required when you want the shades to align at specific
pre-determined intermediate positions. First fasten the plastic bead keeper into the wall
or jamb in an accessible position. Then crimp additional stop beads onto the chain
wherever the predetermined stops are desired.
Upper
Limit
Bead
Stop
Position
Upper
Limit
Bead
Stop
Position
Lower Limit Bead Position for
Regular and Reverse Roll Shades.
Installing the Chain Retainer (Required)
The Chain Retainer must be installed on all manual shades to prevent possible child
strangulation. You can either screw it directly to the jamb or screw it to the wall or sill
using the base. Attach safety labeling as required by your locality.
Installing the Chain Retainer
—wall mount.
Maintenance
ShadeCloth Maintenance
The ShadeCloth is washable and it is recommended that it be cleaned annually. To maintain the
shadecloth properly, use a static-eliminating chemical on a dry mop to occasionally wipe down
the fabric and free it of dust. If for any reason the shadecloth should become spotted, such as
grease, etc., simply use a mild soap and water solution to “spot” the stained area.
Changing the ShadeCloth on Mecho/5
Remove the top Stop Bead and lower the shade so that the SnapLoc® Spline is visible. The spline,
which is welded to the ShadeCloth, is removed from the tube by lifting the top of the spline away
from the tube and then lifting the shade out and away from the spline slot. A new shade band
attaches by inserting the bottom of the SnapLoc Spline into the bottom of the channel on the tube
and pressing the spline into the slot on the tube. Adjust the shade height and reset the top Stop Bead.
Mecho Brackets and Chain Maintenance
SnapLoc® Spline
and ShadeCloth
Shade brackets require no maintenance other than the rare repair of a broken chain. If the chain breaks it can be repaired by splicing
with a chain connector or invisibly spliced by utilizing a pair of bead-chain splice pliers. If a new chain is required, the length required
is twice the height of the shade unit minus 2 inches. The chain is inserted into the bottom channel of the drive-end bracket and led
around the sprocket. To guide the chain into the offset position slot, insert a thin plug into the chain slot to be bypassed. Use the
chain clasp supplied by MechoShade to attach one end of the chain to the other. Bead Stops that were attached to the old chain
should be positioned in the same places on the new chain or use new bead stops.
MechoSystems
Corporate Headquarters
42-03 35th Street
Long Island City, NY 11101
T: +1 (718) 729-2020
F: +1 (718) 729-2941
E: marketing@mechosystems.com
W: mechosystems.com
Copyright © 2012 MechoShade Systems, Inc. All
rights reserved. All trademarks herein are owned by
MechoShade Systems, Inc. No part of this document
may be reproduced or otherwise used without the
express written consent of MechoShade Systems, Inc.
This literature was printed on post-consumer paper.
L10012.1112
SnapLoc® Top-Hook Fascia Installation
Installing the SnapLoc® fascia
Standard Round
1. Insert the top hook of the
fascia into the space between
the ceiling and the bracket as
shown. (See Figures 1a, 2a,
3a, and 4a.)
Mecho /5
Electro®/3
2.00 in.
(51mm)
0.06 in.
(1.5mm)
®
(5.8mm)
0.23 in.
Engage the top hook onto the
bracket lip.
2. Push the lower part of the
fascia forward until the bottom
hook snaps into the bracket.
This must be performed at both
ends of the fascia. (See Figures
1b, 2b, 3b, and 4b.)
Figure 1a
Standard Square
Figure 1b
1.75 in.
(44.5mm)
Mecho /5
Electro®/3
0.06 in.
(1.5mm)
®
Note
If there is a center support
bracket, the fascia must be
secured there as well, using
the same method.
Figure 2a
Figure 2b
2.00 in.
(51mm)
0.19 in.
(4.8mm)
Mecho®/5 Extended
Electro®/3 Extended
Electro®/2
Figure 3a
Figure 3b
4.25 in.
(108mm)
0.16 in.
(4mm)
Mecho /5 Double
Electro®/3 Double
Electro®/2 Double
Electro®/2 Extended
Electro®/2 Extended Plus
®
Figure 4a
Figure 4b
Over
MechoSystems
Corporate Headquarters
42-03 35th Street
Long Island City, NY 11101
T: +1 (718) 729-2020
F: +1 (718) 729-2941
E: info@mechosystems.com
W: mechosystems.com
© 2012 MechoShade Systems, Inc. All rights reserved. All trademarks herein are owned by MechoShade Systems, Inc. No part of this document
may be reproduced or otherwise used without the express written consent of MechoShade Systems, Inc.
page 1 of 2
L10076.0512
MSS P/N: SM089
Fascia Fit Adjustment Instructions
To tighten the
SnapLoc® fascia
(Regular-roll shades only)
A snapping sound indicates the
fascia is securely fitted onto the
bracket. A secure fit prevents
lateral movement of the fascia
during normal operation.
Note
The fascia must conform to
Figure 5a to ensure a proper
fit. If the fit of the fascia to the
brackets is too loose, the fascia
should be adjusted according to
Figure 5b.
87º–89º
Figure 5a
Figure 5b
Standard factory
set 87º–89º angle
If fascia is too loose
The snap should secure the
fascia to the bracket so there
is no lateral movement.
Apply force in the direction of the
arrow to reduce angle A and to
tighten the bracket fit.
Fascia removal procedure
1. Pull the bottom hook of the
fascia down with both hands,
pulling it out of the bracket. This
must be done near the bracket
at both ends and near the center
support, if present.
Pull down/lift up
2. Rotate the bottom of the fascia
upward and lift the top hook so
that it clears the bracket groove.
3. Pull the fascia out.
MechoSystems
Corporate Headquarters
42-03 35th Street
Long Island City, NY 11101
T: +1 (718) 729-2020
F: +1 (718) 729-2941
E: info@mechosystems.com
W: mechosystems.com
© 2012 MechoShade Systems, Inc. All rights reserved. All trademarks herein are owned by MechoShade Systems, Inc. No part of this document
may be reproduced or otherwise used without the express written consent of MechoShade Systems, Inc.
page 2 of 2
L10076.0512
MSS P/N: SM089


