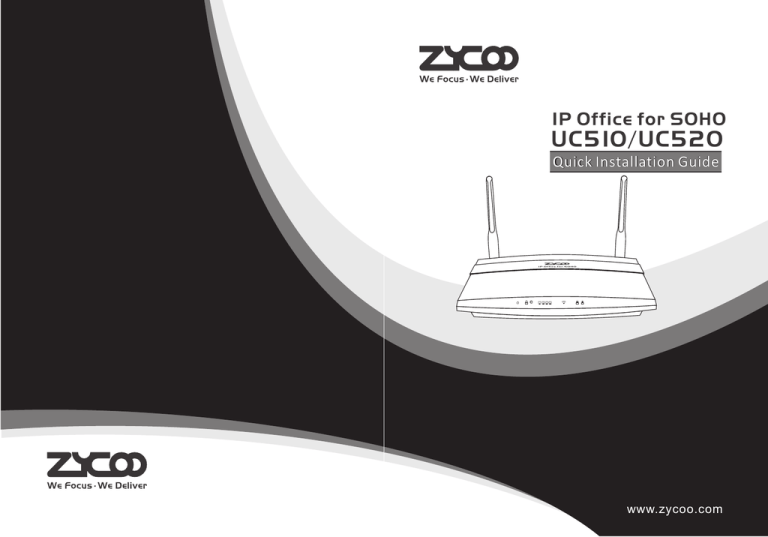
IP Office for SOHO
UC510/UC520
Quick Installation Guide
IP Office for SOHO
e
1
2
3
4
www.zycoo.com
1 Package Contents
Table of Contents
1 Package Contents
03
2 Hardware Installation
04
2.1 Safety Precautions
04
2.2 Product Installation
07
2.3 Physical Connection
07
2.4 LED Definitions
3 Basic System Configuration
Thank you for purchasing ZYCOO IP Office for SOHO. These are the items
included with your IP Office for SOHO purchase:
IP Office for SOHO
e
1
2
3
IP Office for SOHO
Power Cord
4
08
08
3.1 Web Login
08
3.2 Network Configuration
09
3.3 PBX Configuration
12
3.4 Reset to factory
15
4 Further Configuration
15
Quick Installation
Guide
Warranty Card
3G/LTE Antenna
for UC520 Only
03
2 Hardware Installation
The followings are instructions for setting up ZYCOO IP Office for
SOHO. Please refer to the illustration and follow the simple steps
below to quickly install your IP Office for SOHO.
2.1 Safety Precautions
Notes:
To avoid any device damage and bodily injury caused by improper
use, please observe the following rules.
Keep the power off during the installation.
Use only the power cord provided with IP Office for SOHO .
Make sure that the supply voltage matches the specifications indicated on the rear
panel of IP Office for SOHO.
Confirm not to bring about the overload of power circuit before turning on the
power of IP Office for SOHO, to avoid the unnecessary damage.
To avoid the electric accident, do not open or remove the cover of IP Office for
SOHO when it is working as well as off the power.
Before cleaning the device, cut off the power supply. Do not clean it by the
waterish cloth, and never use any other liquid cleaning method.
To ensure normal operation and long service life of the device,
please install it in an environment that meets the requirements
described in the following subsection. Please keep a proper
temperature and humidity in the equipment room. Too high/low
humidity may lead to bad insulation, electricity leakage,
m e c h a n i c a l p ro p e r t y c h a n g e s a n d c o r ro s i o n s . To o h i g h
temperature may accelerate aging of the insulation materials and
can thus significantly shorten the service life of the device. For
normal temperature and humidity of the device, please check the
following table.
Environment
Operating
Storage
Temperature
0 C~40 C
-20 C~55C
Humidity
10%~90%RH Non-condensing
5%~95%RH Non-condensing
Clearness
IP Office for SOHO
e
1
2
3
4
Site Requirements
40 C
0C
IP Office for SOHO
e
1
04
2
3
4
The dust accumulated on IP Office for SOHO can be absorbed by
static electricity and result in poor contact of metal contact points.
Some measures have been taken for the device to prevent static
electricity, but too strong static electricity can cause deadly
damage to the electronic components on the internal circuit board.
To avoid the effect of static electricity on the operation of IP Office
for SOHO, please dust the device regularly, and keep the indoor air
clean.
05
2.2 Product Installation
Electromagnetic Interference
Module Installation
IP Office for SOHO
e
1
2
3
4
PHONE
Electronic components including capacitance and inductance on
the device can be affected by external interferences, such as
conducted emission by capacitance coupling, inductance coupling,
and impedance coupling. To decrease the interferences, please
make sure to take the following measures:
Use the power supply that can effectively filter interference from
the power grid.
Keep the devices far from high-frequency, strong-current devices,
such as radio transmitting station.
Use electromagnetic shielding when necessary.
LINE
LAN4
LAN3
LAN2
LAN1
USB2
WAN
USB1
Turbo
This IP Office for SOHO can support two analog ports, whose
combinations are as follows:
2FXO
1FXS+1FXO
Note:
The module is default installed in the device before releasing from
factory. It’s forbidden to open the housing box and change the
module by yourself; Otherwise Warranty Void.
Do not touch any module on the device, just to prevent the module
from being damaged by static electricity.
2.3 Physical Connection
Note: To avoid any device damage and bodily injury caused by
improper use, please obey the following requirements for
installation and maintenance.
PHONE
Phone
06
LINE
LAN4
PSTN
LAN3
LAN2
PC
07
LAN1
WAN
ITSP
USB2
USB1
Turbo
Power
Step 4.
2.4 LED Definitions
Indication Function
PWR
Power Status
WPS
WPS Status
WAN
WAN Data Status
LAN
Wi-Fi
LAN(1..2..3..4) Data Status
Wireless Status
1
FXO
2
FXS
3G/4G
3G/4G Status
Status
Explaination
On
Off
On
Off
200ms Blink
100ms Blink
Blink
Off
Blink
Off
On
Off
On
Off
On
Off
Power On
Power Off
WSC Succeeded(Off after 300s )
WPS Ready or Disabled
WSC Running
WSC Failed
Data Transport
Disconnected
Data Transport
Disconnected
Wi-Fi enabled
Wi-Fi disabled
Channel Loading Succeeded
ChannelLoading Failed
Channel Loading Succeeded
Channel Loading Failed
Module Works
On
(UC520 support)
Blink
Off
Step 5.
Enter the default address “http://192.168.1.1:9999” of
the UC510 into the browser.
Enter the default username(admin) and password
(admin). Then click “Login” to enter the graphic user
interface to set.
Module Loading Succeeded
or Data Transport
No Module, or No SIM card,
or Not Working
Notice:WPS (Wi-Fi Protected Setup), WSC (Wi-Fi Simple Configuration)
3 Basic System Configuration
Default URL address: http://192.168.1.1:9999
Default Username: admin
Default Password: admin
3.1 Web Login
Step 1. Connect the network cable to the UC510 WAN port.
Network connection mode of WAN port is DHCP by default.
Step 2.
Step 3.
Connect a computer and the UC510 LAN port in the same
network. Ensure IP address of computer is in the
192.168.1.X segment. Default IP of UC510 is 192.168.1.1.
3.2 Network Configuration
Go to Router Gateway
Internet WAN
It supports several modes for internet connection: PPPoE(ADSL)/
DHCP(Auto config) /STATIC(fixed IP)/ LTE(for UC520 only).
3.2.1 PPPoE(ADSL):
WAN Connection Type: Select “PPPoE(ADSL)”
Start a web browser: Internet Explorer (version 7.0 or
higher), Firefox or Chrome.
08
09
You need to input the username and password provided by the ISP
(Internet Service Provider), then dial-up to the internet by the
equipment.
You need to input the fixed IP address, subnet mask, gateway and
DNS Server.
3.2.4 LTE
3.2.2 DHCP(Auto Config):
WAN Connection Type: Select “ DHCP(Auto Config)”
LTE is default supported by UC520 only. WAN Connection Type:
Select ”LTE”
Accessing Internet with the IP assigned by the ISP(Internet
Service Provider) automatically; no need to configure anything.
3.2.3 STATIC(fixed IP):
WAN Connection Type: Select “ STATIC(fixed IP)”
You need to input the username and password provided by the
ISP(Internet Service Provider). Then dial-up to the internet by the
equipment.
Note:
If any questions, please contact your local ISP(Internet Service Provider).
10
11
Step 2: Go to PBX
Trunk Settings
3.3 PBX Configuration
Step 1: Go to PBX
Extension Settings
Extensions
Extensions
Trunk
Extensions
Create FXO trunks to connect to PSTN network
Step 3: Go to PBX Extensions
Configure DialRule
Outbound Routes
Extension:The account number for registration
Password:The password for registration
12
13
DialRules
Create a dial rule which can call to external phones via a specified
FXO trunk
Place this call through:Choose the FXO trunk
Custom Pattern:Define dial rule(XXX. represents any 4-digits or
more than 4-digits numbers; because the default
extension number is 3-digits, such dial rule cannot
conflict with extension number)
Step 4: Go to PBX
Configure DialPlan
Extensions
Outbound Route
DialPlans
3.4 Reset to factory
Recovery configuration files
When a system failure occurs, you can reset the system to factory
default by pressing the turbo button for 5 seconds, and then
release the button.
Notice: Please back up the configuration file before reset.
Recovery whole system
Press the "turbo" button for 5 seconds when the device is power
on, the system will be in recovery mode to be restored.
Notice: Use this way to recovery system when the system cannot be
started or in abnormal situation.
4 Further Configuration
Thank you for the purchase of ZYCOO products. The above steps
introduce simple configuration for IP Office for SOHO. For further
configuration, please refer to the user manual. If you have other
questions, please contact the local dealer or distributor from
which you purchased this product.
Select PSTN into DialPlan1, then the extension number 810 can call
external phones with dial plan1.
You can also browse our online FAQ resource at the ZYCOO Web site
first to check if it could solve your issue. If you need more support,
please contact ZYCOO support team.
ZYCOO online FAQ:
www.zycoo.com/html/Knowledge_Base.html
Support team email address:
support@zycoo.com
Copyright © ZYCOO Co., Ltd. 2014 All Rights Reserved
14
15


