Chapter 9 Parallax and Distance to Stars
advertisement
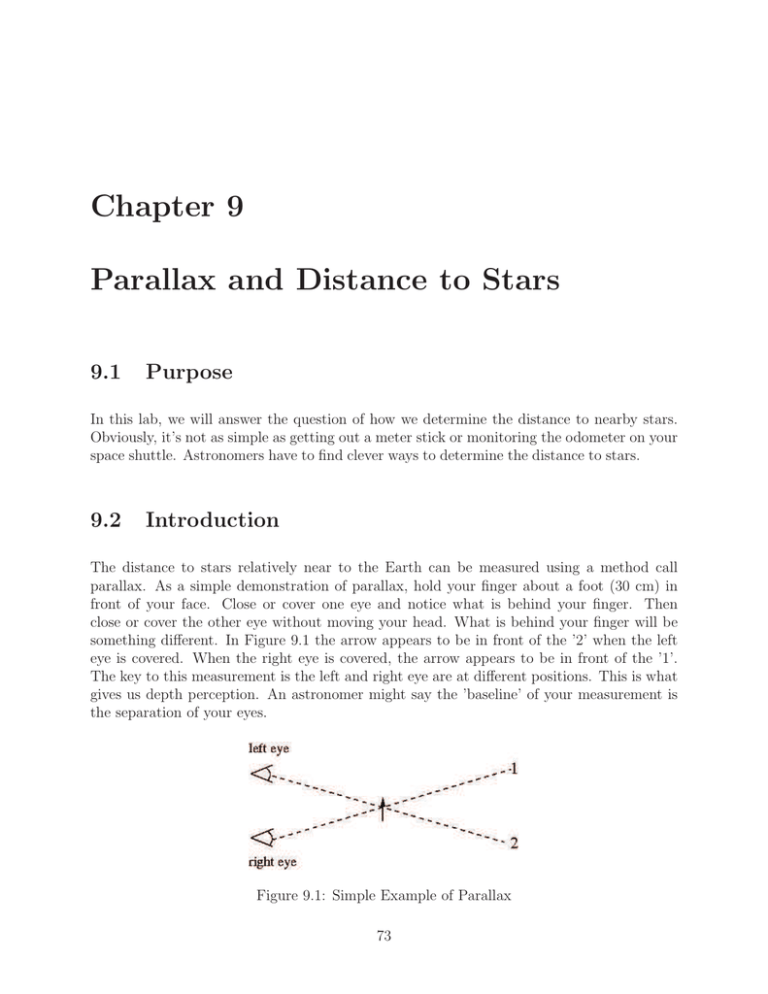
Chapter 9 Parallax and Distance to Stars 9.1 Purpose In this lab, we will answer the question of how we determine the distance to nearby stars. Obviously, it’s not as simple as getting out a meter stick or monitoring the odometer on your space shuttle. Astronomers have to find clever ways to determine the distance to stars. 9.2 Introduction The distance to stars relatively near to the Earth can be measured using a method call parallax. As a simple demonstration of parallax, hold your finger about a foot (30 cm) in front of your face. Close or cover one eye and notice what is behind your finger. Then close or cover the other eye without moving your head. What is behind your finger will be something different. In Figure 9.1 the arrow appears to be in front of the ’2’ when the left eye is covered. When the right eye is covered, the arrow appears to be in front of the ’1’. The key to this measurement is the left and right eye are at different positions. This is what gives us depth perception. An astronomer might say the ’baseline’ of your measurement is the separation of your eyes. Figure 9.1: Simple Example of Parallax 73 If the star is relatively near to Earth, we can use parallax to determine its distance. Typically, we employ this method by measuring the angular position of a star at two different locations, along some baseline of known distance. For example, we can measure the star’s position now, and do it again six months later when the Earth is on the other side of the Sun. Refer to the following diagram: Figure 9.2: Using Parallax to Measure the Distance to a Star When we look at the star now, it appears to be in position A. In six months, the star appears to have shifted to position B. By carefully measuring the tiny angular displacement, p, we can use the Small-Angle Formula to determine the distance d. Note that our baseline is a distance of 1 AU. The angle p will be small (measured in arcseconds) and is 21 of the total observed angular displacement. Astronomers adopted a new unit of distance, the parsec, to measure stellar distances. If d is in parsecs, then the following equation applies: d= 1 p As an example, if a star has appeared to shift by only 0.20 arcseconds, then it’s a distance of d = 1/0.20 = 5 parsecs away. We can convert this into more familiar units by using the following conversion factors: 1 parsec (pc) = 206, 264.8 AU = 3.09 × 10¹⁶ m = 3.26 light years Unfortunately, the parallax method is only accurate for stars that are relatively nearby (closer than a few hundred light years). Parallax angles of stars are difficult to measure. The European Space Agency (ESA) launched the Hipparcos satellite in 1989. Hipparcos can measure parallactic angles of about 0.001 arcsecond. Before Hipparcos, only a hundred or so parallax angles were known with accuracy. The Hipparcos data has increased our knowledge of distances to several thousand stars with better than 5% accuracy. Several thousand stars, however, is still only a very small fraction of the galaxy. 74 9.3 Procedure In this experiment we will use parallax to measure your distance in a photograph taken of the lab class. After the photograph measurement, we will calculate the distance to some nearby stars using data from Stellarium. 9.3.1 Using Parallax to Measure Distance in a Photograph In this section of the procedure, your TA will take two photograph of the class from slightly different positions. Since we would like to use the Small-Angle formula, it is best if the photographs are taken outside where the distances between the camera, objects (students) and background are large. If the weather does not permit taking the photographs outside, it can be done in the long hallway outside the classroom. Figure 9.3 show a schematic diagram of the relevant objects in the two photographs. The distance object such as a distant tall tree, edge of a building or church steeple should move very little in between the two photographs. The closer object (the arrow indicating a student) should show a shift in position. This shift can be measured as an angle, ∆θ if the angular width of the photograph is known. Figure 9.3: The angle ∆θ is the parallax angle from the two photographs 1. Your TA will take two photographs of the class. A long string with markers every 5 meters will be stretched out when the photograph is taken. Note your approximate position along the string from the camera and record it below. Approximate distance from the camera The TA may use the physics department’s digital camera with a measure horizontal angular width of ≈50o or another camera. The TA will confirm the angular width of 75 the photograph depending on which camera is used. The angular width of the photo is the number of degrees in the horizontal direction which are record in the photograph. Your TA will ask one student to hold a meter stick at a known distance from the camera to confirm the horizontal angular width of the image. The TA will also tell you the baseline, i.e. shift in position between the two photographs Record the angular width of the camera and the baseline below. Camera horizontal angular width baseline 2. After the TA takes the two photographs, copies of each photograph will be provided to each lab group. Measure the width in centimeters of the photograph with a ruler and record it below. Width of photo 3. Line up the two photographs one below the other. Mark the center of a person on each. Measure the distant of the apparent shift of the person and record it below. Apparent shift of person 4. The angular shift (∆θ) can be found using a ratio: camera horizontal angular width width of photo = ∆θ distance of apparent shif t Find ∆θ and record it below. ∆θ 5. If the small angle formula is applicable, the angle in radians should be 0.1 (5.73o ) or smaller. Convert the angle to radians and record it below. ∆θ in radians 6. If ∆θ is small enough for the small angle formula to apply, the distance to the object is given by: d= baseline ∆θ where d is the distance to the person, the baseline is the value provided by your TA and ∆θ is the angular shift in radians. Calculate d and record it below. distance to person (d) 9.3.2 Distance to Stars using Parallax In this section, we will use stellarium parallax data to find the distance to several nearby stars. 1. Start Stellarium on your laptop. Set the date to the current date and the time to 10 pm (22:00) so the stars are visible. 76 2. You may want to turn off the ground feature (sixth item from the left on the lower menu bar). Depending on the time of year some of the stars in the table may be below the horizon. 3. You can use the Search window (third option from the bottom on the side menu bar) to locate the stars. When you find the star and click on it, the data for the star will appear. The bottom item in the star data list is parallax. 4. Complete Table 9.1 for each star (1 pc = 3.26 ly) Star Polaris (α UMi) Merak (β Ursae Majoris) Altair (α Aqi) Sirius A (α CMa) Vega (α Lyr) Pollus (β Gem) Fomalhaut(α PsA) Parallax (“) Distance (pc) Distance (ly) Table 9.1: Data Table for the Stellarium Parallax data, 9.3.3 Questions 1. A typical separation of the eyes is about 6 cm. If an object appears to shift by you cover one eye and then the other, what is the distance to the object. 1o 2 when 2. Would it be more or less accurate to measure the parallax of a star from Neptune. Explain why. 3. Show that 1 pc = 206265 AU. (Hint: Convert 1” of angle to radians and use the small angle formula.) 77 9.4 Conclusion Write a conclusion about what you have learned. 78
