“Almost Assembled” Adirondack Assembly Instructions
Standard Chair
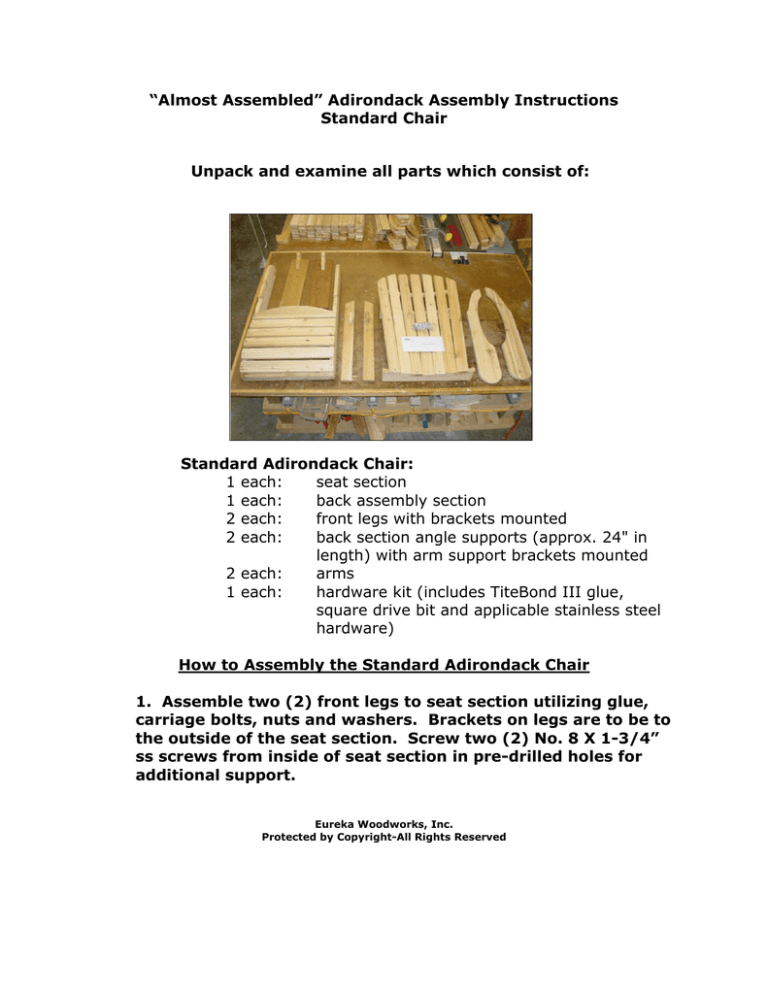
Unpack and examine all parts which consist of:
Standard Adirondack Chair:
1 each:
seat section
1 each:
back assembly section
2 each:
front legs with brackets mounted
2 each:
back section angle supports (approx. 24" in
length) with arm support brackets mounted
2 each:
arms
1 each:
hardware kit (includes TiteBond III glue,
square drive bit and applicable stainless steel
hardware)
How to Assembly the Standard Adirondack Chair
1. Assemble two (2) front legs to seat section utilizing glue,
carriage bolts, nuts and washers. Brackets on legs are to be to
the outside of the seat section. Screw two (2) No. 8 X 1-3/4”
ss screws from inside of seat section in pre-drilled holes for
additional support.
Eureka Woodworks, Inc.
Protected by Copyright-All Rights Reserved
Place glue
between leg
and seat base
prior to
attachment
2. Apply glue to notched area on seat base assembly and
attach back assembly to seat base using No. 8 X1-3/4” ss
screws in pre-drilled holes. Use a clamp to hold in place while
inserting screws.
Apply glue
to notched
area on seat
base before
attaching
seat back
assembly
Eureka Woodworks, Inc.
Protected by Copyright-All Rights Reserved
3. Apply glue and screw angle bracket assemblies into the
middle back slat support through pre-drilled holes using No. 8
X 1-3/4” ss screws. Apply glue and connect bottom of angle
assemblies to seat base assembly through pre-drilled holes
using 3/8” X 2-1/2” ss carriage bolts, washers and nuts. Note:
bracket mounted to angle bracket assemblies should be facing
out, away from chair.
Apply glue
prior to
assembly
4. Apply glue to rear edge of arm and mount into back section
angle supports through pre-drilled holes using No. 8 X 1-3/4”
ss screws. Then position front of arm over front leg and arm
support brackets, apply glue and mount from underneath
through arm support bracket using No. 8 X 1-3/4” ss screws.
Apply glue
to rear edge
of arm prior
to attaching
to back
section angle
support
Apply glue
on top of
front arm
support and
front leg
prior to
attaching
arm
Eureka Woodworks, Inc.
Protected by Copyright-All Rights Reserved
5. Let glue dry, do any final “touch up” sanding deemed necessary
and your Eureka Standard Adirondack Chair is ready for a lifetime of
use! If you have any problems with assembly, call 877-212-1147 for
assistance.
Eureka Woodworks, Inc.
Protected by Copyright-All Rights Reserved
almostassyladchair


