CP-UM-1713E
WARNING
VBC7000 Series
Seismic Detector
Installation Manual
Warnings are indicated when mishandling this
product might result in death or serious injury.
CAUTION
Cautions are indicated when mishandling this
product might result in minor injury to the user,
or only physical damage to the product.
WARNING
• Before wiring the VBC7000, be sure to turn the power
off. Failure to do so might cause electric shock.
CAUTION
• Be sure to read the installation manual before using
this device. Improper use could result in damage to the
device or equipment, and may cause bodily injury.
• Do not install the device in places below. Faulty
operation, fire, or explosion could result.
• On a steep incline
• In a place that is normally subject to vibration, or that
receives shock from an opening and shutting door,
etc.
• Where the temperature or humidity is high
• Where there is water droplet spray or excessive
dampness
• In a place subject to magnetic fields
• Where there is dust or corrosive gas
• Where there is flammable or explosive gas
• Do not use this device as a step, or subject it to
unreasonable force. Product damage or user injury
could result.
• To avoid malfunction, never remove the cover.
• Make sure that the locking screw is fastened before
transporting the device. Otherwise the sensor may be
damaged by vibration or impact.
• Do a functional check at least once a year, and check
the Gal response level at least once every three years.
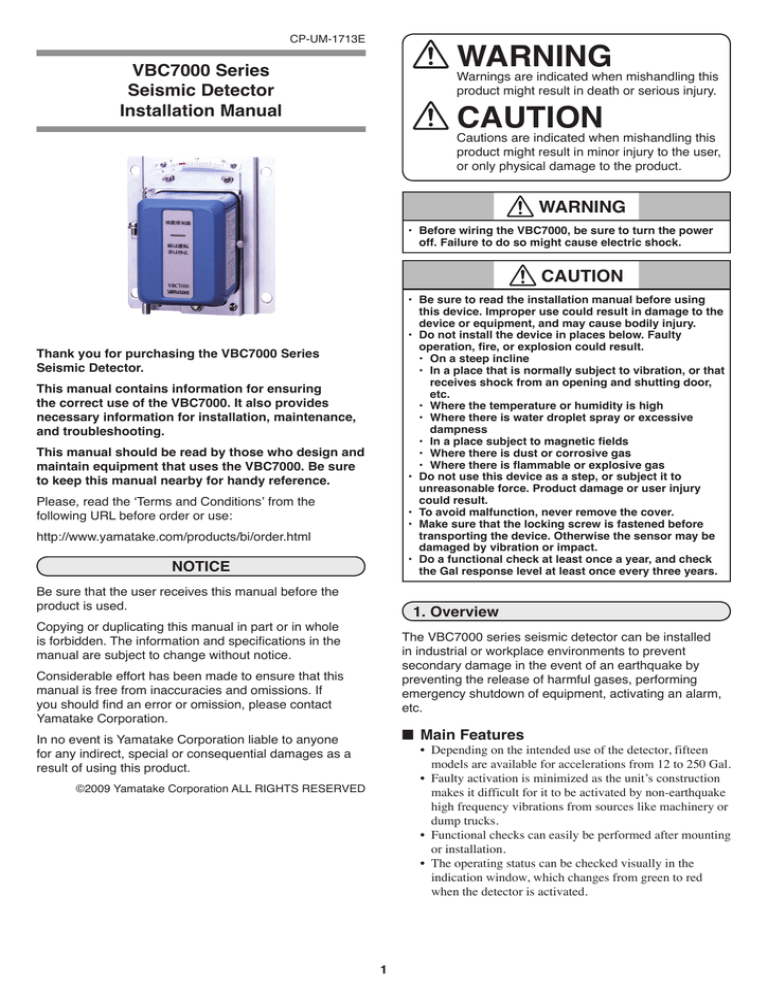
Thank you for purchasing the VBC7000 Series
Seismic Detector.
This manual contains information for ensuring
the correct use of the VBC7000. It also provides
necessary information for installation, maintenance,
and troubleshooting.
This manual should be read by those who design and
maintain equipment that uses the VBC7000. Be sure
to keep this manual nearby for handy reference.
Please, read the ‘Terms and Conditions’ from the
following URL before order or use:
http://www.yamatake.com/products/bi/order.html
NOTICE
Be sure that the user receives this manual before the
product is used.
1. Overview
Copying or duplicating this manual in part or in whole
is forbidden. The information and specifications in the
manual are subject to change without notice.
The VBC7000 series seismic detector can be installed
in industrial or workplace environments to prevent
secondary damage in the event of an earthquake by
preventing the release of harmful gases, performing
emergency shutdown of equipment, activating an alarm,
etc.
Considerable effort has been made to ensure that this
manual is free from inaccuracies and omissions. If
you should find an error or omission, please contact
Yamatake Corporation.
■■ Main Features
In no event is Yamatake Corporation liable to anyone
for any indirect, special or consequential damages as a
result of using this product.
• Depending on the intended use of the detector, fifteen
models are available for accelerations from 12 to 250 Gal.
• Faulty activation is minimized as the unit’s construction
makes it difficult for it to be activated by non-earthquake
high frequency vibrations from sources like machinery or
dump trucks.
• Functional checks can easily be performed after mounting
or installation.
• The operating status can be checked visually in the
indication window, which changes from green to red
when the detector is activated.
©2009 Yamatake Corporation ALL RIGHTS RESERVED
1
■■ Operating principle
■■ Installation
Normally the internal sensor is attached to a permanent
magnet, as shown below. If an earthquake occurs and the
sensor is subjected to a force that exceeds the selected
horizontal acceleration, the sensor instantly drops and
presses a lever, which activates a micro switch.
Permanent magnet
1. Hold a plumb line against the wall or pillar where the
detector is to be mounted and determine the position of
the mounting holes using this line as a datum.
2. Attach the detector firmly using four M6 screws in the
four mounting holes.
3. After loosening the two level adjustment screws and the
level adjustment nut, move the base back and forth and
around so that the ball chain is not in contact with the
perimeter of the level hole, and then fasten the screws
and nut temporarily. Adjust the base carefully so that the
ball chain is positioned in the center of the level hole,
and tighten the screws and nut securely.
Permanent magnet
Lever
Lever
NC
Sensor
NO
NC
Sensor
NO
COM
COM
Micro switch
Micro switch
Handling Precautions
Handling Precautions
If the ball chain is touching the perimeter of the
level hole, faulty operation may occur.
If the locking screw is fastened, the sensor is
pushed up and is unable to drop. The locking
screw must be removed before use.
4. Adjust the scale plate so that the “0” is in line with the
pointer on the base, and fasten securely.
0
10
20
2. Part names
Scale plate
Level adjustment screws
Spare screw
Base
Indication window
Setting knob
0
10
20
Center
Side panel
Cover
Ball chain
■■ Wiring
S ET
RE
E S
T
T
NC
NO
CAUTION
COM
• Do the wiring work in conformity with the electric
facility technical standards.
• The grommet membrane protects against dust. Cut it
only where necessary for the wires to pass through.
• Do not put wire around the setting knob.
• Connect the ground terminal to the earth. Otherwise if
there is an insulation failure or the like, there will be an
electric shock hazard.
VBC7000
Terminals
Level
Ball chain
Grommet with
membrane Locking screw
Ground terminal
Level
Mounting holes
adjustment nut
Terminals
3. Installation and wiring
CAUTION
NC
NO COM
Normal position
• To prevent electric shock, connect the wiring for the
power last.
• Check the wiring before turning the power on.
Otherwise electric shock or damage to the device may
occur.
• Mount the device on a firm wall or pillar. Otherwise a
malfunction may occur.
• Mount the device vertically, using the level, to prevent
malfunction.
• Never remove the cover. Doing so might cause a
malfunction.
1. Loosen the side panel retaining screw and remove the
side panel.
2. Pass insulated wires through the grommet membrane.
3. Connect the wires to the terminals.
4. After wiring, re-attach the side panel.
5. After installation and wiring, remove the locking screw
and replace it with the spare screw to protect against
dust. Keep the locking screw in case there is a need to
move the detector in the future.
2
4. Operation
6. Specifications
■■ Functional check and setting
SET:
Gently rotate the setting knob to the RESET side
until it stops. The detector is now set and the
display window turns green.
TEST: Rotate the set dial to the TEST side to activate the
detector, and the display window turns red. Check
that the electrical contacts are operating correctly.
General
After testing by turning the knob between RESET and
TEST two or three times, turn it to RESET to begin
operation.
Item
Name
Detection
method
External
dimensions
Mass
Color
Mounting
RESET
S ET
RE
E S
T
T
TEST
Performance
5. Maintenance
CAUTION
Electrical
• In conjunction with the periodic inspection of
equipment or machinery, do a functional check at least
once a year, and a Gal response level check at least
once every three years.
• Replace the detector if any abnormality is found in the
functional or Gal checks.
• Before transporting, be sure to fasten the locking
screw. Otherwise vibration or shock may damage the
detector.
■■ Gal response level check
1. Remove the side panel.
2. Loosen the level adjustment nut sufficiently so that the
base can be moved left and right, and remove the two
level adjustment screws.
3. Using the level adjustment nut as the axis of rotation,
gently rotate the base clockwise and note the pointer
indication on the scale when the device is activated.
Repeat this procedure two or three times, and check that
the average reading falls within the red region of the
scale.
Handling Precautions
In this procedure, slight variations in the reading
may occur according to the adjustment of the
level at the time of installation and the zero
adjustments for the scale plate, in addition to the
way in which the base is rotated.
4. After the inspection has been completed, return the
detector to its former state, and fasten securely.
Red region
0
10
0
10
20
20
3
Terminal box
Conduit
Allowable
temperature
Sensing
direction
Operation
indication
Setting
Operation
check
Acceleration
setting check
Contact form
Contact rating
Contact
material
Insulation
resistance
Dielectric
strength
Specification
Seismic detector
Magnetic
147×163×102.5 mm (W×H×D)
Approx. 1.6 kg
Blue
Indoor, on firm wall or pillar surface (level
for vertical mounting is provided).
Retaining screws: M6 (4)
Mounting pitch: 130×130 mm
M3.5 terminal screws
Dia. 15 mm, grommet with membrane
-10 to +50 °C (no high humidity or
corrosive environments)
Horizontal and vertical
By change of color in indication window:
green for Run (reset), red for Stop
(tripped out)
Set manually with setting knob
Manual
Gal response level check by tilting the
detector
SPDT (single pole double throw)
125/250 Vac, 10 A with resistive load, 2 A
with motor load (power factor 0.4)
Silver alloy
100 MΩ or more (500 Vdc megger)
1500 Vac, 1 min
■■ External Dimensions
147
130 ±1
113
10
Acceleration
(gal)
4-10
400
300
20
36
0
■■ Operating characteristics
Unit: mm
Earthquake
area
Non-earthquake vibrations:
The VBC7000 is not sensitive
to non-earthquake vibrations.
Operating range of VBC7000
200
100
Setting acceleration (100 gal)
■■ VBC7000 series models
VBC7000
Model number
VBC7000-012
VBC7000-015
VBC7000-020
VBC7000-025
VBC7000-030
VBC7000-040
VBC7000-060
VBC7000-080
VBC7000-100
VBC7000-120
VBC7000-135
VBC7000-150
VBC7000-200
VBC7000-225
VBC7000-250
82.5
102.5
23
38.5
80
10
130 ±1
163
102
0
Frequency
(Hz)
Unit: Gal
Acceleration setting
12 ± 7
15 ± 10
20 ± 14
25 ± 15
30 ± 15
40 ± 16
60 ± 18
80 ± 20
100 ± 22
120 ± 24
135 ± 26
150 ± 27
200 ± 32
225 ± 35
250 ± 37
Specifications are subject to change without notice.
(08)
Advanced Automation Company
1-12-2 Kawana, Fujisawa
Kanagawa 251-8522 Japan
URL: http://www.azbil.com
1st Edition: Issued in Feb. 2009 (S)
4


