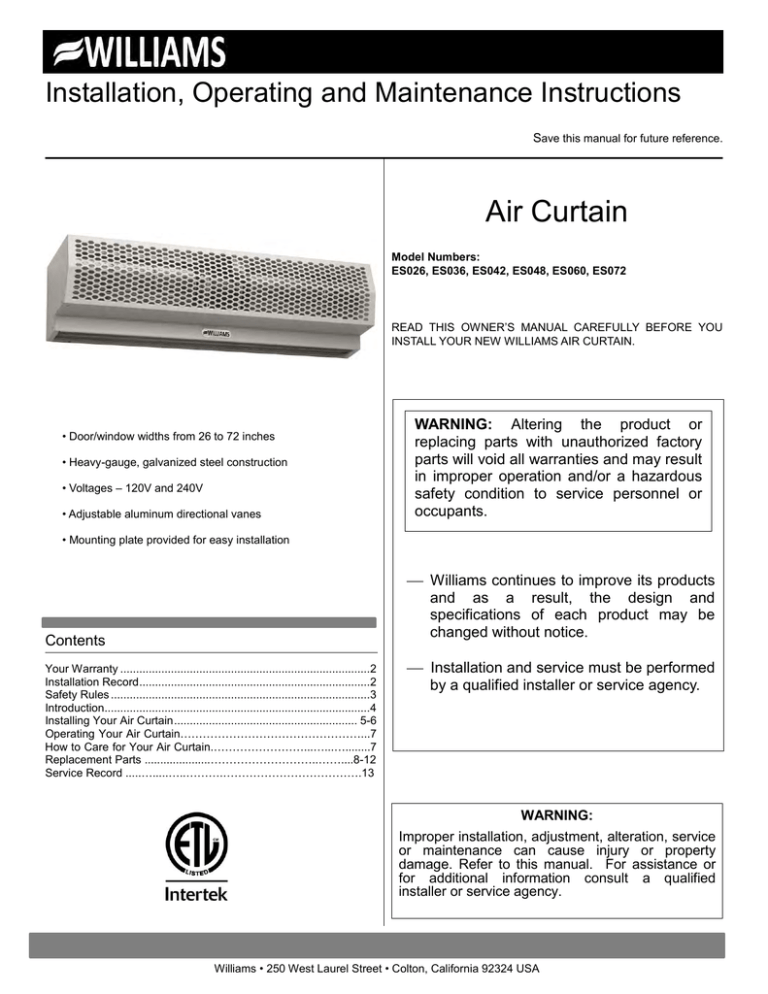
Installation, Operating and Maintenance Instructions
Save this manual for future reference.
Air Curtain
Model Numbers:
ES026, ES036, ES042, ES048, ES060, ES072
READ THIS OWNER’S MANUAL CAREFULLY BEFORE YOU
INSTALL YOUR NEW WILLIAMS AIR CURTAIN.
• Door/window widths from 26 to 72 inches
• Heavy-gauge, galvanized steel construction
• Voltages – 120V and 240V
• Adjustable aluminum directional vanes
WARNING: Altering the product or
replacing parts with unauthorized factory
parts will void all warranties and may result
in improper operation and/or a hazardous
safety condition to service personnel or
occupants.
• Mounting plate provided for easy installation
Williams continues to improve its products
and as a result, the design and
specifications of each product may be
changed without notice.
Contents
Your Warranty ...............................................................................2
Installation Record .........................................................................2
Safety Rules ..................................................................................3
Introduction....................................................................................4
Installing Your Air Curtain .......................................................... 5-6
Operating Your Air Curtain…………………………………………...7
How to Care for Your Air Curtain.……………………...…...…........7
Replacement Parts .....................………………………..……....8-12
Service Record .....….....…..……….……………………………….13
Installation and service must be performed
by a qualified installer or service agency.
WARNING:
Improper installation, adjustment, alteration, service
or maintenance can cause injury or property
damage. Refer to this manual. For assistance or
for additional information consult a qualified
installer or service agency.
Williams • 250 West Laurel Street • Colton, California 92324 USA
Your Warranty
The manufacturer, Williams, warrants this air curtain to the original purchaser under the following conditions:
LIMITED FIVE-YEAR WARRANTY
1. Any part thereof which proves to be defective in material or workmanship within five years from date of original purchase for use will be replaced at the Manufacturer’s
option, FOB to its factory.
2. No liability is assumed by the Manufacturer for removal or installation labor costs, nor for freight or delivery charges.
LIMITATIONS
1. THIS LIMITED WARRANTY IS THE ONLY WARRANTY MADE BY THE MANUFACTURER, IMPLIED WARRANTIES OF MERCHANTABILITY OR FITNESS FOR ANY
PARTICULAR PURPOSE ARE LIMITED TO THE SAME FIVE YEAR TERM AS THE EXPRESS WARRANTY. UNDER NO CIRCUMSTANCES SHALL THE
MANUFACTURER BE LIABLE FOR INCIDENTAL, CONSEQUENTIAL, SPECIAL OR CONTINGENT DAMAGES OR EXPENSES ARISING DIRECTLY OR INDIRECTLY
FROM ANY DEFECT IN THE PRODUCT OR ANY COMPONENT OR FROM THE USE THEREOF. THE REMEDIES SET FORTH HEREIN ARE THE EXCLUSIVE
REMEDIES AVAILABLE TO THE USER AND ARE IN LIEU OF ALL OTHER REMEDIES.
Some states do not allow limitation on how long an implied warranty lasts, and some states do not allow the exclusion or limitation of incidental or consequential
damages, so the above limitations or exclusions may not apply to you.
2. This warranty does not include any charge for labor or installation.
3. This warranty does not extend to painted surfaces or to damage or defects resulting from accident, alteration, misuses or abuse or improper installation.
4. This warranty does not cover claims which do not involve defective workmanship or materials.
DUTIES OF THE ENDUSER
1. The equipment must be installed by a qualified installer and operated in accordance with the installation instructions furnished with the equipment.
2. Any travel, diagnostic costs, service labor, and labor to repair the defective unit will be the responsibility of the owner.
3. A bill of sale, cancelled check, payment record or permit should be kept to verify purchase date to establish the warranty period.
4. Have the installer enter the requested information in the space below.
GENERAL
1. The manufacturer neither assumes nor authorizes any person to assume for it any other obligation or liability in connection with said equipment.
2. Service under this warranty should be obtained by contacting your dealer. Provide the dealer with the model number, serial number, and purchase date verification.
3. If, within a reasonable time after contacting your dealer, satisfactory service has not been received, contact: Customer Service Department, 250 West Laurel Street,
Colton, CA 92324 for assistance.
4. THIS WARRANTY GIVES YOU SPECIFIC LEGAL RIGHTS AND YOU MAY ALSO HAVE OTHER RIGHTS WHICH VARY FROM STATE TO STATE.
Installation Record
Model No. ______________________________________________________________ Serial No. ___________________________
Original Purchaser____________________________________________________________________________________________
Address ____________________________________________________________________________________________________
City and State ___________________________________________________________ Zip ________________________________
Dealer _____________________________________________________________________________________________________
Address ____________________________________________________________________________________________________
City and State ___________________________________________________________ Zip ________________________________
Installation Date_______________ Name ________________________________ Signature_________________________________
(Dealer or authorized representative who certifies that this appliance is installed in accordance with Manufacturer’s instructions and local codes.)
2
Stay Safe
8.
Any access panels, guards or parts removed for servicing
must be replaced prior to operating to avoid property
damage, bodily injury or death.
9.
Always use good safety practices regarding the handling,
installation and servicing mechanical equipment.
10.
When the air curtain is operating, some components
operate at high speeds. Personal injury can result in
touching these items.
11.
Take caution that no internal damage will result if screws or
holes are drilled into the cabinet.
Always contact Williams about any problems or conditions
that you do not understand.
12.
Always use proper eye protection, safety equipment and
tools equipment during the installation.
Use only manufacturer’s replacement parts.
other parts could cause injury or death.
13.
No wiring or other work should be performed without
verifying that the fan coil is completely disconnected from
the power source and locked out.
WARNING: Read these rules and the instructions
carefully. Failure to follow these rules and
instructions could cause a malfunction of the air
curtain. This could result in death, serious bodily
injury and/or property damage.
INSTALLATION MUST CONFORM TO LOCAL CODES.
COMPLIANCE WITH ALL CODES IS THE RESPONSIBILITY OF
THE INSTALLER.
1.
2.
3.
The important safety instructions, warnings and cautions in
these pages are not meant to cover all possible problems or
conditions.
Use common sense and caution when
installing, maintaining or operating the equipment.
Use of any
It is the sole responsibility of the customer to provide the
necessary protection to prevent vandalism and weather
protection of the equipment.
Under no circumstance should the air curtain be left
exposed to the elements.
Protect the units from dirt, plaster and other debris during
the entire construction phase.
Prior to start-up, the entire interior of the unit should be
inspected for debris and dirt. Clean, if necessary.
Any failure of the unit or damage to the building as a result
of improperly protecting and cleaning the unit is not covered
by the warranty.
4.
Units weigh 25 to 75 pounds. A minimum of two people are
recommended for handling and installation.
5.
The equipment must be properly supported. Supports must
always be adequate to hold the equipment securely.
6.
All power must be disconnected before any installation or
service is performed. More than one power source may be
supplied to the air curtain.
7.
Protect adjacent flammable material when welding or
soldering. Use a heat shield to protect against sparks and
solder.
3
Introduction – 4
Introduction
The following steps are all needed for proper installation and safe operation of your air curtain. If you have any doubts as to any
requirements, check with local authorities. Obtain professional help where needed. All of the checks and adjustments in the Start-Up
Procedures are vital to the proper and safe operation of the air curtain. Please read the instructions before you install and use your air
curtain. This will help you obtain its full value. It could also help you avoid needless service costs if the answer to the problem is found
within this instruction manual.
Always consult your local HVAC inspector or building department regarding regulations codes or ordinances which apply to the
installation. Check the air curtain nameplate prior to installation. It is the responsibility of the installing contractor to inspect and verify
that the unit received is the correct model number, voltage, etc. Any discrepancies should be resolved before uncrating and/or
installation. Williams is not responsible for any back charges due to an incorrect unit being installed.
Upon delivery, examine each unit and all parts carefully for shipping damage. Immediately report any freight damage to the freight
carrier and file a freight claim with the carrier. All units are shipped FOB factory; therefore Williams is not responsible for damage
during transit.
Returns require written authorization from Williams. Unauthorized returns will be refused. All material returned will be inspected. Any
damage, missing parts, rework or repackaging resulting from prior installation, abuses or neglect will constitute just cause for Williams
to issue partial or no credit.
Helpful Installation Information
The following material will help you in making the installation:
National Electrical Code ANSI/NFPA No. 70 or, in Canada, C.S.A. StandardC22.1
Unpacking Your Air Curtain
Upon delivery, examine each unit and all parts carefully for shipping damage. Immediately report any freight damage to the freight
carrier and file a freight claim with the carrier. All units are shipped FOB factory, therefore Williams is not responsible for damage
occurring transit.
It is the responsibility of the installing contractor to inspect and verify that the unit received is the correct model number, voltage, etc.
Any discrepancies should be resolved before uncrating and /or installation. Williams is not responsible for any back charges due to an
incorrect unit being installed.
Returns require written authorization from Williams. Unauthorized returns will be refused. All Material returned will be inspected. Any
damage, missing parts, rework or repackaging resulting from prior installation, abuses or neglect will constitute just cause for Williams
to issue partial or no credit.
REMOVE PACKING MATERIAL. Be sure to remove cardboard inserts from around blower wheels.
4
Installing Your Air Curtain
The following steps are needed for proper installation and safe operation of your air curtain. Installation must adhere to all local and
national code requirements. If you have any doubts as to any requirements, obtain professional help. Remember to ALWAYS consult
your local HVAC inspector or building department regarding regulations, codes, or ordinances which apply to the installation .
This unit must be installed in a manner which will allow the blower panel to be removed in order to clean the blower and motor and to
provide access to electrical connections.
It is the sole responsibility of the customer to provide the necessary protection to prevent vandalism and weather protection of the
equipment. Protect the units from dirt, plaster and other debris during the entire installation phase. Prior to start-up, the entire interior
of the unit should be inspected for debris and dirt. Clean, if necessary. Any failure of the unit or damage to the building as a result of
improperly protecting and cleaning the unit is not covered by the warranty.
Mounting
Units weigh 25 to 75 pounds. A minimum of two people are recommended for handling and installation.
Determine the location above the opening to where the air curtain is to be installed. It should be centered in the opening and as close
to the top of the opening as possible. Make sure there are no obstructions that will interfere with the curtain of air.
The wall mounting plate must be level and be securely mounted to the structure with sufficient load-carrying capacity to support the
weight of the equipment. All anchors for mounting must be placed and sized to ensure a safe installation. Mounting hardware is not
included.
Slide the top of the air curtain down to engage the top of the wall plate, then pivot the front down to the bottom of the plate. Using the
screws provided, attach the unit to the wall plate through the holes along the bottom edge of the plate. Ensure that there are no gaps
between the unit and wall.
Hanging mount - there are four threaded openings on top of the unit for suspending the unit from the ceiling, if desired.
For NSF Installations:
The Maximum installation height is 7 feet. Make sure there no obstructions that will interfere with the air curtain. Ensure that there are
no gaps between the unit and the wall.
Hanging mount option – Units with model numbers that end in ”N” have pan head screws installed in the four threaded openings on top
of the unit. These must be removed before installation in the hanging mount position (suspension rods from the ceiling).
Electrical
No wiring or other work should be performed without verifying that the air curtain is completely disconnected from the power source and
locked out. Verify a good ground connection exists prior to energizing the power source.
All wiring must comply with local and national code requirements. Williams air curtains are provided with a wiring diagram and
nameplate data to provide the necessary information needed for field wiring. Wiring used for connections to the air curtain must be
rated for at least 90° centigrade. All wiring connections must be tight.
For outdoor wiring, motor wiring must go thru rainproof conduit and fittings to a rainproof electrical junction box located above the unit
with no more than 2 feet of conduit run so that the motor wires may reach the junction box without having splices. Do not make wire
splices inside the air curtain cabinet when it is being installed outdoors.
The motor must be properly wired prior to start up. The warranty on all motors is void if the motor is burned-out due to incorrect wiring.
Check the rating of the unit to determine: voltage, frequency, phase, amperage, appropriate switching, maximum over current protection
(MOP) and full load amps (FLA).
Any optional items, such as fan switches to be field installed must be wired in accordance with the wiring diagram supplied with the unit
and the switch manufacturer’s directions. See page 6 Figures 2 and 3.
Adjusting Air Foil Deflector
The air foils have 40° of adjustment. The majority (approximately 85%) of the air flow should be directed to the outside. See figure 1.
To adjust the air foils loosen the screws securing the air foil bracket. Adjust the air foils to the angle desired and retighten the screws.
5
Installing Your Air Curtain
FIGURE 1
FIGURE 2 – Single Speed (NSF)
FIGURE 3 - Variable Speed
6
Operating Your Air Curtain
Start-Up Procedure
Blower Wheel: With the power off, be sure that the blower wheel(s) rotate freely and quietly. To avoid imbalance or vibration, make
sure the blower has been cleaned from any installation debris.
Housekeeping: To ensure the best performance, be sure the equipment is clean of any debris collected during installation.
Access Panels/Filters: All access panels and filters must be in place before operation.
Caring for Your Air Curtain
How to Care for Your Air Curtain
WARNING
RISK OF ELECTRICAL SHOCK CAN CAUSE INJURY OR DEATH.
Disconnect all remote electric power supplies before servicing. Closing the door or window should not be used for disconnect
purposes.
To attain maximum performance, a formal schedule of maintenance should be performed. See page 18.
Motor and Blower: At a minimum, the motor and blower should be cleaned annually. More frequently if installed in a dirty/greasy
environment.
Filter: The filter should be changed every three months, or more often as required.
CAUTION
This unit must be installed in a manner that allows it to operate according to the nameplate data and comply with all
applicable codes. Williams will assume no liability for damage to the unit or building due to misapplication, including
field installed control devices not furnished or specified by Williams.
7
Replacement Parts
Models: ES036, ES042, ES048 – NSF RATED
8
Replacement Parts
Models: ES060 and ES072 – NSF RATED
9
Replacement Parts
10
Replacement Parts
11
Replacement Parts
12
Replacement Parts
Models: ES026, ESO36, ES042, ES048 – Variable Speed
13
Replacement Parts
Models: ES060 AND ES072 – Variable Speed
14
Replacement Parts
15
Replacement Parts
16
Replacement Parts
17
Replacement
Parts
Service Record
Model No. __________________________________________________ Serial No. ______________________________________
Model Description ____________________________________________________________________________________________
Installation Date ______________________________________________________________________________________________
Filter Part No. ______________________________________
Date
Voltage ______________
Service Performed
18
Parts Required
Amps ____________
Service
Company
Signature
Replacement
Parts
Service Record
Date
Service Performed
19
Parts Required
Service
Company
Signature
Replacement
Parts
Service Record
Date
Service Performed
250 West Laurel Street, Colton, CA 92324
(909) 825-0993 • FAX: (909) 824-8009
e-wfc-fc.com
20
Parts Required
Service
Company
Signature
P626356 - Revised 10-21-2013
All Rights Reserved


