2955AT
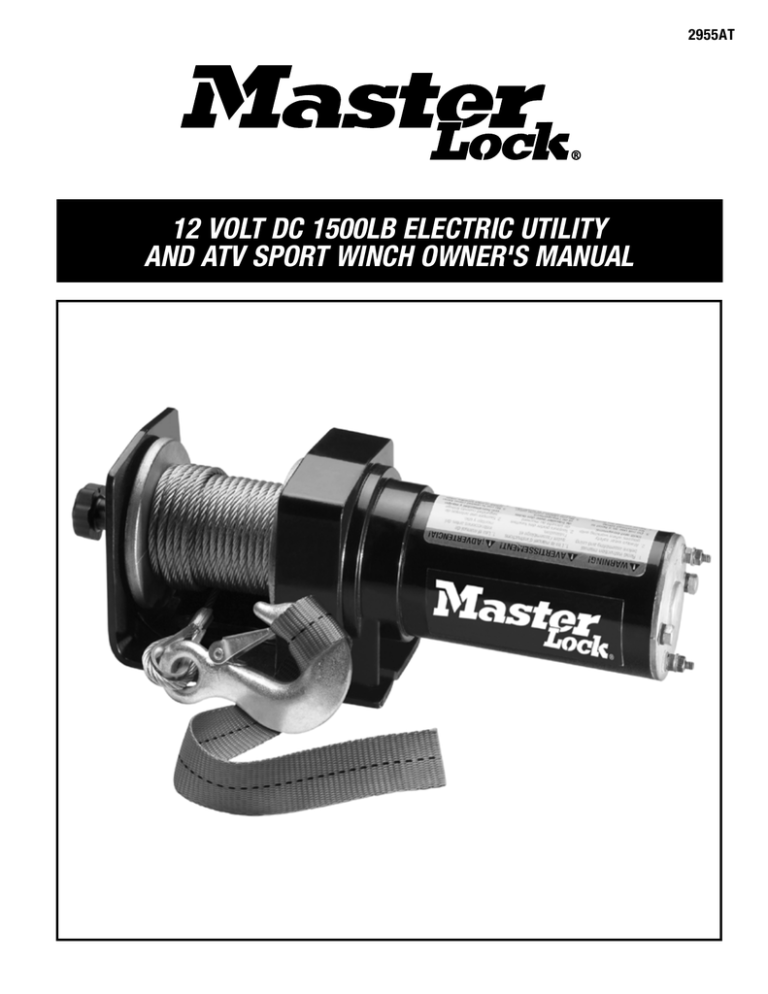
12 VOLT dc 1500lb ELECTRIC UTILITY
AND ATV SPORT WINCH OWNER'S MANUAL
Table of Contents
INTRODUCTION . . . . . . . . . . . . . . . . . . . . . . . . . . . . . . . . . . . . . . . . 1
WIRING INSTRUCTIONS . . . . . . . . . . . . . . . . . . . . . . . . . . . . . . . . . . 4
SAVE THIS MANUAL . . . . . . . . . . . . . . . . . . . . . . . . . . . . . . . . . . . . 1
OPERATING INSTRUCTIONS . . . . . . . . . . . . . . . . . . . . . . . . . . . . . . 5
INCLUDED ACCESSORIES . . . . . . . . . . . . . . . . . . . . . . . . . . . . . . . . 2
USING YOUR WINCH . . . . . . . . . . . . . . . . . . . . . . . . . . . . . . . . . . . . 6
PRODUCT FEATURES . . . . . . . . . . . . . . . . . . . . . . . . . . . . . . . . . . . 2
Trouble Shooting . . . . . . . . . . . . . . . . . . . . . . . . . . . . . . . . . . . . 8
PERFORMANCE SPECIFICATIONS . . . . . . . . . . . . . . . . . . . . . . . . . . 2
MAINTENANCE INSTRUCTIONS . . . . . . . . . . . . . . . . . . . . . . . . . . . . 8
GENERAL SAFETY INFORMATION . . . . . . . . . . . . . . . . . . . . . . . . . . 3
Warranty . . . . . . . . . . . . . . . . . . . . . . . . . . . . . . . . . . . . . . . . . . . 9
MOUNTING INSTRUCTIONS . . . . . . . . . . . . . . . . . . . . . . . . . . . . . . . 4
Introduction
Thank you for purchasing the Master Lock® electric utility and ATV
winch. We hope you are pleased with the performance and reliability
of your winch. Your winch was designed for non-industrial use.
All other applications may void warranty.
of your winch, it is extremely important that you read and understand
this Owner’s Manual prior to installing and operating this winch.
Make sure that anyone else who operates your winch also reads and
understands this manual.
As with any power tool, there is a potential for personal injury if your
winch is improperly installed or operated. To ensure safe operation
Save This Manual
You will need this manual for future reference. It is recommended that you keep your invoice for this winch inside the front cover of this
manual and keep both in a safe, clean and dry place for future reference.
Replacement parts and accessories are not available for your winch. Should this product not function or be missing any parts, do not
use it and return it to place of purchase. Always have a qualified technician perform all repairs on your winch, never attempt to repair
your winch yourself.
1
Included Accessories
1. Power cord fitted with water sealed plug
for safe operation
2. Remote control with water
sealed plug for safe operation
Power Cord 64"
Remote Control
Cable 42"
3. 35' (34' working length) galvanized steel
cable with attached winch hook and
Handsaver strap
35' Galvanized Steel Cable
(34' Working Length)
4. Mounting Plate for trailer hitch
Mounting Plate
Handsaver Strap
Product Features
1. Convenient power for pulling stuck vehicles and other heavy items
4. Forward/Reverse operation
2. Powerful 1,500lbs pulling power
5. Free spooling function
3. 12 Volt DC powered for convenient use without extension
cords or small gas engines
Performance Specifications
Capacity:
Cable Length: 35ft (34ft working length) 5/32" galvanized steel cable
resists corrosion.
Pull Strength Performance Ratings
Cable Layer
Peak Pulling Capacity lbs/kg
1
2
3
4
5
1500
1225
1025
900
800
680
556
465
408
363
Maximum Designed Stall Load: 1875lbs/850kg
Current Draw:
@560lbs Load: 10.3 amps
@1,500lbs Load: 27 amps
Power Cable: 64" length
Duty Cycle:
Remote Control Cable: 42" length
Fully Loaded @ 1,500lbs (weight of object)
@ 2.5 minutes of operation. Allow 8 minutes to
cool before resuming use.
Net Weight: 13.7lbs
Line Speed: 6.4 ft/minute (No load)
Power Supply: 12 Volt DC
Light Load @ 250lbs (weight of object) @
2.5 minutes of operation. Allow 2 minutes to
cool before resuming use.
Overall Dimensions: 4-1/2" x 4-5/16" x 12-5/8"
2
General Safety Information
WARNING: FAILURE TO READ AND FOLLOW THE SAFETY INSTRUCTIONS IN THIS
OWNER’S MANUAL BEFORE INSTALLING OR USING YOUR ELECTRIC WINCH COULD RESULT IN DAMAGE
TO YOUR WINCH AND SERIOUS OR FATAL INJURY!!
WARNING: Never operate your winch when under the influence of
drugs, alcohol or medication.
WARNING: Never apply a load to your winch with the cable fully
extended. Keep at least five turns of cable on the winch drum.
The usable cable length is approximately 34 feet.
WARNING: Never use your winch to lift or move human beings. Do
not use for scaffolding, elevators, or any other application in which
human beings could be positioned on or under the load at any time.
WARNING: Always keep the winching area free of all bystanders and
clutter. Never stand between the load being pulled and your winch.
WARNING: Never use your winch in any vertical lifting or lowering
application. Your winch should not be used as an overhead hoist, or
to suspend a load.
WARNING: Your 12 Volt DC winch operates from a low voltage DC
power source (e.g., an ATV, car, or truck battery). Never connect your
winch to a 120 Volt AC power source.
WARNING: Your winch is a power tool that is capable of creating high
forces that can pose significant safety hazards. Never allow children
or anyone who is not familiar with this Owner’s Manual to operate
your winch.
WARNING: To prevent entanglement and/or lacerations of hands,
keep hands off of winch cable and winch hook when spooling or
operating. Always use handsaver strap when spooling or operating.
Never remove handsaver strap from hook.
WARNING: Your winch must be securely attached to a structural
member or frame of a vehicle that is capable of sustaining loads in
excess of the winch capacity. When attaching the winch to a vehicle,
make sure the mounting area is rigidly supported by the vehicle
frame.
WARNING: Remove all jewelry, loose clothing, or anything that may
get caught in the motor’s moving parts prior to operating
you winch.
WARNING: Never use your winch to support a load when winching
operation has been completed. Always secure the load properly,
using tie down straps or chains.
WARNING: Never modify or alter any part of your winch.
Modifications and alterations may weaken the structural integrity of
your winch and lead to failure of your winch. Modification or alteration
of your winch may also void your warranty, cause winch damage, or
serious personal injury.
WARNING: Always wear safety glasses and heavy gloves when
operating your winch. Keep hands and fingers clear of the winch
drum and cable area during operation. Do not attempt to guide the
cable by hand as it spools in or out or rewinds on the winch drum.
WARNING: Never install your winch with substituted hardware or
components that are different from those supplied with your winch.
Substitutions of inferior equipment and/or hardware may void your
warranty, or cause winch damage or serious personal injury.
WARNING: Pull only on areas of the vehicle as specified by the
vehicle manufacturer.
WARNING: Only attachments and/or adapters supplied by the
manufacturer shall be used.
WARNING: Never exceed the maximum rated winch pulling capacity
of 1,500lbs. If overloaded, your winch has enough power to
potentially snap loose or break the winch cable, creating serious
safety hazards. Avoid shock loads created by turning your winch on
and off intermittently to take up cable slack. Shock loads can
momentarily far exceed the winch and cable ratings.
WARNING: Mounting Bolts: DO NOT USE any bolts weaker
than ISO grade 5.
WARNING: Use an approved nylon recovery strap to “snatch” or pull
out a stuck vehicle. Nylon webbing will absorb the shock of heavy
weight pulls.
WARNING: Damaged wire cable must be replaced to safely operate
any winch.
WARNING: Your winch is equipped with a high-quality cable capable
of handling a load of 1,500lbs. Do not use vehicle pulling power to
increase the pulling capacity of your winch. When a cable snaps loose
or breaks under tension, the cable tends to whip toward the winch
area. It is recommended that a blanket or rug be placed over the
cable during winching operations to minimize whipping action in case
the cable slips or breaks.
WARNING: Never engage or disengage the clutch if winch is under
load, wire cable is under tension or wire cable drum is moving.
WARNING: Prolonged winching without allowing the winch motor to
cool will damage the motor. Prolonged winching may drain the
battery faster than it is charging even if the engine is idling.
3
Mounting Instructions
Your winch is designed to be mounted permanently. No Hardware Included.
Permanent
Mounting
3. Attach the winch to the
desired location using
bolts, nuts, washers,
and lock washers.
Do not use any bolts
weaker than ISO grade 5.
1. Select a mounting
site on the front or
rear of your ATV
vehicle, truck bed,
or other suitable
locations. Never
install your winch
in a location
that obscures
its warning and
instruction labels.
Your winch can
generate 1,500lbs of pulling force so be sure that the mounting
site selected can withstand a load well in excess of the 1,500lb
pulling force.
WARNING: You may need to use steel reinforcement plates,
or weld on additional bracing on your vehicle, depending on the
mounting site you select. Do not mount the winch where there
would be the possibility of it being submerged in water. The
winch is weather resistant but not water proof.
4. Be sure that the winch is
positioned so that the
cable does not rub the
front opening of the winch
or across sharp edges,
corners, or moving parts
of the vehicle or any other object.
Temporary Mounting on Ball Mount/Hitch Ball
1.Bolt winch to mounting plate using bolts and
nuts provided.
2. Attach the winch adapter mounting plate assembly to your trailer hitch, by inserting the trailer hitch ball through the shaped
hole in the adapter mounting plate. Never install your winch in a
way that obscures its warning and instruction labels.
2. P osition winch in desired location, and mark for drilling the
locations of the holes on the mounting plate of the winch.
WARNING: Prior to drilling, always verify that the marked
locations for drilling are clear of fuel lines, fuel tank, brake lines,
electrical wires, etc. Drill the marked locations on your vehicle.
Wiring Instructions
Your winch is designed to be wired permanently.
Plan a route for the electrical wiring from the point of the vehicle where the winch is mounted. Route the electrical wiring from the winch
to the battery being careful to avoid contacting hot or sharp surfaces. Make sure that the electrical wiring is secured along its route with
appropriate fasteners in a location clear of moving parts, road or trail debris or any
possibility of being damaged by operation or maintenance of the vehicle.
Connect wire #3, black wire of shorter wire pair, to (–) winch motor terminal.
Connect wire #1, red wire of shorter wire pair, to (+) winch motor terminal.
Connect wire #4, black wire of longer wire pair, to (–) battery post.
#3 Black
Connect metal plate exiting from overload relay to positive battery post. Note that
opposite side of overload relay should have been previously connected to wire #2,
red wire of longer wire pair.
ARNING: Always wear eye protection when working around a battery.
W
Do not lean over the battery while making connections. Remove all jewelry,
loose clothing, or anything that may get caught in the motor’s moving parts
prior to connecting wiring to the battery.
WARNING: Be sure you are using a 12 volt automotive battery or equivalent,
in good condition.
4
#1 Red
#2 Red
#4 Black
Negative (-)
Positive (+)
Operating Instructions
The following operating instructions are intended to provide you with a basic understanding of your electric winch and to teach you the basics
of proper winching techniques. Users must understand that every winching situation has the potential for personal injury. In order to minimize
the risk to you and others in the area, it is important for you to read and understand this Owner’s Manual, familiarize yourself with the operation
of your winch prior to having to use it, carefully analyze each particular situation you are putting the winch to use, and constantly be aware of
the importance of safety.
Getting to Know the Components of Your Winch
❷W
inch Drum
❶ Motor
❸ Winch Cable
❺Clutch Knob
❼ Remote Control
❹W
inch Hook
❻ H andsaver Strap
AVERTISSEMENT!
WARNING!
¡ADVERTENCIA!
60188
Entanglement/Cutting Hazard
Keep Hands Off of Cable and Hook
Always Use Handsaver Strap When Respooling and Operating
Risque d’emmêlement/de lacérations Garder les mains loin du câble et du crochet
Toujours utiliser la courroie protège-mains durant le bobinage et l'utilisation
Peligro de enredo/corte
Mantenga las manos alejadas del cable y del gancho Siempre use la correa para protegerse las manos al rebobinar u operar
Your winch contains the following component parts:
❶ Motor: The winch motor is powered by your vehicle’s 12 Volt DC battery. The winch motor provides power to the gear mechanism which
turns the winch drum and spools the winch cable in or out of the winch.
❷ W
inch Drum: The winch drum is the cylinder onto which the winch cable is stored when the drum spools the cable in or out of the winch.
The winch drum is driven by the winch motor and gear drive train.
❸ Winch Cable: The winch cable is the metal cable that is wrapped around the winch drum. The winch hook is permanently attached to the
end of the winch cable.
❹ W
inch Hook: The winch hook is used to attach the winch cable to the load to be pulled. The hook should be attached onto the load using
a pulling point, tow strap, or chain. Never wrap the winch cable around the object to be pulled and hook the winch hook onto the winch
cable itself.
❺Clutch Knob: The clutch knob allows you to manually disengage the winch drum from the motor and gear mechanism, enabling the winch
drum to rotate freely (known as “free spooling”). Engaging the clutch, “locks” the winch drum back onto the motor and gear mechanism.
❻W
inch Handsaver Strap: The winch handsaver strap is used to guide the winch cable. Always use when guiding winch cable in and out.
❼ Remote Control: The remote control enables you to operate the winch drum while standing clear of the winching process. Specifically,
it allows you to start, stop, and change the direction of the rotation of the winch drum.
5
Using Your Winch
WARNING: Never attach cable, rope, chains or other objects to
the winch hook to increase the length of a pull.
1.Put on heavy gloves and safety glasses. Take your time, analyze
your situation, and plan your pull carefully.
WARNING: Never operate or install a winch without reading and
understanding the operation manual. Practice using your winch
before having to use it in a real situation. A real situation is no
time to be learning how to use your winch.
WARNING: Always inspect winch installation and winch cable
condition before performing a winching operation. Never operate
your winch if it is loose or damaged or when the winch cable is
frayed, kinked, or damaged. If damage or wear to any
component of your winch is observed, do not use the winch and
never attempt to repair it yourself. Always have a qualified
technician perform all repairs on your winch.
6. Hook the winch hook onto the object using a pulling point, tow
strap, or chain. It is best to hook the winch hook on the object to
be winched as low as possible. It is also important to align the
vehicle and winch in a straight line with the object to be pulled.
This allows the winch cable to wind tightly and evenly onto the
winch drum when it is pulled into the winch. Neat, tight spooling
avoids cable binding. Never pull a load at extreme angles.
WARNING: Never wrap the winch cable around the object and
hook the winch hook onto the cable itself. This can cause
damage to the object being pulled and kink, fray, or otherwise
damage the winch cable.
WARNING: Always remove jewelry, loose clothing, or anything
else that may get entangled in moving parts of winch.
WARNING: If the winch cable becomes bound on the winch drum
(i.e., pinched between successive turns of the cable),
alternatively power the winch cable in and out a few inches.
Never use your hands to attempt to free a bound winch cable
under load.
WARNING: Always wear heavy gloves and keep hands clear of
winch cable, winch hook, and winch drum during winching
operation.
2. Be sure that all unnecessary bystanders and clutter do not
remain in the area during winching operations.
3. Prolonged winching without allowing to cool will damage the
motor. Prolonged winch operation may drain the battery faster
than it is charging even if engine is idling.
4. To pull out the winch
cable, pull and rotate
clutch knob 90˚ so
it is positioned out.
This will disengage
the winch clutch and
allow the winch drum
to free wheel. Pull out
the amount of cable
as needed from the
freespooling winch drum
using the handsaver
strap. Always leave at least five turns of the winch cable on the
winch drum to prevent the cable from pulling out of the winch.
5. Pull the winch cable to the object to be pulled or moved. Be sure
to keep tension on the winch cable to prevent it from becoming
twisted or over-wrapped when slackened and potentially
damaged.
7. When ready to begin winching, be careful not to let the
remote control cable dangle in front of the winch or create a
tripping hazard.
WARNING: Always keep remote control
cord clear of the winch drum, winch cable,
and winch hook.
WARNING: Never put your finger through
the hook. If your finger should become
trapped in the hook, you could lose your
finger. Always use the handsaver strap
when guiding the winch cable in or out.
Entanglement/Cutting Hazard
• Keep hands off of winch cable and winch hook
when spooling or operating.
• Always use handsaver strap when spooling or operating.
• Never remove handsaver strap from winch hook.
WARNING!
WARNING: Always maintain at least five turns of the winch cable
on the winch drum to prevent the cable from pulling off the drum
under load.
AVERTISSEMENT!
¡ADVERTENCIA!
60188
Entanglement/Cutting Hazard
Keep Hands Off of Cable and Hook
Always Use Handsaver Strap When Respooling and Operating
Risque d’emmêlement/de lacérations Garder les mains loin du câble et du crochet
Toujours utiliser la courroie protège-mains durant le bobinage et l'utilisation
Peligro de enredo/corte
Mantenga las manos alejadas del cable y del gancho Siempre use la correa para protegerse las manos al rebobinar u operar
6
Using Your Winch (continued)
WARNING: Avoid shock loading the winch cable by using the
remote control switch intermittently to take up cable slack. Shock
loads can momentarily far exceed the winch and winch cable
load ratings. For extended winching, stop at reasonable intervals
to allow the winch motor to cool.
8. R
e-engage the clutch knob by rotating it 90˚ so the pin snaps
back into slot when winch is not operating. This will engage the
winch and lock the winch drum.
WARNING: Always make sure clutch is fully engaged.
ARNING: Never engage clutch with motor running. Winch
W
clutch should always be fully engaged when winch is in use.
WARNING: Never engage or disengage the clutch if the winch
is under load, winch cable is under tension or winch drum
is moving.
9. Using the winch remote control and the handsaver strap, slowly
wind the winch cable until there is no slack in the cable. Make
sure all winching connections are secure and properly seated.
10. A lways operate your winch with an unobstructed view of the
winching operation. Prior to continuing the pull make sure that
everyone is well clear of the area and that you are standing
in an area with unobstructed access to, and clear view of the
winch, its labels, and its controls. Once the winch cable is under
tension, stand to the side of the cable and well clear of it. Never
step over or under the winch cable when it is under tension.
ARNING: It is recommended that a heavy blanket, rug, or chain
W
be placed over the midpoint of the winch cable prior to
continuing the winching procedure. This will allow energy to be
absorbed if the winch cable should snap loose or break.
11. M
ake sure that bystanders in the vicinity are at a safe distance
and aware that you are going to start the pull.
12. W
ith your vehicle’s engine off and light tension on the
winch cable, begin winching slowly and steadily. Be sure
that the winch cable is winding evenly and tightly around
the winch drum.
13. The electric motor attached to your winch is designed for
intermittent use only and should not be used in constant duty
commercial or industrial applications. Extended use of your
winch without cooling off periods can cause overheating
damage to the motor. A maximum run time of six to eight
minutes is recommended.
14. If the motor becomes too hot to the touch, stop and let it cool
for a few minutes.
15. Once the pull is complete and the object winched has been
secured with tie down straps or chains, use the remote control
to release the tension on the winch cable with the remote
control. Disconnect the remote control from the winch and
disconnect the winch cable and hook from the pulling point,
tow strap or chain connected to the object which was winched.
16. T o respool the winch cable correctly, use the remote control to
power in and respool the winch cable. It is necessary to keep a
slight load on the cable. This is accomplished by holding (while
wearing gloves) the winch hook with the handsaver strap and
applying a slight load on it while the cable is respooled.
This ensures that the cable is wound tightly and evenly around
the winch drum, and prevents the winch cable from slipping
or kinking.
7
Troubleshooting
Symptoms
Possible Cause(s)
Motor will not operate or only in one direction
1. Switch inoperative
2. Broken wires or bad connection
3. Damaged motor
Motor runs extremely hot
1. Long period of operation
2. Failed or removed overload
3. Damaged motor
Motor runs, but with insufficient
1. Weak battery
power or line speed
2. Battery to winch wire too long
3. Poor battery connection
Motor runs but drum doesn’t turn
Winch runs backwards
Winch coasts
Motor operates but stops
4. Poor ground
5. Damaged motor
1. Clutch not engaged
1. Motor wires reversed
2. Switch wires reversed
3. Battery switch installed incorrectly
1. Excessive load
1. Excessive load/overload
Corrective Action
1. Replace switch
2. Check for poor connections
3. Replace or repair motor
1. Allow to cool
2. Replace or repair overload
3. Replace or repair motor
1. Recharge or replace battery
and check charging system
2. Keep winch within distance allowed
by lead wires
3. Check battery terminals for corrosion
and clean as required
4. Check and clean connections
5. Replace or repair motor
1. Engage clutch
1. Recheck wiring
2. Recheck wiring
3. Check battery connections
1. Reduce load or double line
1. Allow to cool
Maintenance Instructions
1. Always inspect winch installation and winch cable condition
before performing a winching operation. Never operate your
winch if it is loose or damaged or when the winch cable is frayed,
kinked, or damaged. Inspect the winch installation, mounting
bolts and electrical connections on a regular basis. Remove any
dirt or corrosion that may have accumulated on the electrical
connections, and ensure you have a clean, tight and secure
electrical contact. Inspect the electrical wiring along its route
and make sure that it is not damaged and is still secured with
appropriate fasteners. Also make sure the electrical wiring is
located in a location clear of hot or moving parts, road debris or
any possibility of being damaged by operation or maintenance of
the vehicle.
3. Always keep your winch, winch cable, and remote control and
its cord free from dirt or other contamination. Use a clean towel
to remove any dirt or debris. It may be necessary to unwind the
winch cable (leaving a minimum of five turns on the winch drum),
wipe, clean, oil with light penetrating oil, and properly rewind the
winch cable.
4. Inspect your vehicle’s battery because operating a winch for long
periods of time places an extra burden on the battery.
Be sure to check and maintain your battery and battery cables
according to manufacturer guidelines. Inspect all electrical
connections on the winch to ensure they are clean and
tight fitting.
WARNING: Always wear eye protection when working around
a battery. Do not lean over the battery while inspecting
connections. Remove all jewelry, loose clothing, or anything that
may get caught in the motor’s moving parts prior to inspecting the
battery.
WARNING: Always wear eye protection, heavy gloves and remove
all jewelry, loose clothing, or anything that may get caught in the
vehicle’s moving parts prior to inspecting your winch.
2. Inspect the winch cable before and after each winching operation
is performed. Make sure it is in good condition and is attached
properly. If the cable has been kinked, frayed, or is abnormally
stiff, the winch should not be used. The winch cable should be
lubricated periodically with a light penetrating oil to improve the
life of the cable. Be sure to also inspect the winch hook for signs
of wear or damage. If the winch hook is damaged do not use
the winch.
5. Inspect the remote control and its cord for wear and/or damage.
If the remote control is damaged do not use the winch.
6. If damage or wear to any component of your winch is observed,
do not use the winch and never attempt to repair it yourself.
Always have a qualified technician perform all repairs on
your winch.
8
1 Year Limited Warranty
Master Lock Company warrants to the original buyer (“you” or “your”) all component parts of your winch except the winch cable for a
period of one (1) year from the provable date of purchase. If your winch fails due to a defect in materials or workmanship during the 1
year warranty, Master Lock Company will replace it free of charge. Simply contact Master Lock Company at www.masterlock.com for
replacement information. This warranty does not cover products which have been abused, altered, damaged, misused, cut or worn.
This warranty is void if winch is used in commercial/industrial applications.
Limitation of Liability: The warranty set forth herein are exclusive, to the extent permitted by law, Master Lock Company disclaims all
other implied or express warranties including all warranties of merchantability and/or fitness for a particular purpose. This warranty
is your sole remedy and Master Lock Company shall not be liable for any damages, whether direct, indirect, incidental, special,
consequential, exemplary, or otherwise, including lost revenues and lost profits, arising out of any theory of recovery, including
statutory, contract or tort. In no event will Master Lock Company’s entire liability exceed the purchase price of this product. Some
states and provinces do not allow the exclusion or limitation of incidental or consequential damages so the above limitations or
exclusions may not apply to you. This limited warranty gives you specific legal rights, and you may also have other rights which vary
from state to state and province to province.
w w w . m a s t e r l o c k . c o m
Master Lock Company LLC, Milwaukee, WI 53210 U.S.A. | 800-308-9244
Master Lock Canada, Oakville, Ontario L6H 5S7 Canada | 800-227-9599
© 2012 Master Lock Company | All Rights Reserved
P16362
01/12

