250
CNC
SMARTSCOPE
Economical Automatic Video Measurement
Travel
mm
CNC 250
X axis
Y axis
Z axis
250
150
200
Extended X
X axis
300
(option)
Versatility.
Economy.
Accuracy.
Pick Any Three.
O P T I C A L
Competition requires that products be of the highest quality. One’s
quality reputation depends on the quality of the measurements made.
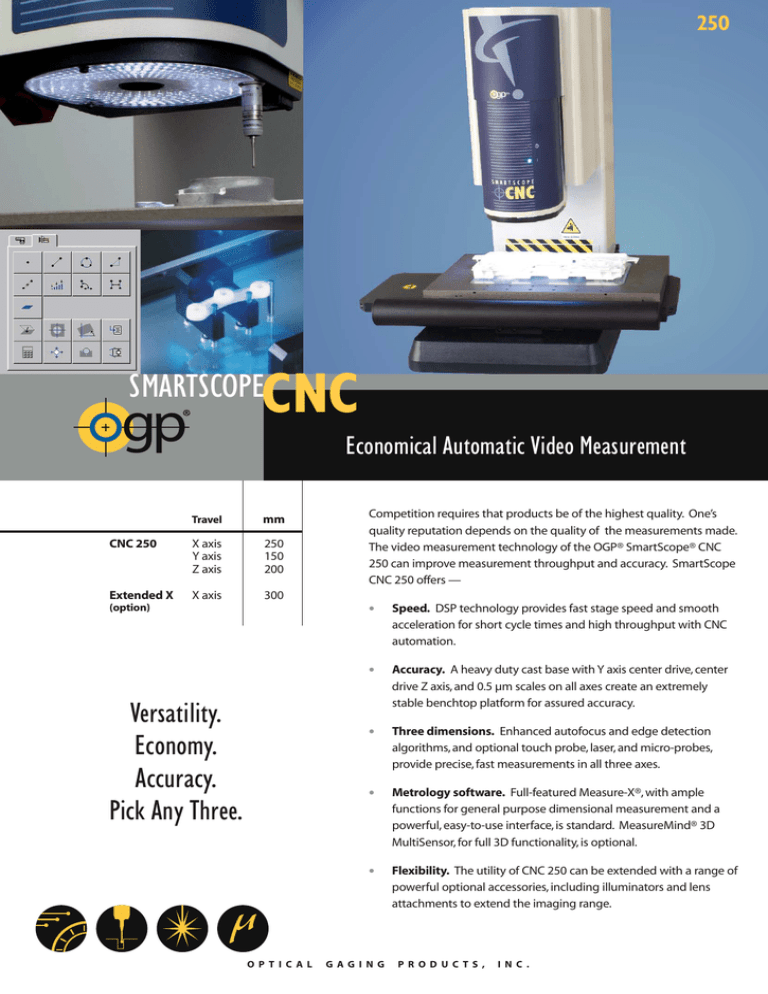
The video measurement technology of the OGP® SmartScope® CNC
250 can improve measurement throughput and accuracy. SmartScope
CNC 250 offers —
•
Speed. DSP technology provides fast stage speed and smooth
acceleration for short cycle times and high throughput with CNC
automation.
•
Accuracy. A heavy duty cast base with Y axis center drive, center
drive Z axis, and 0.5 µm scales on all axes create an extremely
stable benchtop platform for assured accuracy.
•
Three dimensions. Enhanced autofocus and edge detection
algorithms, and optional touch probe, laser, and micro-probes,
provide precise, fast measurements in all three axes.
•
Metrology software. Full-featured Measure-X®, with ample
functions for general purpose dimensional measurement and a
powerful, easy-to-use interface, is standard. MeasureMind® 3D
MultiSensor, for full 3D functionality, is optional.
•
Flexibility. The utility of CNC 250 can be extended with a range of
powerful optional accessories, including illuminators and lens
attachments to extend the imaging range.
G AG I N G
P RO D U C TS ,
I N C .
CNC
250
SMARTSCOPE
Technical Specifications
n Standard
n
n
n
n
n
n
n
n
n
n
n
n
n
n
n Optional
Stage travel (XYZ): 250 x 150 x 200 mm
Extended X axis: 300 mm
Measuring unit dimensions (approx LWH): 74 x 64 x 81 cm, 115 kg
Shipping crate dimensions (approx LWH): 145 x 110 x 120 cm, 200 kg
XYZ scale resolution: 0.5 µm
Motor drives: DC servo with joystick control (X, Y, Z, zoom)
Interactive stage control: 4-axis (X, Y, Z, zoom) with ergonomic, multifunction hand controller (requires MeasureMind 3D metrology software)
Worktable: Hardcoat anodized, with fixture holes and removable stage glass, 25 kg load capacity
Zoom lens: Patented† 12:1 AccuCentric® auto-calibrating with up to 25 calibrated positions
Optical accessories: 0.5x, 0.75x, 1.5x, and 2.0x lens attachments; 2.5x and 5.0x replacement lenses; LED grid projector, laser pointer (not available with
TTL laser)
Camera: ½” format high resolution color CCD with 768 x 494 pixel array
Illumination: Green LED substage, white LED coaxial TTL surface, patented†† 8 sector/8 ring SmartRing™ LED
Image processing: 256 level grayscale processing with 10:1 sub-pixel resolution
Multisensor options: Touch probe and change rack, Feather Probe™, Rainbow Probe™ scanning white light sensor, on-axis TTL laser,
off-axis DRS™ laser (contact OGP for possible combinations of sensors)
n
n
n
Power requirements: 115/230 vac, 50/60 Hz, 1 f, 700 W
Rated environment: Temperature between 18 and 22° C, stable to ± 1° C; 30-80% humidity (non-condensing); vibration <0.001g below 15 Hz
Operating environment: 15-30° C
n
n
Metrology software: OGP Measure-X®
OGP MeasureMind® 3D MultiSensor
Computer: Minimum configuration Dual Core processor @ 1.8 GHz, 1 GB RAM, 80 GB hard drive, 1.44 MB floppy drive, DVD-RW drive,
parallel, serial, and USB 2.0 ports, on board 10/100 LAN
Operating system: Microsoft® Windows™ XP Professional
Computer accessories: Single or dual 22” flat panel LCD monitor(s), keyboard, three-button mouse (or user supplied)
Software: For use with Measure-X or MeasureMind 3D; MeasureFit® Plus, SmartReport® powered by QC-Calc™, MeasureMenu™, Scan-X®
Software: For use with MeasureMind 3D only; SmartScript®, SmartTree™, SmartProfile™
n
n
n
n
n
Where L=measuring length in mm. Applies to thermally stable system in rated environment. All optical accuracy specifications at maximum zoom lens setting.
n
n
n
XY area accuracy: E2=(2.0 + 5L/1000) µm*
XY area accuracy: E2=(2.5 + 5L/1000) µm* (extended X travel system)
Z linear accuracy: E1=(3.0 + 5L/1000) µm**
Z linear accuracy: E1=(2.0 + 5L/1000) µm** (with optional 2.0x lens attachment/grid projector, on-axis TTL laser w/5.0x replacement lens,
or off-axis DRS-2000 laser)
Z linear accuracy: E1=(1.5 + 5L/1000) µm** (with optional TP-20/-200 touch probe, or off-axis DRS-300/-500 laser)
n
n
Warranty: One year
Accessories: Fixtures and calibration artifacts, rotary indexers
n
n
†
Patent Number 5,389,774 ††Patent Number 5,690,417
*With evenly distributed 5 kg load. Depending on load distribution, accuracy at maximum rated load may be less than standard accuracy. XY axis artifact: QVI 25 intersection grid reticle at standard
measuring plane. The standard measuring plane is defined as a plane that is 25 mm above the worktable.
**Z axis artifact: QVI step gage or master gage blocks.
Multisensor Measurements for Manufacturing Professionals
Optical
Gaging
Products Inc.
World Headquarters and Technology Center: 850 Hudson Avenue • Rochester, NY 14621 USA • Tel 585.544.0400 • Fax 585.544.8092
OGP Shanghai Co, Ltd: 17 Lane 593 • East Jin An Rd • Pu Dong New District • Shanghai, China 201204 • Tel 86.21.5045.8383/8989 • Fax 86.21.6845.8800
OGP Messtechnik GmbH: Nassaustr. 11 • 65719 Hofheim-Wallau, Germany • Tel 49.6122.9968.0 • Fax 49.6122.9968.20
Optical Gaging (S) Pte Ltd: 21 Tannery Road, 347733 Singapore • Tel 65.67.41.8880 • Fax 65.68.46.8998
A Quality Vision International Company
Internet: www.ogpnet.com • intl-sales@ogpnet.com
Copyright © 2009 Optical Gaging Products, Inc. All rights reserved. Trademarks are the properties of their respective owners. Printed in USA. Specifications subject to change without notice. Please recycle. Publication Number 790341-0209
