Here - SuperTrapp
advertisement

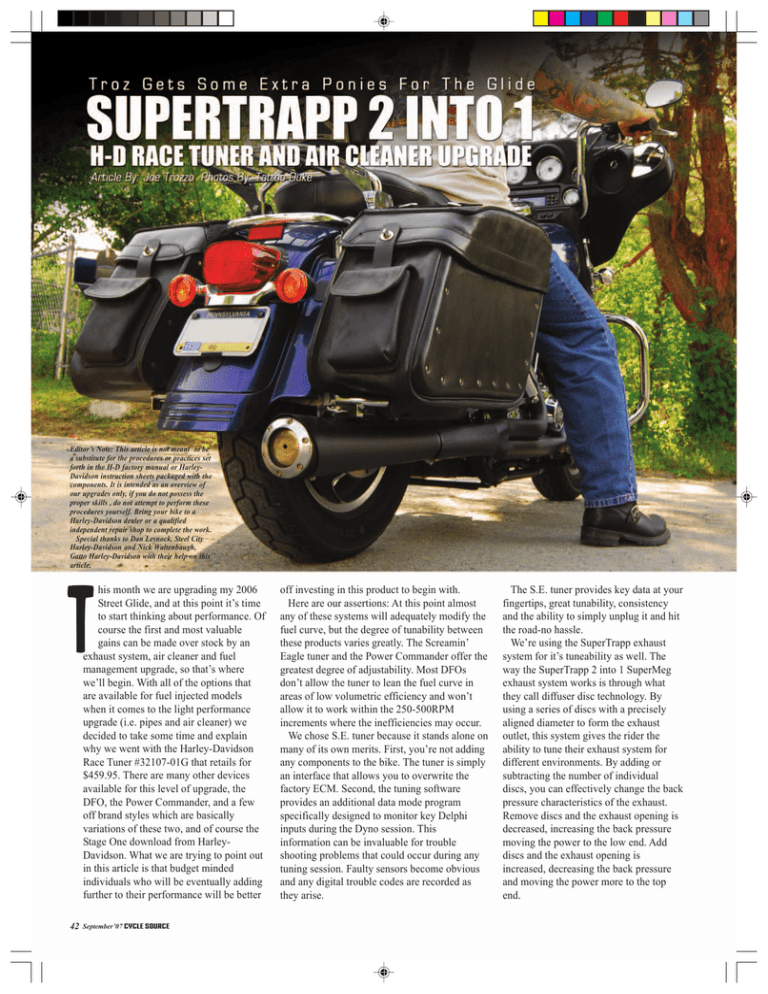
Editor’s Note: This article is not meant to be a substitute for the procedures or practices set forth in the H-D factory manual or HarleyDavidson instruction sheets packaged with the components. It is intended as an overview of our upgrades only, if you do not possess the proper skills , do not attempt to perform these procedures yourself. Bring your bike to a Harley-Davidson dealer or a qualified independent repair shop to complete the work. Special thanks to Dan Lesnock, Steel City Harley-Davidson and Nick Waltenbaugh, Gatto Harley-Davidson with their help on this article. T his month we are upgrading my 2006 Street Glide, and at this point it’s time to start thinking about performance. Of course the first and most valuable gains can be made over stock by an exhaust system, air cleaner and fuel management upgrade, so that’s where we’ll begin. With all of the options that are available for fuel injected models when it comes to the light performance upgrade (i.e. pipes and air cleaner) we decided to take some time and explain why we went with the Harley-Davidson Race Tuner #32107-01G that retails for $459.95. There are many other devices available for this level of upgrade, the DFO, the Power Commander, and a few off brand styles which are basically variations of these two, and of course the Stage One download from HarleyDavidson. What we are trying to point out in this article is that budget minded individuals who will be eventually adding further to their performance will be better 42 September’07 CYCLE SOURCE off investing in this product to begin with. Here are our assertions: At this point almost any of these systems will adequately modify the fuel curve, but the degree of tunability between these products varies greatly. The Screamin’ Eagle tuner and the Power Commander offer the greatest degree of adjustability. Most DFOs don’t allow the tuner to lean the fuel curve in areas of low volumetric efficiency and won’t allow it to work within the 250-500RPM increments where the inefficiencies may occur. We chose S.E. tuner because it stands alone on many of its own merits. First, you’re not adding any components to the bike. The tuner is simply an interface that allows you to overwrite the factory ECM. Second, the tuning software provides an additional data mode program specifically designed to monitor key Delphi inputs during the Dyno session. This information can be invaluable for trouble shooting problems that could occur during any tuning session. Faulty sensors become obvious and any digital trouble codes are recorded as they arise. The S.E. tuner provides key data at your fingertips, great tunability, consistency and the ability to simply unplug it and hit the road-no hassle. We’re using the SuperTrapp exhaust system for it’s tuneability as well. The way the SuperTrapp 2 into 1 SuperMeg exhaust system works is through what they call diffuser disc technology. By using a series of discs with a precisely aligned diameter to form the exhaust outlet, this system gives the rider the ability to tune their exhaust system for different environments. By adding or subtracting the number of individual discs, you can effectively change the back pressure characteristics of the exhaust. Remove discs and the exhaust opening is decreased, increasing the back pressure moving the power to the low end. Add discs and the exhaust opening is increased, decreasing the back pressure and moving the power more to the top end. FIGURE 1 We start off by running the Glide up to optimal operating temperature and getting its baseline established. Pretty good considering most stock Twin Cams come in at 58 hp or so. This one, however, achieved 67.88 with over 73 foot pounds of torque. FIGURE 2 After a cool down period, we begin by removing the stock exhaust system. Follow instructions provided in your factory service manual for disassembly. Retain the stock flange nuts and flanges for installation of the new system. FIGURE 3 Remove the stock exhaust gaskets from the cylinder heads and replace with new conical (stock) type, available from your local Harley-Davidson dealer. SuperTrapp advises against using the more popular “Flat Type” exhaust gaskets with their head pipes. FIGURE 4 Before installing the new system, layout and inspect the supplied hardware and components. Take a minute and read the instructions supplied by SuperTrapp for assembly procedure. This is important because each manufacturer has specific torque and component installation sequences. FIGURE 5 Inspect original exhaust retaining rings. If they look bent or twisted, then replace them before installing them on the new head pipes. Mount the head pipes using the stock nuts. Do not tighten at this time, simply turn them on far enough to hold the head pipes in place, but still loose enough to allow for manipulation. FIGURE 6 Install supplied #24 hose clamp around the front head pipe, between the front and rear pipes, at the stock transmission mount location. Wrap the hose clamp around the stock bracket. Do not tighten at this time. FIGURE 7 Install the supplied T-bolt clamp over the end of the muffler, if you’re not sure which end, stop now and slide the muffler into position over the end of the head pipe. Do not tighten clamp at this time. FIGURE 8 Attach the muffler to your stock support bracket using new lock washers and square nuts supplied by SuperTrapp. Tighten both bolts at this time. Tip: Slide a small, flat blade screwdriver between the nut and the bracket to keep it from spinning while tightening. FIGURE 9 At this point you can start tightening the remaining mounting hardware, beginning by aligning the head pipe and tightening the flanges, then move back the pipe tightening the clamp at the transmission and finally the T-bolt on the muffler. CYCLE SOURCE September‘07 43 FIGURE 10 To install the heat shields, the instructions tell you to simply slide the hose clamps into slots on the back of each shield. I personally recommend you wear a pair of gloves during this step because it’s a tight fit and requires a little patience. FIGURE 11 Final tightening sequence for this system is provided by SuperTrapp and must be followed to achieve the proper fit. It is important to note that you must check and retighten all the fasteners after the first couple of rides and again at each scheduled maintenance. FIGURE 12 Finally, we install the SuperTrapp discs and end cap with the supplied hardware. The manufacturer suggests running all 20 discs that are supplied with the closed end cap. This is the best combination for performance concerns. 44 September’07 CYCLE SOURCE FIGURE 13 FIGURE 16 Now we’ll move on to our air cleaner upgrade. We will be installing the Screamin’ Eagle kit #29773-02B $139.95. Remove the stock air cleaner assembly, the cover, the air cleaner element and backing plate by following the factory service manual, saving the two stock breather bolts for installation of new components. Finally we drill a small 3/8 hole in the end cap of the exhaust system to accept the sniffer that will aid us in reading the air/fuel mixture for final tuning. Using the afore mentioned breather bolts, install the new Screamin’ Eagle backing plate. A new backing plate gasket and two orings, that go between the backing plate and the heads at the breather location, are supplied with the kit. Apply a small amount of supplied Loc-tite and torque to specs. The last component of this operation will be the Harley-Davidson Race Tuner kit #32107-01G that retails for $459.95. The kit comes with the race tuner cartridge itself and a CD which contains a user manual, and a set of baseline, pre-programmed EFI calibrations. FIGURE 14 FIGURE 15 Install the supplied breather hoses and three air cleaner studs, then install the air cleaner and finally the air cleaner cover. All supplied hardware come with lock-patches so no Loc-tite is needed for this step. FIGURE 17 FIGURE 18 Hook up the computer interface module to both the data connector of the bike and the technician’s lap top using cables sold separately. From here the appropriate baseline is selected for our combination. tuner, at this point we gained an impressive 10 more horsepower and 6 more foot pounds of torque. The most significant of those improvements were in the torque curve from around 3,500 to 4,500 RPM. This was a nice gain to the mid range and will make the bike fun to ride. Overall, our best numbers came in at 77.57 max. horsepower and 78.22 max torque. Chart 1 – In this chart you can see the horsepower and torque created by the stock Twin Cam 88. The best numbers were 67.88 horsepower with over 73 foot pounds of torque. Chart 2– Our final dyno numbers are displayed in this chart after upgrading the fuel management system, air cleaner and exhaust. Without getting overly carried away with tuning the pipe or the race Riding Impressions: Right off the bat I was very pleased with the look of the SuperTrapp 2 into 1 system; in spite of the fact that I’m not a big fan of crossovers or true duals. Once I fired it up I realized the sound had changed considerably. The tone is real good and very distinct to SuperTrapp. It isn’t annoyingly loud at idle or low RPM, but at the same time, opens up real nice when you get on it. As I headed out to the highway, I noticed that the bike had a lot more pull. Going up through the gears, I felt that it got up to speed faster and the engine wasn’t working as hard. When I came off the exit ramp, after about 60 miles or so of highway time, there was no pop on deceleration. I have about 500 miles on this system now and the powdercoat is holding up real well. We plan on doing some further tuning to the disc system on this pipe, but for now we decided to stick to SuperTrapp’s suggested starting point. The real issue with the race tuner here is that having spent the initial $459.95, we’re now set for any future performance upgrades. The race tuner, as long as it’s kept with the original bike it was purchased for, has infinitesimal tuning possibilities. That means that no matter where I go from here: big bore, stroker, performance heads, different exhaust, I won’t have to spend more money on another management system. If I had originally gone with the Stage I download, pre-programmed for S.E. slip-on mufflers and their S.E. air cleaner kit, not only would it have not been adequate for this combination, but if I change to anything more extensive in the future, it would be obsolete. It might seem like the $145.95 you pay for it would save you a few hundred but in the long run, it doesn’t add up that way. Cycle Re-sources: SuperTrapp Industries, Inc. 4540 W. 160th St., Cleveland, OH. PH: 216-265-8400 www.supertrapp.com Harley-Davidson Motor Co. www.harley-davidson.com CYCLE SOURCE September‘07 45
