Instruction
Manual
T30069
CP Hand Tool
Introduction:
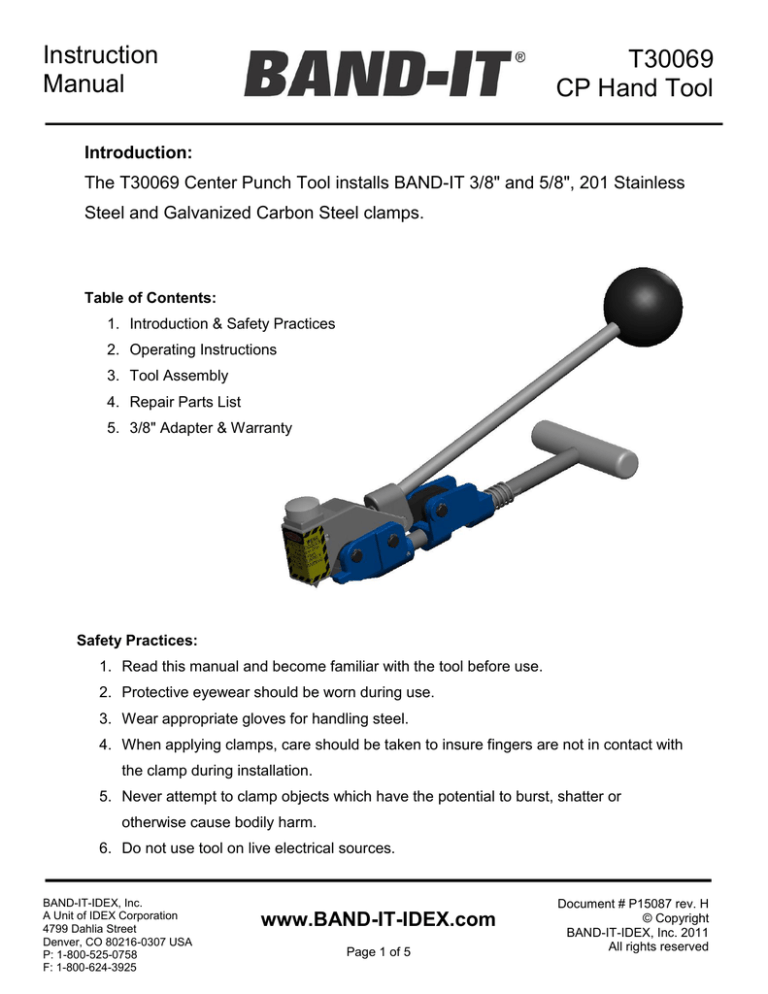
The T30069 Center Punch Tool installs BAND-IT 3/8" and 5/8", 201 Stainless
Steel and Galvanized Carbon Steel clamps.
Table of Contents:
1. Introduction & Safety Practices
2. Operating Instructions
3. Tool Assembly
4. Repair Parts List
5. 3/8" Adapter & Warranty
Safety Practices:
1. Read this manual and become familiar with the tool before use.
2. Protective eyewear should be worn during use.
3. Wear appropriate gloves for handling steel.
4. When applying clamps, care should be taken to insure fingers are not in contact with
the clamp during installation.
5. Never attempt to clamp objects which have the potential to burst, shatter or
otherwise cause bodily harm.
6. Do not use tool on live electrical sources.
BAND-IT-IDEX, Inc.
A Unit of IDEX Corporation
4799 Dahlia Street
Denver, CO 80216-0307 USA
P: 1-800-525-0758
F: 1-800-624-3925
www.BAND-IT-IDEX.com
Page 1 of 5
Document # P15087 rev. H
© Copyright
BAND-IT-IDEX, Inc. 2011
All rights reserved
T30069
CP Hand Tool
Operating
Instructions
1
2
FORWARD POSITION
OR “OPEN”
SLIDE
TIGHTEN CLAMP
LOAD CLAMP
Push tension handle all the way forward. Insert
BAND-IT Center Punch clamp tail and push all the
way into tool.
Tighten the clamp with short downward strokes. Tension
handle should be in down position at completion of
tightening clamp.
Note: Do not lift tension handle too high as it may open up
buckle pusher, resulting in improper clamp application.
Tool Tip: To apply 3/8” wide clamps, use S03289
adapter kit.
See attached instructions for 3/8”
adapter.
If clamp tension needs to be released before locking, move
handle forward and move slide back against spring. This
raises pulling dog and releases clamp tension.
3
4
LOCK CLAMP
Holding tension handle down, lock clamp by hitting
punch at least twice with 2 lb. Mallet.
Note: Only use genuine BAND-IT Center Punch
clamps. Disregarding this may result in substandard
clamps or tool failure. BAND-IT CP clamps are made
out of Type 201 Stainless Steel or Galvanized Carbon
Steel material with a stainless steel buckle for added
strength.
BAND-IT-IDEX, Inc.
A Unit of IDEX Corporation
4799 Dahlia Street
Denver, CO 80216-0307 USA
P: 1-800-525-0758
F: 1-800-624-3925
REMOVE CLAMP TAIL
Hold work-piece and pivot the tool back and forth to break
off clamp tail. Remove tail from tool by operating tension
handle. When tail has moved through holding dog, raise
tension handle and pull tail free.
www.BAND-IT-IDEX.com
Page 2 of 5
Document # P15087 rev. H
© Copyright
BAND-IT-IDEX, Inc. 2011
All rights reserved
T30069
CP Hand Tool
Tool Assembly
20
15
18
11
21
17
19
12
16
15
1
7
10
9
(6X)
Retaining Ring
13
3
2
6
22
8
7
4
5
INCLUDED ACCESSORY
14
INSTRUCTIONS:
DISSASSEMBLY AND ASSEMBLY OF PUNCH
To replace the punch (10), remove the head spring pin (3). Rotate the punch holder (11) until the
retaining ball (12) is visible on the inside of the head (19). Remove the retaining ball and pull the punch
out. Replace the punch and reassemble in reversed manner.
BAND-IT-IDEX, Inc.
A Unit of IDEX Corporation
4799 Dahlia Street
Denver, CO 80216-0307 USA
P: 1-800-525-0758
F: 1-800-624-3925
www.BAND-IT-IDEX.com
Page 3 of 5
Document # P15087 rev. H
© Copyright
BAND-IT-IDEX, Inc. 2011
All rights reserved
T30069
CP Hand Tool
Repair Parts
List
REPAIR PARTS LIST FOR T30069
QTY
DESCRIPTION
1
COMPRESSION SPRING, 5/8” DIA.
1
SPRING PIN, 1/8” DIA.
1
HEAD SPRING PIN
NO.
1
2
3
PART NO.
A04987
C09787
J64287
4
S03289
1
5
6
7
8
9
10
11
12
13
14
15
16
17
18
19
20
21
22
S05777
S05887
S06887
S06987
S08387
S19087
T25287
T25587
T25987
T26487
T26787
T27040
T27187
T27288
T27488
T27988
T28687
T28740
1
1
2
1
6
1
1
1
1
1
2
1
1
1
1
1
1
-
T28088
1
1
-
T28888
1
-
T32190
1
-
T32290
1
BAND-IT-IDEX, Inc.
A Unit of IDEX Corporation
4799 Dahlia Street
Denver, CO 80216-0307 USA
P: 1-800-525-0758
F: 1-800-624-3925
ADAPTER INSERT TO INSTALL 3/8” WIDE CENTER PUNCH CLAMPS
(INCLUDED ACCESSORY)
BUCKLE PUSHER
HOLDING DOG
PIN, PULLING/HOLDING DOG
PIN, HEAD PIVOT
RETAINING RING, 5/16” DIA.
PUNCH
PUNCH HOLDER
RETAINING BALL, 5/32” DIA.
DECAL, DANGER
SPRING, HOLDING DOG
DOWEL PIN, 5/16” DIA.
SLIDE
PULLING DOG
LINK
HEAD
TENSION HANDLE ASSEMBLY
SLIDE BAR AND TENSION HANDLE ASSEMBLY
NOSE
HEAD ASSEMBLY INCLUDES: HEAD SPRING PIN, DANGER DECAL,
HEAD PUNCH, RETAINING BALL, AND PUNCH HOLDER
NOSE AND SLIDE ASSEMBLY INCLUDES: NOSE, SLIDE,
COMPRESSION SPRING, HEAD SPRING PIN, AND SLIDE BAR AND
TENSION HANDLE
PUNCH KIT INCLUDES: PUNCH, PUNCH HOLDER AND RETAINING
BALL
GRIPPER KIT INCLUDES: PULLING DOG, COMPRESSION SPRING 2X,
RETAINING RING X 3 AND HOLDING DOG
www.BAND-IT-IDEX.com
Page 4 of 5
Document # P15087 rev. H
© Copyright
BAND-IT-IDEX, Inc. 2011
All rights reserved
3/8" Adapter &
Warranty
T30069
CP Hand Tool
1. To convert T30069 center punch tool, rotate head back to expose buckle pusher and nose of tool.
2. Press down on the lobe at the rear of the buckle pusher to raise the front portion for insertion of
adapter between the buckle pusher and the nose.
3. Seat the adapter against the buckle pusher with the post of the adapter hooked at the rear of the
triangle shapes of the buckle pusher. Release the pressure on the buckle pusher lobe to secure the
adapter into place. Rotate the head forward. The tool is now ready to use.
4. Repeat instructions 1 and 2 to remove adapter.
ADAPTER
PRESS DOWN & BACK
Warranty:
For Warranty information, visit the following URL
www.BAND-IT-IDEX.com/Warranty.html
BAND-IT-IDEX, Inc.
A Unit of IDEX Corporation
4799 Dahlia Street
Denver, CO 80216-0307 USA
P: 1-800-525-0758
F: 1-800-624-3925
www.BAND-IT-IDEX.com
Page 5 of 5
Document # P15087 rev. H
© Copyright
BAND-IT-IDEX, Inc. 2011
All rights reserved


