Comparison Analysis
_______________________________________________________________
Subject Area: All subjects
Grade Level: 6 – 12 (ages 11 - 18)
Time: At least two 45-minute class periods; time outside of class as necessary
Lesson Objective:
Students will use Inspiration® to help them analyze the similarities and differences between any two
things.
Common Core State Standards1:
College and Career Readiness Anchor Standards for Reading:
Standard 7. Integrate and evaluate content presented in diverse media and formats,
including visually and quantitatively, as well as in words.
College and Career Readiness Anchor Standards for Writing:
Standard 1. Write arguments to support claims in an analysis of substantive topics or texts
using valid reasoning and relevant and sufficient evidence.
Standard 6. Use technology, including the Internet, to produce and publish writing and to
interact and collaborate with others.
Overview:
Making comparisons is a powerful exercise to get students of all ages thinking critically. In order to
effectively compare two things, students must first research and understand each of them. Then they
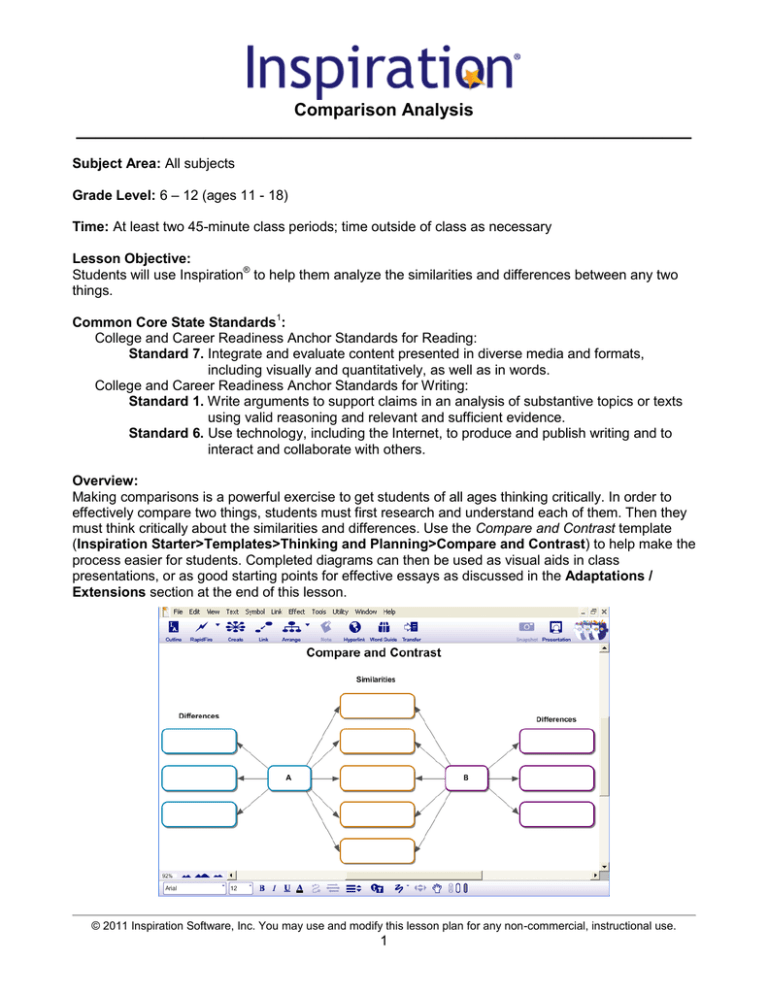
must think critically about the similarities and differences. Use the Compare and Contrast template
(Inspiration Starter>Templates>Thinking and Planning>Compare and Contrast) to help make the
process easier for students. Completed diagrams can then be used as visual aids in class
presentations, or as good starting points for effective essays as discussed in the Adaptations /
Extensions section at the end of this lesson.
© 2011 Inspiration Software, Inc. You may use and modify this lesson plan for any non-commercial, instructional use.
1
Preparation:
• This lesson requires the Inspiration® software application published by Inspiration Software,
Inc. 30-day trials can be downloaded at <http://www.inspiration.com/Inspiration>.
• Access to library resources and/or the Internet would also be helpful for student research.
Lesson:
1. Open the Comparison template and demonstrate for students how it can be used to compare
any two things. Engage students by asking them to suggest two things or people that they
have learned about in your class that they could compare. Enter one of them as “A” and the
other as “B.” As a class, brainstorm similarities and differences and add those ideas to the
appropriate parts of the diagram.
2. Explain that they will be adding visual symbols, as well as text, to their diagrams. Adding
symbols will help them and their readers to better understand and remember the content.
Optional: Additional graphics can be inserted into diagrams via the Edit menu.
3. Optional, but recommended: Share a comparison example with students, and talk the students
through it, as well, so they have a better idea of what a finished diagram might look like.
Possible examples include:
•
Revolution Comparison (Inspiration Starter>Learn to Use>Examples>Social
Studies>Revolution Comparison):
•
Theme Comparison (Inspiration Starter>Learn to Use>Examples>Language
Arts>Theme Comparison):
© 2011 Inspiration Software, Inc. You may use and modify this lesson plan for any non-commercial, instructional use.
2
•
Comparing Tech Inventions (Inspiration Starter>Learn to Use>Examples>Thinking and
Planning>Comparing Tech Inventions):
4. Be sure to point out how additional information can be added in Notes. Demonstrate how
notes that have been added to symbols can be shown by clicking the Note Quick Controls
in the upper-right corner of the symbol with the note. All notes in a diagram can be shown
quickly at the same time in Outline View.
5. Students should be organized into groups of 2-4 to complete the project. Groups will then
choose two topics to compare, such as two revolutions in history. You may want to provide a
list of acceptable topics, or you may have groups choose topics and then submit their
proposals for review.
6. Suggest that one or two group members focus on one topic, and one or two focus on the
other. Then groups can share what they learn with each other to determine similarities and
differences. Optional: Tell students that completed diagrams will be used as visual aids during
class presentations.
7. Encourage students to add Hyperlinks to their sources of information, including any
multimedia files available on the Internet.
8. Tell students they can go to Outline View to finish organizing their information. Demonstrate
how items can be reorganized within the outline.
© 2011 Inspiration Software, Inc. You may use and modify this lesson plan for any non-commercial, instructional use.
3
9. Have students “publish” their work by making presentations about their comparisons to the
class using the integrated Presentation Manager. See the Creating Oral Presentations I and
II lesson plans for more information about this process. A data projector or interactive
whiteboard should be used, if one is available, to display graphics and visual talking points.
Adaptations / Extensions:
• Complete diagrams can also be used as visual aids in Diagram View. Subtopics can be
hidden or viewed using the Subtopic Quick Controls
to allow focused attention on the
topics being discussed.
•
Students can transfer their project to a word processor using the Transfer tool to complete a
written essay about their comparison.
•
Inspiration® may be used to create more in-depth diagrams of each topic. Students could
begin the process by using the RapidFire® tool to quickly record what they know about the
topic.
© Copyright 2011. National Governors Association Center for Best Practices and Council of Chief State
School Officers. All rights reserved. Learn more online at <http://www.corestandards.org>.
© 2011 Inspiration Software, Inc. You may use and modify this lesson plan for any non-commercial, instructional use.
4

