Calibration technology
Precision Pressure Sensor
Models CPT6100, CPT6180
WIKA data sheet CT 25.10
Applications
■■ Testing technology
■■ Calibration technology
■■ Laboratories and maintenance shops
■■ Avionics
Special Features
■■ Accuracy up to 0.01 % IS-50
■■ Measuring range from -15 ... 6,000 psi / -1 ... 400 bar
■■ RS-232 or RS-485 interface
■■ Compact design
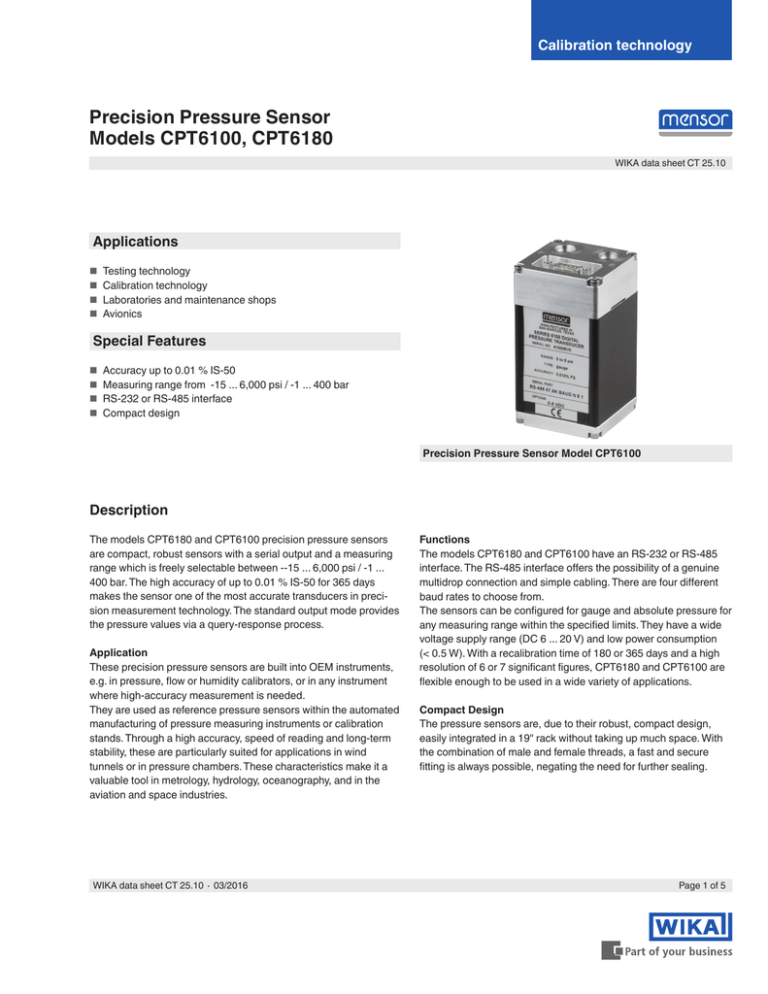
Precision Pressure Sensor Model CPT6100
Description
The models CPT6180 and CPT6100 precision pressure sensors
are compact, robust sensors with a serial output and a measuring
range which is freely selectable between --15 ... 6,000 psi / -1 ...
400 bar. The high accuracy of up to 0.01 % IS-50 for 365 days
makes the sensor one of the most accurate transducers in precision measurement technology. The standard output mode provides
the pressure values via a query-response process.
Application
These precision pressure sensors are built into OEM instruments,
e.g. in pressure, flow or humidity calibrators, or in any instrument
where high-accuracy measurement is needed.
They are used as reference pressure sensors within the automated
manufacturing of pressure measuring instruments or calibration
stands. Through a high accuracy, speed of reading and long-term
stability, these are particularly suited for applications in wind
tunnels or in pressure chambers. These characteristics make it a
valuable tool in metrology, hydrology, oceanography, and in the
aviation and space industries.
WIKA data sheet CT 25.10 ∙ 03/2016
Functions
The models CPT6180 and CPT6100 have an RS-232 or RS-485
interface. The RS-485 interface offers the possibility of a genuine
multidrop connection and simple cabling. There are four different
baud rates to choose from.
The sensors can be configured for gauge and absolute pressure for
any measuring range within the specified limits. They have a wide
voltage supply range (DC 6 ... 20 V) and low power consumption
(< 0.5 W). With a recalibration time of 180 or 365 days and a high
resolution of 6 or 7 significant figures, CPT6180 and CPT6100 are
flexible enough to be used in a wide variety of applications.
Compact Design
The pressure sensors are, due to their robust, compact design,
easily integrated in a 19" rack without taking up much space. With
the combination of male and female threads, a fast and secure
fitting is always possible, negating the need for further sealing.
Page 1 of 5
Specifications
Precision Pressure Sensor Technology
Model
CPT6100
CPT6180
Accuracy 1)
0.03 % FS
0.01 % FS
0.01 % IS-50 2)
Absolute pressure
0 ... 0.36 up to 0 ... 1 psi
0 ... 25 up to 0 ... 70 mbar
-0.36 ... 0.36 up to -0.5 ... 0.5 psi
-25 ... 25 up to -35 ... 35 mbar
-
0 ... ≥ 1 up to 0 ... 6,000 psi 0 ... ≥ 70
mbar up to 0 ... 400 bar
-0.5 ... 0.5 up to -14.5 ... 6,000 psi
-35 .... 35 mbar up to -1 ... 400 bar
0 ... 7.5 psi up to 0 ... 6,015 psi abs.
0 ... 500 mbar up to 0 ... 401 bar abs.
0 ... 15 up to 0 ... 6,000 psi
0 ... 1 up to 0 ... 400 bar
-15 ... 145 psi up to 0 ... 6,000 psi
-1 ... 10 up to 0 ... 400 bar
0 ... 15 up to 0 ... 6,015 psi abs.
0 ... 1 up to 0 ... 401 bar abs.
Calibration interval
180 days
180 days
365 days
Measuring ranges
Gauge pressure
Bi-directional
CPT6100 as barometric reference
Measuring range
8 ... 17 psi abs. / 552 ... 1,172 mbar abs.
Accuracy 1)
0.01 % of reading
Calibration interval
365 days
Pressure units
psi, bar, mbar, Pa, kPa, hPa, MPa, tsi, atm, torr, Dynes/cm², g/cm², kg/cm², mSW, oz/in², psf, tsf, mmH2O (4 °C), cmH2O (4
°C), mH2O (4 °C), inH2O (4 °C), inH2O (20 °C), inH2O (60 °F), ftH2O (4 °C), ftH2O (20 °C),
ftH2O (60 °F), µmHg (0 °C), mmHg (0 °C), cmHg (0 °C), inHg (0 °C), inHg (60 °F), inSW (0 °C), ftSW (0 °C), mtorr (0 °C)
1)
2)
The accuracy is defined by the total measurement uncertainty, which is expressed with the coverage factor (k = 2) and includes the following factors: the intrinsic performance of the instrument, the measurement uncertainty of the reference instrument, long-term stability, influence of ambient conditions, drift and temperature effects over the compensated range during a periodic zero point adjustment.
0.01 % IS-50 accuracy: Between 0 ... 50 % of the measuring span, the accuracy is 0.01 % of half the measuring span and between 50 ... 100 % of the measuring span, the accuracy is 0.01 % of reading.
Precision Pressure Sensor
Case
Mounting position
<15 psi / 1 bar negligible
Can be adjusted through zero point adjustment (linear shift of the characteristic curve)
Dimensions
see technical drawings
Weight
1.11 lb / 505 g
Display
Resolution
Filter
Warm-up time
CPT6100: 6 significant figures
CPT6180: 7 significant figures
Adjustable exponential filter from 0 ... 99 %
The filter is only active within a defined range of 0.010 % FS.
Approx. 15 min up to the specified accuracy
Connections
Pressure connections
Connection 7/16-20 SAE for pressure and reference port
The reference port is sealed for absolute pressure sensors
Overpressure safety
10 % above the nominal pressure of the sensor
Material, wetted parts
Aluminum, brass, 316SS, Buna-N, Viton®, silicone grease, silicone rubber, nylon, ceramic, glass, silicon
Voltage supply
Power supply
DC 6 ... 20 V; 45 mA for DC 12 V
Permissible ambient conditions
Viton® fluorelastomer is a registered trademark of DuPont Performance Elastomers.
Page 2 of 5
WIKA data sheet CT 25.10 ∙ 03/2016
Precision Pressure Sensor
Storage temperature
-20 ... +70 °C / -4 ... 158 °F
Humidity
0 ... 95 % r. h. (relative humidity, non-condensing)
Compensated temperature range
15 ... 45 °C / 59 ... 113 °F
Communication
Interface
RS-232 or RS-485
Baud rates
9600, 19200, 38400 or 57600 baud
Signal output
Query and response
Measuring rate
Standard: 10 values/s
Option: 50 values/s
Standard: 100 ms for a FS pressure pulse
Option: 20 ms for a FS pressure pulse
Response time
CE Conformity and Certificates
Certificate
Calibration 3)
3)
Calibrated in a horizontal position.
Standard: ISO 17025, A2LA Certification
Option: DKD/DAkkS calibration certificate
Approvals and certificates, see website
WIKA data sheet CT 25.10 ∙ 03/2016
Page 3 of 5
Dimensions in [mm] in.
Top view
55.37
2.18
55.37
2.18
0
0
Side view
(4X) 6-32 UNC-2B
(4X) M3 x 0.5
46.74
1.84
40.19
1.58
15.19
.60
99.09
3.90
95.12
3.75
11.68
.46
0
8.64
.34
0
Bottom view
(4X) 6-32 UNC-2B
(4X) M3 x 0.5
46.74
1.84
40.19
1.58
15.19
.60
Page 4 of 5
40.19
1.58
46.74
1.84
8.64
.34
15.19
.60
0
8.64
.34
0
WIKA data sheet CT 25.10 ∙ 03/2016
Scope of Delivery
Accessories
■■ Precision pressure sensor model CPT6180 or model
■■ Voltage supply over RS-232 or RS-485 interface cable
CPT6100
■■ Operating instructions
■■ ISO 17025, A2LA Certification
■■ External overpressure protection
■■ Pressure adapters
Options
■■ DKD/DAkkS calibration certificate
Ordering Information
CPT6100 / Instrument version / Pressure unit / Type of pressure / Start of measuring range / End of measuring range / Accuracy /
Type of certificate / Mounting position / Interface / Baud rate / Output mode / Analogue output / Mounting thread / Pressure adapter /
Additional order information
03/2016 UM based on 12/2014 EN
CPT6180 / Instrument version / Pressure unit / Type of pressure / Start of measuring range / End of measuring range / Accuracy /
Type of certificate / Mounting position / Interface / Baud rate / Output mode / Mounting thread / Pressure adapter / Additional order
information
© 2011 WIKA Alexander Wiegand SE & Co. KG, all rights reserved.
The specifications given in this document represent the state of engineering at the time of publishing.
We reserve the right to make modifications to the specifications and materials.
Page 5 of 5
WIKA data sheet CT 25.10 ∙ 03/2016
Mensor
201 Barnes Drive
San Marcos, Texas 78666
Tel.
(512) 396-4200
Fax
(512) 396-1820
sales@mensor.com
www.mensor.com
