Employee/Affiliate Confirm
advertisement

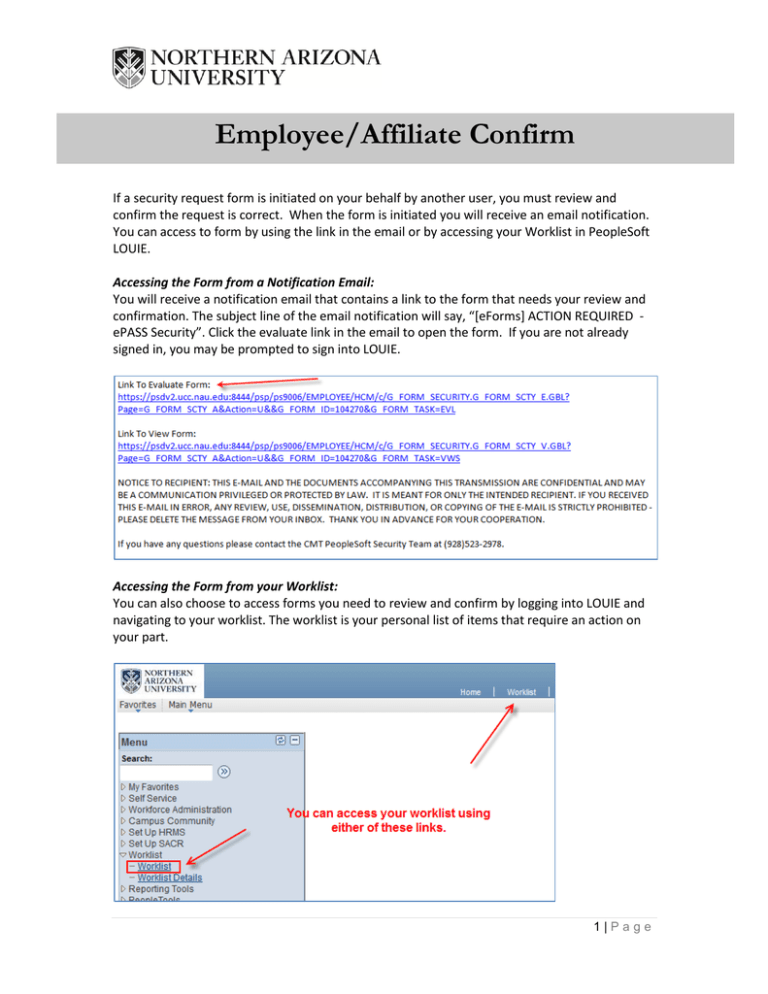
Employee/Affiliate Confirm If a security request form is initiated on your behalf by another user, you must review and confirm the request is correct. When the form is initiated you will receive an email notification. You can access to form by using the link in the email or by accessing your Worklist in PeopleSoft LOUIE. Accessing the Form from a Notification Email: You will receive a notification email that contains a link to the form that needs your review and confirmation. The subject line of the email notification will say, “[eForms] ACTION REQUIRED ePASS Security”. Click the evaluate link in the email to open the form. If you are not already signed in, you may be prompted to sign into LOUIE. Accessing the Form from your Worklist: You can also choose to access forms you need to review and confirm by logging into LOUIE and navigating to your worklist. The worklist is your personal list of items that require an action on your part. 1|Page Once your worklist opens you can select the link to the form you need to approve. Reviewing the Form: The top portion of the form will display your basic information such as name, email address and job or affiliation information. If this is not you, don’t proceed! Please contact the Information Technology Service's Solution Center by phone at 523-1511 or (statewide) 888/520-7215. You may also email the Solution Center at ask-its@nau.edu. Business Need: This section is filled in by the initiator of the form to explain the need for the security being requested. Please describe specific job responsibilities that require this type of access. A business need of, “To fulfill job duties” or "Same security as previous employee" is not adequate. If you do not feel this explanation is not sufficient for the roles being requested, please recycle the form, on the next page, asking for a more complete business need. 2|Page Time Entry/Leave Usage Entry: If the Time Reporting or Leave Reporting boxes are checked, access is being requested to enter and approve time or enter leave usage information for the department indicated. Security Roles: Request Security: The role(s) being requested will be highlighted in yellow. Currently Assigned Administrative Security: This will display the security currently assigned. This cannot be changed on a request form. Next: Click to move forward to the next page. Cancel: Click to return to the ePASS Home Page. 3|Page File Attachments: Upload: To upload a document, click the upload button. A blank field will appear with a ‘browse’ button. Click on the browse button to access your files and select the correct document. The document name will then appear in the field. Click ‘upload’ to attach the document. Use the Description drop down box to indicate the type of document you are attaching. Note: Only the following file types are permitted: DOC, DOCX, GIF, JPEG, JPG, PDF, TIF, TIFF, XLS, XLSX. The file name cannot be any longer than 60 characters. If necessary, use the 'Add File Attachment' to upload additional files. 4|Page Submit the Form: Everyone requesting access to an NAU system must read and abide by the NAU Data Access Policy. To read the policy, click on the NAU Data Access Policy link. Form Messages: All form messages must be acknowledged (check the box) before the form can be submitted. Please remember that clicking the ‘Approve’ button in a transaction is the equivalent of your signature and indicates that you attest, to the best of your knowledge, that the information is correct and you approve the role(s) being requested are correct. Comments: Make any comments that may be helpful for any additional approvers. If the form is being recycled to be updated, please include a comment with instructions to the initiator of the form. If the form is being rejected, please include a rejection reason. Be aware that comments become part of the permanent record and cannot be removed. Comment History: This will display any previous comments. Approve: Click if the security request is complete, the access being requested is appropriate for your job duties and the form is ready for further approval. Reject: Rejecting a form stops the process completely and requires that a new form be started. This may occur if a transaction is no longer necessary or something changed to make the transaction irrelevant. 5|Page Recycle: If you find something in the form that needs to be changed, you should ‘recycle’ the form. This returns the form to the initiator to make the change. Inserting comments lets the initiator clearly know what they must change. Previous: Click to return to the previous page. Cancel: This will end your review of the form without changing it, but not changing the work your initiator did, and return to the ePASS Home Page. View This Form: Use this link to view the details of the form in ‘read only’ mode and to see the approval status of the form For more information on viewing a security form please see the ‘Employee /Affliate View’ training document. After confirming the request, the following steps will take place: 1. Data steward(s) and/or other reviewers will approve the request. 2. After all approvals are complete the system will automatically assign the security. 3. You and your supervisor will get an email stating that your security has been approved and assigned. You can then use the new security in PeopleSoft. 4. If the request is denied or recycled the initiator will receive an email with a link to update or view the request. 6|Page

