Visual Acuity
advertisement
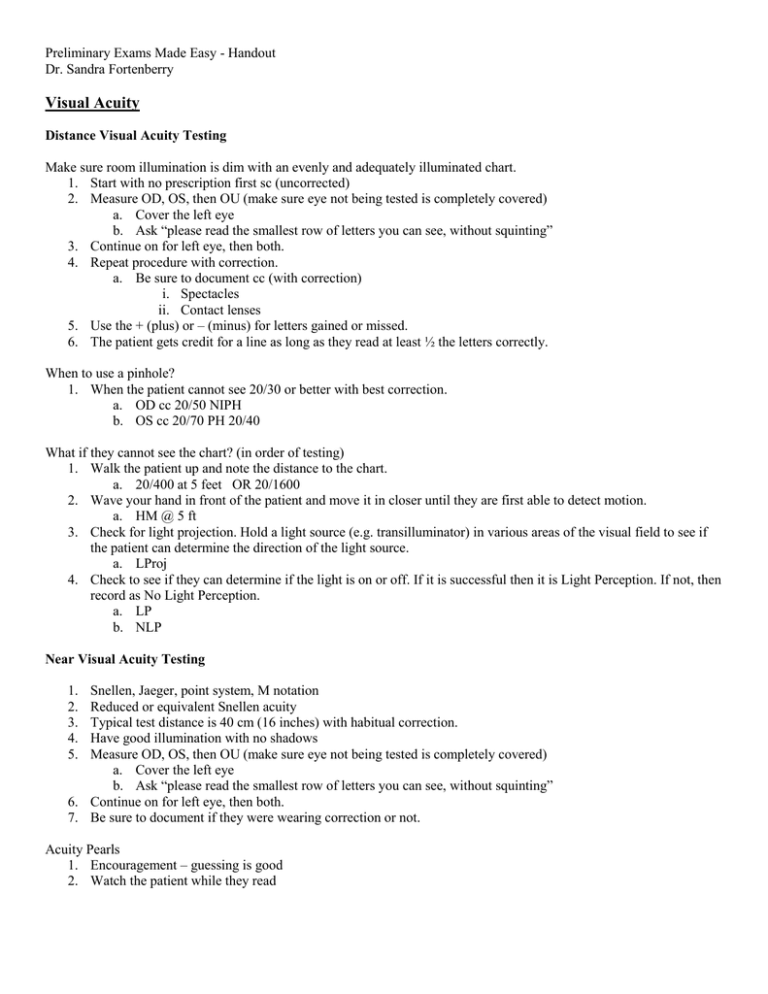
Preliminary Exams Made Easy - Handout Dr. Sandra Fortenberry Visual Acuity Distance Visual Acuity Testing Make sure room illumination is dim with an evenly and adequately illuminated chart. 1. Start with no prescription first sc (uncorrected) 2. Measure OD, OS, then OU (make sure eye not being tested is completely covered) a. Cover the left eye b. Ask “please read the smallest row of letters you can see, without squinting” 3. Continue on for left eye, then both. 4. Repeat procedure with correction. a. Be sure to document cc (with correction) i. Spectacles ii. Contact lenses 5. Use the + (plus) or – (minus) for letters gained or missed. 6. The patient gets credit for a line as long as they read at least ½ the letters correctly. When to use a pinhole? 1. When the patient cannot see 20/30 or better with best correction. a. OD cc 20/50 NIPH b. OS cc 20/70 PH 20/40 What if they cannot see the chart? (in order of testing) 1. Walk the patient up and note the distance to the chart. a. 20/400 at 5 feet OR 20/1600 2. Wave your hand in front of the patient and move it in closer until they are first able to detect motion. a. HM @ 5 ft 3. Check for light projection. Hold a light source (e.g. transilluminator) in various areas of the visual field to see if the patient can determine the direction of the light source. a. LProj 4. Check to see if they can determine if the light is on or off. If it is successful then it is Light Perception. If not, then record as No Light Perception. a. LP b. NLP Near Visual Acuity Testing 1. 2. 3. 4. 5. Snellen, Jaeger, point system, M notation Reduced or equivalent Snellen acuity Typical test distance is 40 cm (16 inches) with habitual correction. Have good illumination with no shadows Measure OD, OS, then OU (make sure eye not being tested is completely covered) a. Cover the left eye b. Ask “please read the smallest row of letters you can see, without squinting” 6. Continue on for left eye, then both. 7. Be sure to document if they were wearing correction or not. Acuity Pearls 1. Encouragement – guessing is good 2. Watch the patient while they read COVER TEST 1) An OBJECTIVE procedure used to determine the presence and type of posture of the eyes. 2) FOUR MAIN PARTS OF THE COVER TEST a)Tests for monocular fixation ability b) Unilateral Cover Test – distinguishes a tropia from a phoria c) Alternating Cover Test – for direction d) Alternating Cover Test – for amount of deviation 3) SET UP a) The target is an isolated letter that is two lines above the threshold acuity of the worse eye. Thus VA of OD 20/20 OS 20/30 then a 20/50 letter should be used. This ensures that the letter can be seen reasonably clearly with both eyes. b) Testing is done with the habitual correction. c) Good illumination on patient’s eye d) Have prisms ready to go! (Once you start alternating, you cannot drop the occluder) COVER TEST PROCEDURE Test for monocular fixation ability. 1. Have the patient fixate the distance target. Choose a reference point on the patient’s right eye to observe. Cover the left eye. Continue to hold the occluder in front of the left eye for approximately four seconds to see if the right eye can maintain steady ocular fixation. Repeat the procedure observing the left eye while the right eye is covered. 2. If steady monocular fixation can be maintained with each eye, the rest of the cover test can be performed. If steady monocular fixation cannot be maintained with each eye, it may be difficult to perform the complete cover test. This can be from a loss of central vision, latent nystagmus or poor fixation control. Unilateral Cover Test 1. Instruct the patient to look at the target and keep it clear. 2. Cover the right eye for 2 seconds and observe the left eye for movement. If no movement, this indicates that the left eye was accurately fixating the target prior to occlusion. Repeat the process one more time (cover OD, observe OS). Remove the occluder and cover the left eye while observing the right eye. If there is no movement, this indicates that the right was accurately fixating the target prior to occlusion. Repeat the process one more time (cover OS, observe OD). Now repeat the test again (cover OD twice, cover OS twice). Any movement of the unoccluded eye indicates the presence of heterotropia (the eye wasn’t fixating accurately and it was turned) Example: Left Esotropia The direction of the deviation is in the direction opposite to that of the movement observed in the unoccluded eye. Cover right eye, left eye seen to move OUT to take up fixation Movement of Unoccluded Eye Deviation OUT = Esotropia IN = Exotropia UP = Hypotropia DOWN = Hypertropia Cover the left eye, no movement of the right eye (fixating correctly) Uncover the left eye, left returns to the position of rest In heterotropia, only one eye is aligned with the fixation object. Therefore, covering the fixating eye will require the deviating eye to make a rapid eye movement to pick up fixation. Covering the deviating eye will require no movement of the fixating eye, since this eye is already looking at the target. Consequently, each eye must be covered in turn, while the fellow eye is observed. In heterophoria, each eye is aligned with the fixation object. Therefore, covering either eye will not elicit a fixation movement of the fellow eye. Thus, if no movement is observed on the unilateral cover test, the patient has either a heterophoria or orthophoria, which can be determined by the alternating cover test. Alternating Cover Test 1. Same target conditions as used for heterotropia testing. 2. Cover the right eye for 3 seconds. This will allow the eyes to deviate to their dissociated position 3. The clinician now prepares to focus their attention on the eye which is behind the occluder. The occluder is quickly switched to the fellow eye, as the clinician looks to see if the occluded eye moves to pick up fixation as the occluder is switched. Alternate the occluder several times. Hold the occluder in front of an eye for approximately 2 seconds each time then quickly switch to the other eye. (i.e., switch, hold, -switch, hold,-switch, hold, etc.) Again, the deviation is opposite that of the movement seen. a. If no movement is seen, the patient is orthophoric b. Lateral deviations: i. If the eye moves in, an EXO deviation is present. ii. If the eye moves out, an ESO deviation is present. c. Vertical deviations: i. If one eye moves up and the other moves down, a VERTICAL deviation is present. d. Lateral and vertical deviations may both be present 4. Phorias and tropias can look exactly the same with the alternating cover test. They should be differentiated with the unilateral cover test before the alternating test is performed. Example : Esophoria Both eyes fixating on target under associated conditions OS turns IN under dissociated conditions (under cover) On removal of the cover, left eye seen to turn OUT to regain fusion Deviation Correcting Prism Orientation Eso = Base OUT Exo = Base IN Right Hyper = Base Down OD (or base UP OS) Left Hyper = Base UP OD (or base DOWN OS) RECORDING Record your final results, including the type, frequency,laterality,magnitude,direction, and comitancy of the deviation. Also indicate test distance and if with / without correction Examples: Dist CTcc 30 prism diopter Right Constant XT; Near CT sc 5 prism diopter esophoria Dist CT cc 10 prism XP; Near CT cc 5 prism AET with OD fixating 50% of the time. WHEN SHOULD A COVER TEST BE PERFORMED? Since many of the procedures carried out during the examination can disrupt binocular vision, the cover test should be performed early into the routine examination. (Hence, it is one the “Entrance Tests”). The cover test should be performed at distance and near with the patient’s current refractive correction. If any change in refractive correction occurs, an assessment of binocular vision should occur through the new prescription. EOM Procedure 1. Have patient remove spectacles, use transilluminator for target at 40cm. 2. Versions a. Instruct patient, “Follow this lighted target without moving your head. Let me know if you ever see double or feel any pain.” b. Move the light smoothly in the physiological H pattern and observe the patient’s eyes or corneal reflexes. The patient’s eyes are taken to endpoint or “bury the sclera.” It is normal to observe a low amplitude nystagmus (fast, uncontrollable eye movements) at the extreme limits of gaze. If a restriction is seen or the patient reports diplopia, perform ductions. 3. For testing the horizontal recti (medial and lateral muscles), the patient will need to look all the way to the right and then all the way to the left. 4. For testing the superior and inferior recti and the superior and inferior oblique muscles: Remember that the superior and inferior recti insert with an angle of approx. 20degrees with the visual axis, whereas the superior and inferior oblique muscles insert with an angle of approx. 50degrees with the visual axis. Move your transilluminator about 20 degrees temporal to the patient’s primary gaze (on the right side) and ask the patient to follow your transilluminator. At this moment, move the transilluminator up (this will generate upward eye movement in both eyes). At this point, you have isolated the right superior rectus and left inferior oblique muscles. While keeping the 20degree position, now move the transilluminator downwards (generating downward eye movements in both eyes). At this point, you have isolated the right inferior rectus and left superior oblique muscles. Repeat these for the left side now. 5. Recording examples: a. If no restrictions are found, record as SFROM OU (smooth, full range of motion); (-) pain (-) diplopia. Do not record as OD, OS unless you tested ductions. b. If a restriction or overaction is found, record the eye and the field of gaze that it occurred in. Example: Versions: OS restriction in up and right gaze, Ductions: OS underaction of IO Confrontation Visual Fields 1. Even illumination (bright setting). Patient and examiner should sit directly opposite each other at the same height and about 67 cms apart. Have patient remove spectacles. 2. Ask the patient to occlude OS. You close / cover your OD, so that your open eye and your patient’s open eye are aligned and level. 3. Ask the patient to look directly into the center of your open eye. Inform your patient that this is a test of side vision and that it is important to keep looking at your open eye. They should not move their eyes or head during the test. Instruct patient, “While still looking at my open eye, tell me how many fingers I am holding up.” Present your finger showing 1, 2, or 5 fingers. 4. Your fingers should be at the farthest extent of your own field of vision (assuming you have a normal visual field). This will have the effect of placing your fingers close to the limit of the patient’s visual field. Make sure your hands are halfway between you and your patient. Test all four quadrants. If your patient gives an incorrect response, make sure that you are able to see the correct number. If not, bring your hand in closer and recheck. 5. Test the other eye Recording – If the test is normal, record FTFC OD, OS (FTFC = Full to finger count). DO NOT WRITE “OU” as this is a monocular test. If the test is abnormal, draw the abnormality. What is the field loss shown below? OS OD Amplitude of Accommodation 1. Bright illumination with overhead light directly above the target. Use a near point target that stimulates accommodation (one line above best V.A.). Start the test at a distance of 40cm. Patient wears habitual DISTANCE Rx. First test monocular (OD, OS), then binocular (OU). 2. Instructions: Ask the patient to cover the left eye. Check to make sure that the patient can see the letters on your push-up stick clearly. Then say, “I want you to watch this letter/row of letters and work hard to keep them clear. I’m going to move them in closer to you, and I need you to tell me when they first get blurred and stay blurred. But, try your best to keep them clear.” Then check OS and then OU. 3. Recording: Amplitudes are recorded in Diopters from the spectacle plane. Measure the distance of the first sustained blur with your ruler (convert to diopters or use the diopter conversion on your ruler). Many clinicians use the inverse relationship between distance and diopters to quickly measure the amplitude of accommodation. Starting at 40 cm, (2.50 D), move in slowly to half the distance (20 cm/5.0 D). Halving the distance again to 10 cm causes another doubling of the amplitude to 10.0 D. In this way, amplitude can be measured by doubling the amplitude every time you halve the distance to the patient. This only works well if you measure the starting distance accurately at 40 cm. Pupil Testing Pupil Size 1. Have patient fixate a distance target 2. Measure in dim illumination using a pupil gauge. It is best to hold your gauge along the temporal aspect of the eye to completely eliminate accommodation. If anisocoria is present, re-measure pupil sizes in bright illumination. 3. Record in mm size OD/OS. Ex. 4/4 mm or 5/5mm or 5/6mm 2/4mm 4. Anisocoria: a. Greater in dim light – Sympathetic defect or dilator muscle problem. b. Greater in bright light – Parasympathetic defect or sphincter muscle problem. c. Equal in dim and bright light – Physiologic Anisocoria. 5. Corectopia – A pupil that is not round in shape Direct and Consensual Response 1. Maintain distance fixation 2. Shine your transilluminator in the OD observing the amount and speed of the pupillary constriction of the OD (Direct response). Shine the light for at least 1 second. 3. Shine your transilluminator again in the OD, but now observe the constriction of the left eye (Consensual response). Shine the light for at least 1 second. 4. Repeat above on OS 5. Reactivity can be graded on a scale of 0 - 4+ (0=no response, 4+ large, rapid response). Numerical values are usually only assigned when the eyes have unequal responses. Example: OD 2+ response, OD 4+ response 6. Expected findings: Direct response should equal consensual response. APD Testing (Swinging Flashlight) 1. Dim room lights as much as possible 2. Shine the brightest light possible on the pupil (transilluminator or BIO light) 3. Patient maintains distance fixation 4. Shine the transilluminator into the OD. Stimulate right eye for three seconds, then move the transilluminator light quickly to the left eye. Hold light in front of OS for three seconds, and then move the light quickly back to the right eye. Perform three cycles. 5. Observe the response of the pupil of the eye receiving light during the swinging flashlight test. 6. Expected finding: The rate and amount of constriction should be the same for both pupils. Therefore, both pupils will stay equally constricted throughout the test. a. Graded on a scale of 1 - 4+ (grade 4+ being severe). b. The eye must be specified. Accommodative/Near Response 1. Turn up room illumination so the patient will have adequate light to view the near target. One of the patient’s own fingers will be the target used for testing the near response. 2. Tell the patient to first look at a distant target (e.g., 20/400 “E”). Then, tell the patient to look at their finger (which will be about 20-40cm away from their eyes). At this point, observe the pupillary reactions. The patient’s pupils will constrict as soon as they look at their finger. 3. Repeat this cycle at least two times (Distant target, then near target; Distant target, then, near target) 4. Expected finding: Pupillary constriction should occur during near viewing and dilation should be observed when changing to a distant target. a. There is NO condition in which the light reflex is present, but the near is absent. b. Light-near dissociation occurs when there is a near response but not a light response. This can occur from several etiologies, but the most well-known is the Argyll-Robertson pupil, sequelae of syphilis. Recording the Pupils 1. All of the above pupil tests are usually grouped together for recording purposes. 2. Normal results example: 4/4m, PERRLA (-) APD 3. PERRLA stands for pupils equal, round, responsive to light and accommodation 4. Anisocoria example: P (7/6, 5/4mm) RRLA (-) APD ; OR: 7/6 5/4 mm PERRLA (-)APD 5. APD example: 5/5mm, PERRLA (+) 3+ RAPD OD Color Vision Testing HRR 1) The HRR plates are tested at a 75cm test distance using the brightest setting of the overhead lamp. The patient must wear their habitual near Rx. HRR consists of 24 plates containing symbols and employs neutral colors which increase in saturation in successive plates of the test. 2) Plate numbers 1-4 are demonstration plates. Plates 1-4 are tested binocularly and are not scored. a. If patient cannot see the demonstration plates, then the patient is either malingering or totally color deficient. 3) The next six plates are for color vision screening, and are tested MONOCULARLY. The screening plates are followed by fourteen plates which are used for grading the severity of protan, deutan and tritan defects. Scoring & Recording: On screening plates 5-10, record the patient’s response (using x, o) in the box provided on the scoring sheet. If the patient’s reply to all three questions is correct, then place a check mark beside the box to indicate a correct response. However, if the patient responds incorrectly to any one of the three questions, no check mark is made. If all six boxes are checked, the patient has normal color vision and you are done. If plates 5 or 6 are not checked, the patient has defective blue-yellow color vision and you must proceed to plates 21-24. If any of plates 7-10 are not checked, patient has defective red-green color vision deficit and you must proceed to plates 11-20. Also, if both screening groups (plates 5-6 and 7-10) are not checked, you must test plates 11-24. The HRR test is valuable for its grading function and for the detection of tritan defects. Only moderate or severe tritan defects are identified. However, it is not possible to distinguish dichromats and severe anomalous trichromats from the test results. The Ishihara and HRR plates are often used together in a clinical examination. The Ishihara plates are used for red-green screening and the HRR plates for estimating the severity of deficiency and for tritan screening. In this lab, we will demonstrate the Ishihara plates. However, you will only use the HRR plates for all lab work, proficiencies and clinic work. Recording: Record the test book used and the number of plates correct over the total number possible for each eye. The demonstration plates are not included in the denominator. Example: HRR Plates 6/6 OD, 6/6 OS Ishihara Color Vision Plates 1) The Ishihara plates are tested at a 75cm test distance using the brightest setting of the overhead lamp. The patient must wear their habitual near Rx. 2) This is a MONOCULAR test. The first plate is a demonstration plate that everyone can see. a. If your patient misses this test plate, then suspect malingering or other cognitive deficit. Each test type is different. Review the answer key inside the test booklet to understand what it means when your patient misses certain color plates. 3) Cover the left eye and test right eye first. 4) Ask the patient to “Read the number in the circle.” Complete the demonstration plate and the following ten plates. As long as your patient misses no more than two, you can stop with these ten plates. If they miss more than two, get out your answer key and closely analyze their responses as you complete the rest of the plates. (This will allow you to label their color deficiency). Now, test the left eye. Recording: Record the test book used and the number of plates correct over the total number possible for each eye. The demonstration plate is not included in the denominator. If they miss 0, 1, or 2 plates, your denominator will be 10. If they miss more than two plates, your denominator will be 13. Example: 1. Ishihara Plates 8/10 OD, 9/10 OS 2. Ishihara Plates 3/13 OD (strong deutan), 4/13 OS (strong deutan) Stereo Acuity Testing VAC Random Dot Stereo Acuity Test (with Polaroid glasses) Use the brightest setting with the overhead light. Adjust the stereo chart for any glare. Test at 40cm. This is a BINOCULAR test. Patient must wear the habitual correction and Polaroid glasses over the correction. 1. First, with the booklet closed, verify that the patient can identify the shapes on the cover of the booklet. Three of the four must be recognizable to them to proceed with a valid test. 2. Instructions: (Fold booklet in half so patient sees only one page of test at any time) a. For adults, start on page 2 with circles. “In each of these twelve boxes there are three circles. One of the circles should appear to stand out closer to you. In box number one, which circle looks closer to you? Box 2…3…4…5…etc…?” If the patient reports that he/she cannot tell, say, “If you had to take a guess, which one would you pick?” b. Encourage guessing until patient misses two consecutive rows. Record the last correct response as end point, in seconds of arc. This part of the test assesses LOCAL STEREOPSIS. c. Next, proceed to the top page and point to each of the four boxes and ask what shape is seen by the patient. Encourage guessing. This part of the test assesses GLOBAL STEREOPSIS. d. If the patient gets none correct in the local or global stereopis, use the Lea shapes and R/L check for suppression. The “R” and the “L” letters in the center of page 2 are used to test for suppression. The patient should be able to see the “R” and the “L” at the same time. If either letter is not seen, the letter not seen is the eye the patient is suppressing (turning off). e. For gross stereo you may use the three boxes of Lea shapes in section C, at the bottom of page two, depending on your patient’s ability to distinguish depth. This section is designed specifically for children. Recording: The amount of stereopsis is the patient’s last correct answer. Record in seconds of arc and the test type used. Also record whether suppression was present or absent and if the patient was able to see the shapes in the random dot stereo boxes (global stereo). Example: VAC Random Dot Stereo Acuity Test: (-) suppression, Wirt circles 20”, RDS 63”-1 a. Expected results are 40” or better. The random dot shapes on page 1 are important to test to rule-out a small- angle strabismus. Any patient with strabismus at the time of the test (even a very small angle) will not be able to see any of these shapes! If the patient can see the shapes, you’ve ruled out a small angle strabismus. It is necessary to write the type of test used because different tests have different maximum measurable levels of stereo. (40” on Stereo fly is good as that is the finest acuity on that test, whereas on Random Dot Stereo Acuity, this is not as good an endpoint because testing as fine as 12.5” is possible.) Amsler Grid Testing This is a MONOCULAR test performed at 30cm with the brightest setting of the overhead lamp. The patient should be wearing their habitual NEAR Rx. Test OD first, then OS. 1. Show the Amsler grid to the patient (OD open, OS closed) and ask the following: a. Can you see the center dot? b. While looking at the center dot, can you see all four corners and all four sides? c. While looking at the center dot, are any areas of the grid pattern missing? (checking for scotomas) d. While looking at the center dot, are any of the lines wavy or bent? (checking for metamorphopsia) Example Recording: (-) defects OD, OS or (-) scotomas, (-) metamorphopsia OD, OS If any defects are present, use a recording form and draw. You can also have the patient draw the distortion/defects/missing areas. NOTES: At 30 cm, each block subtends 1 degree. Therefore, the entire grid tests the central 20 degrees, (ten degrees on either side of fixation) Do this test on… a. Diabetics, especially if suspecting macular edema. b. Patients who may be at risk for a subretinal neovascular membrane (SRNVM) (e.g., patients with presumed ocular histoplasmosi, AMD, etc) Age-related macular degeneration (AMD) is the leading cause of blindness in the elderly. Therefore, many doctors advocate testing all patients 55 years old and older.
