0
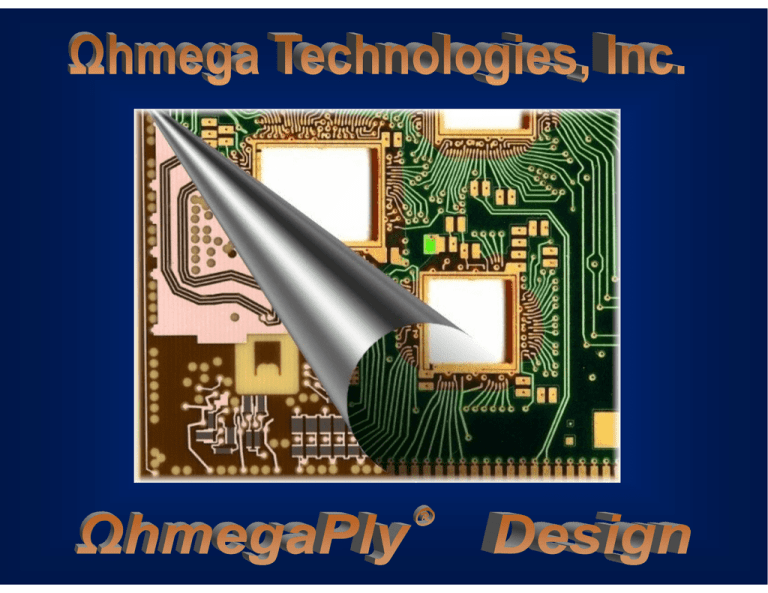
OhmegaPly® Embedded Resistor Technology
1. Electrodeposited thin film resistive material for planar resistor
2. Standard subtractive PCB processing
3. Surface or embedded resistors
4. Mature technology (30+ years)
5. Field Proven, Excellent Long Term Reliability
6. Performance Enhancing, Cost Effective Resistor Technology in High
Speed/High Density Circuit Designs
1
OhmegaPly® Manufacturing Overview
OhmegaPly® is a thin film Electrodeposited-On-Copper NiP metal alloy (RESISTORCONDUCTOR MATERIAL) that is laminated to a dielectric material and subtractively
processed to produce planar resistors. Because of its thin film nature, it can be buried within
layers without increasing the thickness of the board or occupying any surface space like
discrete resistors.
COPPER
COPPER
ELECTROPLATING
RCM
NICKEL
PHOSPHOROUS
LAMINATION
OHMEGAPLY®
LAMINATE
2
OhmegaPly® Sheet Resistivity Vs. % Tolerance
Sheet Resistivity
10 Ω/
25 Ω/
50 Ω/
100 Ω/
250 Ω/
Material Tolerance
3%
5%
5%
5%
10%
3
OhmegaPly® Laminate Recommended Copper Type
TOCIII
PT
DFF
PTFE
Hi Tg Epoxy
Ohmega/Faradflex ®
Rogers Duroid®
Polyimide
BC12
Arlon CLTE
Lead-Free
BC8
Ohmega/Faradflex ®
Rogers 4003
BC24
Ceramic-Filled
BC16
LCP (Rogers Ultralam 3850)
Flex
1R25 with TOCIII COPPER FOIL at 200X
1R25 with PT COPPER FOIL at 200X
1R25 with DFF COPPER FOIL at 200X
4
Advantages of OhmegaPly®
A.
Electrical Advantages
1. Improved line impedance matching,
2. Shorter signal paths and reduced series inductance,
3. Eliminate the inductive reactance of the SMT device,
4. Reduced cross talk, noise and EMI
B.
PCB Design Advantages
1. Increase active component density & reduced form factors,
2. Improved wireability due to elimination of via.
3. Improved reliability due to elimination of solder joints.
C.
Improved Reliability
1. Low RTC of <50 PPM
2. Life testing: 100,000 hours = +2% at 110° C
3. Stable over wide frequency range: tested beyond to 20+ GHz.
4. Lead-free compatible
D.
Economic Advantages
1. Elimination of discrete resistors
2. Improved assembly yield
3. Board densification and/or size reduction
5
Advantages of OhmegaPly®
D.
Economic Advantages
4. Board simplification (double sided SMT to single sided SMT;
potential layer and via count reduction )
5. Deliver tested board to the assemblers
E.
Minimal Risk
1. Over 30 years of use
2. Predictable
– Design: Know how to achieve target with simple formula (L/W x Rs)
– Process: Know how to characterize and compensate
– Linear relationship: increase 10% resistor length equal to 10% increase
in resistance value
– Yield: process capability and tolerance drive yields
3. Proven long term reliability
6
Typical OhmegaPly® Applications
Actual Designs Used Over the Past 30 Years
Surface resistor application –Potentiometer (35 mm SLR camera).
7
Typical OhmegaPly® Applications
Interposer board.
8
Typical OhmegaPly® Applications
Series termination resistors in a BGA package.
9
Typical OhmegaPly® Applications
Pull-up resistors in an avionic application
10
Typical OhmegaPly® Applications
HDI board.
11
Typical OhmegaPly® Applications
Series termination resistors for telecom switching card
12
Typical OhmegaPly® Applications
OhmegaPly® Resistors in Flex Circuit
13
Typical OhmegaPly® Applications
Parallel termination resistors in a BGA package.
14
Typical Ohmega-Ply ® Applications
Buried resistor application – 2” X 3” Probe Card.
15
Distribution of Ohmega-Ply® Resistor Values
10 OHMS
40%
30 OHMS
35%
50 OHMS
30%
100 OHMS
25%
1Kohm
20%
5 Kohm
15%
10 Kohm
10%
100 K ohm
5%
0%
TERMINATING
TERMINATING
PULL
PULL -- UPS
UPS
Resistor Type
1 (Ohm s)
16
OhmegaPly® Basic Design Overview
A. Explanation of Ohms-Per-Square
The resistance of a OhmegaPly® resistor:
R = RS
Length of Resistor
Width of Resistor
Equation.1
Where RS is the sheet resistance (in ohms per square) of the PRT material.
The resistance value of the resistor can be determined by sheet resistance and
geometry of the resistor according to the formula above.
R = RS × N
Equation.2
Where N is the number of squares ( N = L W )
17
OhmegaPly® Basic Design Overview
Sheet resistivity (stated in Ohms per square) is dimensionless
•
A square area of resistive material = sheet resistivity of resistive material
E.g., a 25 Ω/(Ohms/Square) sheet resistance
L1 = W1
N1 = 1
R1 = 25 Ohms
•
L2 = W2
N2 = 2
R2 = 25 Ohms
L3 =W3
N3 =3
R3 = 25 Ohms
Resistor value = sheet resistivity x ratio of element length to width (R =Rs x L/W)
E.g., a 25 Ω/ sheet resistivity
Length = 0.030” (30 mils)
Width = 0.015 “ (15mils)
Resistor value = 25 Ω/ x (30mils/15mils)
= 25 Ω/ x 2 squares = 50 ohms
18
Determine and Recommend Resistor Sizes Under
Spreadsheet Program
A - DESIGN SPECIFICATION
Please enter the resistance value (R ) in Ohm, power rating (P) in milliWatt, and maximum tolerance
(t ) in percent for each desired resistor (R 1 , R 2 , R 3 , R 4 & R 5 ) in table 1 below, and exit the cell
to allow the program performs the calculations.
R1
Resistance Value (R) in Ohm
Power Rating (P) in mW
Maximum Tolerance (t) in %
R2
10
20
7
R3
25
62
11
50
65
15
R4
R5
100
125
15
250
250
20
Table 1. For designer to enter the resistance, power rating and percent tolerance values of desired resistors
B - RECOMMENDED MINIMUM WIDTH AND LENGTH OF DESIRED RESISTORS
Sheet
R1
R2
R3
R4
R5
Resistivities
W1
L2
W2
L2
W3
L3
W4
L4
W5
L5
(Ohm/Sq.)
(Mil)
(Mil)
(Mil)
(Mil)
(Mil)
(Mil)
(Mil)
(Mil)
(Mil)
(Mil)
10
25
50
100
35.0
123.0
210.0
385.0
35.0
49.2
42.0
38.5
12.0
23.0
35.0
58.0
30.0
23.0
17.5
14.5
7.0
11.0
16.0
28.0
35.0
22.0
16.0
14.0
7.0
13.0
20.0
35.0
70.0
52.0
40.0
35.0
250
607.0
24.3
770.0
77.0
84.0
16.8
59.0
23.6
t*
t*
t*
t*
P*
t*
t*
t*
t*
t*
t*
t*
P*
P*
t*
P*
P*
P*
P*
P*
7.0
13.0
19.0
32.0
175.0
130.0
95.0
80.0
53.0
53.0
P*
P*
P*
P*
P*
Table 2. The recommended minimum width and length for each desired resistor which is calculated by the program base on the given
values by the designer in table 1.
C - RECOMMENDED RESISTOR FOOTPRINTS
Rs
R2
R3
50
100
Bar Type
Partial Square
Partial Square
Partial Square
Bar Type
Bar Type
Partial Square
Partial Square
Bar Type
Bar Type
Bar Type
Partial Square
Bar Type
Bar Type
Bar Type
Bar Type
Serpentine
Bar Type
Bar Type
Bar Type
250
Partial Square
Partial Square
Partial Square
Partial Square
Bar Type
10
25
R1
Table 3. The recommended resistor footprints for different type of sheet resistivities
R4
R5
19
Ohms Per Square
150 Ω
330 Ω
50 Ω
Termination and pull-up resistors in an ATM switching card.
20
OhmegaPly® Basic Design Overview
Basic Resistor Pattern
1. Bar Type
a. Multiple Squares (N ≥ 1)
b. Partial Squares (N < 1)
21
OhmegaPly® Basic Design Overview
2. Meander Type
Basically, a meander resistor can be considered as a bar resistor with the exception
of the corner squares (right-angle bends). Due to the change in current density at
right-angle path, the effective number of square is 0.56.
e.g., sheet resistance ( RS) = 100 Ω/
No. of squares = 37
No. of corner squares = 16
Total No. of effective squares = 37 + (16 x 0.56)
= 45.9
≅ 46
Resistance value = 46 x 100
= 4.6 KΩ
22
PCB processing of OhmegaPly®
Artwork layout
PRT resistors processing consists of two prints:
1st print – COMPOSITE image of conductors and resistors
2nd print – RESISTOR DEFINE image of resistor elements, which is commonly used
for voltage or ground plane with most of the copper preserved or CONDUCTOR
PROTECT image of conductor, commonly used for signal plane
VOLTAGE/GROUND
PLANE
COPPER
PAD
ISOLATION
CHANNEL/
CLEARANCE
Composite (negative film) resistor define
SIGNAL PLANE
COPPER
PAD
Composite (negative film) conductor protect
23
PCB processing of OhmegaPly®
A. Step-By-Step Processes and Required Chemistries.
• STEP 1: Apply Photoresist to
Laminate
• STEP 2: Print and Develop
Composite Image
• STEP 3: Etch Unwanted Copper
Using Any Conventional Etchant (1st
etch)
• STEP 5: Strip Photoresist
• STEP 6: Apply Photoresist, Print
• STEP 7: Etch Away Copper Over
and Develop Conductor Protect Image the Designed Resistor Using a
(2nd print)
Selective Alkaline Etchant (3rd etch)
• STEP 4: Etch Unwanted Resistive
Material with Copper Sulfate
Solution (2nd etching process)
• STEP 8: Strip Photoresist
24
PCB processing of OhmegaPly®
Design Element Termination and Overlap Area
1. Element Termination Area – design element length longer (5-10 mils) so that
any misregistration or misalignment of artwork can be compensated.
LENGTH OF
RESISTOR ELEMENT
MISREGISTRATION
ELEMENT TERMINATION AREA
Composite - 1st print
25
PCB processing of OhmegaPly®
2. Overlap Area – design the overlap area (5 to 10 mils beyond resistor’s width) so that
any misregistration or misalignment of artwork in image printing process can be
compensated as is shown in figure above.
OVERLAP AREA
MISREGISTRATION
Resistor defined – 2nd print
26
Thermal/Mechanical Isolation
The primary purpose of thermal or mechanical isolation is to reduce stress from the flow of heat
from a plated through via or surface mount pad during soldering, process, reflow, hot air, etc
Secondarily, it also acts as a mechanical isolation preventing resistance change during via drilling
and/or x,y and z axis dimensional movement of the PCB.
The recommended thermal isolation distance from the plated through hole to the resistor element
is 10 mils, and laser drill microvias the minimum distance is 5 mils.
0.010”
COPPER PAD
PLATED THROUGH HOLE
Thermal/mechanical isolation
THERMAL ISOLATION
RESISTOR ELEMENT
27
Thermal/Mechanical Isolation
A server backplane showing thermal/mechanical
isolation of OhmegaPly® resistors
28
OhmegaPly® Thin Film Subtractive Versus Thick
Film Additive Technologies
Reoccurring CAD problems in embedded passive designs have to do with the difference between
thick film additive and thin film subtractive technologies. Resistor elements and terminations are
determined by different techniques for additive than for subtractive processes.
Type of Resistor
Element Footprint Creation
First Print
Second Print
Additive (print and silkscreen)
Length (etch) Width (screen paste)
Subtractive (two print and etching) Width (etch) Length (etch element)
CAD/CAM operators in companies who switch from one technology to another must make
artwork adjustments because the compensation for dimensional stability and registration
tolerances are different.
DRC programs may not support embedded component technologies and errors may escape
detection. Most common is the lack of overlap of the second print image to the first print
image.
29
Resistor Design Method Graphic Layout
OhmegaPly is a subtractive technology where the manufacturing starts with a laminate
with a thin film resistance material under the copper.
The first production film is a Gerber, extended Gerber or ODB++ document with the
pad and trace layer merged with the resistor body layer.
This picture shows the pad/trace for a resistor.
This picture shows the resistor body layer.
30
Resistor Design Method Graphic Layout
The combined Gerber film result.
31
Design Parameters for Optimum Long Term Stability
As a Function for Resistor Operating Temperature
Long-term reliability is a function of operating temperature. Like most electronic components, operating temperature
(ambient temperature + temperature rise) is one of the most important factors that determine power rating of the
component. As more power is dissipated through the resistors, the temperature of the resistor film increases which makes
it more susceptible to thermal oxidation. Stability is measured by the change of resistance with aging. The figure below
illustrates the relationship between different operating temperatures and change of resistance with respect to time.
AGING CURVE AT DIFFERENT OPERATING TEMP FOR OMEGA 25 OHM/SQ MATERIAL
Because the resistor film is a part of
laminate, the physical and thermal
characteristics of the substrate become
major considerations. The heat
dissipation of resistor films depends on:
1. The size (area) of the resistor
2. The circuit thickness and
material type
3. The circuit configuration
(clad/unclad)
4. ambient temperature
5. The thermal conductivity of the
substrate
6. Additional system cooling (e.g.
air-cooling, other heat sinking,
etc.)
32
Design Parameters for Optimum Long Term Stability
1. Size (area) of Resistor
The power density is defined as the total power dissipated divided by the effective surface area. The power density of resistor
element increases as element area decrease, all other conditions illustrate that for the same power input, the temperature rise
depends on the area of the resistor.
TEMPERATURE RISE Vs. POWER DISSIPATION FOR DIFFERENT RESISTOR AREA
R1 = 25Ω area of R1 = 0.500 x 0.500 = 0.2500 in2
R2 = 25Ωarea of R2 = 0.250 x 0.250 = 0.0625 in2
R3 = 25Ωarea of R3 = 0.125 x 0.125 = 0.0156 in2
R4 = 25Ωarea of R4 = 0.063 x 0.063 = 0.0039 in2
R5 = 25Ωarea of R5 = 0.031 x 0.031 = 0.0010 in2
For the same power input, the temperature rise
of R5 (smallest area) is the highest. In other
words, the resistors with larger area can
dissipate more power than a smaller on
provided that all conditions remains the same.
If space available, design the resistor as large
as possible.
33
Design Parameters for Optimum Long Term Stability
2. The Substrate Thickness & Configuration (clad/unclad)
Because the resistor is buried within the layers,
the physical and thermal characteristics of the
substrate directly affect the manner of heat
dissipation from the substrate e.g. the thickness
of the substrate and cladding (heat sinking
effect). As shown in the above graph the
temperature rise in the resistor (R1) is improved
significantly when copper cladding (R2) is used
R1 = 250Ω
R2 = 250Ω
R3 = 250Ω
R4 = 250Ω
R5 = 250Ω
R6 = 250Ω
Core Thickness
0.0025 in
0.0025 in
0.025 in
0.025 in
0.062 in
0.062 in1
Cladding
1R25/0 (unclad)
1R25/1 (clad)
1R25/0 (unclad)
1R25/1 (clad)
1R25/0 (unclad)
R25/1 (clad)
34
Design Parameters for Optimum Long Term Stability
3. OhmegaPly® Power Dissipation vs. Area of Element
For resistor area larger than 1100 mil2,
the recommended power dissipation at
25 °C ambient is as follows:
POWER DENSITY OF 10-250 OHM/SQ. MATERIAL VERSUS
DIFFERENT RESISTOR AREA AT 25C AMBIENT
10 Ω/
0.187+ MilliWatts/mil2
25 Ω/
0.150+ MilliWatts/mil2
50 Ω/
0.138+ MilliWatts/mil2
100 Ω/
0.100+ MilliWatts/mil2
250 Ω/
0.090+ MilliWatts/mil2
1.2000
10 Ohm/Sq.
P ow er Density (m W /m il 2 )
1.0000
25 Ohm/Sq.
y = 76.5x -0.87
50 Ohm/Sq.
y = 61.2x -0.87
0.8000
250 Ohs/Sq.
y = 54.5x -0.87
0.6000
Maximum power dissipation depends
on the ambient temperature, resistor
element size, and laminate/circuit
board thermal properties. Dissipation
improves with the use of natural heat
sinks such as ground and power
planes. Typical power dissipation for
most PRT resistor designs operating
at an ambient of less than 70 °C is
approximately 1/10 to 1/8 watt.
100 Ohm/Sq.
y = 45.9x -0.87
0.4000
y = 39.7x -0.87
0.2000
0.0000
0
100
200
300
400
500
600
700
800
900
1000
1100
Resistor Area (mil2)
The recommended power dissipation of small resistor area
(less than 1100 mil2) at 25 °C ambient
35
Design Parameters for Optimum Long Term Stability
For resistor area larger than 1100
mil2, the recommended power
dissipation at 80 °C ambient is as
follows:
POWER DENSITY OF 10-250 OHM/SQ. MATERIAL VERSUS
DIFFERENT RESISTOR AREA AT 80 °C AMBIENT
0.8000
10 Ohm/Sq.
0.7000
25 Ohm/Sq.
y = 49.7x-0.87
50 Ohm/Sq.
2
Power Density (mW/mil )
0.6000
100 Ohm/Sq.
y = 39.9x-0.87
0.5000
10 Ω/
0.122+ MilliWatts/mil2
25 Ω/
0.098+ MilliWatts/mil2
50 Ω/
0.090+ MilliWatts/mil2
100 Ω/
0.065+ MilliWatts/mil2
250 Ω/
0.059+ MilliWatts/mil2
250 Ohs/Sq.
y = 35.4x-0.87
0.4000
y = 29.8x-0.87
0.3000
y = 25.9x-0.87
0.2000
0.1000
0.0000
0
100
200
300
400
500
600
700
800
900
1000
2
Resistor Area (mil )
The recommended power dissipation of small resistor area
(less than 1,100 mil2) at 80 °C ambient
1100
Maximum power dissipation
depends on the ambient
temperature, resistor element
size, and laminate/circuit board
thermal properties. Dissipation
improves with the use of natural
heat sinks such as ground and
power planes. Typical power
dissipation for most PRT resistor
designs operating at an ambient of
less than 70 °C is approximately
1/10 to 1/8 watt.
36
Tolerance, How Important Is It?
Excerpts from paper by Wally Doeling, Sequent Computer, 1998:
For high speed designs and short rise times, the ohmegaPly® resistor tolerance is not as nearly as
important as the elimination of the inductive reactance of the SMT chip component, vias and trace.
z Frequency is key driver requiring improved signal integrity,
1. 100 MHz to 20 GHz.
2. Rise times less than 1.0 ns.
z The actual tolerance is a combination of
1. The initial mismatch of the device value and line impedance,
2. The device tolerance (percentage), and
3. The series inductance and inductive reactance of the device.
Resistor Type
1/4 watt axial
1/8 watt axial
1/8 watt 1206
Ωhmega-Ply®
Rise time
1.0 ns
0.5 ns
0.25 ns
0.9 nH
Series Inductance
2.5 nH
1.0 nH
<0.4 nH
Inductive Reactance
2.8 ohms (1206)
5.6 ohms (1206)
11.3 ohms (1206)
z For these applications, a 10% ohmegaPly® resistor is better than a 1-% SMT tolerance.
37
Manual Resistor Design
Design Demonstration
R1
R2
1. Part lists for demo
R3
R4
R5
R6
R7
R8
R1 & R2 are partial square resistors.
R3 & R4 are multiple squares resistors used in
analog, digital and RF applications.
4031 Elenda Street
Culver City, California 90232
Phone: (310) 559 - 4400
Fax: (310) 837 - 5268
Web Site: www.Ohmega.com
R12 is used as heating element.
R13 & R14 are higher value meander resistors.
R17 also contains a ladder network for trimming
to tight tolerances (1%) as required in some
digital and analog applications.
R15 is a power divider for microwave
applications.
R15
R16
R9
R5, R6 & R7 are series terminating resistors.
R9, R10 & R11 are parallel terminating resistors
under BGA package for high-speed logic
applications.
R14
Ohmega Technologies, Inc.
R17
R18
R12
R10
R8’s are higher value resistors used in digital
applications with limited “real estate”. Referred
to as “Wraparound” resistors
R13
hmega
R19
R11
The resistance value and recommended power dissipation are
listed below. Individual resistors can be tested to the suggested
powers.
Resistor
No. of
Nominal
Power
No.
Square
Resistance
Dissipation
(Ohm)
(mW)
1, 2
0.5
12.5
173
3, 4
10.0
250
1552
5
24.0
600
523
6
5.0
125
120
7
2.0
50
75
8
12.2
305
654
9, 10, 11
1.8
43.75
138
12
1.0
25
5786
13
83.0
2075
2327
14
51.5
1287.5
1790
15
0.8
20
340
16,17,18,19
1.0
25
141
38
Manual Resistor Design
1. Resistor Footprints from Spreadsheet in AutoCAD
50, 125, 250 & 600 ohms resistor design
39
Manual Resistor Design
2. Manual Design Rule Check (DRC)
12 ohms resistor design
40
Manual Resistor Design
3. AutoCAD PCB Layout
Composite image of conductors and resistors
41
Manual Resistor Design
Figure 16 – Resistor define - image of resistor elements
42
Manual Resistor Design
Resistor define overlay the composite image of conductors and resistors
43
Manual Resistor Design
4. CAM Layout
ECAM Panelized PCB - copper + resistor
44
Manual Resistor Design
ECAM Panelized PCB - copper
45
Manual Resistor Design
ECAM Panelized PCB - resistor
46
Manual Resistor Design
Finished resistors
47
Designing a VeriBest PCB using Ohmega Buried Resistors
• Make-up of a Buried Resistor
• Library Naming Conventions
• Placing Buried Resistors in a Schematic
• Setting Up VeriBest to Handle Buried Components
• Setting up Job Parameters
• Setting up Pin Table
• Setting up Pin Correspondence Table
• Placement and Routing Procedures for Buried
Components
• Recommended Placement Procedure
• Pushing Components
• Recommended Routing Procedure
• Outputting Gerber Data
• Composite (Trace) layer
• Resistor Define layer
• Reference layer
• Other Notes of Importance
48
Make-up of a Buried Resistor
Size, Number of Characters, and Positional
Location of Reference Designator and
Opposite Side Reference Designator
Trace and Via
Keep Outs
Trace connecting the pins as a
Polygon Shape
Pin 1 Location
Pin 2 Location
(green outline)
Component Outline
Size, Number of Characters,
and Positional Location of Part
Number
(orange outline)
Resistor Define shape created
as a Resistor Shape
49
Library Naming Conventions
The following naming conventions were used to build the Schematic, PDB, and Cell Libraries
Schematic and PDB Libraries -
BR100_1/4W_25MAT
Buried Resistor
Power Rating
Value (in ohms) Ohmega Material (in ohms)
2D Cell Library (see Buried Resistor
Library spreadsheet
for cross reference)
BR100A
Unique #
Buried Resistor Ohmega Material
A = 25 ohm material
B = 50 ohm material
C = 100 ohm material
D = 250 ohm material
Placing Buried Resistors in a Schematic
You place buried resistors in schematic capture just as you do any other part. When a
buried resistor is placed on the board, you will see the resistor value (in ohms) below the
shape. In the example to the right, an 8 ohm resistor was placed and was given the
reference designator BR3 after compiling was completed.
50
3) Reference layer
The Reference layer is simply a layer
that can be referenced to show which
Buried Resistors are in which where.
Drafting Element • Turn on the level on which your
references reside.
• If you have a board title and or
targets layer for your board, you can
turn them on here.
Example of Gerber results
using these settings
Composite (Trace) Layer and Reference
Layer are turned on.
51
Parametric Design in Supermax® ECAD of
Mentor Graphics
52
Parametric Design in Supermax® ECAD of
Mentor Graphics
Supermax ECAD provides an effective platform for the design of
embedded passive components – resistors, capacitors, inductiors and
transformers.
Advanced capabilities for embedding
passive components
•
•
•
•
•
•
•
•
Create and place embedded components on any
layer
Edit components online
Automatic synthesis of resistors and capacitors
Resistor types: L-shape, serpentine, tophat and
rectangle
Automatic generation of all production documents
Firmly integrated with common schematic
environments such as Mentor Graphics® Design
Architect® and DxDesigner™
Integrated with analysis tools and virtual prototyping
environments
Read and write standard formats such as GDS
Design Rule Check (DRC)
Since embedded passives are not standard discrete
compo-nents but are, in fact, DC short circuits, DRC
functions need to recognize the difference between a DC
short circuit and an AC short circuit. With Supermax
ECAD, design specifica-tions are met with an extensive
rules set and online DRC of electrical and manufacturing
rules. In addition, Supermax ECAD has online verification
of signal integrity rules, clear-ance rules, trace resistance,
impedance and propagation delays.
53
Parametric Design in Supermax® ECAD of
Mentor Graphics
With Supermax ECAD, the design process is even faster than with conventional discrete components as no
library is required. Resistors are automatically synthesized from component values usually available as
properties from the schematic.
The synthesis takes nominal value, trimable range, tolerance, power rating, aspect ratio and geometry into
account. The generated resistors can be interactively edited with dynamic feed back of the resulting
resistance.
A comprehensive Design Kit is available and together with sample designs and an instructive tutorial
design guide, technology introduction is made fast, flexible, and correct.
54
Parametric Design in Supermax® ECAD of
Mentor Graphics
Once a resistor is set to be an embedded resistor, the system automatically syntheses
multiple permutations of the resistor. One for each available resistance material in the
set up and for each material one of each available geometry (Rectangle, top hat,
serpentine).
For each resistor the resulting power handling and dimensions are shown and the
designer may choose the desired permutation by clicking in the spreadsheet or use the
automatic optimization functions to optimize either on total area or by the number of
resistance materials needed.
55
Standard CAD Layout Tools
Ohmega resistor design with standard CAD tools
Instructions available for:
1. Mentor Boardstation
2. Allegro
3. Intergraph, Classic
4. PAD Power PCB
Use in conjunction with Excel program, those
methods achieves full logic-DRC resistor
controlled schematic or net list level.
56
Resistor Electrical Test Recommendations
Electrical testing is required to verify correct resistor values and identify out-of-tolerance resistors.
100% Electrical tests should be performed on both the innerlayers and the finished bare board.
Net list testing is required as comparative testing cannot identify nominal resistor values nor incorrect series or parallel
resistor networks. AOI is not a substitute for inner layers electrical test.
Custom software may be required to program the tester. Net lists downloaded to the tester must include all resistor
locations or test points and all resistor min/max values.
One of three methods are:
1. A CAD generated net list in a format that includes resistors.
2. A CAD generated net list with a secondary resistor file to merge at CAM station.
3. Gerber extraction net list at the CAM station.
Standard electrical test equipment is utilized:
1.
2.
3.
4.
Universal bare board tester (bed-of-nails with fixture).
Flying probe tester (fixtureless).
Custom built tester.
Manual measurement system.
The resistance measurement accuracy depends on the instrument accuracy, contact resistance, probes and leads.
57
Resistor Electrical Test Recommendations
Test Parameters:
The measurement current should not exceed the rated current carrying capacity of the resistor, as high current could cause
permanent damage to the resistor.
For most automated bare board test equipment, the recommended program test parameters and procedures are:
1. Input the power rating (watts) of the resistor, if this feature is supported by the test system.
2. Input the test voltages on most other standard systems,
Continuity {opens} 10 volts (20mA limiting current).
Isolation {shorts} 40 volts (10 Mega ohm failure).
Special probes enable innerlayer testing through double treat or black oxide coatings.
For extremely low value resistors (i.e. less than 15 ohms), contact, probe and lead resistance becomes a critical factor in
determining measurement accuracy.
Fixtures for innerlayer testing may have to be rebuilt if the panel layout (PCB location or orientation) is changed or scaled
after the first fixture is built.
First time users should contact their Test Equipment Manufacturer to determine the applicability of the their test equipment
and availability of the required software
Coupons electrically tested to monitor material, process variation, but coupons are not a substitute for 100% electrical testing
read boards.
58
Resistor Trimming
Examples of Resistor Design for trimming
Plunge Trim
L-cut trim
The top figures are designed without special modification for trimming except to provide enough area
to handle power dissipation and current if cross-section is reduced by a conventional trim cut
Trimmable resistor Ladder network
trimmed multiple square resistor
The bottom figures are designed with segments for adjust without reducing cross-section of primary
current path
59
Resistor Trimming
Cut 2
Cut 1
Finished Trim
Pulsed Laser Machining
Target R Value
Current Flow Modeling
Resistance
2
1
Cut 1
Cut 2
Distance of trim
60
Ohmega Resistor Built in Trace (ORBIT ™)
61
ORBIT™ Applications
ORBITTM as series terminating resistors.
62
Ohmega®/FaradFlex®
63
Ohmega®/FaradFlex®
Ohmega®/FaradFlex® Properties for 1R25/BC24
Properties
Ohmega/FaradFlex Core
Remarks and Conditions
Copper Weight, μm
35
Nominal
Sheet Resistivity, ohms / square
25
Nominal
Dielectric Thickness, μm
24
Nominal
Cp@ 1MHz, nF/in2(pF/cm2)
1.0 (155)
IPC-TM 650
2.5.5.3
Dk @1MHz
4.4
Loss Tangent @ 1MHz
0.015
IPC-TM 650
2.5.5.3
IPC-TM 650
2.5.5.3
Peel Strength, lbs/in
5.0
IPC-TM 650
2.4.9
Dielectric Strength, kV/mil
5.3
IPC-TM 650
2.5.6.3
Tensile Strength, Mpa(kpsi)
152(22.0)
ASTM
D-882 A
Elongation, %
18.5
ASTM
D-882 A
64
Comparison of OhmegaPly®/FaradFlex® Vs. FR4
Properties
1R25/BC24
Core
Ohmega Core
FR-4 (control)
Sheet Resistivities (ohm/square)
25
25
+/-5%
+/-5 %
Material Tolerance
Load Life Cycling Test
Resistor Size: 0.500" X 0.050"
Loaded:
(∆ R%) @ 150mW
Unloaded:
(∆ R%)
<1.6
<1.2
<5
Current Noise Index in dB
<-23
<-15
Humidity Test (∆ R%)
0.5
0.5
Characteristic (RTC) PPM/°C
-6.0
50
Thermal Shock (∆ R%)
0.2
-0.5
Solder Float (∆ R%)
After 1 Cycle
After 5 cycles
-0.4
-0.6
0.5
0.45
0.15
2
Power Density (mW/mil )
derated at 50%
Remarks and Conditions
Nominal
MIL-STD-202-108I
Ambient Temp: 70C
On Cycle: 1.5 hrs
Off Cycle: 1.5 hrs
Length Of Test: 10000 hrs
MIL-STD-202-308
Voltage Applied: 5.6 Volts
MIL-STD-202-103A
Temp: 40 °C
Relative Humidity: 95%
Time: 240 hrs
MIL-STD-202-304
Hot Cycle: 25°, 50°,75° 125°C
Cold Cycle: 25°, 0°,-25°, -55°C
MIL-STD-202-107B
No of Cycles: 16
Hot Cycle Temp: 125 °C
Cold Cycle Temp: -65 °C
MIL-STD-202-210D
Temp: 260°C
Immersion: 20 Second
Step-up Power Test
Synergistic Effect!
65
Ohmega®/FaradFlex® Material Availability
®
®
OhmegaPly Sheet
Resistivities (Ohm/square)
10
25
50
100
250
Cp @ 1MHz/1GHz (pF/cm2)
FaradFlex Products
BC24
x
x
x
x
x
BC16
x
x
x
x
x
BC12
o
x
x
o
o
BC8
o
x
x
o
o
180/160
250/225
300/270
480/430
BC12TM
o
o
o
o
o
BC16T
o
o
o
o
o
700/600 1700/1450
X- Current Availability
O- Available in 2008
66
® Flex Circuit Applications
OhmegaPly
Ohmega-Ply RCM® Ni-P Embedded Resistors
MULTILAYER FLEX TAPE APPLICATIONS
35 mm Tape BGA - 1mm Pitch
Reel to Reel Process Capability
ETCHED RESISTOR TOLERANCES
Nominal Value - ohms:
25
37.5
50
75
100
Aspect ratio (# of squares):
Resistor width - mils:
Resistor Length - mils:
1
8
8
1.5
8
12
2
8
16
3
8
24
4
8
32
Mean value (ohms)
Percent tolerance
35 ohms 44 ohms 54 ohms 78 ohms 105 ohms
+/- 50% +/- 25% +/- 20% +/- 15% +/- 10%
Ohmega-Ply RCM®1/2R25
{Half ounce - 25 ohms/square} Resistive -Conductive-Material
Note:
Percent tolerance decreases with resistor width and length.
Mean value can be corrected by artwork compensation.
67
OhmegaPly® in Microwave Applications
1
2
3
0.060’’ CLTE
4
5
6
0.060’’ CLTE
FIRST LAMINATION
7
8
CLT CORE MATERIAL
VENDER COPPER
PLATED COPPER
OHMEGA LAYER
55NI PREPREG
ABLEFILL
SPEEDBOARD
OhmegaPly® resistor in microwave application
for Globalstar antenna.
FINAL LAMINATION
Layer stackup.
68
OhmegaPly® in Microwave Applications
0.026” x 0.0145
Enlargement of a four-up array 16-way power divider with 50 Ω/sq
OhmegaPly® resistors
69
OhmegaPly® in Microwave Applications
Power divider for space application
70
OhmegaPly® in Microwave Applications
Insertion Loss vs Frequency
Rogers 0.020" RT/d 6202 with four copper types
0.00
-0.02
A v e ra g e d B / in c h
-0.04
-0.06
-0.08
-0.10
low profile
ED foil
Ohmega on Reverse
treated
foil (smooth)
-0.12
Ohmega on high profile ED foil (rough)
-0.14
1/2 oz. Rolled (smooth)
1/2 oz. ED (rough)
-0.16
Calculated smooth
-0.18
Calculated rough
-0.20
0.0
2.0
4.0
6.0
8.0
10.0
12.0
Frequency, GHz
71
OhmegaPly® in Microwave Applications
INSERTION LOSS vs FREQUENCY
ARLON 0.030 " CLTE-XT
0.000
Average dB/inch
-0.050
-0.100
1oz ED (control)
-0.150
OhmegaPly 1R25 PT
OhmegaPly 1A50 DFF
OhmegaPly 1R25 TOC
-0.200
1oz RT (control)
-0.250
2.0
5.0
10.0
15.0
20.0
25.0
30.0
35.0
40.0
Frequency (GHz)
72
Mars Express with OhmegaPly® in Beagle 2 Lander
Lander
Lander
PAW
PAW
f Mars Express orbiter
f Beagle 2 Lander with instruments
on its robotic arm
®
Ohmega-Ply
resistorson
oninner
innerlayer
layer
Ohmega-Ply®resistors
f X-Ray Spectrometer with cover to
measure the elements in rocks
All images all Rights Reserved Beagle 2
f Ohmega-Ply® resistors in
electronic lander PC board
®
Ohmega-Ply
Ohmega-Ply®
resistors
resistorson
on
inner
innerlayer
layerof
of
boards
boards
f X-Ray Spectrometer (XRS) with
Ohmega-Ply® resistors
XRS
XRS
Electronic
Electronic
lander
landerPC
PC
board
board
f Top view of PAW (position
adjustable workbench)
April, 2003
73
Ohmega-Ply® Cost Analysis
A. Traditional Cost Model (direct replacement of discrete resistor with Ohmega-Ply)
Volume:
®
2
Ohmega-Ply Material (Cents/in )
Board Convesion Cost Adder
Prototype
Low
Medium
High
$0.20
$0.40
$0.14
$0.25 - $0.30
$0.10
$0.15 - $0.20
$0.07
$0.11 - $0.15
TYPICAL BOARD COST ADDER PER LAYER OF VARIOUS (DISCOUNT) LEVELS
80
Discrete Resistor Cost
At $0.01/Discrete
70
At $0.05/Discrete
Ohmega-Ply Cost Adder
Prototype
60
Low Volume
Medium Volume
50
Cents/in
2
High Volume
40
30
20
10
0
0
2
4
6
8
10
12
14
16
18
20
Component Density/in2
74
OhmegaPly® Cost Analysis
B. Technology Tradeoff Cost Model (enhanced PCB design using OhmegaPly® to replace
discrete resistors)
Following is a comparison of some board technologies (per square inch of board area). The
comparison is based on an application requiring 10 resistors per square inch of board area:
Substrate type
Standard 6-layer with SMT
Standard 6-layer with Ohmega
Microvia 4-layer with SMT
Sequential build 6-layer
(buried vias with SMT)
Cost addder
substrate
Total cost
bare board
SMT cost
(resistor)
Total cost, bare
board + resistor
--$0.20
$0.46
$0.49
$0.12
$0.32
$0.58
$0.61
$0.20
--$0.20
$0.20
$0.32
$0.32
$0.66
$0.81
Use of Ohmega-Ply® in design may:
• Reduce board area
• Reduce layer count
• Allow for discrete SMT to become single side SMT
• Improve loaded board testability
• Allow for more traditional PCB technology (through hole versus HDI)
C. Not all or nothing proposition Ohmega-Ply can be cost effective without the removal
of all SMT components
75
Application Library
Draw Resistance
No. Value (Ohm)
1
62
2
4700
3
305
4
44
5
1500
6
50
7
1000
8
200
RCM Used
(Ohm/Sq)
25
100
25
25
100
50
250
100
Resistor Pattern
Applications
Bar
Meander/Serpentine
Meander
Bar
Meander/Serpentine
Bar
Circular
Bar
ECL Parallel
Pull up/down
ECL Parallel
ECL Parallel
Pull up/down
ECL Series
Heating
Potentiometer
76
Application Library
Draw 1 – 62 ohm resistor design under BGA.
77
Application Library
Draw 2 – 4.7K ohm resistor design.
78
Application Library
Draw 3 – 305 ohm resistor design.
79
Application Library
Draw 4 – 44 ohm resistor design.
80
Application Library
Draw 5 – 1.5K ohm trimmable resistor design.
81
Application Library
Draw 6 – 50 ohm series termination resistor design.
82
Application Library
Draw 7 – 1K ohm resistor design (heater).
83
Application Library
Draw 8 – Potentiometer resistor design.
84
OHMEGA TECHNOLOGIES, INC.
4031 ELENDA STREET
CULVER CITY, CA 90232-3799
PHONE: (310)559-4400
FAX: (310)837-5268
WEB SITE: http://www.ohmega.com
Version 1.8
November 2007
Copyright © 2007 Ohmega Technologies, Inc.
85

