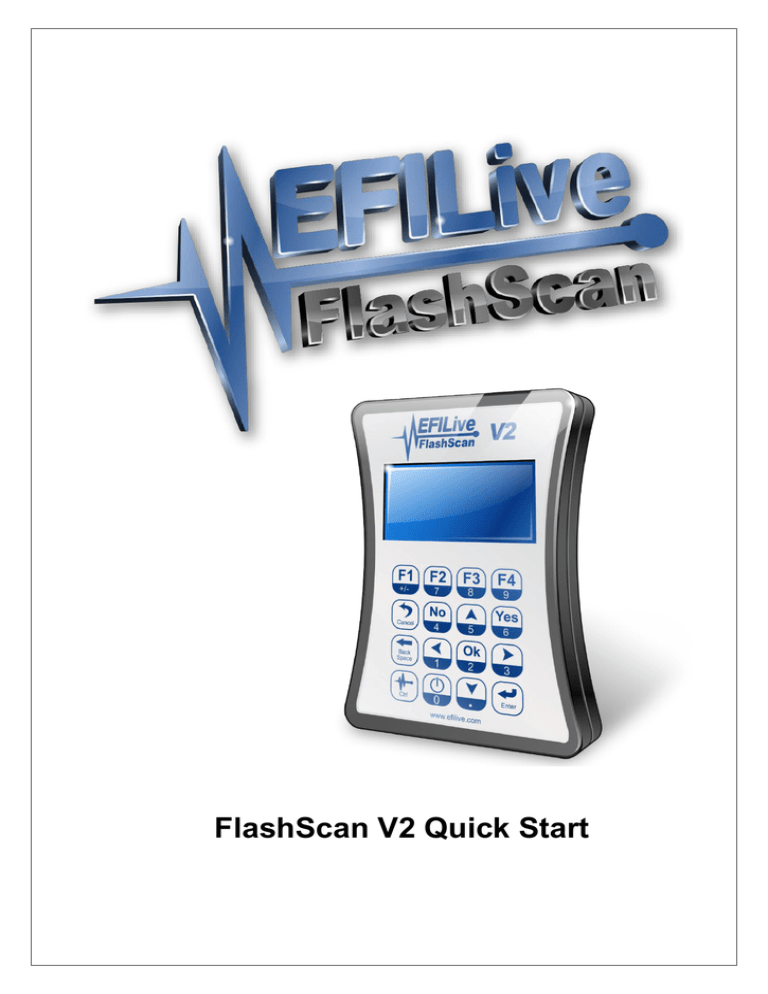
FlashScan V2 Quick Start
This page deliberately left blank.
Inside front cover.
FlashScan V2 Quick Start
FlashScan V2 Quick Start
Paul Blackmore and Jesse Bubb
© 2008 EFILive Limited
All rights reserved
First published
Jul 11, 2008
Revised
May 22, 2014
Edited by: EMARKAY
You may freely copy and distribute this entire document.
You may freely quote, copy and distribute portions of this document, only if any such
quote or copy acknowledges EFILive as the original author.
If you wish to quote, copy or distribute portions of this document without acknowledging
EFILive as the original author, written permission must be obtained from EFILive
Limited. Permission may be requested via email to permissions@efilive.com
EFILive®, FlashScan® and AutoCal® are a registered trademarks of EFILive Limited.
All other trademarks belong to their respective owners.
This page deliberately left blank.
FlashScan V2 Quick Start
Contents
Conventions used in this document ................................................................................. 3
FlashScan Shipping......................................................................................................... 3
FlashScan V2 Package Contents .................................................................................... 4
PC/Laptop Specification .................................................................................................. 5
FlashScan V2 Operating and Storage Conditions ........................................................... 5
Unpacking FlashScan V2 ................................................................................................ 6
Taking Care of FlashScan V2 .......................................................................................... 6
Connecting FlashScan .................................................................................................... 7
Installing the EFILive Software ........................................................................................ 8
Installing FlashScan USB Drivers .................................................................................... 9
Registering FlashScan V2 for use with the V7.5 Software ............................................ 10
Is your software up to date? .......................................................................................... 11
Using FlashScan V2 to Display Trouble Codes ............................................................. 12
Location of the OBD II Connector .............................................................................. 12
Display System Readiness Test Results ................................................................... 13
Display Diagnostic Trouble codes .............................................................................. 13
Clear Diagnostic Trouble codes ................................................................................. 13
Making a Backup Copy of the Vehicle’s Controller ........................................................ 14
Congratulations ............................................................................................................. 16
More Information ........................................................................................................... 16
Real Time Tuning .......................................................................................................... 17
Training and Education.................................................................................................. 17
Thank you...................................................................................................................... 17
www.efilive.com
support@efilive.com
1
This page deliberately left blank.
FlashScan V2 Quick Start
Conventions used in this document
Potential danger
Important information
Helpful information
FlashScan Shipping
EFILive is committed to quality and service and that commitment extends to our
shipping and handling of your order.
If your FlashScan box was delivered with obvious, visible damage, please contact
sales@efilive.com and let us know. Please send us a picture of the damage if possible.
You may be eligible for a refund of your shipping charges.
If you reside in the USA, and your package does not arrive within two business days,
please contact sales@efilive.com and let us know. You may be eligible for a refund of
your shipping charges.
www.efilive.com
support@efilive.com
3
FlashScan V2 Quick Start
FlashScan V2 Package Contents
4
FlashScan V2 interface device
EFILive software installation CD
Blue License Registration Card
Blue Warranty Registration Card
White EFILive FlashScan Limited Warranty sheet
Addressed warranty reply envelope
FlashScan serial number sticker that matches the one on the box
EFILive pen
2 x AD-2 external input connectors
4 x clear plastic stick on feet
EFILive OBDII cable (J1962-A to RJ45)
EFILive USB cable (USB-A to USB-B)
EFILive serial cable (DB9 Female to RJ12)
support@efilive.com
www.efilive.com
FlashScan V2 Quick Start
PC/Laptop Specification
Configuration
Recommended
Minimum1
CPU type
Pentium class CPU
(Includes AMD and Cyrix)
Pentium class CPU
(Includes AMD and Cyrix)
CPU speed
800MHz or faster
500MHz
Free memory
64Mb or more
32Mb
Free3 hard disk space
100Mb or more
100Mb
2 x USB 1.1 or 2.0
USB 1.1
2
I/O port
1
2
3
4
4
Pointing device
Mouse, trackball, touch pad, etc.
Keyboard
Standard PC keyboard
Screen
Standard PC Screen at least 1024x768
Operating System
Windows 7
Windows XP
PC configurations that are below the recommended configuration may not support
the full features of EFILive.
Free memory means memory that is not already in use by other applications.
Free hard disk space means space that is not already in use by other applications.
Two USB ports are only required while upgrading from FlashScan V1 to
FlashScan V2, otherwise only one USB port is required.
FlashScan V2 Operating and Storage Conditions
Condition
Temperature
Humidity
Operating Range
Storage Range
Minimum
Maximum
Minimum
Maximum
0°C
32°F
50°C
122°F
-10°C
14°F
60°C
140°F
-
90%
-
90%
Shock
Pressure
50G, 11ms
50G, 11ms
115kPa
16.68psi
115kPa
16.68psi
5V A/D Input Voltage
0V
6V
-
-
12V Switch Input Voltage
0V
14V
-
-
4.75V
5.25V
-
-
9V
24V
-
-
USB Input Voltage
Vehicle Input Voltage
Thermocouple Input
www.efilive.com
Only connect K-Type thermocouple sensors to
the thermocouple inputs.
support@efilive.com
5
FlashScan V2 Quick Start
Unpacking FlashScan V2
Remove FlashScan V2 from its sealed bag and retrieve the serial number sticker. Keep
the serial number in a safe place. You will need it for all customer service
communications with EFILive.
In the same clear plastic bag as the two AD-2 connectors, are four clear plastic domes.
If desired, fit the domes over the four screws on the back of the FlashScan V2 unit.
Apply pressure by hand for about 5-10 seconds to aid the bonding process.
Please fill out the Warranty Registration Card and mail it back to EFILive using the
envelope provided. Note that international postage rates may apply. Or use the online
registration form here: http://www.efilive.com/warranty-and-product-registration. By
registering your purchase of FlashScan V2, you ensure that any warranty claim will be
dealt with swiftly. In addition, when EFILive publishes urgent and/or important
information about your FlashScan V2, EFILive will know how to contact you if required.
Dispose of any packaging that is no longer required, and do not leave any plastic bags
or used twist ties within reach of young children.
Taking Care of FlashScan V2
Your FlashScan V2 device is a sensitive electronic device. Care must be taken when
using, transporting or storing FlashScan V2.
6
Never leave FlashScan V2 in direct sunlight; it will damage the LCD screen and
the polycarbonate keypad.
Never expose FlashScan V2 to solvents or other corrosive or oxidizing agents.
Do not immerse FlashScan V2 in any liquid.
Do not expose FlashScan V2 to high temperatures or open flames.
Remove ALL connectors from FlashScan V2 before transporting or storing
FlashScan V2. Failure to do so may cause internal connections to break.
Never wrap cables around FlashScan V2 that are still connected, even when not
in use. Doing so can put excessive stress on the internal connectors and can
cause them to break.
Do not allow uninsulated wires to contact any part of the vehicle’s chassis or
electrical system. Take particular care to never allow FlashScan, or any wires
connected to FlashScan, to contact the vehicle’s battery terminals or other power
source.
Never use a DC to AC power inverter to operate your laptop while FlashScan is
connected to either the vehicle or the laptop or both. To power a laptop from the
vehicle, EFILive recommends using a purpose built laptop adapter. For example
the iGo Juice 70, available from www.igo.com
support@efilive.com
www.efilive.com
FlashScan V2 Quick Start
Connecting FlashScan
Please note, FlashScan does not ship with
an SD memory card. EFILive recommends
purchasing multiple small capacity SD
Memory cards rather than one large one.
That way you can keep a backup of your
data on a different card to protect against
card failure while away from the workshop.
WARNING
The RJ45 connector used on FlashScan’s
OBDII cable is the same size as a standard
network cable plug. Never connect the
OBDII cable directly to your computer’s
network socket. You will almost certainly
damage your PC’s network connection.
And never connect FlashScan directly to a
network cable, you may damage the
FlashScan interface.
www.efilive.com
support@efilive.com
7
FlashScan V2 Quick Start
Installing the EFILive Software
Insert the EFILive CD into your PC CD-ROM drive.
If your PC is configured to AutoPlay CDs, then please wait until the EFILive installer
begins.
If the EFILive installer does not begin automatically, then your PC may not be
configured to AutoPlay CDs. You can manually start the EFILive installer by right
clicking on the CD drive icon in Windows Explorer and selecting AutoPlay.
Some computers have AutoPlay disabled for security reasons. If the AutoPlay
option is not able to start the installer, you can start the installation manually
by double clicking on the EFILive_Installer.exe program.
The installer will display the following window. Please click on the Installation Guide icon
to display the installation instructions.
To view the installation instructions, you will need the Adobe Reader installed on your
PC. If Adobe Reader is not installed on your PC, you may install it by clicking on the
Adobe PDF icon.
8
support@efilive.com
www.efilive.com
FlashScan V2 Quick Start
Installing FlashScan USB Drivers
When you install the V7.5 or V8.2 software on Windows 2000, Windows XP or Windows
Vista, the EFILive installer automatically installs the FlashScan and AutoCal USB
drivers.
When you install the V7.5 software on Windows 98 or Windows ME, the FlashScan and
AutoCal USB drivers are not automatically installed.
To manually install the USB drivers, please refer to the appropriate FlashScan USB
installation document for your Windows operating system.
Installing FlashScan V2 on Win98.pdf
Installing FlashScan on Win2K-XP-Vista.pdf
If the EFILive software cannot connect to FlashScan V2, the most probable cause is
incorrectly installed USB drivers. If you have trouble with Windows not recognising the
FlashScan V2 device, EFILive recommends uninstalling the drivers and reinstalling
them again.
The uninstall document is called:
Uninstalling FlashScan.pdf
These documents can be found on the EFILive CD, in the folder InstDoc
You can also download these documents from EFILive’s web site:
http://www.efilive.com/downloads.html
www.efilive.com
support@efilive.com
9
FlashScan V2 Quick Start
Registering FlashScan V2 for use with the V7.5 Software
From within the Scan Tool or Tuning Tool software, select the menu option:
Help->Register EFILive...
Copy the license registration details from
the blue License Registration Card
into the License Manager window.
If this is your first EFILive license, then
enter the details in the [License.1] tab
page. If there are existing license
details, then enter the data in the first
unused tab page.
All details must be entered exactly as they appear on the License Registration
Card. The majority of license registration problems are caused by incorrectly
entered data.
Take particularly care to enter the correct date. The year is most often
entered incorrectly.
Leave the RoadRunner field empty unless you have been issued a
RoadRunner License. To obtain a RoadRunner Real-Time License, please
contact MoatesWare LLC at http://www.moates.net/
10
support@efilive.com
www.efilive.com
FlashScan V2 Quick Start
Is your software up to date?
The EFILive software is constantly evolving to keep pace with tuning technology. New
updates and features are released regularly. Because of this, the CD in your FlashScan
V2 package may not contain the latest and greatest software from EFILive.
After installing the software from the CD, which is described in the previous
section, we highly recommend checking EFILive’s web site for the most
up-to-date software.
You may select the “Check for Updates” option in the Windows Start menu:
Start->All Programs->EFILive->V7.5->Tools->Check for Updates
Or
Start-> All Programs->EFILive->V8->Tools->Check for Updates
The web site address for updated software is: http://www.efilive.com/downloads.html
www.efilive.com
support@efilive.com
11
FlashScan V2 Quick Start
Using FlashScan V2 to Display Trouble Codes
Location of the OBD II Connector
The OBD II connector is located in the passenger compartment within reach of a
technician seated in the driver’s seat.
Access to the connector does not require any special tools for the removal of any
instrument panel cover, connector cover or any barriers that may be obscuring
the connector.
Left hand drive
Right hand drive
Turn the vehicle’s ignition to the on (or run) position, but do not start the engine.
Connect the OBDII cable from the vehicle to FlashScan.
FlashScan will start up and attempt to connect to the vehicle. You will see activity
on one of the orange LEDs to indicate that FlashScan is communicating with the
vehicle.
After approximately 2-3 seconds, the main menu will be displayed. It will look
similar to this:
12
support@efilive.com
www.efilive.com
FlashScan V2 Quick Start
Display System Readiness Test Results
Press the F3 button to select the Diagnostics option.
Press the F3 button to select the Test Results option.
Press the F1 button to select the System Readiness tests option.
EFILive documentation often refers to sequences (similar to the
steps above), by the appropriate function keys only. So the above
example may also be written as: Select: F2->F3->F1
Such notation always assumes that the starting point is the first
menu displayed by FlashScan.
Scroll up and down through the eleven test results using the Up and Down arrow
buttons. The top right hand corner of FlashScan’s display shows the line number
of the last visible item and the total number of lines that can be displayed.
Press the OK (or Cancel) button to exit from the Readiness Test display screen.
Display Diagnostic Trouble codes
Select: F3->F2->F1->F1 to select the EPA Current DTCs option.
Scroll up and down through any DTCs that may have been displayed using the
Up and Down arrow buttons.
Press the OK (or Cancel) button to exit from the Display DTCs screen.
Clear Diagnostic Trouble codes
Select: F3->F2->F2 to select the Clear DTCs option.
Confirm that you wish to clear the DTCs by pressing the Yes button.
Press the OK (or Cancel) button to exit from the Clear DTCs option.
Clearing DTCs will also clear all Readiness Tests’ Status.
www.efilive.com
support@efilive.com
13
FlashScan V2 Quick Start
Making a Backup Copy of the Vehicle’s Controller
Turn the vehicle’s ignition to the on (or run) position, but do not start the engine.
Connect the OBDII cable from the vehicle to FlashScan.
Connect the USB cable from FlashScan to the PC or laptop.
Start the EFILive Scan and Tune software (version 8) by selecting the Windows
Start Menu option: Start->All Programs->EFILive->V8->EFILive Scan and Tune
5. Select the [F3: Tune] option.
6. Select the [F2: Read] option
7. Click the [Auto Detect] button. If the controller is not auto detected, right-click in
the engine (or transmission) controller’s grey box and select the appropriate
controller.
1.
2.
3.
4.
You will see a screen similar to this
Make sure your vehicle battery is capable of providing 12V for at least
5 minutes.
We recommend that you turn off the headlamps, daytime running
lights, radio, air conditioning and as many other accessories as
possible.
On some vehicles, applying the park brake 1 “click” may extinguish
daytime running lights, if applied before ignition is switched on.
14
support@efilive.com
www.efilive.com
FlashScan V2 Quick Start
8. Click the [Read] button.
9. Once the read process has completed, follow the onscreen instructions and turn
off the ignition for the indicated time. It is important that you turn the ignition off
(and leave it off) to allow the PCM time to reset back to normal operation.
10. To save the data that has just been read from the vehicle, click the [Save] button
11. EFILive recommends saving *.ctz tune files in the folder:
\My Documents\EFILive\V8\Tune
It is a good idea to create sub-folders in the Tune folder named
after the vehicle’s controller type, and save each vehicle’s *.ctz
files in its matching folder.
Use a naming convention like this: 2005_corvette_57L_A4_stock.ctz.
That way it is easy to keep track of your files. This is just a suggestion; you may
name the files anything you like.
12. For peace of mind, backup the original *.ctz files that have been read from each
vehicle onto a CD for safekeeping.
Repeat steps 7 through 10 for any other controllers that you wish to backup,
including other supported controllers on the same vehicle.
www.efilive.com
support@efilive.com
15
FlashScan V2 Quick Start
Congratulations
You have successfully installed, configured, licensed and used your EFILive
FlashScan tuning system. You are now ready to start scanning, logging and tuning
your vehicle.
Unless you have done this type of tuning before, we recommend you proceed
cautiously and make small, incremental adjustments and keep detailed notes of
what you change and why.
Where possible, measure the effects of any changes to validate that the changes
have a positive effect.
Research and read as much information as you can about tuning EFI engines.
More Information
The Scan Tool User Manual can be accessed from the Scan Tool software menu:
Help->Help contents.
The Tuning Tool User Manual can be accessed from the Tuning Tool software
menu: Help->Help contents.
Tutorials can be accessed via the menu: Help->Tutorials, from either software
package.
Additional documents and tutorials are available from EFILive’s web site:
http://www.efilive.com/downloads.html
Become a member of EFILive’s online community, you may register free on our
forum, where you can get instant help from tuners located all over the world:
http://forum.efilive.com/
16
support@efilive.com
www.efilive.com
FlashScan V2 Quick Start
Real Time Tuning
EFILive has partnered with MoatesWare LLC to bring you RoadRunner; the most
comprehensive, affordable, real time tuning system for LS1 gas and LB7 diesel
vehicles.
Other systems claim to be “real time” but they are just software emulators that
attempt to simulate real time tuning. By combining the RoadRunner PCM with
EFILive’s powerful tuning software, you can make changes to any supported
vehicle’s PCM in real time and experience the feedback immediately.
To learn more about real time tuning or to purchase your own RoadRunner PCM, go
to: http://www.moates.net/
Training and Education
EFILive and EFI University have created an EFILive specific EFI tuning training
course. The course is run regularly in the USA and in Australia. Please contact EFI
University, (http://www.efi101.com/efilive.html) to obtain course locations, schedules
and rates.
Thank you
Thank you for purchasing EFILive FlashScan. We believe you will have many years
of trouble free tuning and quality motoring in your FlashScan tuned vehicle(s).
If you should ever have trouble with any of EFILive’s products, please contact the
place of purchase to discuss the problem. Most problems can usually be resolved
quickly via telephone or email.
www.efilive.com
support@efilive.com
17
This page deliberately left blank.
Inside back cover.
EFILive Limited
2/121 Elliot Street Howick,
Auckland, New Zealand
www.efilive.com
Support email: support@efilive.com
Support forum: http://forum.efilive.com/


