does a basic drill string for vertical - add
advertisement

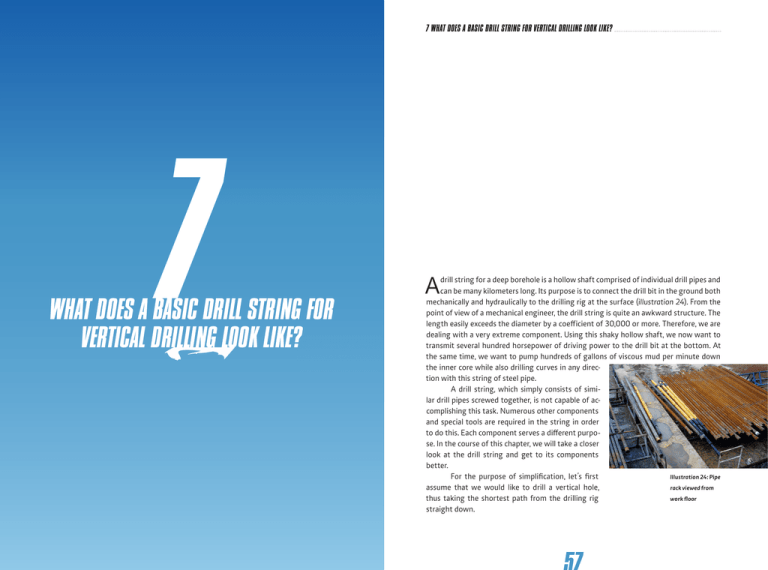
7 WHAT DOES A BASIC DRILL STRING FOR VERTICAL DRILLING LOOK LIKE? 7 WHAT DOES A BASIC DRILL STRING FOR VERTICAL DRILLING LOOK LIKE? A drill string for a deep borehole is a hollow shaft comprised of individual drill pipes and can be many kilometers long. Its purpose is to connect the drill bit in the ground both mechanically and hydraulically to the drilling rig at the surface (illustration 24). From the point of view of a mechanical engineer, the drill string is quite an awkward structure. The length easily exceeds the diameter by a coefficient of 30,000 or more. Therefore, we are dealing with a very extreme component. Using this shaky hollow shaft, we now want to transmit several hundred horsepower of driving power to the drill bit at the bottom. At the same time, we want to pump hundreds of gallons of viscous mud per minute down the inner core while also drilling curves in any direction with this string of steel pipe. A drill string, which simply consists of similar drill pipes screwed together, is not capable of accomplishing this task. Numerous other components and special tools are required in the string in order to do this. Each component serves a different purpose. In the course of this chapter, we will take a closer look at the drill string and get to its components better. For the purpose of simplification, let’s first Illustration 24: Pipe assume that we would like to drill a vertical hole, rack viewed from thus taking the shortest path from the drilling rig work floor straight down. 7 WHAT DOES A BASIC DRILL STRING FOR VERTICAL DRILLING LOOK LIKE? 7.1 DRILL BIT ROLLER CONE BIT OR ROCK BIT Roller Cone Bit oder Rock Bit 59 Diamond Bit 60 Which is the better bit? 61 R T he drill bit is located at the bottom end of the drill string. It cuts the rock, creating cuttings which are flushed to the surface by the drilling mud. It is crucial to match the best bit for the rock and also to optimize the drilling parameters. If the cuttings are too coarse, they cannot be removed steadily or completely from the borehole. If, on the other hand, the cuttings are too fine, we have obviously wasted way too much of our valuable operating power at the bit to pulverize the rock rather than using it to “make hole” (illustration 14). The drill bit has an unbelievably difficult life. From above, the drill string presses with multiple tons of weight and below is the rock, often extremely hard, that is supposed to be drilled. Depending on the type of bit and how it is driven, it rotates at a rate of 60 to 1,000 revolutions per minute (RPM), often performing several millions of revolutions during its lifespan and drilling many kilometers, sometimes in one run. Of course, it is supposed to remain Illustration 25: sharp for a long time, to drill fast and, as desired by the customer, to be Roller cone bit for reasonably affordable. hard (left) and Obviously not all of these wishes can be simultaneously fulfilled softer formations and, as in real life, one has to make compromises. (middle), as well as Drill bits can be divided into two major groups: roller cone and a PDC bit (right) diamond bits (illustration 25). oller cone bits were invented more than a hundred years ago. Mostly they are equipped with three cones fitted with teeth. If the bit is pressed on the bottom and the drill string is set into rotation, the cones will roll over the formation and break the rock. Due to the fact that there are many different types of formations, there are also many types of roller cone bits to match the specific properties of those formations. For obvious reasons, we cannot go into every detail of the construction of those roller cone bits, but we would at least like to point out the differences between tooth bits and insert bits. Tooth bits are used in softer formations. As the name suggests, their cones have long teeth. When manufactured, the cones, as well as their teeth, are milled out of solid pieces of raw material. Basically, a tooth on the bit works like the spade we use for gardening at home. The blade, or the tooth, is pressed firmly into the ground and then as much material as possible is removed from the ground by the tilting action of the blade. Insert bits, on the other hand, are used in hard to very hard formations. Their cones are equipped with short spiky inserts made of hard metal. When they are rotated on the bottom, only some of the numerous spikes come into contact with the formation at the same time. This results in more force being applied to the formation, which then causes the brittle rock to break under the high pressure. Roller cone bits are versatile and comparably low in price. First of all, this is very nice for the user. Much less favorable, however, is the fact that the delicate ball bearings have a limited lifespan. These bearings are necessary for cones to rotate on the bit. Obviously, if a bit is composed of many moving parts, there is a chance that something can break. Therefore, roller cone bits do not last as long as we might desire. After one or two days of drilling in a challenging formation with a high load, the life of a roller cone bit will come to an end, despite its careful and robust Illustration 26: construction. You have to be careful that the cones do not come loose, Roller cone bit or in extreme cases, fall off (illustration 26). Drilling cannot continue without and with when there is junk in the borehole since every piece of hard metal will roller cones damage the next bit and quickly render it useless. Therefore, any lost cones have to be fished out of the borehole before the next bit is run in the hole. These fishing attempts will cost the drilling company a lot of time and money, which is highly undesirable. One could, of course, exchange the bit after only a few hours of drilling in order to avoid anything falling off the bit. However, this also would not be such a good idea because the constant tripping out and in of the drill string would cost a lot of time, making the whole effort quite expensive again. 7 WHAT DOES A BASIC DRILL STRING FOR VERTICAL DRILLING LOOK LIKE? DIAMOND BIT D iamonds are harder than any other material. Thus, it is suitable to use diamonds to cut rock. In the 1950s bits were already being built that were covered with natural diamonds and could cut the rock like metal on a lath. The great advantage to roller cone bits was that they did not have any movable parts, resulting in a much longer service life. On the other hand, manufacturing those natural diamond bits was very expensive because they required a large amount of diamonds in addition to a high amount of manual labor. Since every natural diamond has a different shape, they had to be fit to the bit individually. In the 1980’s the mass production of industrial diamonds started. These were much cheaper than natural diamonds and it was possible to produce them in standardized sizes that were much easier to work with. Most suitable for the construction of drill bits are Polycrystalline Diamond Cutters, or PDC’s. These consist of mostly triangular or round shaped synthetic diamond plates that are soldered onto metal carriers. PDC bits are equipped with a number of ribs, known as “blades” by experts. The cutters are fixed to the front edge of the blades (illustration 25). PDC bits, along with roller cone bits, are the most frequently used drilling bits in the field today. Often they can be used for a week or even longer without losing their cutting edge. Some formations are so abrasive and hard that they cannot be successfully cut using either PDC bits or roller cone bits. The only way to effectively work on these formations is to sort of “sand them down.” To do this, special bits were developed that consist of a matrix interspersed with minute splinters of diamonds. As the softer matrix is worn off by the formation, new splinters of diamond appear and work on the rock. This type of bit is called an “impregnated bit.” However, they represent only a very small group and have a very small market share percentage. WHICH BIT IS BETTER? O f course, diamond bits are much more expensive than roller cone bits. The money needed to purchase a standard diamond bit would be enough to buy a good middle class car, or five to ten roller cone bits. But since a diamond bit normally lasts so much longer than a roller cone bit, one or more expensive roundtrips can be saved. The determination of whether a roller cone bit or a diamond bit is the more economical way to drill a well can only be made on a case by case basis. This decision depends primarily on the rock, as well as other conditions. On extremely expensive offshore rigs with rental costs easily reaching one million dollars per day, the choice is obvious. If using a diamond bit can save even one roundtrip that would cost one million dollars, I would gladly pay several ten thousand more for the bit! On simple and cost effective land rigs, time is not quite as important. At a daily rate of 10,000 dollars, I’d rather accept having to take a roundtrip in order to swap out a cheap bit, instead of purchasing a relatively outrageously expensive diamond bit. The diameter of the hole that is to be drilled also has to be taken into consideration when selecting the bit. In the larger diameter sections in the upper part of the hole, a roller cone bit will likely be used because such a large diamond bit would require a huge amount of diamonds. This cannot be afforded even on an offshore rig! In the lower section of the hole, where the diameter is smaller, it pays to use a diamond bit since the manufacturing of minute roller bearings would be too complicated. As you can see, the question of which bit is the best cannot be easily answered because it depends on a multitude of conditions. The selection of the correct drill bit is therefore gladly left to the appropriate service companies. 7.2 DRILL PIPES A fter we have selected the correct bit for drilling the formation down in the hole, we have to connect it somehow to the drilling rig at the surface so that we can send the mud down and transmit rotary power. What would be more natural than to use simple pipes outfitted with thread connectors on either end so that they can be screwed together? These pipes are called drill pipes. Like almost all the components in the drill string, they have a length of about 30 feet each (illustration 27). The actual drill pipe is relatively narrow with a diameter which is standardized, as is almost everything in the drilling business. Both ends are welded with connectors that are larger in diameter. One connector has a female, or box thread, the other one has a matching male, or pin thread. The threads of drilling equipment are almost exclusively tapered threads, meaning the diameter of the pin decreases towards the free end. The box threads are correspondingly shaped. Tapered threads are more robust than cylindrical threads and are therefore better suited for the rough operating conditions on a drilling rig. Obviously the threaded ends of the pipe are hollow so that the mud can flow freely through the drill pipe. Illustration 27: Drill pipes (by R. Ritschel) 7 WHAT DOES A BASIC DRILL STRING FOR VERTICAL DRILLING LOOK LIKE? Illustration 28: Roughnecks using “make-up” tongs. Multiple drill pipe sections are screwed together to make up the drill string. In order to screw them together, large “make-up” tongs hang from the derrick above the work floor and are used by the roughnecks (illustration 28). A drill string is relatively thin and flexible, therefore no downward pressure must be applied from above. If pressure was applied, it would bend and, in the worst case, could even lock up in the borehole. Thus, the drill string is put together in a way so that it is constantly kept under tension. In order to provide the tension necessary at all times, heavy weights, known as drill collars, are attached to the lower end. Sculpture in a shopping mall in Edmonton, Canada 7.3 DRILL COLLARS T he bit down at the end of the drill string has to be pushed strongly into the rock so that it drills quickly. But where does this weight on the bit (WOB) actually come from? No weight can be transmitted to the bit via the thin drill string because it will buckle or give way immediately when it is pushed from the surface. It will eventually jam up the borehole, making it impossible to push forward. Therefore, one has to provide the WOB using so-called drill collars which are located on the lower end of the drill string. Drill collars are especially thick walled and, consequently, heavy drill pipes. While their considerable weight presses the bit into the rock, it also keeps the upper part of the drill string under constant tension, thus keeping it from buckling. As a result, drill collars are an essential part of every bottom hole assembly. Most drill collars have grooves on their outer diameter along their body that are spiral shaped (illustration 29). This is because the drilling mud is prepared in a way so that the pressure inside the borehole is always slightly greater than in the pores of the surrounding rock. As long as the drill string is rotating, everything is fine. But when a Illustration 29: thick drill pipe with a slick surface leans motionless onto the soft mud Drill Collars cake for some time, for example when a new drill pipe is being installed (by R. Ritschel) at the surface, it is possible that the drill pipe in the hole cannot be mo- ved afterwards, even with a huge amount of power. This is because the mud has pressed it firmly into the wall of the borehole. The high pressure inside the borehole presses the drill collar onto the wall while the lower pressure in the pores of the rock cannot provide resistance and the soft mud cake acts like a seal between the two zones of different pressure. Consequently, the drill string is stuck to the wall. Those grooves were invented to prevent this from happening. Large slick surfaces enabling the drill pipe to stick to the wall do not exist anymore, and the dreaded blocking, called “differential sticking”, can no longer occur.


