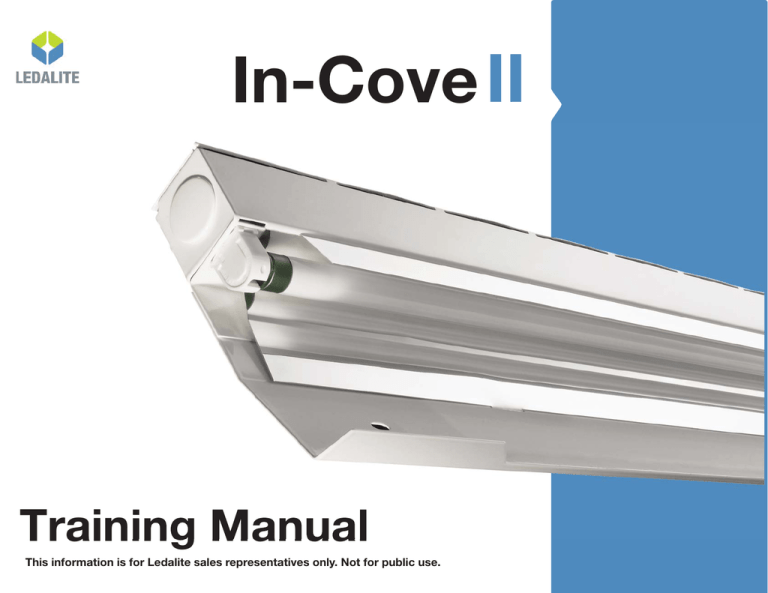
In-Cove II
Training Manual
This information is for Ledalite sales representatives only. Not for public use.
Table of Contents
In-Cove II Sales Training © 2007 Ledalite. All rights reserved
Introducing In-Cove II
3
Key Features
4
In-Cove II Improvements
5
Sales Approach
6
Sales Sample
Demonstration Tips
Setting Up the Sales Sample
What to Talk About
6
6
7
8
Sales Tools
9
Sales Training Presentation
Sales Presentation
Product Brochures
Website
Competitive Analysis
Applications
LightXpress
Keeping Customers Up-to-Date
9
9
9
9
9
9
9
9
Page 2
Introducing In-Cove II
Completely redesigned high-performance cove
lighting that virtually eliminates socket shadows
to evenly illuminate architectural surfaces.
Exceptional forward-throw distribution ideal for
cove applications in retail, office lobbies and
other large public spaces.
In-Cove II Sales Training © 2007 Ledalite. All rights reserved
Page 3
Key Features
Great Forward-throw
Asymmetrical optical system produces exceptional forward-throw distribution and enables close-to-ceiling mounting with excellent uniformity and
virtually no socket shadows between modules.
Precision Light Control
In-Cove II fixtures can be mounted in multiple positions and orientations
to enable precise coordination of optical distributions for any type of cove
lighting challenge.
Exceptional Efficiencies
In-Cove II offers up to 93% fixture efficiency, which translates into
increased efficiency and energy cost-savings over conventional cove lighting systems.
Freedom of Choice
Four profile sizes accommodate T5, T5HO and T8 lamping options. Available in 2,3,4,6 or 8ft module lengths that can be mounted together to
create continuous runs of various lengths.
In-Cove II Sales Training © 2007 Ledalite. All rights reserved
Page 4
In-Cove II Improvements
The following chart illustrates the significantly improved optical
performance of In-Cove II vs. the original In-Cove product.
Comparison of In-Cove (28) vs In-Cove II (38)
In-Cove LP
In-Cove II
280
380
8
9
20 gauge (NYC) as
standard
8
9
Includes T5 as
standard
1T5HO
Peak angle
115
115
Peak to zenith
2.4
5.4
Efficiency
80.4%
87.2%
1T8*
Peak angle
125
113
Peak to zenith
2.2
3.6
Efficiency
74.9%
79.1%
* Larger In-Cove profile (281 series) not used for 1T8 comparison.
In-Cove II Sales Training © 2007 Ledalite. All rights reserved
Page 5
Sales Approach
In-Cove II, the completely redesigned cove lighting solution
from Ledalite, offers significantly
improved performance over the
previous In-Cove product offering.
To truly succeed in selling In-Cove
II, it is important that specifiers
clearly understand what makes this
product so different from other cove
lighting products on the market.
Below are some helpful tips on how
to successfully sell this product.
Sales Sample
In-Cove II must be seen to be fully
appreciated, so try to demonstrate
it in person wherever possible. Your
agency has been supplied with a
sample kit to support your sales
efforts.
Each In-Cove II sales sample contains the following components in a
custom protective carrying case:
• 2 - 2' Fixtures (with quickconnect plugs)
• 2 - T5 Lamps (in protective
lamp tubes)
• 1 Tablecloth
• 2' x 8-1/2" x 2" Metal Backdrop
• 2 Levelling Plates
• 1 Needle Nose Pliers
Notes:
In-Cove II Sales Training © 2007 Ledalite. All rights reserved
1. The quick-connect plugs for
connecting the two sample
fixtures, and the grommets in
the knockouts through which
they protrude, are unique to
the sales sample only and have
been pre-installed as a safety
precaution for demonstration
purposes.
2. The rotary sockets, which
secure the lamps, rotate in one
direction only.
Demonstration Tips
•
Show the product brochures
which include photography and
product details that can help
you highlight key points.
•
Know the competition – If you
are in a competitive bidding
situation, refer to the In-Cove II
competitive analysis to identify
the key strengths of the product.
•
Know the clients – Before
presenting any lighting product, understand your client’s
needs to ensure you are demonstrating a viable solution that
meets the challenges of their
project(s).
•
Heat the lamp–plug in the lamp
prior to your presentation so the
lamp is heated and running at
optimal light output.
Page 6
Sales Approach
Setting Up the Sales Sample
Step 1: Lay the tablecloth on the
demonstration surface to avoid
any scratching/scuffing before
unpacking the fixtures.
Step 2: Insert the lamps and turn
the rotary sockets downwards to
engage.
Step 3: With both fixtures side-byside on the surface, connect the
two fixtures together using preinstalled quick-connect plugs.
Step 4: Slide fixtures together,
ensuring quick-connect plugs are
tucked inside wiring cavity and
fixtures are flush together.
Note: You should be viewing the
fixture along the length of the lamp
(0°), rather than looking broadside
at the lamp (90°). This is the most
challenging viewing angle from the
perspective of socket shadows,
allowing for the best demonstration
of the exceptional performance of
the product.
Step 5: Insert the metal backdrop
behind the two fixtures.
In-Cove II Sales Training © 2007 Ledalite. All rights reserved
Step 6: Insert levelling plates
beneath the outer ends of the
fixtures. Plug in, and switch fixtures
on to demonstrate the smooth,
even illumination and absence
of socket shadows against the
backdrop.
Page 7
Sales Approach
What to Talk About
Illimination of Socket Shadows:
Precision Light Control:
With one fixture raised, talk about how In-Cove II’s unique optical design
virtually eliminates unattractive socket shadows and produces smooth,
even illumination across the back wall. Point out the highly reflective
notched front reflectors which help to bounce additional light back into
areas that would otherwise display socket shadows. Another feature to
point out is the reflector over the lamp which reduces light on the back wall
and increases forward-throw distribution out into the space.
Thanks to In-Cove II’s exceptional optical design and the use of Miro IV®
reflectors, fixtures can be mounted in multiple positions and orientations
to enable precise coordination of optical distributions with architectural
requirements to illuminate flat, sloped, floating or vaulted ceilings. Hold
one fixture up to demonstrate how the fixture can be mounted at various
angles:
TOP VIEW OF COVE
For Standard Cove Applications
Position 1: Hold fixture flat
Position 2: While holding fixture flat, tilt downwards
For Sloped or Vaulted Ceiling Applications
Position 3: Hold fixture with lamps facing upwards
Position 4: While holding with lamps facing up, tilt fixture forward
For Wall Wash Applications
Position 5: Hold fixture with lamps facing downwards
Position 6: While holding with lamps facing down, tilt fixture back
ROOM
WALL
Highly-reflective notched front
reflectors help to bounce additional
light back into areas that would
otherwise display socket shadows.
Reflector over lamp reduces
light on back wall and increases
forward-throw distribution out
into the space.
Asymmetrical Distribution:
In-Cove II’s highly-effective asymmetrical optical system produces a low
peak candela angle. This makes it an ideal approach to cove lighting when
compared to more traditional alternatives. At this time, take the opportunity
to point out the far more effective asymmetric distribution of light by InCove II vs. the traditional strip light used for cove lighting.
Exceptional Efficiencies:
In-Cove II offers up to 93% fixture efficiency, which translates into
increased efficiency and energy cost-savings over conventional cove
lighting systems.
In-Cove II Sales Training © 2007 Ledalite. All rights reserved
Page 8
Sales Tools
Sales Training Presentation
Competitive Analysis
A narrated PowerPoint presentation highlighting key messaging, sales
approach guidelines, sales tools, etc is available to help you sell In-Cove
II with confidence. A viewable version of this presentation is available for
download.
Make use of the competitive analysis chart to identify the strengths of InCove II when you get into competitive bidding situations. A downloadable
version of this chart is available.
Sales Presentation
Applications
A PowerPoint presentation detailing In-Cove II’s key features and benefits is A series of application reports that detail lighting levels, power densities
available for download. Incorporate this slideshow as part of your customer and uniformities using various lamping and distribution options will soon
be available on LightXpress. The reports are a handy reference tool to help
presentation.
you provide customers with practical information.
Note: This information is generic, if you require more project-specific
Product Brochures
calculations, please contact our Applications department for assistance.
Each full-color brochure features product and installation photography as
well as high-level specifications and order information to help you make
LightXpress
your presentations.
All product configurations have been integrated in LightXpress, Ledalite’s
web-based quotation and configuration system. With LightXpress, you
can go online to get quick prices, configure systems, build and manage
quotations, and generate detailed spec packages – within minutes and
without paper.
Keeping Customers Up-to-Date
•
Website
Ledalite’s corporate website is a valuable resource for sales and product
information. Visit www.ledalite.com/products/in-cove-ii to navigate through
all In-Cove II product options and technical details, create customized spec
sheets (including photometry), download images and product resources
and more…
In-Cove II Sales Training © 2007 Ledalite. All rights reserved
•
•
E-mail specifiers a link to the In-Cove II website. The address is: http://
www.ledalite.com/products/in-cove-ii
Remember to make use of the competitive analysis chart to identify InCove II strengths when you get into competitive situations.
Remember, In-Cove II beats the competition on many levels, so sell it
with confidence
Page 9

