The Engineering Design Process Engineering Design Process
advertisement

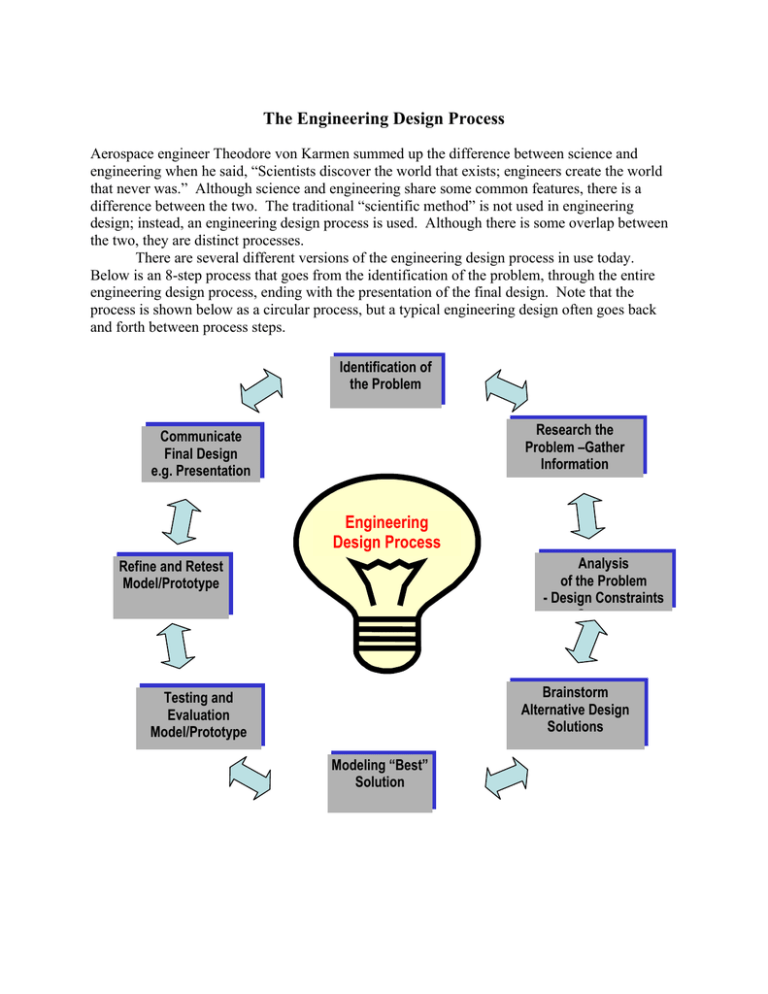
The Engineering Design Process Aerospace engineer Theodore von Karmen summed up the difference between science and engineering when he said, “Scientists discover the world that exists; engineers create the world that never was.” Although science and engineering share some common features, there is a difference between the two. The traditional “scientific method” is not used in engineering design; instead, an engineering design process is used. Although there is some overlap between the two, they are distinct processes. There are several different versions of the engineering design process in use today. Below is an 8-step process that goes from the identification of the problem, through the entire engineering design process, ending with the presentation of the final design. Note that the process is shown below as a circular process, but a typical engineering design often goes back and forth between process steps. Identification of the Problem Research the Problem –Gather Information Communicate Final Design e.g. Presentation Engineering Design Process Analysis of the Problem - Design Constraints G Refine and Retest Model/Prototype Brainstorm Alternative Design Solutions Testing and Evaluation Model/Prototype Modeling “Best” Solution 1. Identification of the Problem It seems obvious that in order to solve a problem, we must first identify what the problem is. Sometimes this is not so straightforward. For example, what appears to be a problem may actually be a result of something else that is actually the problem you should be solving. Also, identifying a problem may come from identifying a customer need, and a lack of an existing solution to that need 2. Research the Problem – Gather Information The next step in the engineering design process is to research the problem. What background information is needed before we can start developing possible solutions to the problem? What sources do we need to obtain that information, and how reliable are those sources. What previous work has been done on this or similar problems that could be used? 3. Analysis of the Problem – Design Constraints After the information has been obtained, the next step is to perform a preliminary analysis. A lot of this analysis will concern design constraints. The optimal solution to a problem may vary depending on the constraints placed on the design. These constraints can be technical, economic and time issues. For example, engineers could probably design a car that could withstand any collision and protect its occupants from injury, but it would be so expensive that nobody could afford to buy the car. Another constraint is that the technology that could be used for this collision-free car is still under development, and is not available to be used in the design. 4. Brainstorm Alternative Design Solutions At this point we are ready to start developing potential solutions to the problem. Brainstorming is an effective method to start this part of the engineering design process. In brainstorming, all members of the design group contribute potential problem solutions. The solutions proposed at this point are more conceptual and at a high level of abstraction, lacking specific implementation details. No idea is judged or discarded; all ideas are recorded for use in the next step of the process. 5. Modeling “Best” Solution After listing possible solutions to the problem, the design team reviews the list, discusses the pros and cons of each possible solution, and comes to a consensus on the best solution to pursue. The design constraints are considered in determining the best solution. The team models this solution, determining what work must be done to convert it from a concept to a solution that can be implemented. 6. Testing and Evaluating Model/Prototype The best way to evaluate a solution is to build and test it. To test it, you need to first develop a detailed design specification, as well as a test protocol. A prototype is an actual device built to implement the proposed solution. Building the prototype provides feedback on the ease or difficulty of creating the proposed solution device. After the prototype is built, it is tested to see if it actually solves the problem. If the prototype does not work out, it may be necessary to return to the previous step and select a different solution, and then prototype and test that solution. 7. Refine and Retest Model/Prototype The engineering design process rarely yields a complete and final solution with the first prototype. It is more likely that the design team will take the feedback from the initial testing and revise its solution. Also, the initial specification for this product will be refined. Then the team prototypes the new solution and tests it, repeating the process as necessary until an acceptable prototype has been developed. This step is often the most time-consuming part of the engineering design process, often taking more time than the other steps combined. 8. Communicate Final Design (e.g. Presentation) There are many ways to present the final design, often varying depending on the audience. For an engineering audience, the presentation may include circuit diagrams, blueprints, and other technical materials such as operating manuals. A presentation for a sales team might focus on the capabilities of the final product and how it compares to other products in the marketplace. A presentation for the general public might emphasize how to use the product, as well as the production of marketing materials.

