!
ThermaSync Instructions
®
Frost Fighter
ThermaSync Defroster Controls
®
www.frostfighter.com
Defroster Technology
W
NE
ThermaSync
®
2700 R Series
Defroster controls with smarts
Blue
2712
ThermaSync, 12 Volt
Orange
2724
ThermaSync, 24 Volt
2800 M Series
Green
Defroster Control Instructions
ThermaSync® Defroster Controls are the perfect companion to Clear
View II and other defrosters.
2812
ThermaSync, 12 Volt
Red
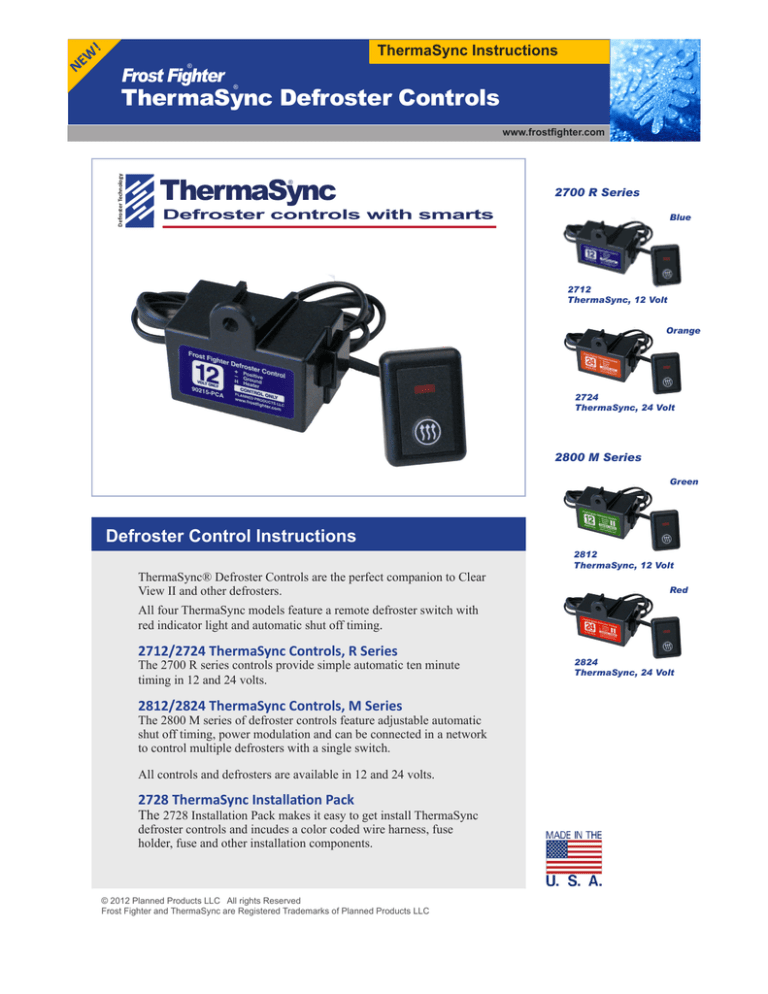
All four ThermaSync models feature a remote defroster switch with
red indicator light and automatic shut off timing.
2712/2724 ThermaSync Controls, R Series
The 2700 R series controls provide simple automatic ten minute
timing in 12 and 24 volts.
2812/2824 ThermaSync Controls, M Series
The 2800 M series of defroster controls feature adjustable automatic
shut off timing, power modulation and can be connected in a network
to control multiple defrosters with a single switch.
All controls and defrosters are available in 12 and 24 volts.
2728 ThermaSync Installation Pack
The 2728 Installation Pack makes it easy to get install ThermaSync
defroster controls and incudes a color coded wire harness, fuse
holder, fuse and other installation components.
© 2012 Planned Products LLC All rights Reserved
Frost Fighter and ThermaSync are Registered Trademarks of Planned Products LLC
2824
ThermaSync, 24 Volt
Clear View II
Electrical and wiring
www.frostfighter.com
Wiring Harness
Important! The vehicle must be running to operate the defroster.
Clear View defrosters come complete with the wire harness and connectors needed to install the defroster. All wires are
labeled and color coded for easy identification. Match the "W" number on the wire with the description below.
No.
Terminals
End 1
Connection
End 2
Length
W-1
Defroster to control
205 Faston + Green Cover
Faston + Black Cover
15 Feet (7 m)
W-2
Control to ground
187 Faston + Blue Cover
Spade Terminal
19 in (48 cm)
W-3
Defroster to ground
250 Faston + Black Cover
Spade Terminal
42 in (107 cm)
W-4
Control to fuse tap
250 Faston + Red Cover
Bare, Not Striped
30 in (76 cm)
W-5
Fuse to power tap
250 Faston + Insulated
Bare, Not Striped
14 in (35.5 cm)
W-6
Cable from control module to switch (H)
Attached to control
Plug for switch
38 in (96 cm)
Wiring Diagram
Important! If replacing wire use 14 awg or bigger.
Power Modulation and Power Measurement
ThermaSync 2812 and 2824 defroster controls modulate the apparent power
the defroster receives. Measuring the voltage from modulating power control is
NOT possible using a standard volt meter. Low power readings and pulsing power
readings are NORMAL.
CAUTION!
Wiring the control in any other
manner will damage the unit. The
fuse must be used in all cases.
ThermaSync Control
Clear View
Defroster
W-3
+
W-1
To Ground
H
+
R
B
Ground
H Defroster GG Green 205
+ Positive R Red 250
Ground B Blue 187
G
-
W-2
W-6
20 AMP
W-4
W-5
To T-Tap wire or
splice with wire
controlled by
ignition switch
Connect Ground First!
Ground (Blue) on the control must
be connected first
Defroster
switch with
LED indicator
Flat cable with
plug to switch
Fuse Tap and
ATO fuse
Important!
The vehicle must be running prior to testing the unit. Control must
be placed inside vehicle.
Clear View Defroster Installation Instructions © 2011 Planned Products LLC, All rights reserved.
Wire ThermaSync Control
STEP 1
Start the installation by wiring the control module. The
module has three terminals each with an identifying letter
stamped in the plastic base. The legend for these letters is
shown in the wiring diagram. Connectors are color coded
and of different sizes.
2. Attach wire W-2 to the module terminal marked with
the “-” symbol using the faston with the BLUE cover.
3. Attach wire W-4 to the module terminal marked with
the “+” symbol using the faston with the RED cover.
GRN
1. Attach wire W-1 to the module terminal marked “H”
using the faston with the GREEN cover.
(H) Defroster
205 Green
(-) Ground
187 Blue
(+) Positive
RED
Warning: Pulling on the wires to remove the faston
connectors from the ThermaSync control can separate
the module. Wiring the control in any other manner will
damage the unit and is not a warranty item.
BLU
4. Attach the spade terminal of wire W-2 to electrical
ground in an area under the dash using one of the kits
self tapping screws if needed.
250 Red
Mount Control and Switch
STEP 2
Once all three wires are attached to the ThermaSync
control, secure it behind the dash using wire ties, or
a self-taping screw. There are two ways to mount the
remote activation switch.
Option 1. Under Dash Mount
1. File two small slots in the under dash switch mount
to allow the connector the switch to pass.
2. Mount the dash switch plate in a convenient location
with easy access to defroster on/off switch using the
self taping screws.
3. Insert the connector into the switch, peal away the
release film, and adhere to plate with the red LED up.
Option 2. In Dash Mount
If an in-dash installation is preferred, drill 7/16 in.
(11mm) hole in an appropriate area on the dash. File
to fit the connector on the back of the switch. Next run
the flat cable through the hole, remove release coating
and connect to the switch. Press the switch into place.
Under Dash
Switch Mount
Mount in the dash
or use the under
dash mounting
plate.
Switch
Switch mounting template.
This is approximately the
size hole needed to mount
the switch in a dash.
7/16 in
(11 mm)
1/16 x 1/2
5/8 in (16 mm)
Clear View Defroster Installation Instructions © 2011 Planned Products LLC, All rights reserved.
Important! The vehicle must be running prior
to testing the unit.
STEP 3
Tap Vehicles Power
Tapping into the vehicle’s power is a critical step in the
installation process. There are several ways to go about
taping into vehicle power. The two most popular are:
Option 1. Wire Tap
Find an existing wire to tap and follow these instructions.
Tap into power
wire controlled by
ignition.
1. Near the fuse box, locate a wire that is about the
size of the W-5 wire supplied (14 awg) and is activated
when the ignition switch is turned on.
2. Place the wire in the open channel of the Wire Tap
(016) supplied, fold the tap body and crimp with pliers.
Fold and crimp
3. Slide wire W-5 End 1 (blue terminal) onto the wire
tap and secure any loose wire with a tie.
WARNING: In all cases the fuse and wire used must
be adequate to handle 20 amps plus the amperage
required by the other units on the same circuit. See
wiring diagram.
Insert W-5 in wire
tap
Do not use wire taps on wire under 16 awg, over 14 awg
or on solid wire.
Option 2. Splice
Cut off the connector (End 1) of wire W-5 and strip
away insulation. Attach the end of wire W-5 to a fuse
position or splice into wire which is activated when the
ignition switch is turned on.
STEP 4
Installing the Fuse
Once wire W-5 has been connected to the vehicle’s
power connect wire W-4 with W-5 using Fuse Tap (015).
1. Locate the free ends of W-5 and W-4. Check wire
lengths and trim to a comfortable length. Do not strip
back insulation.
Connecting both wires
(W-4 & 5) with fuse tap.
2. Insert the free end of W-4 into the Fuse Tap making
sure to seat the wire through the tap so that it presses
against the center stop in the Tap.
3. Repeat for wire W-5 End 2
Fold the fuse tap and
crimp.
4. Using pliers, fold the connector body and crimp.
5. Insert ATO fuse supplied and seat it firmly in the fuse
tap. It can take some pressure to seat.
WARNING: In all cases the ATO fuse and fuse tap MUST
be used.
Vehicle power has been taped and now runs to the
Control Module.
Insert and seat fuse.
STEP 5
Run Wire to Defroster
Run wire W-1 (the long one), already attached to the
control module back to the rear window defroster. Take
a moment to consider on which side and where it will
attach to the defroster.
Grounding
A grounding strap may be needed, connecting the ground
on the molding to a ground an the chassis itself in order
to provide adequate grounding.
Wire W-1 can be run under carpet, side molding or under
overhead molding, whichever is the most feasible on
your vehicle. Part of the wire may be concealed under
the rear deck but will require drilling.
All grounding connections should he secure and the
grounding points should be clean and clear of all insulating materials and paint. This is necessary to avoid shorting out the defroster circuit.
If the wire is too long do not cut the wire at this stage!
STEP 6
Connect Defroster
Connect wire W1 to one of the integral tabs on the bus
bar. If wire W-1 is too long it can be shortened. Use the
extra faston terminal supplied in your kit to attach in
place of the one removed. Simply cut off attached faston
and crimp on the new faston.
Next attach wire W-3 (ground) to the other integral bus
bar tab. Wire W-3 can be grounded in the trunk area by
drilling a hole in the rear deck or it can be grounded to
the rear window frame if it is metallic and grounds to the
chassis.
To shorten defrost wire...
Trim wire to length and strip insulation, Crimp
connector to wire using needle nose pliers
If you wish to connect the grounding wire to the window
molding area, care must be taken as the window molding
screws will probably not supply sufficient grounding.
A good ground is very important!
Wire W-3 can be shortened and a forked terminal (018) can
be crimped to permit attachment to the window molding or
grounding area inside the trunk.
Insert connector in cover and snap shut
Planned Products LLC
4699 Nautilus Court S.
Suite 201
Boulder, CO 80301
Tel:
Fax:
email:
Web:
(303) 682-0274
(303) 682-0678
info1@frostfighter.com
www.frostfighter.com
Connecting power and ground to the defroster
via the integral tabs
Troubleshooting
If defroster does not operate check the following:
A. Switch light flashes but goes off. Start the vehicle.
The vehicle must be running to operate defroster.
B. See that the defroster switch is on.
C. Allow sufficient time for heat elements to function,
about 10 minutes.
D. See if the fuse is blown: if so, replace with one of
same type and current voltage rating.
E. Verify that the light is on when you press the
defrosters “on” switch. Of the light is not on there is
no power to the Control Module. Check the wiring
on the control module.
F. Check to see if there is 12+ vdc on the bus bar faston
connectors. To do this use a volt meter and connect
the leads to the defroster bus bar tab/clips. If there
is power to the connectors then the problem is
in the defroster grid. Inspect the bus bar/copper
element connection carefully.
G. FIRMLY press the black plastic cover down on the
bus bars concentrating pressure over each of the
grid/bus bar junctions.
Proprietary Notice and Liability Disclaimer
The information disclosed in this document, including all
designs and related materials, is the valuable property of
Planned Products and/or its licensors. Planned Products
reserves all patent, copyright and other proprietary rights
to this document, including all design, manufacturing,
reproduction, use and sales rights thereto, except to the extent
said rights are expressly granted to others.
The products discussed in this document are warranted in
accordance with the terms of the Limited Warranty Statement.
However, actual performance of each product is dependent
upon factors such as configuration, customer setup, installation
and operator control. Because implementation by customers
vary, the suitability of a specific product to the customer’s
application must be determined by the customer and is not
warranted by Planned Products. Neither Planned Products nor
appointed sales agents shall be liable to the purchaser of this
product or third parties for damages, losses, costs or expenses
incurred by purchaser or third parties as a result of accident,
misuse or abuse of this product.
To allow for design improvements, the information in this
document is subject to change at any time, without notice.
Planned Products assumes no responsibility for errors or
omissions. Neither is any liability assumed for damages
resulting from the use of the information contained herein.
Reproduction of this document or any portion thereof without
written approval of Planned Products is prohibited.
H. If condition persists, contact Planned Products.
Planned Products LLC
4699 Nautilus Court South
Suite 201
Boulder, CO 80301-5307
Tel:
(303) 682-0274
Fax:
(303) 682-0678
Email: Info1@frostfighter.com
Web: www.frostfighter.com
ThermaSync Defroster Control Settings
The ThermaSync 2812/2824 controls allow for
several timing options from 10 to 160 minutes or
manual operation. The settings are selectable by
changing the jumpers on the circuit board.
To make a change in the
timing please contact
Planned Products for the
proper settings.
Version - 11/10/2011
© 2011 Planned Products LLC
MADE AND PRINTED IN USA
In addition to timing the
control’s power modulation is set by internal
jumpers. DO NOT CHANGE THESE JUMPERS.
The defroster and control are matched. Changing
the power modulation settings will cause the
defroster to fail.
ThermaSync 2712/24 Controls do not feature
power modulation, adjustable timing and are not
SwitchBoss Compatible.
UNDER NO CIRCUMSTANCE CHANGE THE POWER
MODULATION JUMPER SETTINGS ON THE PRINTED
CIRCUIT BOARD.
Frost Fighter and ThermaSync are Registered Trademarks of
Planned Products LLC. All rights reserved.
Warranty and Disclaimer
Since the Seller cannot control the manner, installation or use
of its products after their sale, Seller will not be responsible
for any consequential or indirect damages. There are no
express warranties which extend beyond the description on
the face hereof. Seller disclaims any implied warranties of
merchantability or fitness for any particular purpose. The Seller
will, at its option, either replace the products sold or refund
the purchase. No warranties will apply if the products are in
any way altered or modified after delivery by Seller.
Clear View Defroster Installation Instructions © 2011 Planned Products LLC, All rights reserved.


