How to make a MIDI Interface - Bare
advertisement

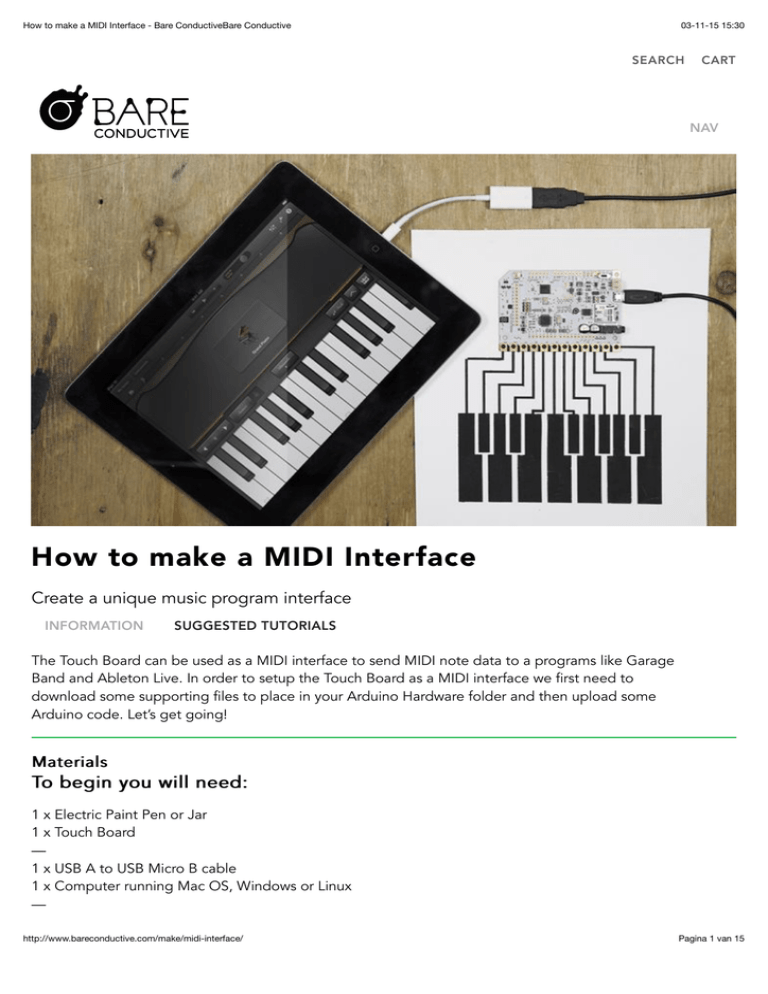
How to make a MIDI Interface - Bare ConductiveBare Conductive 03-11-15 15:30 SEARCH CART NAV How to make a MIDI Interface Create a unique music program interface INFORMATION SUGGESTED TUTORIALS The Touch Board can be used as a MIDI interface to send MIDI note data to a programs like Garage Band and Ableton Live. In order to setup the Touch Board as a MIDI interface we first need to download some supporting files to place in your Arduino Hardware folder and then upload some Arduino code. Let’s get going! Materials To begin you will need: 1 x Electric Paint Pen or Jar 1 x Touch Board — 1 x USB A to USB Micro B cable 1 x Computer running Mac OS, Windows or Linux — http://www.bareconductive.com/make/midi-interface/ Pagina 1 van 15 How to make a MIDI Interface - Bare ConductiveBare Conductive 03-11-15 15:30 1 x A4 sheet of paper (preferably over 200 g/m^2) 1 x Masking tape 1 x Vinyl or plastic stencil (optional) 1 x Paint brush Step 1 Plug in your Touch Board Plug in your Touch Board using a micro USB cable and turn the switch ON. This is always a good first step. If this is the first time you are programming your Touch Board please go to the “Setting up Arduino with your Touch Board” tutorial first. Before we start making MIDI notes you need to get Arduino setup properly to work with the Touch Board. Don’t worry, its easy! Links Setting up Arduino with your Touch Board http://www.bareconductive.com/make/midi-interface/ Pagina 2 van 15 How to make a MIDI Interface - Bare ConductiveBare Conductive 03-11-15 15:30 Step 2 Download Arduino MIDI Hardware Core In the same way we downloaded the Hardware Plugins and placed them in the Hardware folder in the above mentioned tutorial, we will now add the MIDI Hardware Core and place it in the Hardware folder. Experts: Click on the download link below. You know the drill, place the folder in your Arduino Hardware folder and restart the Arduino IDE. You can jump to Step 6. Note you now need to make an adjustment in the arcoremaster file structure, so the following steps might be useful too. The rest of us: Carry on with Step 3 below and we’ll take you through it – it’s simple! Links Hardware Cores http://www.bareconductive.com/make/midi-interface/ Pagina 3 van 15 How to make a MIDI Interface - Bare ConductiveBare Conductive 03-11-15 15:30 Step 3 Download the Arcore Hardware Plugin For those who are unfamiliar with installing hardware plugins, here is an easy route to getting this done. Close the Arduino IDE if you have it running. Next, download the same link given above, open the .zip and copy the contents to somewhere that suits you. In Mac it might automatically unzip the folder in the Download folder and name it “arcore-master”. http://www.bareconductive.com/make/midi-interface/ Pagina 4 van 15 How to make a MIDI Interface - Bare ConductiveBare Conductive 03-11-15 15:30 Step 4 Place it in the hardware folder By now you should already have a Hardware folder sitting next to your Libraries folder in your Arduino sketch folder. If not, return to the tutorial link in Step 1 and follow the steps outlined there. Otherwise, place the “arcore-master” folder into the Hardware folder. Step 5 A quick folder adjustment http://www.bareconductive.com/make/midi-interface/ Pagina 5 van 15 How to make a MIDI Interface - Bare ConductiveBare Conductive 03-11-15 15:30 The structure of the Arcore library is such that two folders need moving to make it work properly with Arduino. Browse to the Arcore-master folder, open it and open the hardware folder inside that. Here you should see two folders – one labelled avr and one labelled sam. Take these two folders and move them up one level, that is to the Arcore-master folder itself. You can see a before and after screenshot showing you the difference. Step 6 Open Arduino If we re-open Arduino we will be able to check our work by looking at the Tools -> Board menu. There should http://www.bareconductive.com/make/midi-interface/ Pagina 6 van 15 How to make a MIDI Interface - Bare ConductiveBare Conductive 03-11-15 15:30 now be the option to select “Bare Conductive Touch Board (arcore, iPad Compatible)”. If you can’t see this option in the menu, first double-check that you are using Arduino 1.5.6 or later. Secondly, go back to Step 5 and make sure that the folder structure has been modified by you exactly as shown. You need to move the avr and sam folders up one level from inside the arcore-master/hardware folder, so that you have arcore-master/sam and arcore-master/avr. Failure to see the board options in the Arduino IDE is always one of these two things. Step 7 Download Touch USB MIDI Interface code It’s now time to download and install the code for this project. The “Touch USB MIDI Interface” link below will download a .zip file containing the Arduino project. Unzip the file and move the “Midi_inteface” folder into your Arduino sketchbook: Windows Libraries/Documents/Arduino or My Documents/Arduino Mac Documents/Arduino Linux (Ubuntu) Home/Arduino Links http://www.bareconductive.com/make/midi-interface/ Pagina 7 van 15 How to make a MIDI Interface - Bare ConductiveBare Conductive 03-11-15 15:30 Touch USB MIDI Interface Step 8 Hit Upload! Open the “Midi_interface” program by double clicking the file, or browse to it using the Arduino IDE: File->Sketchbook->Midi interface. Ensure that Bare Conductive Touch Board (arcore, iPad Compatible) is selected under Tools->Board and that the correct serial (TTY) port is selected under Tools->Port. With all of the correct settings selected, click File->Upload to push the code to the Touch Board. The RX and TX LEDs will flash on the Touch Board and the Arduino IDE should say “Done uploading” after a couple seconds. You can test the code by touching an electrode to see if the ‘L’ LED lights up red on each press. http://www.bareconductive.com/make/midi-interface/ Pagina 8 van 15 How to make a MIDI Interface - Bare ConductiveBare Conductive 03-11-15 15:30 Step 9 Open Garage Band Open Garage Band and wait for the program to open. Then, create a new project selecting the piano icon Once this is open it should detect the MIDI input from the Touch Board and notify you with a pop-up dialog box stating it has found a midi input device. Run your finger across the Touch Board’s electrodes and Piano key notes should light up and sound from Garageband! http://www.bareconductive.com/make/midi-interface/ Pagina 9 van 15 How to make a MIDI Interface - Bare ConductiveBare Conductive 03-11-15 15:30 Step 10 Connecting to an iPad or iPhone If you have a Lightning to USB Camera Adapter or an Apple 40-pin to USB Camera Adapter you can also connect the Touch Board to an iPad or iPhone. Install Garage Band onto your smart device and using the same code on your Touch Board you can send Midi data to the program. Have a play around with different instruments if you like, its pretty cool playing them on paper instead of a screen! Links Lightning to USB Camera Adapter http://www.bareconductive.com/make/midi-interface/ Pagina 10 van 15 How to make a MIDI Interface - Bare ConductiveBare Conductive 03-11-15 15:30 Apple 40-pin to USB Camera Adapter Suggested Tutorials http://www.bareconductive.com/make/midi-interface/ Pagina 11 van 15 How to make a MIDI Interface - Bare ConductiveBare Conductive 03-11-15 15:30 An A to Z on setting up your Touch Board, changing the sounds, and creating an interactive surface with Electric Paint. Getting Started with the Touch Board Ever wonder how we make our clean graphics? It's easy! Find out how to do it yourself using vinyl stencils. Stencil Graphics with a Vinyl Stencil http://www.bareconductive.com/make/midi-interface/ Pagina 12 van 15 How to make a MIDI Interface - Bare ConductiveBare Conductive 03-11-15 15:30 Find out how to attach your Touch Board to practically any surface! This tutorial shows a range of ways to connect to the Board. Connecting to the Touch Board http://www.bareconductive.com/make/midi-interface/ Pagina 13 van 15 How to make a MIDI Interface - Bare ConductiveBare Conductive 03-11-15 15:30 Touch Board £55.00 The Touch Board gives you the ability to turn almost any material or surface into a sensor, and comes... ADD TO CART Date Posted 2014/09/26 Rating 1 vote, 5.00 avg. rating (93% score) http://www.bareconductive.com/make/midi-interface/ Pagina 14 van 15 How to make a MIDI Interface - Bare ConductiveBare Conductive 03-11-15 15:30 Home Contact Make FAQ Shop Shipping News T&Cs About Education Resellers Bare Conductive First Floor, 98 Commercial St London, E1 6LZ +44 (0)207 650 7977 info@bareconductive.com Email First Name Last Name SUBMIT Built by Everywhere http://www.bareconductive.com/make/midi-interface/ Pagina 15 van 15
