INTERACTIVE DEMONSTRATION The Interactive Demonstration
advertisement

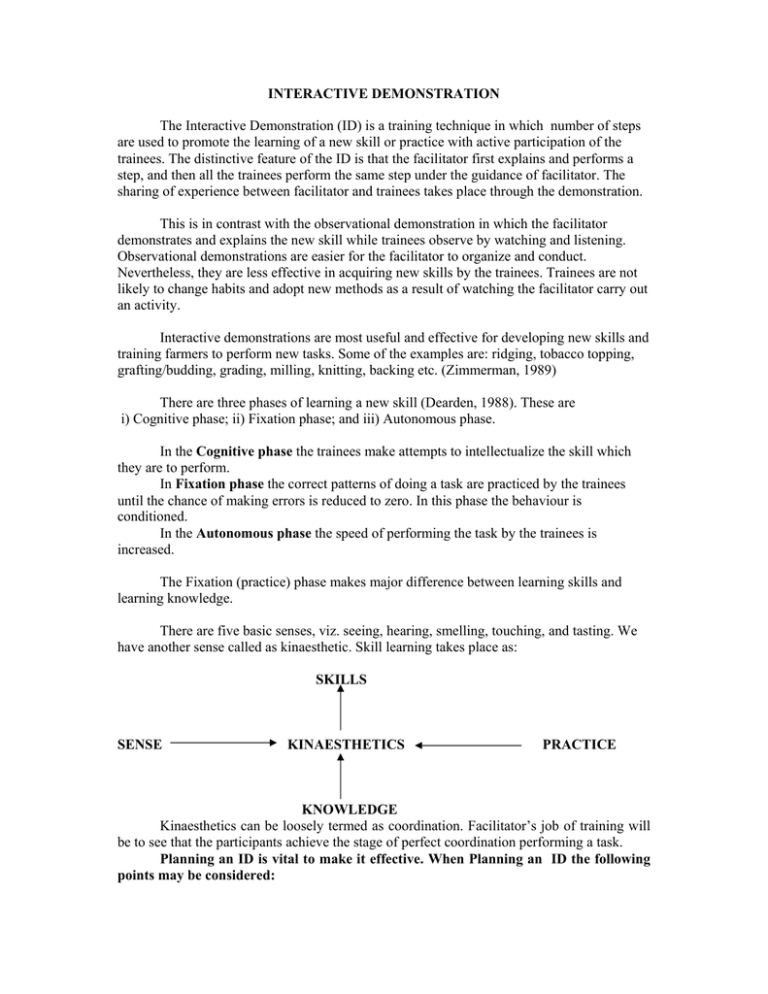
INTERACTIVE DEMONSTRATION The Interactive Demonstration (ID) is a training technique in which number of steps are used to promote the learning of a new skill or practice with active participation of the trainees. The distinctive feature of the ID is that the facilitator first explains and performs a step, and then all the trainees perform the same step under the guidance of facilitator. The sharing of experience between facilitator and trainees takes place through the demonstration. This is in contrast with the observational demonstration in which the facilitator demonstrates and explains the new skill while trainees observe by watching and listening. Observational demonstrations are easier for the facilitator to organize and conduct. Nevertheless, they are less effective in acquiring new skills by the trainees. Trainees are not likely to change habits and adopt new methods as a result of watching the facilitator carry out an activity. Interactive demonstrations are most useful and effective for developing new skills and training farmers to perform new tasks. Some of the examples are: ridging, tobacco topping, grafting/budding, grading, milling, knitting, backing etc. (Zimmerman, 1989) There are three phases of learning a new skill (Dearden, 1988). These are i) Cognitive phase; ii) Fixation phase; and iii) Autonomous phase. In the Cognitive phase the trainees make attempts to intellectualize the skill which they are to perform. In Fixation phase the correct patterns of doing a task are practiced by the trainees until the chance of making errors is reduced to zero. In this phase the behaviour is conditioned. In the Autonomous phase the speed of performing the task by the trainees is increased. The Fixation (practice) phase makes major difference between learning skills and learning knowledge. There are five basic senses, viz. seeing, hearing, smelling, touching, and tasting. We have another sense called as kinaesthetic. Skill learning takes place as: SKILLS SENSE KINAESTHETICS PRACTICE KNOWLEDGE Kinaesthetics can be loosely termed as coordination. Facilitator’s job of training will be to see that the participants achieve the stage of perfect coordination performing a task. Planning an ID is vital to make it effective. When Planning an ID the following points may be considered: • • • Objective of the demonstration should be clearly defined and understood by the participants. Venue (Workshop, KVK farm, farmer’s farm, nursery) should be choosed which could provide very conducive situation. The target audience, i.e. which farmers should participate: wheat growers or milk producers or all the club members? Others Points: • Trainees can learn about a skill through talks and demonstrations, but they can only learn how to do it through ID in which practice with the trainer is involved. • Knowledge to be given during ID should be limited to that which will improve understanding and performance of the task. Most background information should have been given before in a more appropriate situation. Suggestion for a Successful Interactive Demonstration Practice First: Gather together a small group of people who are willing to let you test your ID on them before you take it to the field. Practising before actually conducting ID will help you see if all your steps flow and your timing is correct. Use all your equipments and posters that your presentation will require. Check your equipments: List all the equipments that you need for the ID and ensure that all of it are in working order and in adequate supply. The Interactive Demonstration; Step by Step An ID may be started with the following preliminary steps. Step1 Set the Climate: Ask the farmers if they want to learn the new skill or method. Mention the potential benefits of acquiring such skills. If the ID is tied to a lecturette, the climate setting for the lecturette can serve both. Step2 State the objective: State the objectives of the ID (i.e. knowledge and skills to be acquired.) Step3 Arrange the Farmers: Be sure all the participants have a clear view of the demonstration area and plenty of room to work. Step4 Display and describe the Materials: Take a few minutes to show and describe the materials to be used in ID. After following preliminary steps, continue an ID with following Operational Steps 1. Ask the farmers what they think the first task is for this ID. What do they need to do first? 2. Performance the operation that comes first. Hopefully this has been identified in the previous discussion. 3. Ask for clarifying question. 4. Request the farmers to repeat the operations that you have just demonstrated. Tell them to do it themselves. 5. Ask the farmers if they can identify the next task to be performed. 6. Perform the next task. 7. Ask for clarifying question. 8. Request the farmers to repeat the task themselves. 9. Follow the task one by one in sequence, ask clarifying questions from participants and request participants to repeat the task. Mid-point Check: At an appropriate point, perhaps half-way through an ID, stop and recall the steps taken thus far. Be sure everybody is clear on what has taken place up to this point. Then continue the ID as above until it is concluded and all steps are covered. Interactive demonstrations should be carried out in accordance with the principles of Experiential Learning Cycle (ELC). At the conclusion of an ID, it is, therefore, necessary for the facilitator/KVK scientist to briefly go through the processing, generalizing and application stages of the cycle. An example of an ID on Lifting a Knap-sack Sprayer Arrange two Knapsack sprayers. Check the sprayers thoroughly on the previous day and practice several times for lifting. Materials Required • Two sprayers and a bucket of water. Inform the participants that you are going to demonstrate a model ID on Lifting a Knap-Sack Sprayer on to the back. • Call one volunteer to participate with you in ID. Ask all the other participants to form a semi-circle. • Arrange the sprayers in such a way so that others can observe clearly. Climate Setting Ask the participants following questions: • Have you ever lifted Knapsack Sprayer on to your back? • If you have not done, how did you do and see others to lift the sprayer? • Have you seen that somebody helps to put the sprayer on to the back or you use a raised base ? • Can you think of lifting the sprayer on to the back without taking anybody’s help or without using any raised base ? • Tell them that in this session you will demonstrate how to lift the sprayer on to the back alone and without using any raised base ? Objectives Clarification • Given 20 lt. of water in a Knapsack sprayer the participants will be able to lift it on to the back without taking help of anybody or using any upper base at one jerk without any pain in the back. Clarify this objective to the participants so that all participants are clear about learning objectives of ID. This helps in moving whole group in right direction. Experience • Ask the participants why they think the first task is for lifting the sprayer. • • • • • • What do they need to do first ? If you do not get correct answer, tell them the first step. Tell the volunteer participants to do each step simultaneously and mid-check whenever necessary. Pour 20 lt of water in both the sprayers. Check that the lid is properly sealed by twisting clockwise ( otherwise chemicals will spread) Pass your left hand half way (since half-way of the arm is very strong) through the right shoulder strap and hold the lance (while the trainer will be doing slowly the volunteer participants will also be doing accordingly. Grip the upper end of right shoulder strap by right hand over the left hand and twist it around to get a firm grip (remember there is 20 lt of water) Have a quick jerk by the right hand over the head so that the left shoulder Processing The following questions may be asked: • What step seemed most difficult? • What are the precautions you would take during lifting? • Do you feel any problem in lifting the sprayer in this way? Generalization. • • • The following question s may be asked: How different is this technique than other way of listening. How would you plan to conduct IDs in future? How much time should you put into planning a typical ID in your training session? Closure: • Review the key learning of the session. • Go back to the objectives of the session • Ask the participants whether the objectives of the session that we formulated have been achieved? • Would they do ID in their training session as they have practised here?


