Making Your Own Greeting Cards Using Microsoft Publisher
advertisement

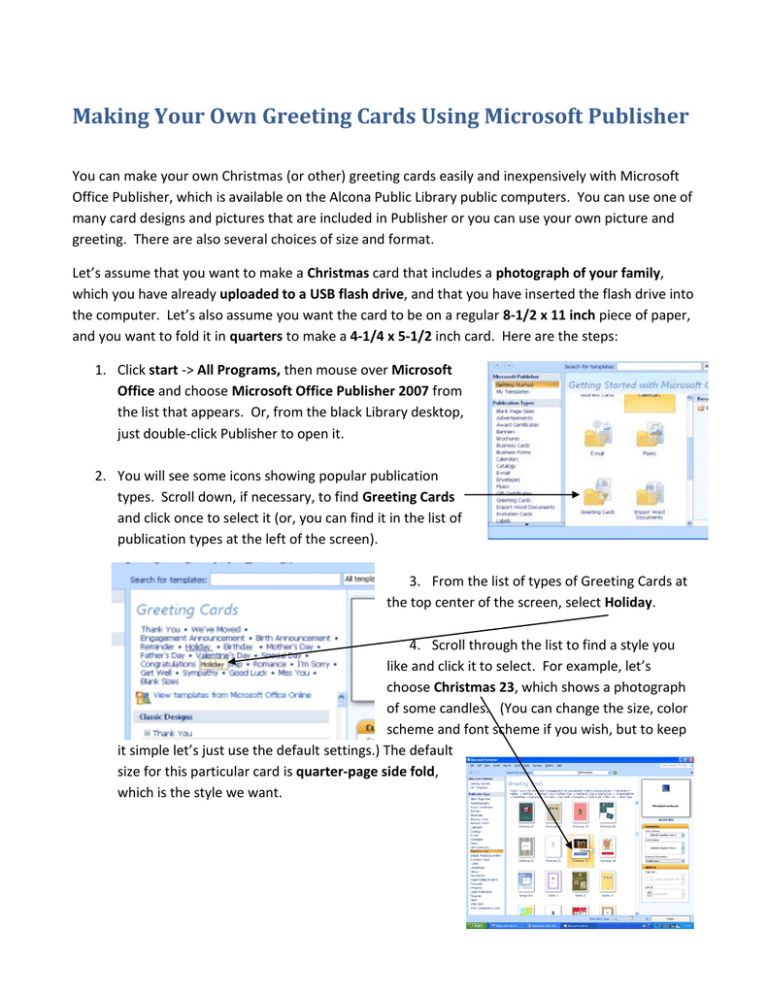
Making Your Own Greeting Cards Using Microsoft Publisher You can make your own Christmas (or other) greeting cards easily and inexpensively with Microsoft Office Publisher, which is available on the Alcona Public Library public computers. You can use one of many card designs and pictures that are included in Publisher or you can use your own picture and greeting. There are also several choices of size and format. Let’s assume that you want to make a Christmas card that includes a photograph of your family, which you have already uploaded to a USB flash drive, and that you have inserted the flash drive into the computer. Let’s also assume you want the card to be on a regular 8-1/2 x 11 inch piece of paper, and you want to fold it in quarters to make a 4-1/4 x 5-1/2 inch card. Here are the steps: 1. Click start -> All Programs, then mouse over Microsoft Office and choose Microsoft Office Publisher 2007 from the list that appears. Or, from the black Library desktop, just double-click Publisher to open it. 2. You will see some icons showing popular publication types. Scroll down, if necessary, to find Greeting Cards and click once to select it (or, you can find it in the list of publication types at the left of the screen). 3. From the list of types of Greeting Cards at the top center of the screen, select Holiday. 4. Scroll through the list to find a style you like and click it to select. For example, let’s choose Christmas 23, which shows a photograph of some candles. (You can change the size, color scheme and font scheme if you wish, but to keep it simple let’s just use the default settings.) The default size for this particular card is quarter-page side fold, which is the style we want. 5. Click Create. The screen will look like this (below): You will see a picture of how the front of the card will look (the blue outline is just a guideline – it won’t appear on the card). Tip: At the bottom of the screen, you will see page numbers 1-4, with page 1 highlighted in orange. Click through each page to see what the entire card will look like before you customize it. That way, you can go back and choose another card if you don’t like the one you’ve chosen. NOTE: If you have chosen a card that does not contain a photograph, or if you don’t want to change the candle photograph, you can skip the following steps 6-8. If you do want to use a photo of your own, follow all steps below. 6. Right-click the photo of the candles and choose Change Picture -> From File… 7. You will be shown the Insert Picture screen. Assuming you have a picture file on a flash drive, navigate to the flash drive: select My Computer, then double-click Removable disk (E:). Then find and double-click your picture file. 8. If necessary, resize the picture to fit within the blue guideline on the Publisher screen. 9. Click in the outside greeting space (in our example, the greeting originally said, “Happy Holidays”), and change the greeting if you wish. (In the sample, the greeting, the fill color, and the size of the box are changed.) Page 2 10. Click the number 2 on the small tab at the bottom of the screen to view the next page. Pages 2 and 3 will appear together. Change the text, if you wish, by clicking in each of the two text boxes. (You can also change or delete the little icon that appears on page 2 if you want to, which I did, in the example below.) 11. Click the tab for page 4, click in the blue text box, and replace the text with your own name. (If you forget this step on a public computer at the Library, it will appear that “Alcona County Library,” or possibly “Public” made the card!) You can change the color of the box as well, if you want. 12. Save the card to your flash drive, if you haven’t already done so. NOTE: If you want to include a note or mini-newsletter that could fit on a quarter of a page, you can remove the icon on page 2, insert a text box to match the size of the blue guidelines, and type your own text in the text box. 13. Before printing, do a Print Preview, (click File and select Print Preview). The Preview will appear in black and white, and pages 2 and 4 will appear upside down due to the way the card will be folded. (If necessary, you may also wish to do a test print in black and white; it’s best not to print in color until you are sure you have what you want, as color copies are 50 cents/page on the Library computers.) 14. Fold the printed card in half horizontally and then vertically, and violà, you’re done! Page 3


