Left Hand Drill Attachment — 4300 Manual

Left Hand Drill Attachment
1/16” through 1/2” ( 2.5 - 20 mm)
(DAREX Part # 4300)
Installation and Operating Instructions
Installation
1 Replace the alignment fixture on top of the grinder with the new LEFT / RIGHT hand alignment fixture.
(This fixture is used for both left and right hand drills.)
2 Unscrew the wing nut and remove the standard swing fixture assembly. Install the left hand swing fixture, set at the angle required and tighten the wing nut
Operating Instructions
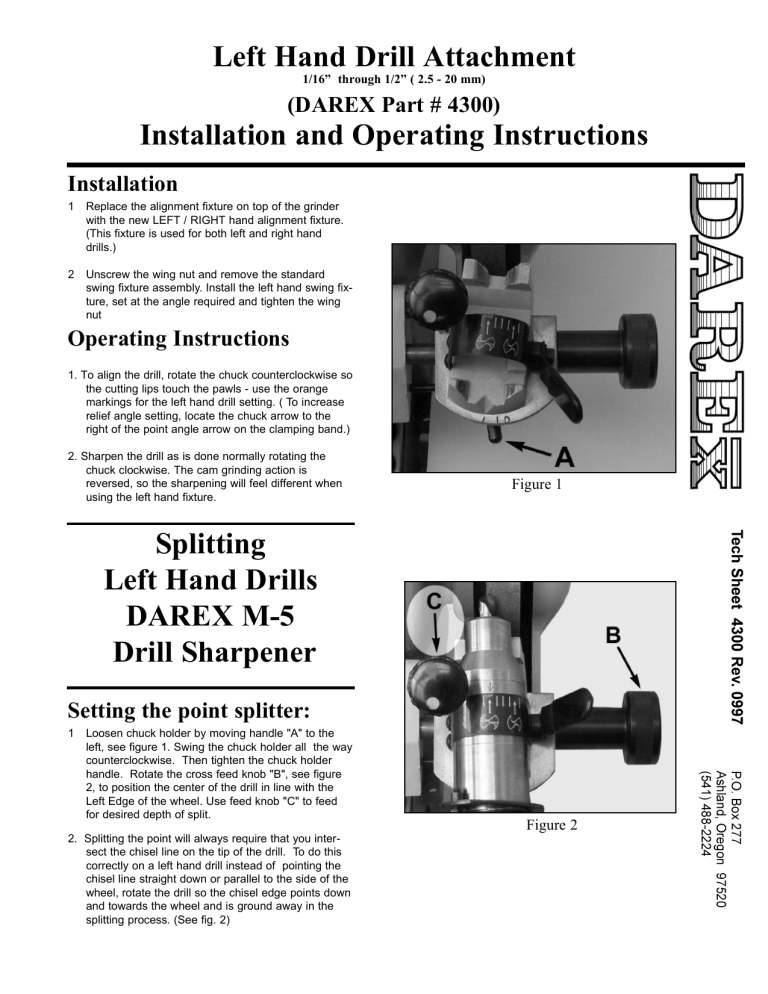
1. To align the drill, rotate the chuck counterclockwise so the cutting lips touch the pawls - use the orange markings for the left hand drill setting. ( To increase relief angle setting, locate the chuck arrow to the right of the point angle arrow on the clamping band.)
2. Sharpen the drill as is done normally rotating the chuck clockwise. The cam grinding action is reversed, so the sharpening will feel different when using the left hand fixture.
Figure 1
Splitting
Left Hand Drills
DAREX M-5
Drill Sharpener
Setting the point splitter:
1 Loosen chuck holder by moving handle "A" to the left, see figure 1. Swing the chuck holder all the way counterclockwise. Then tighten the chuck holder handle. Rotate the cross feed knob "B", see figure
2, to position the center of the drill in line with the
Left Edge of the wheel. Use feed knob "C" to feed for desired depth of split.
2. Splitting the point will always require that you intersect the chisel line on the tip of the drill. To do this correctly on a left hand drill instead of pointing the chisel line straight down or parallel to the side of the wheel, rotate the drill so the chisel edge points down and towards the wheel and is ground away in the splitting process. (See fig. 2)
Figure 2

