A short introduction to Möbius bands
advertisement
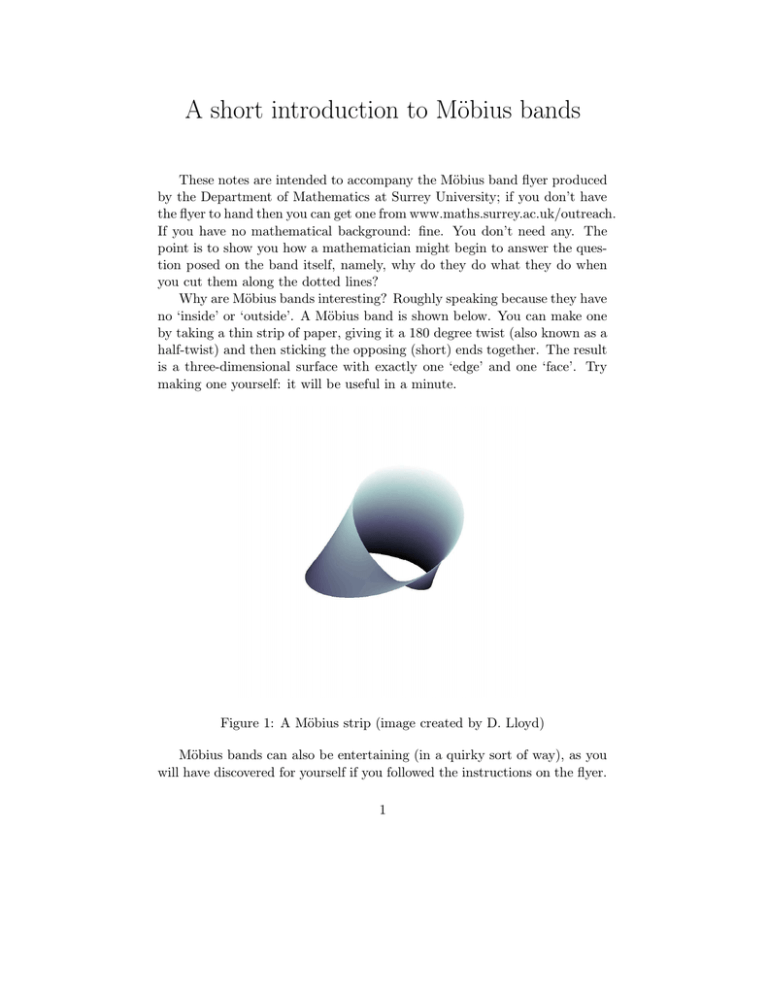
A short introduction to Möbius bands These notes are intended to accompany the Möbius band flyer produced by the Department of Mathematics at Surrey University; if you don’t have the flyer to hand then you can get one from www.maths.surrey.ac.uk/outreach. If you have no mathematical background: fine. You don’t need any. The point is to show you how a mathematician might begin to answer the question posed on the band itself, namely, why do they do what they do when you cut them along the dotted lines? Why are Möbius bands interesting? Roughly speaking because they have no ‘inside’ or ‘outside’. A Möbius band is shown below. You can make one by taking a thin strip of paper, giving it a 180 degree twist (also known as a half-twist) and then sticking the opposing (short) ends together. The result is a three-dimensional surface with exactly one ‘edge’ and one ‘face’. Try making one yourself: it will be useful in a minute. Figure 1: A Möbius strip (image created by D. Lloyd) Möbius bands can also be entertaining (in a quirky sort of way), as you will have discovered for yourself if you followed the instructions on the flyer. 1 The explanation begins with a warm-up example using the band you should have made above. You won’t need the bands provided on the flyer yet. Starter: one dotted line Take the band you have just made and cut it along the centre line. What happens? You should have produced another band but this time with two sides and two edges. So it’s not a Möbius band. What is it? If you had to make it from a strip of paper using only one piece of tape, how many half twists would you have to give the strip of paper to reproduce this shape? In general if you give the strip an even number of half-twists before cutting, would you expect to get a Möbius type band (i.e. a surface with only one ‘side’) or a cylinder (a surface with two ‘sides’)? There is a method which uses diagrams to keep track of what goes on when we fold, stick and cut the strips of paper. It’s called the cutting and pasting method and it’s described below. Cutting and pasting Suppose you represent your flat strip of paper before it has been twisted or stuck to anything by a square. On the left vertical edge of the square draw an arrow pointing up. This represents the ‘direction’ of this edge. Now draw an arrow facing down on the opposite edge, as shown below. The Möbius band is made by twisting the square so that the arrows both point the same way and then pasting the arrowed edges together. Figure 3 below represents a simple band, or cylinder, formed by matching the direction of the arrows and then pasting the arrowed edges together. How do we represent the effect that your scissors had when you cut along the centre line of your Möbius band? The centre line on the band corresponds to the dotted line in Figure 4 below. Now we have to label the square with arrows, but this time the arrow labels have to take account of the cut we are about to make. We use the following observations to help with the labelling of the diagram: (i) The left edge and right edge will be cut into two pieces: the upper left one will need to match with the lower right, and vice versa. 2 Figure 2: Twist it until the arrows point in the same direction to make a Möbius band Figure 3: This diagram represents a cylinder (ii) We should keep track of the new edge or edges we have made. The correct labelling is shown in the left-hand diagram in Figure 5. The letter ‘e’ is just a label attached to the new edge created by the cut. Cutting in the sense of ‘cutting and pasting’ corresponds to making a virtual cut along the dotted line to produce two virtual pieces as in the right-hand figure below. Flip one of the two pieces in the right-hand figure so that single arrows both point down. At the same time this ensures that both double arrows point up. Paste the single arrows together. You should arrive at the following picture: Now delete the central vertical line with a single arrow on it: this is really what we mean by pasting. Note that the letter ‘e’ appears twice along the 3 Figure 4: The Möbius band before you cut it along the centre line e e Figure 5: Label and cut top edge, showing that they ‘match up’ as you’d expect. The total number of edges has risen from one to two. We are left with the diagram representation of a cylinder as we noted earlier, which shows why you create just one new two-sided band from the starting Möbius band. It is important to note that the cutting and pasting method does not tell you how many twists the cylinder has. In this case it just tells you whether you have created a surface with one ‘side’ or two ‘sides’. But it is still useful, as we shall see in the next section. Main course: two dotted lines Now you will need the flyer to hand: this section explains what happens when you form and then cut the Möbius band with two dotted lines printed on it. All we have to do is label the diagram correctly before making our 4 e e Figure 6: Pre-cylinder virtual cuts. The correct labelling is shown in the left-hand diagram below; the effect of cutting is shown in the right-hand diagram. Figure 7: Labelling and cutting the two dotted line Möbius band Looking at the right-hand diagram in Figure 7 we see that the middle rectangle represents a Möbius band: it cannot be connected to either of the other two rectangles because its arrows wouldn’t match up. But the bottom and top rectangles can be combined: the bottom rectangle should be flipped over so that its single arrow points up and then it can be pasted to the single arrow on the top rectangle, producing the diagram of a cylinder. So we should get: Figure 8: Producing a cylinder and a Möbius band Can you ‘track the edges’ as we did in the previous section? 5 Why are they interlinked? The fact that the Mobius band and cylinder are interlinked requires more careful reasoning. Look at the diagram below. fix fix back forward Figure 9: The bold line becomes a circle when you form the Möbius band When you give the paper a half-twist you could begin by fixing (to the desk, say) the regions marked ‘fix’ and moving the other regions towards you or away from you according to the intructions ‘forward’ or ‘back’ written next to the diagram. Eventually the regions marked ‘fix’ will have to move in order to make the band, but initially they can stay put. The horizontal line passing through the middle of the diagram will eventually join up to form a cirle inside the Möbius band. The edges with single arrows attached will eventually join and effectively pass through the middle of this circle; at the same time, the edges marked with triple arrows will join up and effectively pass through the outside of this circle. This happens because as one of the single arrow edges moves forward so must a triple arrow edge move back: this is a consequence of giving the paper a half-twist. Dessert: four dotted lines Below is the correctly labelled diagram for the Möbius band with four dotted lines (see Figure 10). Can you use this to predict the outcome of cutting up the Möbius band? What three dimensional shape is represented by the mystery diagram Figure 11 below? [Hint:what goes well with coffee? Equivalently, what does coffee go in?] 6 Figure 10: Labelling for the four dotted line Möbius band Figure 11: Mystery diagram 1 Acknowledgement Many thanks to David Lloyd for providing me with the Möbius band image in Figure 1 and to Kathryn Harkup for producing the Möbius flyer. J. Bevan, Department of Mathematics, University of Surrey, UK. 7
