SCC SMT Series
Microstructure
Pressure Sensors
0 psi to 5 psi through
0 psi to 100 psi
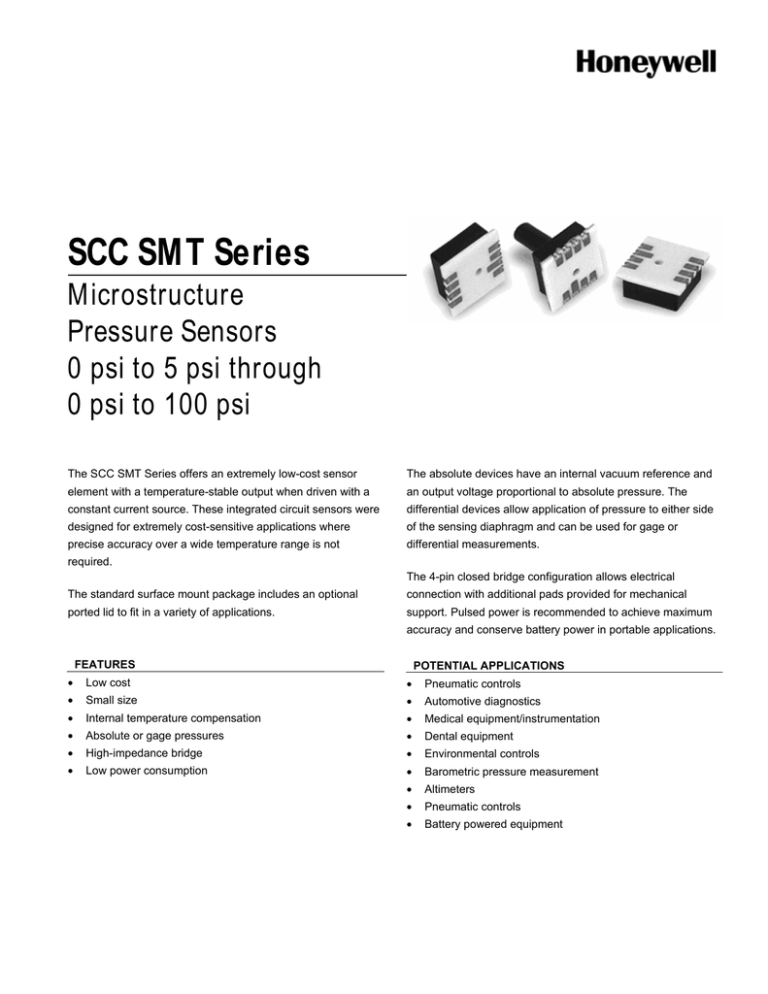
The SCC SMT Series offers an extremely low-cost sensor
The absolute devices have an internal vacuum reference and
element with a temperature-stable output when driven with a
an output voltage proportional to absolute pressure. The
constant current source. These integrated circuit sensors were
differential devices allow application of pressure to either side
designed for extremely cost-sensitive applications where
of the sensing diaphragm and can be used for gage or
precise accuracy over a wide temperature range is not
differential measurements.
required.
The 4-pin closed bridge configuration allows electrical
The standard surface mount package includes an optional
connection with additional pads provided for mechanical
ported lid to fit in a variety of applications.
support. Pulsed power is recommended to achieve maximum
accuracy and conserve battery power in portable applications.
FEATURES
POTENTIAL APPLICATIONS
•
Low cost
•
Pneumatic controls
•
Small size
•
Automotive diagnostics
•
Internal temperature compensation
•
Medical equipment/instrumentation
•
Absolute or gage pressures
•
Dental equipment
•
High-impedance bridge
•
Environmental controls
•
Low power consumption
•
Barometric pressure measurement
•
Altimeters
•
Pneumatic controls
•
Battery powered equipment
SCC SMT Series
(1)
PRESSURE SENSOR SPECIFICATIONS
Characteristic
Supply current, IS
Compensated temperature
Operating temperature
Storage temperature
Humidity
Lead temperature (soldering 2 s to 4 s)
Parameter
1.5 mA
0 °C to 50 °C [32 °F to 122 °F]
-40 °C to 125 °C [-40 °F to 257 °F]
-55 °C to 125 °C [-67 °F to 257 °F]
0% to 100% RH
250 °C [482 °F]
(1)
STANDARD PRESSURE RANGES
(2)
Maximum Pressure
Operating
Pressure
0 psi to 5 psi
20 psi
0 psi to 15 psi
30 psi
0 psi to 30 psi
60 psi
0 psi to 100 psi
150 psi
PERFORMANCE SPECIFICATIONS
Sensitivity
Nominal
7.50
4.30
2.90
1.30
(3)
Unit
Std. Dev.
±0.68
±0.37
±0.57
±0.20
mV/mA/psi
mV/mA/psi
mV/mA/psi
mV/mA/psi
(1)
Characteristic
Zero pressure offset (TA = 25 °C)
(4)
Linearity, hysteresis, repeatability
(5)
Temperature effect on span
(5)
Temperature effect on offset
(6)
Long-term stability of offset and span
(7)
Response time (10% to 90%)
Input resistance (TA = 25 °C)
Output impedance
Min.
-30.0
-1.0
-1.5
-2.0
–
–
4.00
4.00
Typ.
-10.0
0.2
0.25
.5
0.1
0.1
5.00
5.00
Max.
20.0
1.0
1.5
2.0
–
–
6.50
6.50
Unit
mV
% FSS
% FSS
% FSS
% FSS
ms
kΩ
kΩ
Notes:
1. Reference conditions: Supply current, IS = 1.0 mA, TA = 25 °C to 70 °C [32 °F to 158 °F], common-mode Line pressure =
0 psig, pressure applied to P1 unless otherwise noted.
2. If the maximum pressure is exceeded, even momentarily, the package may leak or burst, or the pressure sensing die may
fracture.
3. Sensitivity is the ratio of the output signal voltage change to the corresponding input pressure change. The sensitivity is
characterized by design and periodic production testing. This parameter in not 100% tested in production.
4. Linearity is based on best straight line fit. Hysteresis is the maximum output difference at any point within the operating
pressure range for increasing and decreasing pressure.
5. Maximum error band of the offset voltage and the error of the band of the span over the compensated temperature range,
relative to the 25 °C reading. Typical temperature coefficients for span and resistance are -2200 ppm/°C and 2200 ppm/°C,
respectively. Temperature effects on offset and span are guaranteed by design. These parameters are not 100% tested in
production.
6. Long term stability over a one year period.
7. Response time for 0 psi to full scale span pressure step change.
2
www.honeywell.com/sensing
Microstructure Pressure Sensors
MOUNTING DIMENSIONS (For reference only: mm [in].)
LOW PROFILE SMT
3,30
[.13]
1,10
O [.05]
3,70
[.14]
0,70
[.03]
O 0,5 [.02]
FOR GAGE PORT (P2)
7X 0,76 [.03]
8X 0,76 [.03]
3,80
[.15]
+ OUT
6,60
[.26]
7,60
[.30]
3,30
[.13]
6,60
[.26]
+ EX
- EX
- OUT
2,00
[.08]
7,60
[.30]
3,30
[.13]
8X 1,27
[.05] ON CENTER
PADS
PORTED “P” SMT
1,01
[.04]
7,61
[.30]
R0,3
[.01]
R0,3
[.01]
3,3
[.13]
6,6
[.26]
6,6
[.26]
2,05
±0.76
[0.081
±0.003]
3,3
[.13]
0,70
[.03]
0,5 [.02]
FOR GAGE PORT (P2)
7X
0,76
[.03]
3,3
[.13]
8X 0,76
[.03]
+ OUT
+ EX
7,6
[.30]
- EX
3,8
[.15]
- OUT
2,0
[.08]
8,7
[.34]
8X 1,27
[.05] ON CENTER
PADS
PORTED “LP” SMT
1,01
[.04]
7,61
[.30]
R0,3
[.01]
R0,3
[.01]
3,3
[.13]
6,6
[.26]
6,6
[.26]
2,3
[.09]
8,7
[.34]
3,3
[.13]
0,70
[.03]
0,5 [.02]
FOR GAGE PORT (P2)
3,3
[.13]
7X
0,76
[.03]
8X 0,76
[.03]
+ OUT
+ EX
7,6
[.30]
- EX
- OUT
2,0
[.08]
3,8
[.15]
8X 1,27
[.05] ON CENTER
PADS
EQUIVALENT CIRCUITS
Vs
- Out
+Out
Honeywell Sensing and Control
3
ORDER GUIDE
WARNING
WARNING
MISUSE OF DOCUMENTATION
PERSONAL INJURY
•
DO NOT USE these products as safety or emergency stop
devices or in any other application where failure of the
product could result in personal injury.
Failure to comply with these instructions could result in
death or serious injury.
The information presented in this product sheet is for
reference only. Do not use this document as a product
installation guide.
• Complete installation, operation, and maintenance
information is provided in the instructions supplied with
each product.
Failure to comply with these instructions could result in
death or serious injury.
WARRANTY/REMEDY
Honeywell warrants goods of its manufacture as being free of
defective materials and faulty workmanship. Honeywell’s
standard product warranty applies unless agreed to otherwise
by Honeywell in writing; please refer to your order
acknowledgement or consult your local sales office for specific
warranty details. If warranted goods are returned to Honeywell
during the period of coverage, Honeywell will repair or replace,
at its option, without charge those items it finds defective. The
foregoing is buyer’s sole remedy and is in lieu of all other
warranties, expressed or implied, including those of
merchantability and fitness for a particular purpose. In no
event shall Honeywell be liable for consequential, special,
or indirect damages.
While we provide application assistance personally, through
our literature and the Honeywell web site, it is up to the
customer to determine the suitability of the product in the
application.
SALES AND SERVICE
Honeywell serves its customers through a worldwide network
of sales offices, representatives and distributors. For
application assistance, current specifications, pricing or name
of the nearest Authorized Distributor, contact your local sales
office or:
E-mail: info.sc@honeywell.com
Internet: www.honeywell.com/sensing
Phone and Fax:
Asia Pacific
+65 6355-2828
+65 6445-3033 Fax
Europe
+44 (0) 1698 481481
+44 (0) 1698 481676 Fax
Latin America +1-305-805-8188
+1-305-883-8257 Fax
USA/Canada +1-800-537-6945
+1-815-235-6847
+1-815-235-6545 Fax
Specifications may change without notice. The information we
supply is believed to be accurate and reliable as of this
printing. However, we assume no responsibility for its use.
Sensing and Control
Honeywell
1985 Douglas Drive North
Minneapolis, MN 55422
www.honeywell.com/sensing
008091-3-EN IL50 GLO Printed in USA
July 2007
© 2007 Honeywell International Inc. All rights reserved.
