69-2024—04 - C7007A, C7008A, C7009A Flame Rod Holder
advertisement

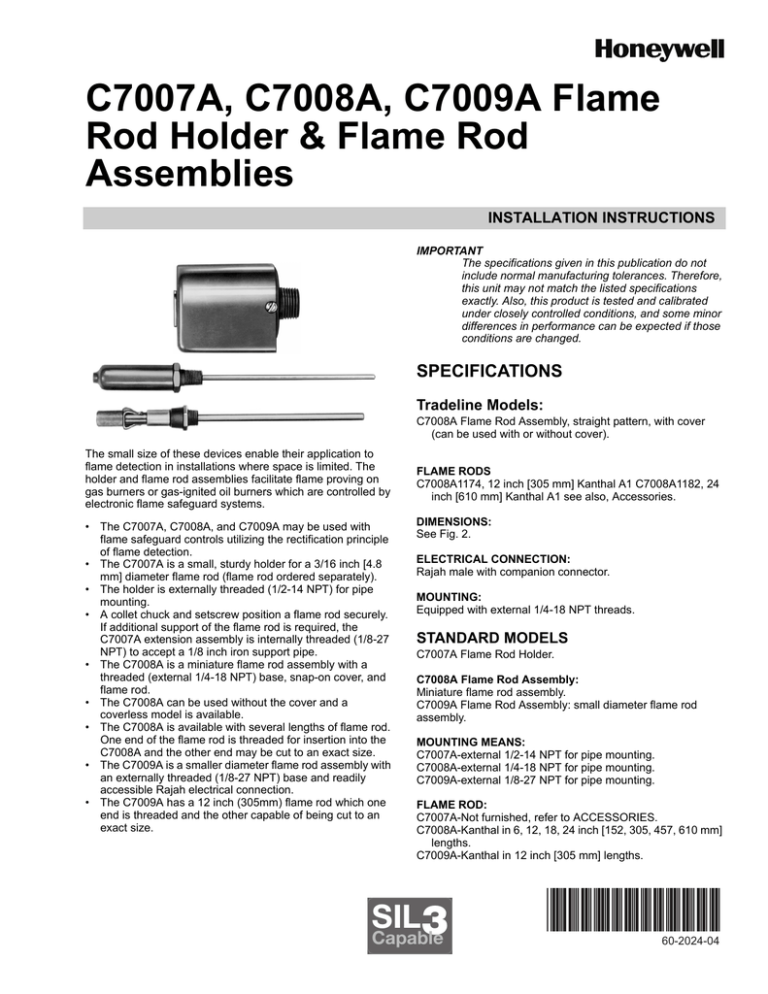
C7007A, C7008A, C7009A Flame Rod Holder & Flame Rod Assemblies INSTALLATION INSTRUCTIONS IMPORTANT The specifications given in this publication do not include normal manufacturing tolerances. Therefore, this unit may not match the listed specifications exactly. Also, this product is tested and calibrated under closely controlled conditions, and some minor differences in performance can be expected if those conditions are changed. SPECIFICATIONS Tradeline Models: C7008A Flame Rod Assembly, straight pattern, with cover (can be used with or without cover). The small size of these devices enable their application to flame detection in installations where space is limited. The holder and flame rod assemblies facilitate flame proving on gas burners or gas-ignited oil burners which are controlled by electronic flame safeguard systems. • The C7007A, C7008A, and C7009A may be used with flame safeguard controls utilizing the rectification principle of flame detection. • The C7007A is a small, sturdy holder for a 3/16 inch [4.8 mm] diameter flame rod (flame rod ordered separately). • The holder is externally threaded (1/2-14 NPT) for pipe mounting. • A collet chuck and setscrew position a flame rod securely. If additional support of the flame rod is required, the C7007A extension assembly is internally threaded (1/8-27 NPT) to accept a 1/8 inch iron support pipe. • The C7008A is a miniature flame rod assembly with a threaded (external 1/4-18 NPT) base, snap-on cover, and flame rod. • The C7008A can be used without the cover and a coverless model is available. • The C7008A is available with several lengths of flame rod. One end of the flame rod is threaded for insertion into the C7008A and the other end may be cut to an exact size. • The C7009A is a smaller diameter flame rod assembly with an externally threaded (1/8-27 NPT) base and readily accessible Rajah electrical connection. • The C7009A has a 12 inch (305mm) flame rod which one end is threaded and the other capable of being cut to an exact size. FLAME RODS C7008A1174, 12 inch [305 mm] Kanthal A1 C7008A1182, 24 inch [610 mm] Kanthal A1 see also, Accessories. DIMENSIONS: See Fig. 2. ELECTRICAL CONNECTION: Rajah male with companion connector. MOUNTING: Equipped with external 1/4-18 NPT threads. STANDARD MODELS C7007A Flame Rod Holder. C7008A Flame Rod Assembly: Miniature flame rod assembly. C7009A Flame Rod Assembly: small diameter flame rod assembly. MOUNTING MEANS: C7007A-external 1/2-14 NPT for pipe mounting. C7008A-external 1/4-18 NPT for pipe mounting. C7009A-external 1/8-27 NPT for pipe mounting. FLAME ROD: C7007A-Not furnished, refer to ACCESSORIES. C7008A-Kanthal in 6, 12, 18, 24 inch [152, 305, 457, 610 mm] lengths. C7009A-Kanthal in 12 inch [305 mm] lengths. SIL3 Capable 60-2024-04 C7007A, C7008A, C7009A FLAME ROD HOLDER & FLAME ROD ASSEMBLIES ELECTRICAL CONNECTION: C7007A-Terminal screw. C7008A and C7009A-Rajah male, with companion connector. 2 3 [56] 16 3 1 32 [28] 1 15 [49] 16 SIL 3 Capable: The C7008 or C7009 when used with a R7847B Ampli-check amplifier in either RM7890, RM7838, RM7800 or RM7840 Relay Module, is SIL 3 Capable in a properly designed Safety Instrumented System. See form number 65-0312 for Certificate Agreement. 9 16 [65] 2 5 8 [41] 1 5 [16] 8 APPROVALS: Underwriters Laboratories listed: File No. MP268, Canadian Standards Association Certified: Master File No. LR 95329-1, Factory Mutual approved: C7008A, C7009A, Swiss Re (formerly Industrial Risk Insurers): acceptable. 1/8-27 NPT 1/2-14 NPT M1844 Fig. 1. Dimensions in inches [mm] of C7007A flame rod holder. ACCESSORIES: Table 1. Flame Rods (Kanthal A1, 2200° F [1204° C] MAX.) Use With C7007A C7008A Part Number Length in Inches [mm] 9 [4] 64 12 [305] None 102709B 18 [457] None 102709C 24 [610] None 102709D 36 [914] None 102709E 48 [1219] None 105478A 6 [152] 6-32 UNS2A 105478B 12 [305] 6-32 UNS2A 105478C 18 [457] 6-32 UNS2A 3 C7009A a 24 [610] 6-32 UNS2A 105644Ca 12 [305] 3-56 NF-2A 5 [16] 8 1/4 - 18 NPT M1840 5 [67] 8 5 [16] 8 7 [22] 8 M1841 Fig. 3. Dimensions in inches [mm] of C7008A flame rod assembly, coverless model 1/8 - 27 NPT THREAD 3 [10] 8 105479B electrical terminal and 21107 washer included. R1061012 Ignition Cable: For ignition installations in a high temperature environment. Rated at 350° F [177° C] for continuous duty, and up to 500° F [260° C] for intermittent use. Tested to 15,000 V. 2 R1298020 Cable: For flame detector "F" lead wire installations in a high temperature environment. Rated up to 400° F [204° C] for continuous duty. Tested for operation up to 600 V and breakdown up to 7500 V. 60-2024—04 3 [79] 32 Fig. 2. Dimensions in inches [mm] of C7008A flame rod assembly. 2 105478D 7 [22] 8 7 8 [22] Thread 102709A 1/4 - 18 NPT 2 3 [56] 16 3 16 [5] M1839 Fig. 4. Dimensions in inches [mm] of C7009A flame rod assembly. C7007A, C7008A, C7009A FLAME ROD HOLDER & FLAME ROD ASSEMBLIES INSTALLATION CAUTION Wrong position will provide inadequate pilot flame. WARNING 1. 2. 3. Read these instructions carefully. Failure to follow them could damage the product or cause a hazardous condition. Check the ratings given in the instructions and on the product to make sure the product is suitable for your application. Installer must be a trained, experienced flame safeguard technician. After installation is complete, check out product operation as provided in these instructions. WRONG POSITION OF ROD ROD MOUNTING If the manufacturer of the burner has not provided a place for mounting the flame rod holder, the installer should select a suitable place on the burner faceplate or a place at the front of the boiler. See Figs. 6, 7, 8, and 9 for typical mountings on various burners. When selecting a location: 1. 2. 3. 4. Locate the unit so that the flame rod will only prove a pilot flame that will safely and quickly light the main flame. Locate the unit so that it will be clear of the fire door opening radius. Locate the unit so that drafts will not blow the pilot flame away from the flame rod. t is preferable to locate the unit so that the flame rod will be vertical or at least angled downward. A rod so installed is less likely to sag at high temperatures. 6. 7. M818 Fig. 5. Positions of flame rod with horizontal type pilot burner. TOP VIEW BURNER C7008A FLAME ROD ASSEMBLY NOTE: For extra electrode support, couple a length of 1/8 inch iron pipe to the extension assembly, which is already threaded (internal 1/8-27 NPT, C7007A only). 5. PILOT BURNER PILOT The unit may also be installed so the flame rod is horizontal or angled upward, but extra support is needed for rods over 12 inches [305 mm] long. If the flame rod will be used to supervise a gas pilot for an oil burner installation, the rod must be located far enough from the oil flame to prevent oil spray from impinging and burning on the surface of the rod. A horizontal or inclined flame rod should enter the pilot flame from the side. If the rod is located above and parallel to a horizontal or semi-horizontal pilot burner, it may falsely indicate that a weak or candling pilot flame is adequate for igniting the main burner. See Fig. 5. M1838 Fig. 6. Suggested installation of flame rod used to prove both main and pilot burners. C7007A HOLDER WITH FLAME ROD PILOT BURNER TOP VIEW M1837 Fig. 7. Suggested installation on tunnel burner. 3 60-2024—04 C7007A, C7008A, C7009A FLAME ROD HOLDER & FLAME ROD ASSEMBLIES C7009A FLAME ROD ASSEMBLY BOSS When the flame rod has been properly positioned, weld or cement the pipe and/or flange permanently. Mount and screw the unit into the adapter pipe and tighten. Connect the lead from the flame rod electrical connection to the proper terminal on the flame safeguard control. PILOT COOL COMBUSTION AREA FLAME ROD NOTE: Even with high temperature stainless steel used in making grounding assemblies, the metal oxidizes when it is exposed to temperatures exceeding 2000° F [1093° C]. Where this deterioration cannot be avoided, a scheduled replacement program should be considered. TOP VIEW FLAME GROUNDING The installer must provide an adequate electrical ground for the pilot flame. The grounding surface in actual contact with the flame must be at least four times greater than the area of the portion of the flame rod in contact with the flame. The ratio of ground to flame contact area with a raw gas pilot is usually less than a factor of four. In situations where the ground area available is inadequate, the ground area must be increased. M1845 Fig. 8. Flame rod installed in cool combustion area of industrial burner. There are three proven methods for providing an adequate grounding surface (area): a) the bomb fin assembly; b) grounding rods threaded into the pilot nozzle; c) ground rods welded to a collar. SIDE VIEW The bomb fin assembly can be made by welding two sections of high temperature stainless steel in the pattern illustrated in Fig. 10-a. Then, this assembly is welded directly over the pilot burner nozzle. BURNER RING The threaded rod assembly is made by cutting a flame rod into six or seven sections each about four inches in length. The face of the pilot nozzle is to be tapped. The tappings being located equidistant from each other around the circumference of the nozzle (see Fig. 10-b). One end of the four inch flame rod sections is threaded and screwed in place as shown in Fig. 10-b. PILOT C7008A FLAME ROD ASSEMBLY M1836 Fig. 9. Suggested installation on ring type burner. After selecting the best location (if burner manufacturer has not provided a mounting place on burner), cut a hole large enough for the correct size pipe (See dimensions, Figs. 1-4) in burner faceplate or in the front of the boiler. Be sure to cut the hole at approximately the angle needed to bring flame rod into proper position to prove the flame. Tack weld or temporarily cement a pipe into hole cut in burner faceplate or boiler wall. If a flange is used, place over hole and weld the pipe to the flange. Do not mount permanently until checkout is complete. Check out entire unit (see checkout section, page 6) to insure that the flame rod is in proper position. Make this test under all conditions of actual firing for the type of flame supervision that will be used. In positioning the flame rod: 1. 2. 3. Avoid bending the flame rod. Keep the flame rod as short as possible. Keep the flame rod at least 1/2 inch [12.7 mm] away from hot refractory material. The welded rod assembly is made by cutting a flame rod into sections as described in the threaded rod assembly. The flame rod sections are then welded to a high temperature stainless steel collar as illustrated in Fig. 10-c. The assembly is then welded in place over the pilot nozzle. If the flame rod is used to prove only the main flame, the flame contact area with the combustion chamber walls is generally adequate for grounding. In some situations, it may be necessary to provide a grounding target. A stainless steel fin or rod assembly similar to those illustrated in Fig. 10 should make an effective target. In all cases, make sure the grounding area is securely connected to ground. WIRING CAUTION Disconnect power supply before making wiring connections to prevent possible equipment damage or electrical shock. All wiring must conform to applicable codes. 60-2024—04 4 C7007A, C7008A, C7009A FLAME ROD HOLDER & FLAME ROD ASSEMBLIES Protect the leadwire from excessive radiant or reflected heat. If any portion of the wire will be exposed to temperatures in excess of 125° F [51.6° C], a heat-resistant wire should be used (see Accessories). For wiring where temperatures do not exceed 125° F [52° C], wire with thermoplastic insulation may be used. If wire is enclosed in conduit, install a two foot flexible connection to the head of the unit. This permits easy removal of unit from combustion chamber. FLAME ROD REPLACEMENT To replace flame rod in the C7008A: remove the cover, pull off the Rajah connector with the wiring, remove (unscrew) the terminal nut and the lock washer at the base of flame rod assembly to free the flame rod. Pull out the old flame rod and insert the new rod. Then replace the lock washer, screw on the terminal nut, push the wiring connector back on, and replace the cover. Procedure is the same for C7009A except that there is no cover. To replace flame rod in the C7007A: Remove the cover, loosen the flame rod setscrew, pull the flame rod out, insert the replacement rod, and tighten the setscrew. Replace the cover. The Honeywell BCS 7700 and 7800 SERIES controls provide for a voltage flame signal measurement. A 20,000 ohm/volt meter with a zero to 5 or 10 Vdc scale is recommended for the BCS 7700 measurement and a one megohm/volt meter is suggested for the 7800 SERIES controls. The flame signal measurement is made by inserting the positive (red) meter probe into the control positive (+) jack and the negative (black) probe into the negative (-) jack of the BCS 7700 or the (-Com) jack of the 7800 SERIES control (see Figs. 12, 13). With the system in operation, the minimum acceptable flame signal voltage is 1.25 Vdc for the 7800 SERIES controls and 2.2 Vdc for the BCS 7700 control. A low flame signal reading indicates the photocell is not receiving sufficient visible flame radiation. Low flame currents can be the result of an improperly positioned sight pipe, restricted field of view, contaminated protective window or focusing lens, or a defective photocell. Flame signals of 4 to 6 microamperes for existing controls and up to 5 Vdc for the BCS 7700 and 7800 SERIES controls can be expected on good applications/installations. W136A VOLTOHMMETER W136A SELECTOR SWITCH A NOTE ON OIL BURNER USAGE 196146 METER CONNECTOR PLUG PLUG If the flame rod is used to prove a gas pilot on an oil installation, oil or soot deposits must not be allowed to form on flame rod insulator. Such deposits might form leakage resistance paths, which in turn could cause nuisance shutdowns of main burner. FLAME SIGNAL METER JACK RED (+) METER LEAD Flame rod and porcelain insulators should be periodically examined for oil or soot deposits. Such deposits should be cleaned off before unit is put back in replace. PLUG-IN FLAME SIGNAL AMPLIFIER RED CONNECTOR BLACK (-) METER LEAD BLACK CONNECTOR M6532A Fig. 10. Measuring microamp flame signal. The performance of the C7007A Holder (with flame rod) and C7008A, C7009A Flame Rod Assemblies can be determined by measuring the flame signal (current/voltage) during pilot burner operation. Most existing Honeywell flame safeguard controls incorporate a flame signal jack on the amplifier or the control itself. The flame current measurement is made with a volt-ohm-meter such as the Honeywell W136A Meter or a microammeter with a zero to 25 microampere scale. A meter connector plug (part no. 196146, provided with the W136A) is used to adapt the W136A to the flame current jack on the flame safeguard control. The W136A Meter probes are connected to the two ends of the connector plug (red to red, black to black). The plug end of the connector inserts directly into the flame current jack of the flame safeguard control (see Fig. 11). If the flame safeguard control does not have a meter jack, or if a meter connector plug is not available, a meter can be wired in series with the "F" lead of the flame detector circuit. During the burner run cycle, the minimum acceptable flame current is two microamperes. 5 RESET B BUTTON PROGRAM MODULE 20,000 V VOLTO OHM METER FLAME METER AMPLIFIER P PROBES BCS 7700 CHASSIS MODULE FOOT MOUNT M7860 Fig. 11. Measuring BCS 7700 controls flame signal voltage. 60-2024—04 C7007A, C7008A, C7009A FLAME ROD HOLDER & FLAME ROD ASSEMBLIES POSITIVE (+) METER LEAD NEGATIVE (-) METER LEAD ONE MEGOHM/VOLT METER M7382 Fig. 12. Measuring 7800 SERIES controls flame signal voltage. 60-2024—04 6 C7007A, C7008A, C7009A FLAME ROD HOLDER & FLAME ROD ASSEMBLIES 7 60-2024—04 C7007A, C7008A, C7009A FLAME ROD HOLDER & FLAME ROD ASSEMBLIES Automation and Control Solutions Honeywell International Inc. 1985 Douglas Drive North Golden Valley, MN 55422 Honeywell Limited-Honeywell Limitée 35 Dynamic Drive Toronto, Ontario M1V 4Z9 www.honeywell.com/buildingsolutions ® U.S. Registered Trademark © 2010 Honeywell International Inc. 60-2024—04 M.S. Rev. 09-10 Printed in U.S.A.


