Accessory
INSTALLATION
INSTRUCTIONS
RECOIL STARTER KIT
P/N 08U70-HR3-A40/A60
Application
Publication No.
A40: TRX420TM1/TE1/FM1/
FM2/FE1, TRX500FM1/
FM2/FE1/FE2
A60: TRX420FA1/FA2
Mll 14473
Issue Date
Revised July 2015
Honda Dealer: Please give a copy of these instructions to your customer.
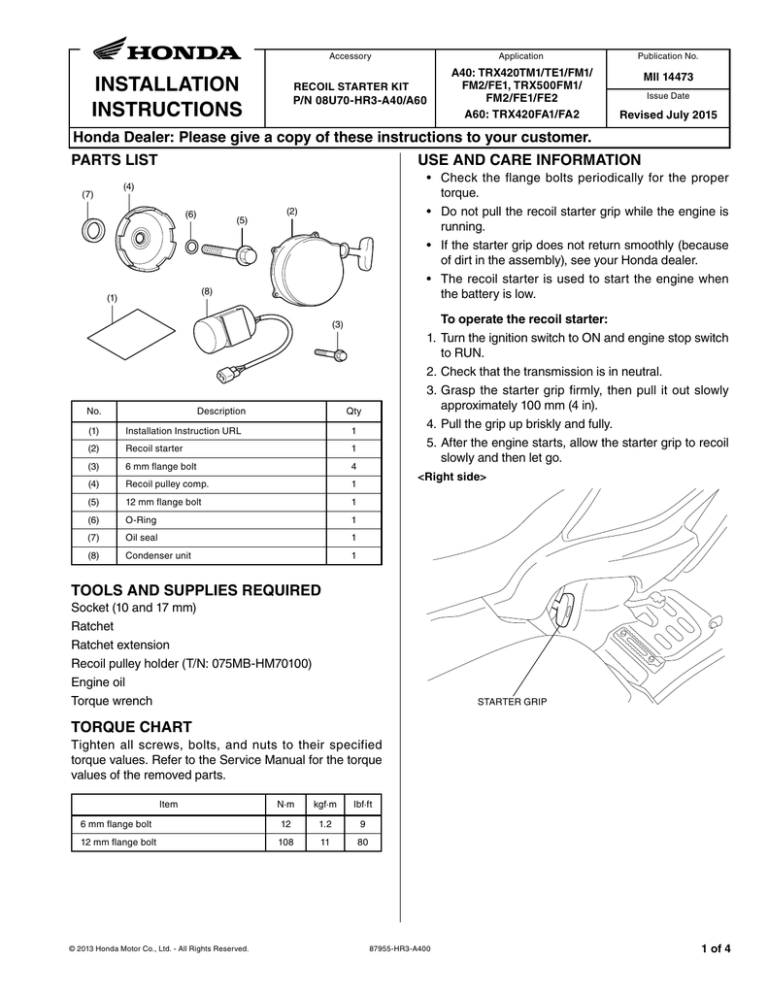
PARTS LIST
USE AND CARE INFORMATION
• Check the flange bolts periodically for the proper
torque.
• Do not pull the recoil starter grip while the engine is
running.
• If the starter grip does not return smoothly (because
of dirt in the assembly), see your Honda dealer.
• The recoil starter is used to start the engine when
the battery is low.
(4)
(7)
(2)
(6)
(5)
(8)
(1)
(3)
1.
2.
3.
No.
Description
(1)
Installation Instruction URL
Qty
4.
5.
1
(2)
Recoil starter
1
(3)
6 mm flange bolt
4
(4)
Recoil pulley comp.
1
(5)
12 mm flange bolt
1
(6)
O-Ring
1
(7)
Oil seal
1
(8)
Condenser unit
1
To operate the recoil starter:
Turn the ignition switch to ON and engine stop switch
to RUN.
Check that the transmission is in neutral.
Grasp the starter grip firmly, then pull it out slowly
approximately 100 mm (4 in).
Pull the grip up briskly and fully.
After the engine starts, allow the starter grip to recoil
slowly and then let go.
<Right side>
TOOLS AND SUPPLIES REQUIRED
Socket (10 and 17 mm)
Ratchet
Ratchet extension
Recoil pulley holder (T/N: 075MB-HM70100)
Engine oil
Torque wrench
STARTER GRIP
TORQUE CHART
Tighten all screws, bolts, and nuts to their specified
torque values. Refer to the Service Manual for the torque
values of the removed parts.
N·m
kgf·m
Ibf·ft
6 mm flange bolt
Item
12
1.2
9
12 mm flange bolt
108
11
80
© 2013 Honda Motor Co., Ltd. - All Rights Reserved.
87955-HR3-A400
1 of 4
2.
Refer to the Service Manual to remove the parts.
INSTALLATION
CAUTION
• To prevent burns, allow the engine, exhaust system,
radiator, etc. to cool before installing the accessory.
NOTE:
• Disconnect the negative (-) cable from the battery
before installing this accessory.
• The memories of the tripmeter and clock will be
erased when you disconnect the battery. Reset the
clock after reconnecting the battery.
1.
Refer to the model specific Service Manual to
remove the indicated parts.
CLAMP
BOLT (Save)
<TRX500 SHOWN>
AIR CLEANER
SUB CHAMBER
TRX500 only.
REAR COVER
SEAT
ACG BOSS
(Save)
BOLT
(Save)
REAR COVER CAP/
O-RING (Save)
3.
BOLT (Save)
Disconnect the negative (-) cable from the battery.
<Inside the battery box>
NEGATIVE (-)
CABLE
RIGHT TANK
SIDE COVER
MUDGUARD
BATTERY
2 of 4
87955-HR3-A400
© 2013 Honda Motor Co., Ltd. - All Rights Reserved.
4.
Install the oil seal as shown.
6.
Install the recoil starter as shown.
6 mm
FLANGE BOLT
OIL SEAL
5.
Install the recoil pulley as shown. Use the special tool
to hold the recoil pulley while torquing the flange bolt.
• NOTE: The recoil pulley is keyed to the flywheel.
Be sure to properly index the recoil pulley to the
flywheel before installing the o-ring and bolt.
RECOIL STARTER
7.
CLAMP
(Reuse)
6 mm
FLANGE
BOLT
Install the condenser unit as shown.
<Inside the battery box>
CONDENSER UNIT
RECOIL PULLEY
COMP.
O-RING
12 mm
FLANGE BOLT
ENGINE OIL
O-RING
© 2013 Honda Motor Co., Ltd. - All Rights Reserved.
12 mm FLANGE BOLT
87955-HR3-A400
3 of 4
8.
Connect the condenser unit harness as shown.
Remove the dummy connector as shown.
2-PIN (White)
CONNECTOR
2-PIN (White) DUMMY
CONNECTOR (Save)
OPERATION CHECKS AFTER INSTALLATION
1. Check that the transmission is in neutral.
2. Check that the negative (-) battery cable is
disconnected from the battery.
3. Turn the ignition switch ON.
4. Hold the recoil starter grip firmly and pull it vigorously
to start the engine.
5. Stop the engine. Turn the ignition switch OFF and
reconnect the negative (-) battery cable securely.
• Note that the above procedure is for checking
functions after installation only. Normally,
use the recoil starter with the battery cables
connected.
9. Reinstall the removed ATV parts.
VEHICLE’S
HARNESS
2-PIN (White)
CONNECTOR
CONDENSER
UNIT
HARNESS
CONDENSER UNIT
4 of 4
87955-HR3-A400
© 2013 Honda Motor Co., Ltd. - All Rights Reserved.


