The first picture shows a student responding to some auditory training i

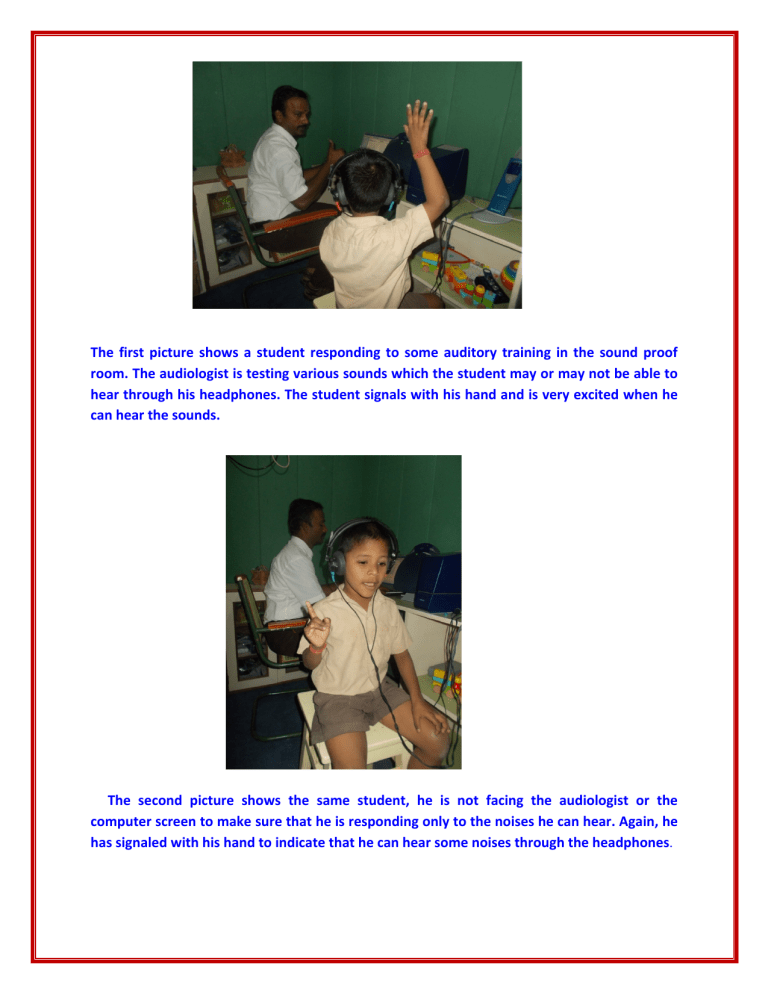
The first picture shows a student responding to some auditory training in the sound proof room. The audiologist is testing various sounds which the student may or may not be able to hear through his headphones. The student signals with his hand and is very excited when he can hear the sounds.
The second picture shows the same student, he is not facing the audiologist or the computer screen to make sure that he is responding only to the noises he can hear. Again, he has signaled with his hand to indicate that he can hear some noises through the headphones .
The next photograph shows a student called Niwin being fitted for a new mould for his hearing aid. The teacher has been trained to use a combination of two substances which creates a waxy mixture which can be injected into Niwin’s ear. The mixture quickly dries and hardens and is then easily removed, having made a perfect mould of Niwin’s ear which can be sent off and used to make a perfectly fitting hearing aid.
In this photograph the teacher is showing different instruments to the class and demonstrating the different noises they make during an auditory training class. This allows the students to practice their listening skills and helps them distinguish the different noises of the various instruments.
The next photograph was taken during an auditory training and listening skills class. The teacher had a variety of different instruments on the table which she used to test the children’s hearing. Here, a student called Alumilai faces away from the teacher while she blows into the recorder. Alumilai can only know which instrument his teacher uses by listening to the noise made, when he turns around he has to identify which he heard, demonstrating his hearing ability.
During the same class as the previous photo, the teacher played a note on the recorder so that the children could listen to what it sounds like and then attempt to identify its noise when not facing the teacher.
This photograph was taken during a lip-‐reading class. The teacher tests the students lip-‐ reading skills by saying different objects to them, and not using any sign language. The students then have to match the object said by the teacher to a picture card on the table. The students then practice saying the words themselves .
The next photograph shows a boy called Vishnu, who has correctly identified the object which his teacher had said by watching her lips and reading them. He is very proud of himself and the teacher is also very pleased with him. Many of the students are keen to answer the teacher and point out which object she had said as they all enjoy the lip-‐reading classes.
This photograph shows a student called Dinesh identifying the object which his teacher had said and then trying to repeat the word himself. This lesson is really good at encouraging the students to lip-‐read as an alternative to always using sign language. Dinesh’s speech is clear and he correctly identified the correct picture for his teacher.
This next photograph shows a student called Praveen pointing out the picture of the object which his teacher had said. He used his lip-‐reading skills to decide which picture he pointed to.
This photo shows a student called Arasu proudly showing the class the picture of the object his teacher had said. He identified the picture correctly using his lip-‐reading skills. The class also watched as the teacher again repeated the word shown in the picture, watching the movements she makes with her lips.
This next photograph shows a portion of a speech therapy class. The class is between a teacher and only one student so that the student has the best opportunity to learn and improve their skills. The teacher is using classroom objects during the lesson, she firstly asks the student to identify an object of her choice, and then repeats the word herself to the student. The two sit facing a mirror so that the student can observe how her teacher’s mouth moves so that she can imitate the word herself and make the appropriate sounds .
In this photograph, the teacher is using talcum powder with the student to practice making the “p” sound. The teacher demonstrated that when she makes the “p” sound, the powder will blow into the air. Such an activity is fun but also memorable to the student so that she can easily remember how to make the “p” sound .
This next photograph shows another part of the speech therapy class where the teacher is closely demonstrating how the student can use her mouth to make the sounds. The teacher emphasizes the sounds of the words so that it is easier for then student to copy her. The student was clearly enjoying the lesson and her speech was very impressive.


