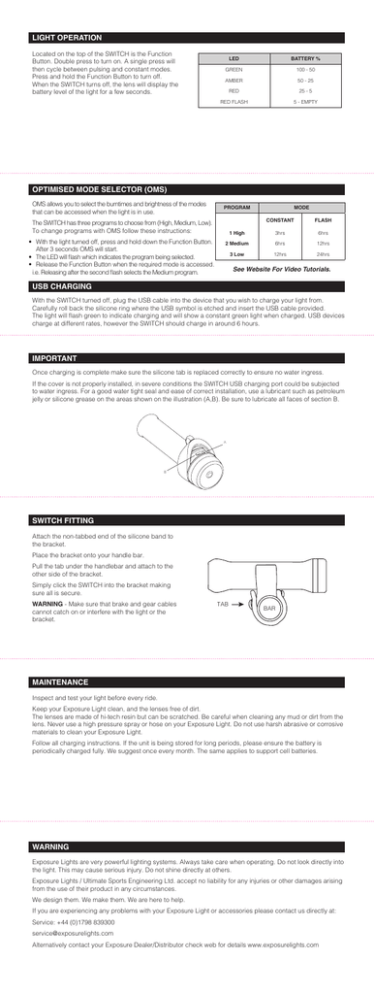
light operation optimised mode selector (oms) usb
advertisement

LIGHT OPERATION Located on the top of the SWITCH is the Function Button. Double press to turn on. A single press will then cycle between pulsing and constant modes. Press and hold the Function Button to turn off. When the SWITCH turns off, the lens will display the battery level of the light for a few seconds. LED BATTERY % GREEN 100 - 50 AMBER 50 - 25 RED 25 - 5 RED FLASH 5 - EMPTY OPTIMISED MODE SELECTOR (OMS) OMS allows you to select the burntimes and brightness of the modes that can be accessed when the light is in use. PROGRAM • With the light turned off, press and hold down the Function Button. After 3 seconds OMS will start. • The LED will flash which indicates the program being selected. • Release the Function Button when the required mode is accessed. i.e. Releasing after the second flash selects the Medium program. MODE CONSTANT The SWITCH has three programs to choose from (High, Medium, Low). To change programs with OMS follow these instructions: FLASH 1 High 3hrs 6hrs 2 Medium 6hrs 12hrs 3 Low 12hrs 24hrs See Website For Video Tutorials. USB CHARGING With the SWITCH turned off, plug the USB cable into the device that you wish to charge your light from. Carefully roll back the silicone ring where the USB symbol is etched and insert the USB cable provided. The light will flash green to indicate charging and will show a constant green light when charged. USB devices charge at different rates, however the SWITCH should charge in around 6 hours. IMPORTANT Once charging is complete make sure the silicone tab is replaced correctly to ensure no water ingress. If the cover is not properly installed, in severe conditions the SWITCH USB charging port could be subjected to water ingress. For a good water tight seal and ease of correct installation, use a lubricant such as petroleum jelly or silicone grease on the areas shown on the illustration (A,B). Be sure to lubricate all faces of section B. A B SWITCH FITTING Attach the non-tabbed end of the silicone band to the bracket. Place the bracket onto your handle bar. Pull the tab under the handlebar and attach to the other side of the bracket. Simply click the SWITCH into the bracket making sure all is secure. WARNING - Make sure that brake and gear cables cannot catch on or interfere with the light or the bracket. TAB BAR MAINTENANCE Inspect and test your light before every ride. Keep your Exposure Light clean, and the lenses free of dirt. The lenses are made of hi-tech resin but can be scratched. Be careful when cleaning any mud or dirt from the lens. Never use a high pressure spray or hose on your Exposure Light. Do not use harsh abrasive or corrosive materials to clean your Exposure Light. Follow all charging instructions. If the unit is being stored for long periods, please ensure the battery is periodically charged fully. We suggest once every month. The same applies to support cell batteries. WARNING Exposure Lights are very powerful lighting systems. Always take care when operating. Do not look directly into the light. This may cause serious injury. Do not shine directly at others. Exposure Lights / Ultimate Sports Engineering Ltd. accept no liability for any injuries or other damages arising from the use of their product in any circumstances. We design them. We make them. We are here to help. If you are experiencing any problems with your Exposure Light or accessories please contact us directly at: Service: +44 (0)1798 839300 service@exposurelights.com Alternatively contact your Exposure Dealer/Distributor check web for details www.exposurelights.com QUICKSTART GUIDE READY, SET UP, RIDE SWITCH PRODUCT MODE PANEL HOURS OF BURN TIME PROGRAM C - CONSTANT F - FLASH For more information please visit: exposurelights.com


