Libby A-line Skirt Pattern
advertisement
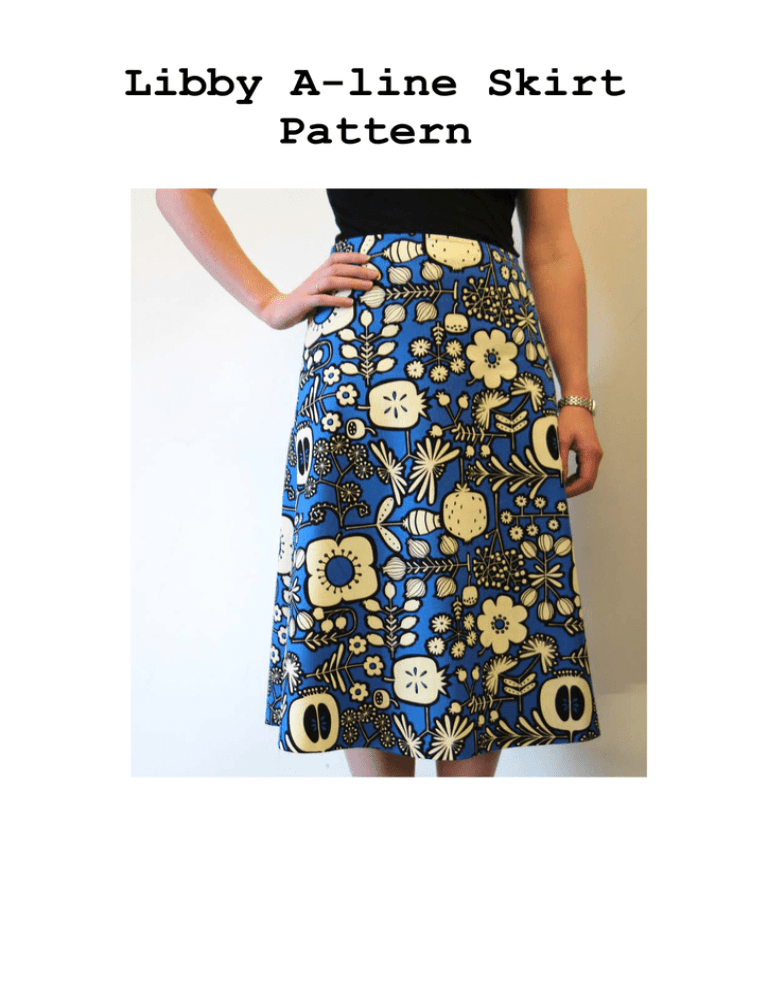
Libby A-line Skirt Pattern Libby A-Line Skirt – This classic and simple a-line skirt comes in short, mid and long length and features a side invisible zipper, back darts and waist facings. This pattern is a perfect staple and works beautifully as a trans-seasonal garment. The Libby A-line Skirt is ideal made up in woven fabrics e.g. cotton, wool, linen and silk. NOTE: Make fit allowances if using a stretch woven. Sizes included:(AUS sizing) 6, 8, 10, 12, 14 and 16 Sizing chart: 6 8 10 12 14 16 Bust 76cm 81cm 86cm 91cm 96cm 101cm Waist 64cm 69cm 74cm 79cm 84cm 89cm Hip 91cm 96cm 102cm 107cm 112cm 117cm Pattern Pieces: Front – cut 1 on fold Back – cut 1 on fold Front facing – cut 1 on fold (plus 1 on fold interfacing) Back facing - cut 1 on fold (plus 1 on fold interfacing) Front waist Vilene shield template – cut 1 on fold in Vilene tear-away only Back waist Vilene shield template – cut 1 on fold in Vilene tear-away only Notions: thread, 20cm invisible zipper, interfacing, tear-away Vilene Meterage for Libby A-line Skirt Size 6, 8, 10, 12, 14, 16 Short length (112cm) 1.10mts, 1.10mts, 1.10mts, 1.10mts, 1.10mts, 1.10mts Short length (140cm) 0.65cm, 0.65cm, 0.65cm, 0.75cm, 0.75cm, 0.90cm Mid length (112cm) 1.35mts, 1.35mts, 1.35mts, 1.35mts, 1.35mts, 1.35mts Mid length (140cm) 0.75cm, 0.75cm, 0.75cm, 0.75cm, 0.85cm, 0.90cm Long length (112cm) 1.75mts, 1.75mts, 1.75mts, 1.75mts, 1.75mts, 1.75mts Long length (140cm) 0.95cm, 0.95cm, 1.00mt, 1.20mts, 1.40mts, 1.55mts Finished Length of Libby A-line Skirt (from centre back)– SHORT LENGTH 17” or 43cm, MID LENGTH 21” or 53cm, LONG LENGTH 28.5” or 73cm Note: You can lengthen or shorten this skirt at the hem. Width around Skirt (at finished hemline) SHORT LENGTH EG. Size 10 - 48” or 122cm MID LENGTH EG. Size 10 - 50” or 127cm LONG LENGTH EG. Size 10 - 56” or 142cm Seam Allowance: NB: seam allowances are included and are in imperial (inches) not metric (centimetres). All seams are ½” except where stated (e.g. hem width) so please take the seam allowances specified in sewing instructions. Sewing Level for this pattern: suitable for beginner, intermediate and advanced sewers. Libby A-line Skirt - Sewing Instructions Please read instructions thoroughly before cutting and sewing. --------Step 1 - Block fusing fabric for front and back facings: Estimate enough fabric to fit the front and back facings and cut a lightweight interfacing in the same shape as your fabric block. Iron your interfacing to the wrong side of the fabric block. Next, place and pin facing pattern pieces back on fabric and cut out facings. 1 Step 2: Cut out tearaway Vilene shields for front and back waistline using the template provided in your pattern. Step 3: On the wrong side of skirt, stitch darts on back pieces, tapering down to 2 nothing at the point. Press darts towards the side seam. Next, sew Vilene shields to front and back waistline on wrong side of fabric, close to the edge and inside the waistlines ½” seam allowance. 3 This secures the waistline and prevents it from stretching. Step 4: Overlock all side seams of your skirt. Doing this before joining together allows for a better finish. Handy Tip: Make sure not to cut anything off the seam allowances. Step 5: Pin right sides of outer right side of skirt (side without zipper) together and, beginning at waist, sew side seam taking ½” seam allowance. Press seams open. Step 6: Pin the right sides of outer left side of skirt (side with zipper) together, and start to sew approx 1” to 2” down from zipper notch, right down to the hem and leaving the top open to insert your zipper. Press seams open. 4 Step 7: Insert a 20cm (8”) invisible zip at the top of the skirt where your opening is. Handy Tip: We recommend an invisible zip as it gives a much cleaner finish to your final garment, especially for side and back openings. For best results use an invisible zipper foot on your sewing machine. With the invisible zipper open, pin zipper in place, making sure that the fabric is sitting right side up and facing you with the seam open. The right side of the zipper must be face down on the fabric with the zipper teeth facing away from seam allowance edge. Make sure to line up the zipper coil edge with the seam line. Place pins parallel to the zipper teeth. Note: the zipper tape is always narrower than the seam allowance. With an invisible zipper foot attached to your sewing machine, drop your foot down onto the zipper, making sure to catch the zipper coil into the groove under the foot. This helps in turning the teeth coils out of the way so that the machine can stitch behind the teeth. Position your needle down to start and sew 5 zipper carefully down from the waist to just before the zipper pull. Backstitch at end. Next, with one side of the zipper attached, line up other side of zipper tape face down onto right side of fabric with seam open. Again, pin parallel to zipper coil, lining up zipper teeth edge with the seam line. Note: Close the zipper to make sure that you’ve pinned it correctly. It’s best to double check that the waistline and top of your zip line up evenly, before you do any sewing. Once you’ve checked, unzip it before sewing and sew the zipper as you did the other side and backstitch at the end. Once the zipper is securely in place, pull the zipper closed and press lightly on right side. Next, remove your invisible zipper foot and attach your regular zipper foot. To close the small opening left at the bottom of your zip, join the right sides of your seam allowances together and pin the opening. 6 Note: Make sure the zipper tail is out of the way so that it doesn't get caught up in the seam. Sew the opening closed by starting where you ended your side seam stitching taking the same ½” seam allowance and finish approx ¼” past where your zipper seam ends, making sure to backstitch at each end. Step 8: Pin the left side seam (right side up) of back facing to the right side seam (right side up) of front facing with right sides facing each other and sew ½” seam allowance. Press seam open. Next overlock bottom edge of facings. 7 Tip: if you prefer, you can neaten back this edge by turning overlocked edge towards wrong side of garment and stitching in place. Note: the other side seam will be left open for zipper opening Step 9 - Attaching the facing: With the zipper tape and seam allowance turned out away from garment, pin the top of the facing to the waist of skirt with right sides facing making sure to match up side seams and centre front and back notches. Sew the facing to the waist taking ½” seam allowance. Trim back waist seam allowance and at zipper opening corners to eliminate bulk. 8 Tear away Vilene shields at waistline edge. Turn facing out away from garment and understitch on the facing close to waist seam line, making sure to catch the waist seam allowance at the back of stitching. Turn back zipper and facing seam towards the wrong side of skirt… 9 …and then turn facing towards inside of skirt. 10 Press waist edge gently and topstitch top edge of waistline on right side ¼” from edge. This will help to keep facing securely towards the inside of garment. Hand stitch facing edge to zipper tape. 11 Step 11: Overlock hem edges and turn up hem 1¼” towards wrong side of garment and either blind hem or machine stitch in place. Press. You're done. Enjoy wearing your Libby A-line Skirt! 12
