Mitutoyo Vision Measuring Systems: QUICK IMAGE, SCOPE, VISION
advertisement
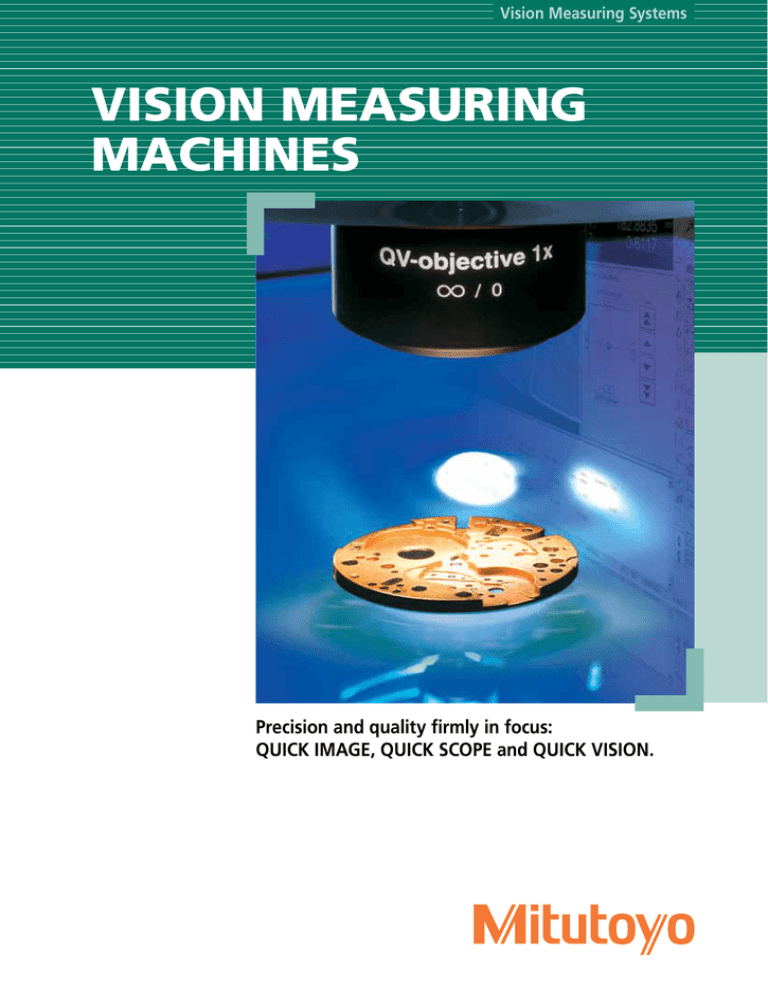
Vision Measuring Systems VISION MEASURING MACHINES Precision and quality firmly in focus: QUICK IMAGE, QUICK SCOPE and QUICK VISION. QUICK IMAGE, QUICK SCOPE and QUICK VISION – focussing on the essentials. VISION MEASURING MACHINES VISIO On the production line, in the quality control room or the laboratory, Mitutoyo offers innovative solutions for all your optical measurement requirements using state-of-the-art image processing technology. Even the most demanding customers will find an off-the-shelf machine that suits their needs, or one that can be customised to do the job, in a range extending from a high-economy compact desktop machine through to the high-precision reference model. In this brochure you will find all the essential facts on machine specifications, configurations, add-ons and software. This quick, sure and efficient guide will help you to find the system you need. More detailed individual product brochures will then give you further information on the system of your choice. Whatever machine you choose, with vision measurement technology from Mitutoyo, you can be sure of the experience, competence and performance of one of the world’s leading measurement technology specialists and customer-oriented service without comparison. Mitutoyo: right in the picture when it comes to precision. ON 2 Vision Measuring Systems by Mitutoyo – a full range for quality and precision. QUICK IMAGE 2D vision system With a large focal depth, workpieces of varying thicknesses or stepped surfaces can be measured simply and without refocussing. Complete capture of small parts in a single view – for quick, easy, automated measurement. Offering convenient, repeatable and programmable measuring sequences, QUICK IMAGE provides you with the best solution for fast evaluation of 2D parts. QUICK SCOPE Measuring microscopes with vision Manual and CNC vision systems for reliable non-contact precision measurement of parts and surfaces and vision profile testing. Deploying high-resolution colour CCD cameras for detailed image acquisition QUICK SCOPE performs complex, automatic measurements on batches of workpieces, or individual parts, with more measuring and analysis capability than any traditional microscope system. QUICK VISION Coordinate measuring machines with vision Powerful CNC-operated systems for intelligent, easy and fully automatic measurement. Offering a variety of filtering functions for reliable measurements, normal and oblique illumination systems, degrees of accuracy and ranges of measurement all the way through to the flexible QV Basic programming language. QUICK VISION is your ideal visual measuring system for precision work. QUICK SCOPE manual QS-L2010ZB QUICK IMAGE QI-A1010 QUICK SCOPE CNC QS250Z QUICK VISION ELF 202PRO Model Accuracy Specific characteristics Measuring range X : Y : Z (mm) 100 : 100 2D image processing system with large visible area and enhanced 200 : 100 depth of field. 200 : 170 2D image processing system with large depth of field and 300 : 170 enhanced accuracy. 400 : 200 QUICK IMAGE A 5.0 µm QUICK IMAGE B 5.0 µm QUICK SCOPE manual 2.5 µm Manual machine with powerzoom with or without CNC autofocus. QUICK SCOPE CNC 2.5 µm CNC operation with powerzoom and autofocus. QUICK VISION ELF 2.0 µm Compact and economical machine for the measurement of medium-sized workpieces. 250 : 200 : 200 QUICK VISION APEX 1.5 µm QUICK VISION HYPER 0.8 µm 300 : 200 : 200 400 : 400 : 250 600 : 650 : 250 QUICK VISION STREAM PLUS 1.5 µm Floor-standing models with four-colour LED coaxial and ring lights to meet the highest demands in image-processing measurements. Particularly suited to economically measuring large workpieces either in production or a controlled environment. The HYBRID models are fitted with a laser scanning system for 3D surface evaluation. QUICK VISION ACCEL 1.5 µm QUICK VISION APEX TP 1.5 μm QUICK VISION HYPER TP 0.8 μm Floor-standing models with stationary measuring table and moving bridge in all three axis for rapid traverse speed and high acceleration. This configuration drastically reduces measurement time required for large workpieces by eliminating the need for clamping. The HYBRID models are fitted with a laser scanning system for 3D surface evaluation. 800 : 800 : 150 1000 : 1000 : 100 1250 : 1250 : 100 1500 : 1750 : 100 Combining image processing and contact measurement turns the QUICK VISION APEX/HYPER TP into a versatile, multi-sensor measurement system. 300 : 200 : 200 400 : 400 : 250 400 : 400 : 250 400 : 400 : 240 600 : 650 : 240 400 : 400 : 200 QUICK VISION WLI 0.8 μm By combining an image processing system with a White Light Interferometer sensor, the QUICK VISION WLI becomes a powerful measuring system for detailed 3D topography analysis with highest accuracy on large workpieces or batches of workpieces. QUICK VISION ULTRA 0.25 μm Maximum precision, premium system with air bearings on all axes for maximum accuracy. QUICK VISION HYPER 404PRO 200 : 100 : 150 300 : 170 : 150 400 : 200 : 150 200 : 250 : 100 QUICK VISION STREAM PLUS 606PR0 QUICK VISION ULTRA 404PRO 4 QUICK IMAGE Series – expanded capabilities. QUICK IMAGE Accuracy: The QUICK IMAGE Series exceeds the capability of profile projectors. • Wide measuring range up to 400 x 200 mm • Large visible area: 32 x 24 mm (QI-A) or 12.8 x 9.6 mm (QI-B) • Rapid, complex on-screen evaluations in a single click • View comparisons with CAD data as templates at a defined scale • Image archiving with and without tools or templates • Bipolar telecentric 0.2X lens for QI-A; 0.5X lens for QI-B 5 µm From physical profile to CAD data comparisons Time saving example Workpiece designation Printed circuit board 9 bores, 2 pitch measurements Measurement task No. of measurement positions required Average measurement time 4 Profile projector 4.4 min QUICK IMAGE 0.9 min Time saved using QUICK IMAGE Measurement time for 10 workpieces Model 80% Profile projector 43.3 min QUICK IMAGE 8.9 min Time saved using QUICK IMAGE Measuring range X : Y (mm) QI-A1010B 100 : 100 QI-A2010B 200 : 100 QI-A2017B 200 : 170 QI-A3017B 300 : 170 QI-A4020B 400 : 200 QI-B1010B 100 : 100 QI-B2010B 200 : 100 QI-B2017B 200 : 170 QI-B3017B 300 : 170 QI-B4020B 400 : 200 Comparison using a profile projector with engineering drawing as template QIPAK – comparison using superimposed template from CAD data (CAD import option required) 82% Infeed range Z Measurement accuracy within video window Repeatability within video window (±2s) U1 accuracy of X- and Y-axes 100 ±5 μm (high-resolution mode) ±8 μm (normal mode, extended depth of focus) ±1 μm (high-resolution mode) ±2 μm (normal mode, extended depth of focus) ±(5+0.08L) μm; L is measured length 100 ±2.7 μm (high-resolution mode) ±4 μm (normal mode, extended depth of focus) ±0.7 μm (high-resolution mode) ±1 μm (normal mode, extended depth of focus) ±(5+0.08L) μm; L is measured length QUICK IMAGE SERIES 6 QUICK SCOPE Series – the economical solution. QUICK SCOPE manual Accuracy: 2.5 µm MANUAL Compact, economical desktop machine for easy manual measurement of workpiece geometry. • High performance-to-cost ratio • Measurement table movements in the X- and Y-axes with convenient rapid adjustment • 3 sizes (200 x 100, 300 x 170, 400 x 200 mm) • With or without autofocus function • Programmable 8X powerzoom • Optical and digital zoom • High resolution CCD colour camera • Halogen fibre-optic lighting • Stage, coaxial and ring lighting • Resolution 0.1 µm (0.0001 mm) • One click tool technology for optimum edge detection • Fast and simple navigation • User-friendly QSPAK software Machine with powerzoom: • Powerzoom programming with automatic adjustment of light intensity and pixel size Model Measuring range X : Y : Z (mm) QS-L2010ZB 200 : 100 : 150 QS-L3017ZB 300 : 170 : 150 QS-L4020ZB 400 : 200 : 150 QS-L2010Z/AFB 200 : 100 : 150 QS-L3017Z/AFB 300 : 170 : 150 QS-L4020Z/AFB 400 : 200 : 150 Accuracy Zoom lens • X,Y: (2.5+0.02L) µm Z: (5.0+0.04L) µm • • • X,Y: (2.5+0.02L) µm Z: (5.0+0.006L) µm • • Magnification on 48 cm (19") screen 0.75X - 5.25X Zoom lens: 30X - 208X 0.5X - 3.5X Zoom lens: 28X - 193X Halogen Halogen Halogen transmitted light coaxial light ring light Auto-focus • • • • • • • • • • • • • • • • • • • • • QUICK SCOPE SERIES QUICK SCOPE CNC Accuracy: A CNC desktop machine with an attractive performance-tocost ratio. Perfectly suited to the measurement of small and medium-sized workpieces. 2.5 µm CNC • Autofocus function • Programmable 8X powerzoom • High resolution CCD colour camera • Halogen fibre-optic lighting • Stage, coaxial and ring lighting • Resolution 0.5 µm (0.0005 mm) • One click tool technology for optimum edge detection • User-friendly QSPAK software Machine with powerzoom: • Powerzoom programming with automatic adjustment of light intensity and pixel size Model QS250Z Control Measuring range X : Y : Z (mm) Accuracy Zoom lens Magnification on 48 cm (19") screen CNC 200 : 250 : 100 (2.5+0.006L) µm • With powerzoom: 28X - 193X Halogen Halogen Halogen stage light coaxial light ring light • • • Auto-focus • 8 QUICK VISION Series – top technology for top-class results. Quickly change magnification without calibration or refocussing All QUICK Vision models feature programmable switchover between 1X, 2X and 6X magnification to let you select the optimum image size during the measurement cycle - and it's fast, with no need to calibrate and re-focus. CCD camera Depending on the magnification, the pixel size and light intensity are adapted to each new adjustment. This allows for 32X to 960X magnification on a 43 cm (17") screen, depending on the objective lens used (1X, 2.5X, 5X). Optimizing the image thanks to stage, coaxial and ring lights All QUICK VISION models come equipped with a stage light for high-contrast edge lighting, a coaxial light for optimized surface lighting and a ring light for lateral illumination. Top left: typical application for the programmable ring light. Top right: stage light Bottom right: coaxial light Bottom left: simple ring light Parabolic reflector for programmable ring light QUICK VISION SERIES Fast and precise triangle-pattern focussing On difficult to detect, reflective and low-contrast surfaces, focussing is greatly facilitated by the projection of a triangular pattern. This is a standard feature on all QUICK VISION models. Application example with triangular pattern focussing Perfect illumination with the programmable LED ring light For best results, even under difficult conditions, the QUICK VISION machines come as standard in their PRO versions with a programmable four-quadrant LED ring light. The brightness of each of the four quadrants can be separately controlled by the software, creating optimum lighting conditions that, for example, will provide contrasting edge definition due to the projection of a shadow. The angle of light incidence can therefore be changed within a range of 30 to 80º in order to adjust the size of the shadow to suit the workpiece topography. LED ring light quadrant Options Flash of brilliance: stroboscopic lighting In addition to the progressive CCD camera, QUICK VISION STREAM PLUS also uses a stroboscopic light to illuminate the target area. Even the already extremely short exposure times of the camera are still relatively long, given the enormous speeds at which QUICK VISION STREAM PLUS measures. The stroboscopic light flashes for just a fraction of a millisecond. As such, the camera chip is only lit for this very small time period, rather than being continually lit from one frame to the next. Mitutoyo has perfectly mastered the art of triggering the flash and image acquisition while in motion at the required point of measurement. Lens design Dichroic reflector LED elements Reflector Light source Parabolic reflector 80° Workpiece surface 60° 30° Four-colour LED coaxial and ring light For improved high-contrast acquisition of images, the QUICK VISION measuring machines (with the exception of the ELF and ULTRA QV versions) operate with four-colour LED coaxial and ring lighting (RGB + white). The colour LEDs also act as colour filters and so also improve the measurement of coloured workpieces. Four-colour ring light (white, red, green and blue) Laser autofocus system for fast and accurate measurement in the Z-axis Except for HYBRID models, all QUICK VISION models can be equipped with a laser autofocus system for much faster and more repeatable Z-axis measurements compared to conventional autofocus technology. A TTL (through the lens) technique is used in which measuring range losses due to adjacent sensors are avoided. An additional benefit is that the visible laser point can also be used for fast and simple workpiece positioning. Laser autofocus system. 10 QUICK VISION ELF QUICK VISION ELF Accuracy: Compact desktop machine for powerful and economic vision measurement. 2 µm • CNC operation • Triangular pattern focussing for low-contrast surfaces • Programmable magnification changer 1X, 2X and 6X • High-precision objective lens system 1X, 2.5X and 5X • High-resolution CCD black and white camera • Resolution 0.1 μm (0.0001 mm) • Accuracy E1 (X, Y) at 20 ºC: (2+0.003L) μm • One click tool technology for optimum edge detection • User-friendly QVPAK software Coaxial and transmitted lighting (white) White ring light Series Quick Vision ELF 202PRO Model Measuring range X : Y : Z (mm) Accuracy Ring light QV-E202P1L-C 250 : 200 : 200 (2+0.003L) µm Programmable four-quadrant LED ring light, white QUICK VISION ELF 12 QUICK VISION APEX/HYPER QUICK VISION APEX/HYPER Floor-standing CNC model designed for demanding tasks in vision-based measurement and featuring a choice of accuracy specification. Incorporates four-colour LED coaxial and ring lights. • White LED transmitted stage light • LED coaxial light with variable light colour • Programmable four-quadrant LED ring light with variable light colour • CNC operation • Triangular pattern focussing for low-contrast surfaces • Programmable magnification changer 1X, 2X and 6X • High-precision objective lens system 1X, 2.5X and 5X • High-resolution CCD black and white camera • Resolution of the QUICK VISION APEX: 0.1 μm (0.0001 mm) • One click tool technology for optimum edge detection • User-friendly QVPAK software Accuracy: 1.5 μm (QV APEX) 0.8 μm (QV HYPER) White LED transmitted light 4-colour LED coaxial light (RGB + white) For an overview of the various QV models, see page 15 4-colour LED ring light (RGB + white) QUICK VISION APEX/HYPER 14 QUICK VISION STREAM PLUS QUICK VISION STREAM PLUS Non-stop measurement of workpiece geometry LED technology for improved illumination. • Measures workpiece geometry while moving • Drastic improvement in throughput • Laser autofocus optionally available for fast focussing • Measures at a speed up to 40 mm/s • LED stage lighting • LED coaxial light with variable colour • Programmable four-quadrant LED ring light with variable colour • Triangular pattern focussing for low contrast surfaces • High-precision objective lens system 1X, 2.5X, and 5X • One click tool technology for optimum edge detection • User-friendly QVPAK software • Progressive black and white CCD camera • Programmable power turret 1X, 2X and 6X Accuracy: 1.5 μm White LED transmitted light 4-colour LED coaxial light (RGB + white) STREAM mode: Stroboscopic illumination (cyan) 4-colour LED ring light (RGB + white) STREAM mode: Stroboscopic illumination (cyan) Overview of QV APEX, QV STREAM and QV HYPER Series Quick Vision APEX PRO Quick Vision APEX PRO3 Quick Vision STREAM PLUS PRO Quick Vision HYPER PRO Model Measuring range X : Y : Z (mm) QV-X302P1L-C 300 : 200 : 200 QV-X404P1L-C 400 : 400 : 250 QV-X606P1L-C 600 : 650 : 250 QV-X302P3N-C 300 : 200 : 200 QV-X404P3N-C 400 : 400 : 250 QV-X606P3N-C 600 : 650 : 250 QV-X302P1S-C 300 : 200 : 200 QV-X404P1S-C 400 : 400 : 250 QV-X606P1S-C 600 : 650 : 250 QV-H302P1L-C 300 : 200 : 200 QV-H404P1L-C 400 : 400 : 250 QV-H606P1L-C 600 : 650 : 250 Lighting system LED transmitted light (white) RGB LED coaxial light RGB LED ring light Halogen transmitted light Halogen coaxial light Halogen ring light Image sensor Accuracy Automatic magnification change 12.7 mm (1/2") black and white CCD camera E1 (X,Y): (1.5+0.003L) μm E1 (Z): (1.5+0.004L) μm 3 levels: 1X / 2X / 6X E2 (X,Y): (2+0.004L) μm 8.46 mm (1/3") colour CCD camera LED transmitted light (blue) RGB LED coaxial light RGB LED ring light Progressive E1 (X,Y): (1.5+0.003L) μm 12.7 mm (1/2") E1 (Z): (1.5+0.004L) μm 3 levels: 1X / 2X / 6X black and white CCD E2 (X,Y): (2+0.004L) μm camera LED transmitted light (white) RGB LED coaxial light RGB LED ring light 12.7 mm (1/2") E1 (X,Y): (1.5+0.003L) μm black and white CCD E1 (Z): (1.5+0.004L) μm 3 levels: 1X / 2X / 6X camera E2 (X,Y): (2+0.004L) μm QUICK VISION STREAM PLUS 16 QUICK VISION ACCEL QUICK VISION ACCEL Accuracy: 1.5 μm Stand-alone machine with fixed measuring stage for fast acceleration and traversing speeds. The dynamic solution for time-optimized production testing. • Fixed measuring stage • Bridge movable in all three axes • No clamping of workpieces or measuring equipment required • Speed in X- and Y-axes 400 mm/s • White LED transmitted lighting • Equipped as standard with stage, coaxial and ring lights • Programmable magnification changer 1X, 2X and 6X • High-precision objective lens system 1X, 2.5X and 5X • High-resolution CCD black and white camera • Resolution 0.1 μm (0.0001 mm) • One click tool technology for optimum edge detection • User-friendly QVPAK software Measuring without workpiece clamping Moving portal Series Quick Vision ACCEL PRO Quick Vision ACCEL PRO3 Model Measuring range X : Y : Z (mm) QV-A808P1L-B 800 : 800 : 150 QV-A1010P1L-B 1000 : 1000 : 150 QV-A1212P1L-B 1250 : 1250 : 100 QV-A1517P1L-B 1500 : 1750 : 100 QV-A808P3N-B 800 : 800 : 150 QV-A1010P3N-B 1000 : 1000 : 150 QV-A1212P3N-B 1250 : 1250 : 100 QV-A1517P3N-B 1500 : 1750 : 100 Lighting system Image sensor LED transmitted light (white) RGB LED coaxial light RGB LED ring light 12.7 mm (1/2") black and white CCD camera Halogen transmitted light Halogen coaxial light Halogen ring light 8.46 mm (1/3") colour CCD camera Accuracy E1 (X,Y): (1.5+0.003L) μm E1 (Z): (1.5+0.004L) μm E2 (X,Y): (2.5+0.004L) μm E1 (X,Y): (2.2+0.003L) μm E1 (Z): (2.5+0.005L) μm E2 (X,Y): (3.5+0.004L) μm E1 (X,Y): (1.5+0.003L) μm E1 (Z): (1.5+0.004L) μm E2 (X,Y): (2.5+0.004L) μm E1 (X,Y): (2.2+0.003L) μm E1 (Z): (2.5+0.005L) μm E2 (X,Y): (3.5+0.004L) μm QUICK VISION ACCEL 18 QUICK VISION TP Series QUICK VISION TP SERIES Accuracy: 1.5 μm (QV APEX) 0.8 μm (QV HYPER) Multi-sensor system – vision sensor and touch probe. • Expanded application range by combining contact and non-contact measurement • Equipped with TP20 or TP200 touch probe • Flexible exchange of stylus configuration with MCR20 change rack (optional) • User-friendly QVPAK software Touch probe Series Quick Vision TP Apex Quick Vision TP Hyper Model Measuring range X : Y : Z (mm) Accuracy Using 1 sensor Using both sensors With optical sensor QVT1-X302P1L-C 300 : 200 : 200 234 : 200 : 200 E1 (X,Y): (1.5+0.003L) μm QVT1-X404P1L-C 400 : 400 : 250 334 : 400 : 250 E1 (Z): (1.5+0.004L) μm QVT1-X606P1L-C 600 : 650 : 250 534 : 650 : 250 E2 (X,Y): (2+0.004L) μm QVT1-H302P1L-C 300 : 200 : 200 234 : 200 : 200 E1 (X,Y): (0.8+0.002L) μm QVT1-H404P1L-C 400 : 400 : 250 334 : 400 : 250 E1 (Z): (1.5+0.002L) μm QVT1-H606P1L-C 600 : 650 : 250 534 : 650 : 250 E2 (X,Y): (1.4+0.003L) μm With Touch Probe E1 (X,Y,Z): (1.8+0.003L) μm E1 (X,Y,Z): (1.7+0.003L) μm More TP models available in the Apex, Hyper and Elf series. Contact Mitutoyo for more information. QUICK VISION TP SERIES 20 QUICK VISION WLI QUICK VISION WLI Accuracy: Multi-sensor system – vision sensor and White Light Interferometer sensor. • Combined non-contact measurements with vision system and White Light Interferometer (WLI) • Easy alignment and positioning with the vision sensor • Full QVPAK functionality with vision system • Enhanced functionality with WLI system for high-resolution topography evaluation • Large measuring range up to 600 x 650 x 240 mm 0.8 μm Application examples 2D top view (Vision system) QV WLI objective lenses 10X and 25X 3D image (WLI sensor) Section analysis Model Measuring range X : Y : Z (mm) Vision sensor WLI sensor Hyper QV WLI 404 PRO 400 : 400 : 240 315 : 400 : 240 Hyper QV WLI 606 PRO 600 : 650 : 240 515 : 650 : 240 Resolution Vision sensor illumination Accuracy 0.01 μm Stage light: white LED Coaxial light: colour LED Ring light: colour LED E1 (X,Y): (0.8+2L/1000) μm E1 (Z): (1.5+2L/1000) μm E2 (X,Y): (1.4+3L/1000) μm QUICK VISION WLI 22 QUICK VISION ULTRA QUICK VISION ULTRA Accuracy: Stationary CNC system with air bearings on all axes for the ultimate in measuring accuracy. The machine to use when nothing else will do. 0.25 μm • CNC operation • Air bearings on all axes • Halogen transmitted light • Halogen coaxial light • Programmable four-quadrant halogen ring light • Programmable magnification changer 1X, 2X and 6X • High-precision objective lens system 1X, 2.5X and 5X • High-resolution CCD black and white camera • Resolution 0.01 μm (0.00001 mm) • One click tool technology for optimum edge detection • User-friendly QVPAK software PRO version: • Programmable four-quadrant LED ring light • 3-stage magnification changer Stable fixed-bridge structure designed using the finite element method (FEM) Standard glass scale The Quick Vision Ultra is equipped with a crystallized glass scale having a resolution of 0.01 μm and linear expansion coefficient of 0.08x10 -6/K. This virtually zero thermal expansion means the Quick Vision Ultra can minimize accuracy fluctuation resulting from thermal changes. Model QV-U404PRO Measuring range X : Y : Z (mm) Accuracy at 20 ºC 400 : 400 : 200 E1 (X,Y): (0.25+0.1L/100) μm E1 (Z): (1.5+0.2L/100) μm E2 (X,Y): (0.5+0.2L/100) μm QUICK VISION ULTRA 24 Accessories Software-controlled indexing rotary table for QUICK VISION machines The horizontal QV-Index rotary table turns the measured parts in 0.1 degree increments and thereby allows measurement of several sides of a workpiece without re-chucking. The software enables fully automatic CNC operation of the additional axis. Mitutoyo objective lens systems for QUICK VISION machines Quality workmanship for best image reproduction. Mitutoyo long working distance objective lens systems are distinguished by their excellent resolution at long working distances. Magnification 0.5X 1X 2.5X 5X 10X 25X Objective lens Order no. N.A. Working distance (mm) Visible area (mm) black and white camera Visible area (mm) colour camera (PRO3) 12.54 x 9.4 9.4 x 7.04 6.27 x 4.7 4.7 x 3.52 2.5 x 1.88 1.87 x 1.41 1.25 x 0.94 0.93 x 0.7 0.62 x 0.47 0.46 x 0.34 0.25 x 0.18 0.18 x 0.14 QV-SL0,5X 02AKT199 0.025 30.5 QV-1X 02ALA400 0.055 34 QV-SL1X 02ALA150 0.055 52.5 QV-HR1X 02AKT250 0.084 40.6 QV-SL2,5X 02ALA170 0.14 60 QV-HR2,5X 02AKT300 0.28 40.6 QV-5X 02ALA420 0.28 33.5 QV-10X 02ALG010 0.28 30.5 QV-HR10X 02AKT650 0.42 20 QV-25X 02ALG020 0.55 13 Accessories Accessories Mitutoyo opti-fix The Mitutoyo opti-fix system allows the quick and safe solution of very different tasks using only a few components. In the case of methods that use reflected as well as transmitted light for measurement of cubic, rotationally symmetrical and, especially, flat workpieces, the use of Mitutoyo opti-fix is a really practical solution. Furthermore, the spring clips and centering pins of different design which are integrated in the system also allow touch-probe measuring. Mitutoyo opti-fix offers the user a large number of possibilities for part fixing, from clamping tweezers for holding miniature parts to a precision vice for handling larger workpieces. Mitutoyo opti-fix round Mitutoyo opti-fix round, an innovative, newly developed tool completes the opti-fix family in the truest sense of the phrase 'the wheel comes full circle'. The circular design allows an infinitely variable adjustment through 360° in the horizontal as well as rotation in space and, additionally, the pin fixing at the sides ensures user-friendly access to the workpiece. 26 QIPAK QSPAK The software package for QUICK IMAGE vision measuring systems. The software package for QUICK SCOPE vision measurement systems. Everything to view, everything to hand: with clearly structured menus, easy-to-read symbols and logical operating sequences, QIPAK takes the effort out of work. All measurement software sequences such as light control, magnification or parts programming, can be followed directly and without difficulty. QSPAK is easy to learn, quick to use, and gives precise results for the QUICK SCOPE vision measuring machine – for quality work without complications. QVPAK The software package for the QUICK VISION system. The enormously versatile and user-friendly basic software for QUICK VISION measuring systems. The sophisticated structure, practical tools and excellent on-screen representation open up a whole new world of efficient measurement. With QVPAK, even extremely complex measurement processes can be planned, controlled and evaluated easily. Even new users will have a smooth entry into the world of QVPAK with its integrated online help. And the programming language QV Basic, which is based on Visual Basic, ensures maximum flexibility – for example when connecting up barcode readers, for data transfer to MS Office applications or the creation of user-defined input and query dialogues. Professional Professional For QUICK IMAGE systems For QUICK VISION systems QIPAK QVPAK Software package Software package Expansion modules Expansion modules MeasurLink MeasurLink Module for the statistical management of measurement data as well as the analysis and storage of that data. Module for the statistical management of measurement data as well as the analysis and storage of that data. QS CAD-IMPORT/EXPORT QV CAD-IMPORT/EXPORT Converts data for transfer between QIPAK and the CAD system. Easy import and export of IGES and DXF file formats. Converts data for transfer between QVPAK and the CAD system. Easy import and export of IGES and DXF file formats. FORMPAK-QV QV EIO PC/QV EIO Efficient, easy-to-use program for contour analysis and evaluation. For QUICK SCOPE systems QSPAK Software package Serves communication between the QUICK VISION system and an externally programmable controller or an external PC via RS-232C interface. QV Partmanager The pallet management program enables testing of several different workpieces consecutively in one measuring flow. During measurement, evaluation is 'at a glance'. PAGPAK Generates parts programs specially for the measurement of bores in printed circuit boards. Reads CNC or NC data from milling or drilling machines and uses them in the test. EASYPAG Expansion modules MeasurLink Module for the statistical management of measurement data as well as the analysis and storage of that data. QS CAD-IMPORT/EXPORT Converts data for transfer between QSPAK and the CAD system. Easy import and export of IGES and DXF file formats. Uses IGES or DXF data for the offline preparation of parts programs. FORMPAK-QV Efficient, easy-to-use program for contour analysis and evaluation. QV GEARPAK Generates a parts program for measuring gearwheels – including evaluation module for gearwheel parameters. FORMPAK-QV Efficient, easy-to-use program for contour analysis and evaluation. 28 Another gauge to measure your partners: competent advice and service Anyone who performs precision work needs a partner with sharp vision. Not only in the development and supply of the ideal measuring system, but also before and after – with advice and service. As a manufacturer of measuring machines with one of the world’s broadest range of products and over seven decades of experience, Mitutoyo has a particularly refined range of services that guarantee absolute customer satisfaction long before, and for a long time after, the decision to purchase. Advice Depending on your requirements, you can define, in close dialogue with the Mitutoyo specialist consultants, the machine or system selection to fit your specific measuring tasks – either standard or special tailor-made solutions in the context of the revolutionary M3 solution concept from Mitutoyo. This guarantees that you will be operating with the most suitable measuring equipment, both in terms of technical aspects and cost. As the sole complete supplier in its sector, Mitutoyo is well placed to configure the most efficient and suitable systems for you. Service A UKAS accredited calibration laboratory; central service workshop; large machine repairs on site at customers’ premises; contract measuring at all orders of magnitude; professional maintenance including using online systems; training and ongoing training at the Mitutoyo Information Center of Metrology (MIM); comprehensive information and data pool in online product lounges; competent service hotlines; contacts at your Mitutoyo customer centres. With all this, you can be sure that you have made the right choice with Mitutoyo – and we can be sure of being able to satisfy your needs completely, well into the future. Because that, at the end of the day, is the standard against which you will measure your machine suppliers. After all, technical perfection goes without saying – at least from Mitutoyo. Competence Competence 30 UK·VIS·01·0105·1209 © MITUTOYO (UK) LTD 2012 Mitutoyo (UK) Ltd West Point Business Park West Portway, Andover Hampshire SP10 3UX T+44 (0)1264 353123 F +44 (0)1264 354883 enquiries@mitutoyo.co.uk www.mitutoyo.co.uk Note: All information regarding our products, and in particular the illustrations, drawings, dimensional and performance data contained in this printed matter as well as other technical data are to be regarded as approximate average values. We therefore reserve the right to make changes to the corresponding designs, dimensions and weights. The stated standards, similar technical regulations, descriptions and illustrations of the products were valid at the time of printing. In addition, the latest applicable version of our General Trading Conditions will apply. Only quotations submitted by ourselves may be regarded as definitive.
