Measuring potential differences
advertisement

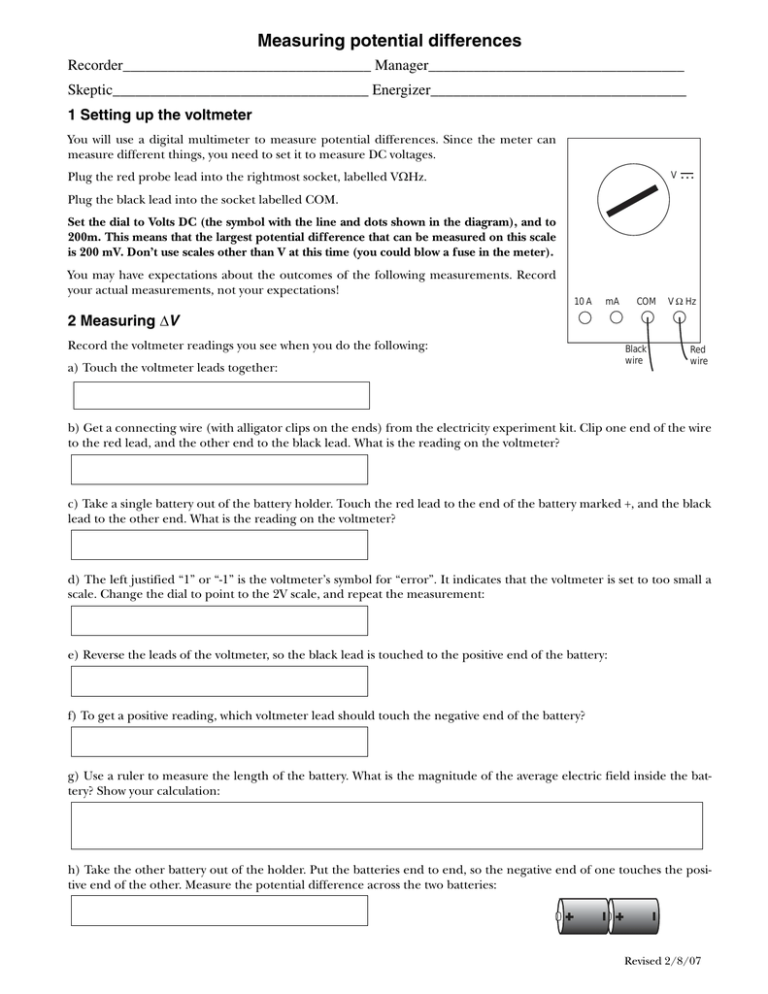
Measuring potential differences Recorder_________________________________ Manager__________________________________ Skeptic__________________________________ Energizer__________________________________ 1 Setting up the voltmeter You will use a digital multimeter to measure potential differences. Since the meter can measure different things, you need to set it to measure DC voltages. V Plug the red probe lead into the rightmost socket, labelled VΩHz. Plug the black lead into the socket labelled COM. Set the dial to Volts DC (the symbol with the line and dots shown in the diagram), and to 200m. This means that the largest potential difference that can be measured on this scale is 200 mV. Don’t use scales other than V at this time (you could blow a fuse in the meter). You may have expectations about the outcomes of the following measurements. Record your actual measurements, not your expectations! 10 A mA COM V Ω Hz 2 Measuring ΔV Record the voltmeter readings you see when you do the following: a) Touch the voltmeter leads together: Black wire Red wire b) Get a connecting wire (with alligator clips on the ends) from the electricity experiment kit. Clip one end of the wire to the red lead, and the other end to the black lead. What is the reading on the voltmeter? c) Take a single battery out of the battery holder. Touch the red lead to the end of the battery marked +, and the black lead to the other end. What is the reading on the voltmeter? d) The left justified “1” or “-1” is the voltmeter’s symbol for “error”. It indicates that the voltmeter is set to too small a scale. Change the dial to point to the 2V scale, and repeat the measurement: e) Reverse the leads of the voltmeter, so the black lead is touched to the positive end of the battery: f) To get a positive reading, which voltmeter lead should touch the negative end of the battery? g) Use a ruler to measure the length of the battery. What is the magnitude of the average electric field inside the battery? Show your calculation: h) Take the other battery out of the holder. Put the batteries end to end, so the negative end of one touches the positive end of the other. Measure the potential difference across the two batteries: Revised 2/8/07 i) What scale did you have to use in part (h) to get a reading other than “error”? j) Turn one of the batteries around and repeat the measurement: k) In the kit are two kinds of light bulbs: short round light bulbs, and long light bulbs. Use only ONE battery, ONE ROUND light bulb, and ONE connecting wire from the kit. (Do not use a socket or a battery holder). Make the light bulb light. Draw a diagram showing your circuit: CHECK WITH ANOTHER GROUP TO SEE HOW THEY DID THIS. Now put the battery back into the battery holder. Using two connecting wires (with alligator clips), one battery, one socket, and a ROUND light bulb, connect the circuit shown at right, so that the bulb is lit. Measure and record the following potential differences and the length of each object, and calculate the magnitude of the electric field inside each object. D A B C Be careful about signs. Keep the leads in the same relative position for all measurements. Some values should be positive, others negative. l) From A to B across the battery ΔV = E = L= m) From B to C (use the most sensitive scale on the voltmeter) ΔV = E = L= n) From C to D (the length of the actual filament, uncoiled, is 1 cm) ΔV = L = 0.01m (uncoiled) E = Is the filament in equilibrium? How do you know? o) From D to A (use the most sensitive scale on the voltmeter) ΔV = E = L= p) What is the round trip potential difference from A to B to C to D back to A? Show your calculation, using your measurements from parts l) through o): q) Take the bulb and socket out of the circuit. Measure the potential difference across the bulb. ΔV = Equilibrium? Make sure that everyone in the group agrees on the results. Check with another group, then give to instructor to grade. Revised 2/8/07

