Hints for Getting More from Your Function Generator
advertisement
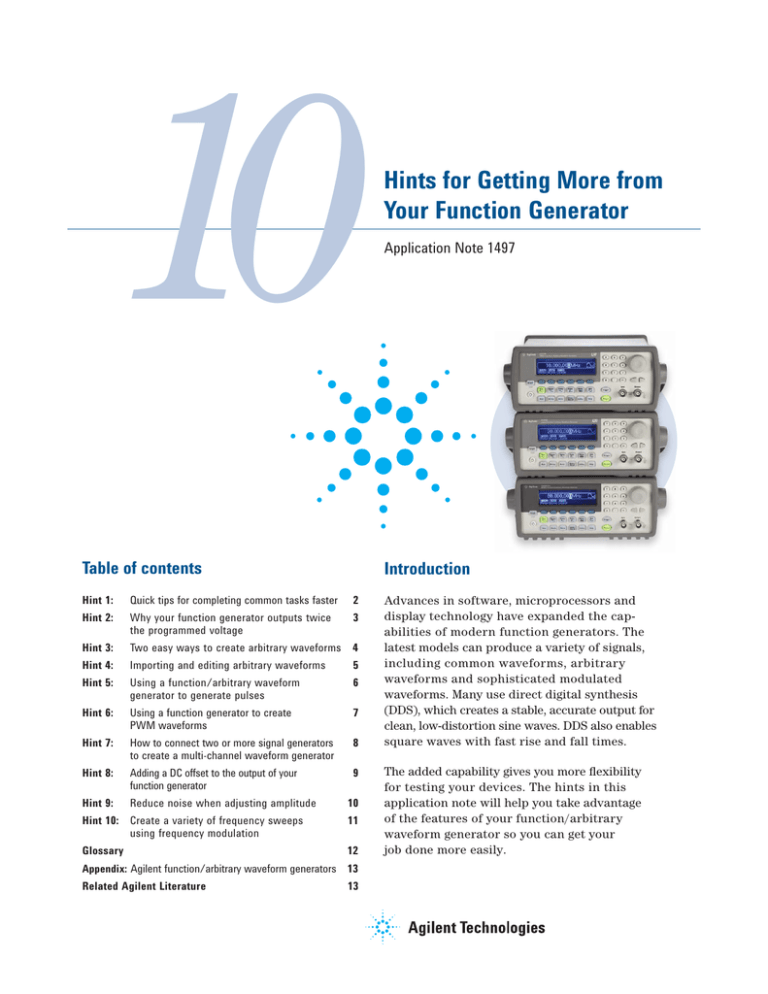
10 Table of contents Application Note 1497 Introduction Hint 1: Quick tips for completing common tasks faster 2 Hint 2: Why your function generator outputs twice the programmed voltage 3 Hint 3: Two easy ways to create arbitrary waveforms 4 Hint 4: Importing and editing arbitrary waveforms 5 Hint 5: Using a function/arbitrary waveform generator to generate pulses 6 Hint 6: Using a function generator to create PWM waveforms 7 Hint 7: How to connect two or more signal generators to create a multi-channel waveform generator 8 Hint 8: Adding a DC offset to the output of your function generator 9 Hint 9: Reduce noise when adjusting amplitude Hint 10: Create a variety of frequency sweeps using frequency modulation Hints for Getting More from Your Function Generator 10 11 Glossary 12 Appendix: Agilent function/arbitrary waveform generators 13 Related Agilent Literature 13 Advances in software, microprocessors and display technology have expanded the capabilities of modern function generators. The latest models can produce a variety of signals, including common waveforms, arbitrary waveforms and sophisticated modulated waveforms. Many use direct digital synthesis (DDS), which creates a stable, accurate output for clean, low-distortion sine waves. DDS also enables square waves with fast rise and fall times. The added capability gives you more flexibility for testing your devices. The hints in this application note will help you take advantage of the features of your function/arbitrary waveform generator so you can get your job done more easily. 1 Hint Quick tips for completing common tasks faster A well-organized and clearly labeled user interface makes it easy for you to set up and adjust the output signal—whether it’s a simple sine waveform or a complex arbitrary waveform. An efficient interface will make it easy for you to take advantage of the tips presented here. Tip: Keypad or knob? Choose the best way to enter/adjust parameters You can adjust parameters using the knob or the keypad. Use the keypad if you want to adjust the generator to a specific setting, such as 1230 kHz. The knob is better for adjusting or tuning the frequency in real time. Use the arrows below the knob to highlight the digit (order of magnitude) you want to adjust. Tip: Take advantage of soft keys Soft keys accelerate the set-up process by displaying only the parameters and units that are relevant to the task you are performing. For example, the softkeys are defined as Vrms or Vp-p when you are changing amplitude; the same keys re-labeled “frequency,” “amplitude” and “DC offset” when you are configuring a sine wave. For even more convenience, press the softkey repeatedly to toggle between similar parameters, such as “frequency” and “period.” To stay organized, always adjust parameters using the soft keys from left to right. Tip: Use the graphical display to set up complex signals Use the “Graph” key to activate the graphical display, which lets you make quick work of setting up more complex signals, such as modulated waveforms or arbitrary waveforms. You can see a modulated signal change on the graphical display as you adjust parameters such as modulation depth. Tip: Store settings for later use Once you configure your function generator to output a desired signal, take the time to store the state. Storing the function generator’s state allows you to recall the complete state with a single button press. You can even name your state (for example, “VENTURI,” “JIMS” or “ACME_LAB”) for easier recall, rather than having to remember the storage location number. Tip: Generate a precise DC voltage source You can generate a DC voltage with the same accuracy as the DC Offset. Go to the “Utility” menu and select “DC On.” The voltage is adjusted the same as other parameters using the keypad or the knob. You can enter any DC voltage from -5 V to +5 V with 4 digits of resolution. Figure 1. The Agilent 33210A, 33220A, and 33250A function generator user interface groups together with common waveforms and provides clearly labeled keys so you can complete simple tasks more easily. 2 2 Hint Why your function generator outputs twice the programmed voltage As the default setting, Agilent function generators display voltage as though it were terminated into a 50-ohm load. When a high-impedance device such as an oscilloscope is used to measure the output of the function generator, the waveform appears to be twice the voltage shown on the display of the function generator. To remedy the discrepancy, you may be able to change the oscilloscope’s input impedance from standard high impedance to a 50-ohm termination (not all oscilloscopes allow you to do this). Another solution is to add a 50-ohm feedthrough to the oscilloscope’s input BNC. Other common impedances are 25, 75, 93, 135, 150, and 600 ohms. Video systems are most often 75 ohms and many audio systems use a balanced 600-ohm termination. If you are not terminating the output of the function generator into a 50-ohm load, it may be necessary to adjust the output voltage to compensate for the different impedance. For a 50-ohm source, the desired voltage (Vmeasured) into an impedance (R) can be calculated as Vmeasured=V[R/(R+50)], where V=2 x display or Vmeasured=display[2R/(R+50)] The Agilent 33210A, 33220A, and 33250A function generators have the ability to do this calculation for you and directly display the desired voltage. They include a feature that allows the output termination to be set to any impedance from 1 ohm to 10k ohms, or infinite. For example, if the output termination is set to 75 ohms and the generator is connected to an oscilloscope with a 75-ohm termination (or 75-ohm feedthrough), the function generator display will match what is displayed on the scope. Function generator Function generator 50 Ω V + Display + 50 Ω – V = 2 x display Vmeasured = 1/2V = 1/2 (2 x display) Vmeasured = display Vmeasured 50 Ω V – + Display – + Vmeasured – V = 2 x display Vmeasured = V = 2 x display Vmeasured ≠ display Figure 2. When you add a 50-ohm load to the output of the function generator, as shown in the diagram on the left, the measured and displayed voltage will be the same. 3 3 Hint Two easy ways to create arbitrary waveforms With modern arbitrary waveform generators that use direct digital synthesis (DDS) technology, you can create arbitrary waveforms two ways: you can define waveforms using the front panel or by downloading a waveform. Agilent’s free IntuiLink software allows you to create arbitrary waveforms using a graphical user interface on your PC, and then download them into your function generator. The latest version of IntuiLink is available at www.agilent.com/find/intuilink. A graphical user interface and linear interpolation make it easy to create simple waveforms from a generator’s front panel. When you create an arbitrary waveform, use the entire vertical resolution for defining amplitude, if you can. Many function generators use a scale of –1 to 1; defining a waveform with values between 0 and 1 would give you only half the amplitude resolution. 0° 90° 180° 270° 360° When creating arbitrary waveforms, the function generator will always replicate the finite-length time record to produce a periodic version of the data in waveform memory. However, as shown in Figure 3, it is possible that the shape and phase of a signal may introduce a discontinuity at the end point. To avoid discontinuities— and the resulting frequency domain leakage errors—it is important to create arbitrary waveforms as a single period or as integer-multiple periods. It’s also worth noting that the generator outputs the entire arbitrary waveform at the specified rate. When an arbitrary waveform is defined as multiple cycles, the actual output frequency may be higher than the specified rate. For example, if a waveform is defined as 10 cycles of a sine wave and it is output at 1 kHz, the actual frequency will be 10 kHz. 90° 180° 270° 360° 1 cycle Figure 3. Create arbitrary waveforms as a single period or as integer-multiple periods to avoid discontinuities 4 4 Hint Importing and editing arbitrary waveforms In addition to generating standard signals, function generators are used to simulate real-world signals for test or characterization. Real-world signals are not always perfect sine waves or pulses. It can be more useful to capture a real-world waveform, modify it, and recreate the waveform with a function/arbitrary waveform generator. You can use the flexibility and editing features of Agilent’s free IntuiLink software to capture a waveform from an oscilloscope, or to edit an existing waveform file. The latest version of IntuiLink is available at www.agilent.com/find/intuilink. To import data from an oscilloscope using IntuiLink, connect to the oscilloscope then use the Tools menu to import the waveform. If your oscilloscope is not listed, you may need to install an add-in. Add-ins for oscilloscopes, as well as additional functionality (such as pulse creation, filtering, and equation editing) can be found on the IntuiLink home page. You can also create your own tools by creating an ActiveX DLL and copying it into the Tools folder. IntuiLink contains help and examples for creating your own tools. If you have already saved your waveform data or have received a waveform file from another source, IntuiLink Waveform Editor can be used to import and edit waveform data stored as comma separated variables (*.csv), text (*.txt), and space delimited variables (*.prn). This can also be useful when importing waveform data from other applications. Once you have imported the waveform data or opened your waveform file, you can use IntuiLink’s editing functions. The first step is to avoid discontinuities by editing the waveform so that a complete cycle is downloaded to the generator. Math functions can be used to add, filter, or reduce noise (smoothing). You can also resize the waveform to take advantage of the full memory depth and vertical resolution of the function/ arbitrary waveform generator. Figure 4. Use IntuiLink Waveform Editor to create or open waveform files then edit the data using math functions. 5 5 Hint Using a function/arbitrary waveform generator to generate pulses Basic applications such as trigger signals, clock signals and logic control usually don’t require the performance of a dedicated pulse generator. Often, you can use a relatively inexpensive general-purpose function generator to create pulses using three techniques. Square wave: Most function generators let you create pulses by varying the duty cycle of a square wave, typically between 20 and 80 percent. You can achieve higher or lower duty cycles using burst mode, which lets you output a single cycle (pulse) of a square wave and then wait a specified period before sending the next pulse. Arbitrary waveform: You can create a wide variety of custom pulses and patterns using the arbitrary waveform capabilities of a function/arbitrary waveform generator to define the desired shape and parameters. While this is not the easiest approach, it does offer lots of flexibility (limited only by memory depth). For best results, use all the available points to describe the pulse. The more points you use, the better your time resolution will be. You can simplify the task by using IntuiLink software (see Hint 3) to create your arbitrary waveform on a PC. 90% Pulse mode: Many newer function generators, such as the Agilent 33210A, 33220A, and 33250A function/arbitrary waveform generators, have built-in pulse capability, which gives you an easy, flexible way to generate pulses. You simply specify the main parameters of a pulse: period, pulse width and edge time (rise/fall time). In all three cases, you can use burst mode to output multiple cycles (N-cycle burst) to create longer, more complex pulse trains. If an external gating signal is available, it can also be used with burst mode to create gated bursts. Once you have configured your function generator to generate a pulse or pulse train, you can use burst mode and triggering to further define the output. You can create a single pulse or a burst of pulses using triggering. Most function generators can accept an external trigger as input and most also provide an external trigger signal. You can set a delay programmatically or from the front panel to offset the pulse from the external trigger, if you want. 90% 50% 50% Pulse width 10% 10% Rise time Fall time Period Figure 5. Pulse waveform parameters 6 6 Hint Using a function generator to create PWM waveforms Pulse-width modulation (PWM) offers a simple way for digital control logic to emulate analog control in devices such as light dimmers, electric motors and automotive engine controllers. To help test this type of control circuit, many function generators can produce a variety of PWM signals. The simplest starting point is a square wave, which is the foundation of every PWM signal. With a duty cycle of 50 percent it is the equivalent of a steady-state control signal at halfpower. Most function generators let you vary the duty cycle from 20 percent to 80 percent, which may allow some basic troubleshooting of a device that’s controlled by a PWM signal. (As described in Hint 5, you can use burst mode to achieve lower duty cycles.) Another alternative is to create a PWM signal using your generator’s arbitrary waveform capability. However, this method has an important limitation: the duty cycle of each pulse is fixed. To change parameters such as duty cycle or the number of pulses, you would have to edit the entire arbitrary waveform or create a new one from scratch. The most versatile solution is to use a function generator with built-in PWM capabilities—the Agilent 33210A and 33220A are good examples of low-cost alternatives to a dedicated pulse generator. With the 33210A and 33220A, you have quick access to all the PWM parameters (frequency, amplitude, and deviation), which makes it easy to modify and experiment with a waveform. You can use either an internal or an external waveform as the modulation source. These capabilities make it possible to use the 33210A and 33220A to emulate a digital control device for system evaluation. As an example, testing the venturi in an automobile engine requires a PWM signal, modulating a triangle wave will open and close the venturi gently (see Figure 6). With a few front-panel commands you can configure the 33210A and 33220A to emulate the engine control circuit that drives the venturi. Figure 6. Modulation with signals such as a triangle wave makes it possible to create dynamic PWM signals like this one, which will open and close an engine venturi. 7 7 Hint How to connect two or more signal generators to create a multi-channel waveform generator It is simple to connect two or more signal generators to create a multichannel waveform generator. This technique works for all types of waveforms: sine waves, square waves, and arbitrary waveforms. Waveforms with externally-referenced clocks maintain a constant phase offset from one another and do not drift. To externally lock two or more single-channel sources, you need a common clock signal, often called an “external reference.” If you want to combine multiple 33210A and/or 33220A Single-channel function/arbitrary waveform generators, you need to add the external reference option to each generator to accept the external reference. The higher-performance 33250A function/arbitrary waveform generator includes external reference capabilities as a standard feature. If you are using multiple 33210As, 33220As, or 33250As, you can use one unit to supply the external clock signal to the other units with a BNC cable. Once the generators are synchronized, you can set the actual phase difference between the two generators. Use a scope or universal frequency counter to observe the phase relationship between the two 10 MHz In 10 MHz Out ±5V 42Vpk It is important to note that digital function generators will lock to 10 MHz only. Most generators will be able to lock to one frequency with a limited range (the digital circuitry and precise clocks cannot be “pulled” too far to match an external clock), although some will allow harmonics of the cardinal frequency or multiple frequencies. Once a function generator is synchronized to another function generator, the two generators will have an unknown phase offset. Usually you can manually adjust the phase or use a common trigger to start the waveforms simultaneously. 10 MHz In 10 MHz Out ±5V 42Vpk ! ±5V 33220A Alternately, you could trigger both generators using a common trigger signal. With both the 33210A, 33220A and 33250A, there is a second BNC available, so you can use the Trig In/ Out BNC of one generator to trigger the other generator. Sharing a common trigger will create a phase offset of 20 ns or less when you trigger the 33210A or 33220A and 1 ns when you trigger a 33250A. However, this is less precise than using a scope or counter and manually adjust the offset. ±1Vpp Modulation Ext Trig/ In FSK / Burst 42Vpk instruments. You can change the phase relationship via the front panel of the source or do it programmatically. ±1Vpp ! Modulation Ext Trig/ In FSK / Burst ±5V TTL TTL 42Vpk 33220A Figure 7. Two externally locked 33220A generators. The generators are using a common clock signal and a common trigger signal. 8 8 Hint Adding a DC offset to the output of your function generator Most function generators have a built-in DC offset that can be added to any waveform. The built-in offset function in the 33210A, 33220A and 33250A can be used with any waveform to generate any combination of amplitude and offset within a –5 Vdc to +5 Vdc window into a 50-ohm load. For applications that require a larger offset, you may be able to use an external power supply to generate the additional offset. To use an external supply to create the DC offset, follow these three steps: 1. The function generator needs to be isolated from ground “floats.” The 33210A/33220A/33250A can float up to 42 volts (output plus DC offset) from earth ground. The maximum DC offset can be calculated by subtracting the peak output from 42 volts. 2. The DC power supply needs to be connected in series. A BNC-T cannot be used, as this would connect the supply in parallel. supply to ground makes it possible to calculate the voltage at the output of the function generator. The output voltage will be the DC supply voltage plus the peak voltage of the generator. The diagram below shows a model of the 33220A, the connections to an external supply and the load. An easy way to make these connections on the 33210A, 33220A, and 33250A is to access the floating ground through the modulation-in BNC, which is located on the rear panel. You can use a BNC connector minus the center conductor; connect this wire to the high of the power supply. Use just a wire to connect the signal output—the center conductor of the output BNC of the function generator—to the high side of the load (do not use the shield of the output BNC). The low side of the load is connected to the low of the power supply. Finally, the power supply low is connected to earth ground. 3. The voltage at the output of the function generator should be less than 42 V. Connecting the power Agilent 33220A A BNC cable 50 Ω B VOUT VGEN 1M Ω RL 45 nF DC power supply + – Voffset Point A center conductor on output BNC Point B outside shield on modulation in BNC Figure 8. 33220A block diagram, showing connections to an external supply and the load 9 9 Hint Reduce noise when adjusting amplitude Function/Arbitrary waveform generators use a combination of amplifiers and attenuators to adjust the signal to the final output amplitude. Using the right combination of attenuation and amplification provides the widest range of amplitude values while preserving the waveform fidelity by keeping noise out of the waveform. In the default mode, autoranging is enabled and the function generator automatically selects the optimal settings for the output amplifier and attenuators. When the amplitude is adjusted from one range to another, momentary disruptions or “glitches” may be noticed. Some generators, such as the Agilent 33210A, 33220A, and 33250A function/arbitrary waveform generators incorporate a range hold feature. When range hold is enabled, the attenuator and amplifier settings are locked into their current state and will not switch as the amplitude is adjusted. This will eliminate the momentary disruptions caused by the switching of the attenuators, however the offset accuracy and resolution (as well as waveform fidelity) may be adversely affected when reducing the amplitude below the expected range change. To use range hold, set the generator to the maximum amplitude required for your application. From the front panel, press “Utility” and select the “Output Setup” softkey. Then press the “Range” softkey to toggle between the “Auto” and “Hold” selections. Figure 9. Range Hold eliminates the momentary disruptions during amplitude adjustments. 10 10 Hint Create a variety of frequency sweeps using frequency modulation Many function/arbitrary waveform generators provide a sweep capability, or the ability to smoothly change from a specified start frequency to the specified stop frequency. The rate at which this change is made usually can be either linear or logarithmic, and setting the stop frequency either above or below the start frequency can be used to vary the direction of the sweep. However, some applications require a variation of frequency sweep, such as stepped sweep, which means moving from the start frequency by a set incremental frequency or in a specific number of steps until the stop frequency is reached. You can create a stepped sweep, as well as more complex pattern sweeps, using frequency modulation. Frequency modulation uses carrier frequency (center) and deviation rather than start and stop frequency, requiring some “translation” between sweep and modulation parameters. Stop frequency Center frequency Start frequency Figure 10. Arbitrary waveform used with FM mode to create a stepped sweep. First, set up your basic waveform the same as you would have for a sweep, by selecting the wave shape, amplitude, and offset. Next, enter the carrier frequency as the frequency of the waveform: Carrier (center) = (start frequency + stop frequency) / 2 Turn on frequency modulation and set your source to internal (rather than external). Set the deviation based on the start and stop frequencies (half the absolute value of the difference): Deviation = |start frequency – stop frequency| / 2 The modulating frequency is equal to the inverse of your sweep rate: Modulating frequency = 1/ sweep time Now select the type of sweep. An upward linear sweep is a positive ramp. A downward linear sweep is a negative ramp. A triangle wave will ramp the frequency in both directions. An upward logarithmic sweep is an exponential. Using the arbitrary waveform features of your generator, you can add more choices to your sweep library. A stepped sweep is created with a staircase waveform, the number of steps equaling the number of discrete frequencies desired. The arbitrary waveform shown in Figure 10 can be used to create a stepped sweep. This particular waveform would output nine discrete frequencies from the start to stop frequency. Adjustments to the width of these steps will change the duration (relative dwell time) of each frequency. Adjustments to the height of these steps will modify which frequencies are output. You can create a pattern sweep by independently adjusting the dwell and frequency for each step. 11 Glossary Arbitrary waveform — a waveform that has been digitally defined and placed in memory. The analog waveform is produced by applying the waveform memory content to a digital-to-analog converter (DAC) and filtering the output. BNC (Bayonet Neill Concelman) — a type of bayonet (twist-lock) coaxial connector commonly used in connections involving small coaxial cables. Deviation — In PWM, used to vary the duty cycle of the pulse (e.g., a 10 percent duty cycle with 5 percent deviation would cause the duty cycle to vary between 5 percent and 15 percent). Direct digital synthesis (DDS) — a method of generating a waveform by taking points of a sampled waveform stored in memory and applying them to the digital port of a digital-toanalog converter. The DAC is clocked at a constant rate, and frequency adjustments are made by repeating a single memory location for multiple clock cycles to obtain low frequencies, while high frequencies are obtained by sampling the stored points. Duty cycle — the percentage of time a pulse train is at its higher voltage. Edge time — the rise or fall time; some instruments may use edge time as a means to set both the rise and fall time to equal values. External clock reference — a precise reference signal used to improve the frequency accuracy of a single function generator or provide a common clock for two or more function generators. Fall time — the time it takes to transition from high to low state; often measured at the 10 percent and 90 percent levels. 12 Modulating frequency — the signal applied to the carrier signal to produce amplitude, frequency, phase or pulse width modulation. Period — the repetition rate of a waveform measured in seconds; for the purposes of this application note, the time between pulses; also, the inverse of frequency. Phase lock — the condition in which a phase-correcting feedback loop maintains control of an oscillator to achieve a consistent relationship between the phase of the oscillator and a reference signal within the limits of one cycle. Pulse width — the amount of time a pulse remains at a specific (normally “true”) logic state. Can either be measured from 1) the time between the leading edge at 50 percent amplitude to the trailing edge at 50 percent amplitude or 2) the time from the beginning of the leading edge to the beginning of the trailing edge. Pulse width modulation — a modulation method that uses the amplitude of the modulating signal to determine the width of the resulting pulse. Commonly used in data communication and digital control applications. Range Hold – fixes the attenuators and amplifier in the output circuitry to eliminate momentary disruptions associated with the switching of ranges when adjusting amplitude. Range hold disables autoranging (optimal settings are automatically selected). Rise time — the time it takes to transition from low to high state; often measured at the 10 percent and 90 percent levels. Appendix: Agilent function/arbitrary waveform generators Value-priced generators with the versatility of custom waveforms • Up to 11 standard waveforms, with sine and square to 10 MHz, 20 MHz or 80 MHz • Arbitrary waveforms at 50 MSa/s or 200 MSa/s • THD less than 0.04% and flatness as low as ± 0.1 dB The Agilent 33210A, 33220A and 33250A function/arbitrary waveform generators give you a range of features including up to 11 standard waveforms and the ability to create versatile arbitrary waveforms. The 33210A offers an optional 8K point arbitrary waveform generator with 14-bit resolution and a sample rate of 50 MSa/s. The 33220A and 33250A offer the arbitrary waveform generator standard with 64K points and 14-bit resolution (33220A) or 12-bit resolution (33250A) and a sample rate of 50 MSa/s (33220A) to 200 MSa/s(33250A). In addition, all three function generators can generate pulse waveforms with variable edge time. Start with the signals a device under test is supposed to see, then add noise, harmonics, spurs and other extraneous signals to see how well it responds. Built-in modulation capabilities and both linear and log sweeps further expand your test possibilities without requiring additional generators. Plus, the external clock-reference timebase increases the frequency stability while letting you generate precise phase-offset signals, phase-lock to another 33210A, 33220A or 33250A, or to a 10 MHz frequency. 33210A, 33220A and 33250A specifications 33210A 33220A 33250A Frequency range 10 MHz 20 MHz 80 MHz (sine, square) Standard waveforms Sine, square, pulse, triangle, ramp, noise, dc volts. Option 002 includes sin(x)/x, exponential rise and fall, cardiac Sine, square, pulse, triangle, ramp, noise, sin(x)/x, exponential rise and fall, cardiac, dc volts Sine, square, pulse, triangle, ramp, noise, sin(x)/x, exponential rise and fall, cardiac, dc volts Arbitrary waveforms Optional 2 to 8 K points 2 to 64 K points 1 to 64 K points Sample rate 50 MSa/s 50 MSa/s 200 MSa/s Modulation AM, FM, PWM, sweep and burst (all internal/ external) AM, FM, PM, FSK, PWM, sweep and burst (all internal/external) AM, FM, FSK, sweep and burst (all internal/ external) Sweep Linear or logarithmic; up or down Linear or logarithmic; up or down Linear or logarithmic; up or down Burst Gated, N-cycle Gated, N-cycle Gated, N-cycle External clock reference Optional External lock range: 10 MHz ± 500 Hz Internal frequency: 10 MHz Optional External lock range: 10 MHz ± 500 Hz Internal frequency: 10 MHz Standard External lock range: 10 MHz ± 35 kHz Internal frequency: 10 MHz GPIB, USB, LAN GPIB, RS-232 Connectivity GPIB, USB, LAN (IntuiLink SW included) Related Agilent Literature Publication title Publication type Publication number 33210A 10 MHz Function/Arbitrary Waveform Generator Data sheet 5988-8926EN 33220A 20-MHz Function/Arbitrary Waveform Generator Data sheet 5988-8544EN 33250A 80 MHz Function/Arbitrary Waveform Generator Data sheet 5968-8807EN How to Generate Low Duty-Cycle Pulses with a Function Generator Application note 5988-7507EN How to Connect Two or More Signal Generators to Create a Multi-Channel Waveform Generator Application note 5988-8151EN Using a Function Generator to Create Pulse-Width Modulation (PWM) Waveforms Application note 5988-9904EN 13 Agilent Email Updates www.agilent.com/find/emailupdates Get the latest information on the products and applications you select. Agilent Direct www.agilent.com/find/agilentdirect Quickly choose and use your test equipment solutions with confidence. www.agilent.com/find/open Agilent Open simplifies the process of connecting and programming test systems to help engineers design, validate and manufacture electronic products. Agilent offers open connectivity for a broad range of system-ready instruments, open industry software, PC-standard I/O and global support, which are combined to more easily integrate test system development. Remove all doubt Our repair and calibration services will get your equipment back to you, performing like new, when promised. You will get full value out of your Agilent equipment throughout its lifetime. Your equipment will be serviced by Agilent-trained technicians using the latest factory calibration procedures, automated repair diagnostics and genuine parts. You will always have the utmost confidence in your measurements. Agilent offers a wide range of additional expert test and measurement services for your equipment, including initial start-up assistance onsite education and training, as well as design, system integration, and project management. For more information on repair and calibration services, go to: www.lxistandard.org LXI is the LAN-based successor to GPIB, providing faster, more efficient connectivity. Agilent is a founding member of the LXI consortium. www.agilent.com/find/removealldoubt www.agilent.com For more information on Agilent Technologies’ products, applications or services, please contact your local Agilent office. The complete list is available at: www.agilent.com/find/contactus Americas Canada Latin America United States 877 894 4414 305 269 7500 800 829 4444 Asia Pacific Australia China Hong Kong India Japan Korea Malaysia Singapore Taiwan Thailand 1 800 629 485 800 810 0189 800 938 693 1 800 112 929 81 426 56 7832 080 769 0800 1 800 888 848 1 800 375 8100 0800 047 866 1 800 226 008 Europe & Middle East Austria Belgium Denmark Finland France 0820 87 44 11 32 (0) 2 404 93 40 45 70 13 15 15 358 (0) 10 855 2100 0825 010 700* *0.125 €/minute Germany 01805 24 6333* *0.14 €/minute Ireland 1890 924 204 Israel 972 3 9288 504/544 Italy 39 02 92 60 8484 Netherlands 31 (0) 20 547 2111 Spain 34 (91) 631 3300 Sweden 0200-88 22 55 Switzerland 0800 80 53 53 United Kingdom 44 (0) 118 9276201 Other European Countries: www.agilent.com/find/contactus Revised: March 27, 2008 Product specifications and descriptions in this document subject to change without notice. © Agilent Technologies, Inc. 2008 Printed in USA, July 16, 2008 5989-1456EN
