2Head and neck assessment (eye)
advertisement
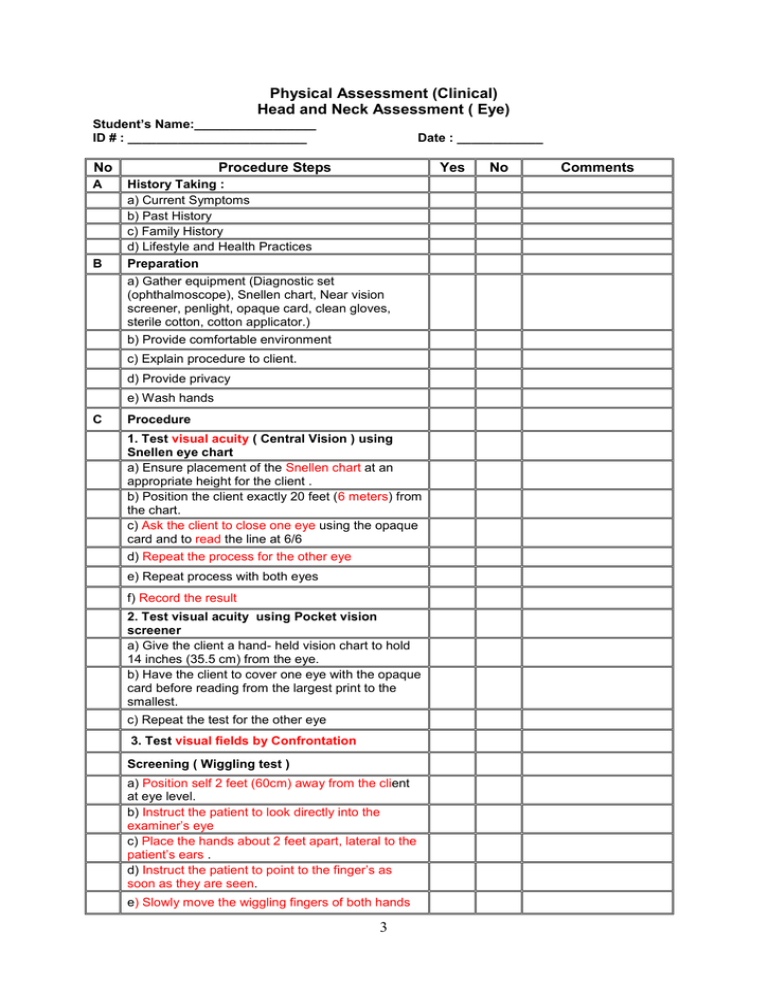
Physical Assessment (Clinical) Head and Neck Assessment ( Eye) Student’s Name:_________________ ID # : _________________________ No A B Date : ____________ Procedure Steps Yes History Taking : a) Current Symptoms b) Past History c) Family History d) Lifestyle and Health Practices Preparation a) Gather equipment (Diagnostic set (ophthalmoscope), Snellen chart, Near vision screener, penlight, opaque card, clean gloves, sterile cotton, cotton applicator.) b) Provide comfortable environment c) Explain procedure to client. d) Provide privacy e) Wash hands C Procedure 1. Test visual acuity ( Central Vision ) using Snellen eye chart a) Ensure placement of the Snellen chart at an appropriate height for the client . b) Position the client exactly 20 feet (6 meters) from the chart. c) Ask the client to close one eye using the opaque card and to read the line at 6/6 d) Repeat the process for the other eye e) Repeat process with both eyes f) Record the result 2. Test visual acuity using Pocket vision screener a) Give the client a hand- held vision chart to hold 14 inches (35.5 cm) from the eye. b) Have the client to cover one eye with the opaque card before reading from the largest print to the smallest. c) Repeat the test for the other eye 3. Test visual fields by Confrontation Screening ( Wiggling test ) a) Position self 2 feet (60cm) away from the client at eye level. b) Instruct the patient to look directly into the examiner’s eye c) Place the hands about 2 feet apart, lateral to the patient’s ears . d) Instruct the patient to point to the finger’s as soon as they are seen. e) Slowly move the wiggling fingers of both hands 3 No Comments No 4-1 4-2 4-3 toward the line of gaze until the patient identifies them Procedure Steps f) Repeat in the same pattern in the upper and lower temporal quadrants. Further testing a) Position self 2 feet (60cm) away from the client at eye level. b) Ask the client to cover the left eye while the examiner covers the right eye. c) Look directly at each other with uncovered eye. d) The examiner extends the left arm at the midline & slowly moves an object upward from below until the client sees the object then test the remaining three visual fields of the clients right eye (superior, temporal, and nasal.) Repeat the test for the opposite eye. 3.Position and alignment of the eyes Survey the eyes for position and alignment with each other . To detect for eye ball protrusion a) Instruct patient to sit down b) Stand behind the patient c) draw the upper lids gently upward and then compare the positions of the eyes and note the relationship of the corneas to the lower lids 4. Extra-ocular muscles Reflections in the corneas Direct a light onto the patient’s eyes from about 2 feet directly in front of the patient . Reflections should be visible slightly nasal to the center of the pupils. Extra-ocular movements looking for conjugate movements, nystagmus, or lid lag. a) Stand about two feet (60cm) in front of the client b) Ask the client to follow the movement of the penlight or the examiner’s finger only with the eyes c) Starting in the midline 1. Move the penlight to the extreme right 2. Then straight up to the right 3. Then pause looking for nystagmus 4. Then down to the right 5. Position the penlight again in the midline without pausing move it to the extreme left 6. Straight up to the left 7. Then pause looking for nystagmus 8. Then down to the left Convergence Ask the client to follow the finger or pencil as moving it in toward the bridge of the nose. The converging eyes normally follow the object to within 5-8 cm of the nose. 5. Inspect external eye structures a)Eyebrows for 1. quantity 2. distribution 3. Scaliness of the underlying skin 4 Yes No Comments b) Eyelids and lashes No Procedure Steps Yes 1. Position of the lids in relation to the eyeballs 2. Width of the palpebral fissures 3. Color of the lids 4. Lesions 5. Condition and directions of the eyelashes 6. Adequacy with which the eyelids close. d) Conjunctiva and sclera 1 Inspect the palpebral conjunctiva of the lower eyelid and the sclera for color, vascular pattern, any nodules or swelling 1. Ask the patient to look up 2 X 2. Place thumbs bilaterally at the level of the lower bony orbital rim 3. Gently pull down the lower lids to expose the palpebral conjunctiva and the sclera. 4. for fuller view of the eye a. rest the thumb and finger on the bones of the cheek and brow, and spread the lids b. Ask the patient to look to each side and down. Inspect the conjunctiva under the upper eyelid. a. Instruct the patient to look down relaxing the eye b. Raise the upper eyelid slightly so that the eyelashes protrude c. Grasp the upper eyelashes and pull them gently down and forward. d. Place a small stick such as applicator at least 1cm above the lid margin e. Push down on the stick as raising the edge of the lid. f. Secure the upper lashes against the eyebrow with the thumb and inspect the palpebral conjunctiva e. After inspection grasp the upper eyelashes and pull them gently forward, ask the patient to look up. e) Lacrimal Apparatus 1. Inspect the regions of the Lacrimal gland and Lacrimal sac for swelling 2. Put on clean gloves 3. Ask the patient to look up 4. Press on the lower lid close to the medial canthus, just inside the rim of the bony orbit ( compressing the Lacrimal sac), look for fluid regurgitated from the puncta into the eye 6. Inspect anterior eyeball structures Cornea With oblique lighting inspect the cornea of each side for opacities in the lens that may be visible through the pupil. Inspect the Iris for shape and color Using light shining from the temporal side look for a crescentic shadow on the medial side of the iris. Normally there is no shadow. 5 No Comments No √ D Procedure Steps The pupils Inspect the Pupils for shape, size, and symmetry Pupillary reactions to light and accomodation a) Dim the light of the room b) Ask the client to stare ahead c) Move the penlight from the client’s side, shine light directly into one eye. d) Observe the constriction of the illuminated pupil e) Observe the simultaneous reaction (consensual) of the other eye. If reaction to light is impaired or questionable test for near reaction in normal room light a) Hold a finger or pencil about 10 cm from the patient’s eye. b) Ask the patient to look alternately at it & into the distance behind it watching for pupillary constriction with near effort. 7. Inspect ocular fundus a) Dim the light in the room b) Ask the client to look at a fixed point straight ahead & not to move. c) For the right eye: hold the ophthalmoscope in the right hand with the index finger on the lens wheel . d) Begin with the lens on 0 diopter. e) Stand at a slight angle lateral to the client line of vision F) Approach the client at about 15 degrees angel toward the nose using the right eye to examine the right eye of the client g) Place the left hand on the client shoulder h) Advance toward the client to assess the red reflex. i) Keep advancing toward the client until the ophthalmoscope touches the eyelashes. j) Rotate the wheel to inspect the fundus k) Look for the optic disk l) Note the major vessels & there color. Procedure Termination a) Put client in comfortable position according to health status b) Provide patient with reassurance c) Return back equipments d) Wash hands e) Document findings 6 Yes No Comments
