Picnic Table Description: Original plans from Yellawood.
California Agriculture Education Agriculture Mechanics Projects
Picnic Table
Original plans from Yellawood.
Description:
This plan makes a table that features separate benches for unencumbered leg room and ample seating for six to eight adults. The half-lap joints on the legs are easy to create and add a touch of elegance. An easy weekend project, this set will soon become the central gathering point for your backyard. This plan calls for a table six feet wide, but you can play with the dimensions until you come up with the length and depth you want. Keep the leg lengths the same, but be aware that a table much bigger than this may require use of 2 x 6 legs, and longer benches may require more support – perhaps just another set of legs, braces and cleat in the middle.
Skills Required:
Students must have the ability to read an assembly plan, properly measure, and operate a miter saw and circular saw.
Size
Materials:
Use redwood or cedar
(3) 2 x 6 x 12'
(3) 2 x 4 x 8'
(4) ¼" x 3 ½" galvanized carriage bolts
(2) ¼" x 4 ½" galvanized carriage bolts
(6) ¼" galvanized cut washers and nuts
3" deck screws
4" deck screws
Waterproof wood glue
Tools Required
:
Miter saw or circular saw
Drill/driver
3/8” drill bit at least 5" long
1" dia. spade or forstner bit
#8 countersink bit (or size appropriate
for the screws you are using)
Socket wrench
Combination square
Wood chisel
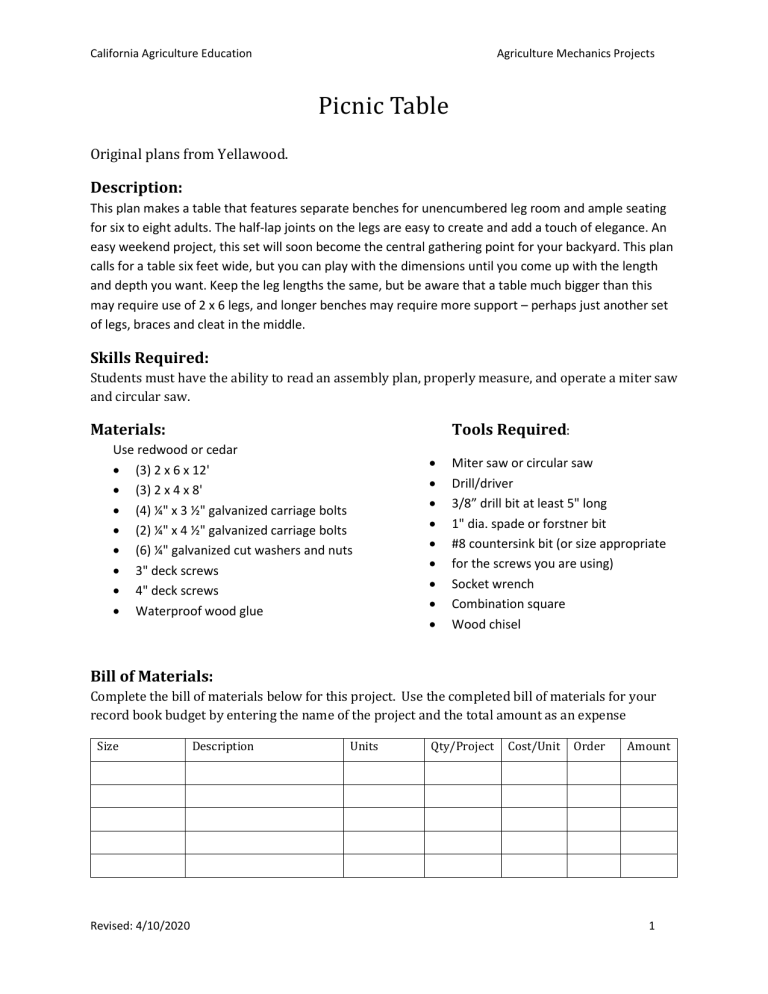
Bill of Materials:
Complete the bill of materials below for this project. Use the completed bill of materials for your record book budget by entering the name of the project and the total amount as an expense
Description Units Qty/Project Cost/Unit Order Amount
Revised: 4/10/2020 1
California Agriculture Education Agriculture Mechanics Projects
Project Price:
Enter the expected price you will receive for the project in your record book budget (income).
Estimated Construction Time:
__10___ hours.
Directions:
1.
Cut all pieces to dimension according to cut lists. For all top slats (A), simply cut two 6-foot lengths from each 12-foot piece of 2 x 6. You’ll want to square both mill-cut ends by trimming
¼" or less from each end before making your measurements and cutting them in half (you should have enough to end up with two 6-foot lengths). On the cleats (B), trim the bottom outside corners off with a simple 45° cut 1" in from the outside edges. For the legs (C), note that lengths are measured from the long points of the parallel angle cuts. For the braces (D), lengths are measured from the long points of the opposite 45° angles. *See illustration for more detail.
2.
The following assembly steps are identical for both benches and the table. Place legs (C) on an assembly table with their “feet” braced against a square surface (temporary stop block, for instance) and their centers roughly one on top of the other. Spread the legs until you get a measurement of 16 ½" from the top to bottom for the bench legs (28" for the table) and trace on both legs where they intersect.
3.
Set your circular saw or miter saw to a depth of ¾" and make several passes between your tracing of the leg intersection and carefully clean out the waste with a sharp chisel to create the half-lap joints. Dry fit and re-measure to make sure everything fits snugly and the “feet” remain square and the correct distance from the tops.
4.
Place your slats (A) face side down on your assembly table and insert ¼" spacers between them.
Make sure the ends are flush and clamp the slats together. Place cleats (B) 8" in from slat ends and mark locations for pilot holes where the screws will catch the meat of your slats. Drill pilot holes and countersinks and connect with glue and 4" deck screws. Center your dry-fit leg assembly on the cleat and drill 3 8" pilot holes through both and attach with 3 ½" carriage bolts.
5.
Fit the brace (D) between the leg assembly and slat bottoms, making sure the legs remain square to the slats. Toe-screw the brace to the underside of the slats and drill a 3 8" pilot hole through the brace where the legs intersect, countersinking the pilot hole on the brace to provide a flat surface for the washer and nut of your 4 ½" carriage bolt.
6.
Sand all edges and surfaces smooth, finish with a waterproofing finish of your choice, place in your favorite picnic spot in your yard, and gather friends and family!
Table Cut List
Part Qty. Size
A Top Slats 6 2 x 6 x 72"
B Cleats 2 2 x 4 x 33"
C Legs 4 2 x 4 x 36"
D Braces 2 2 x 4 x 24"
Bench Cut List
Part Qty. Size
A Top Slats 4 2 x 6 x 72"
B Cleats 4 2 x 4 x 11 ½ "
C Legs 8 2 x 4 x 18 ¼"
D Braces 4 2 x 4 x 15 ½ "
Revised: 4/10/2020 2
Part
Top
B Cleats
C Legs
D Braces
Qty.
4
4
8
4
Size
2 x "
2 x 4 x 18 ¼"
2 x 4 x 15 ½ "
California Agriculture Education
Photo/Drawing:
Photos collected from Yellawood®
Agriculture Mechanics Projects
Revised: 4/10/2020 3
California Agriculture Education Agriculture Mechanics Projects
Construction Log:
Complete the log below making an entry every day you work on the project. Transfer the logged hours to your record book journal for this SAE enterprise.
Date Tasks Completed Skills Used/Learned Hours
Actual Price Received:
Enter the actual price you received for the project in your record book journal as income. $_________
Revised: 4/10/2020 4
California Agriculture Education Agriculture Mechanics Projects
Project Portfolio:
Complete a portfolio for the project that includes:
A description of the project and the skills you learned building the project. Include the hours spent on the project and the income (if sold). Use the construction log to complete this narrative. Write in complete sentences.
The Bill of Materials
The project plan
2-8 photos documenting the project at various stages of construction.
Revised: 4/10/2020 5
