Learning to Program: Part 2 Writing Methods and Events
advertisement
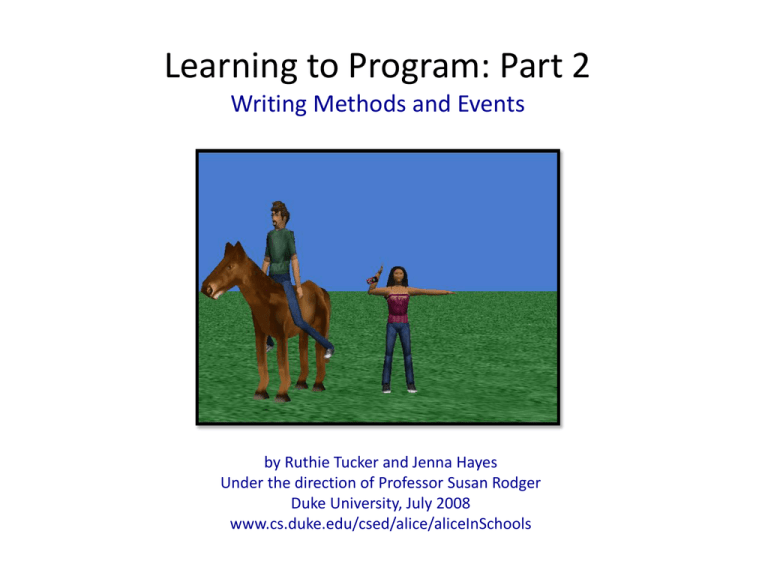
Learning to Program: Part 2 Writing Methods and Events by Ruthie Tucker and Jenna Hayes Under the direction of Professor Susan Rodger Duke University, July 2008 www.cs.duke.edu/csed/alice/aliceInSchools Methods – Creation What if we want our character to do something that he doesn’t already know how to do? We can teach characters by writing our own methods. Now we will write a new method for Jenna to allow her to cartwheel. Click on Jenna in the object tree and scroll down to the area labeled “create new method”. A gray box will pop up. Name it “cartwheel” Now, in the method editor there should be a tab named “Jenna.cartwheel” Methods – Creation We need to code each of the character’s body parts individually. Drag up a Do together from the bottom of the method editor window and drop it into your cartwheel method. Methods – Writing To code each of Jenna’s body parts, we have to be able to select them. Click on the plus sign beside your character in the object tree. The parts should expand out. Click on the part that you want to animate and look down at its list of methods. Pick the method you want and drag it into the method editor. For example, click on Jenna’s UpperBody and then her Chest. Find the RightUpperArm to see the methods for just this arm. Then, drag over the roll method, and select left and “other…”. Methods – Writing A window with a calculator will appear. Enter in .18 and click Okay. You now have your first line of code inside the cartwheel method! Do the same for Jenna.UpperBody.Chest.LeftUpperArm but have it roll to the right .18 revolutions instead. Note: Alice will remember that you typed in .18 so that next time you’re looking for a number it will be in the menu. Methods – Writing Your final code should look like this. You should drag and drop in the rest of it to match. You will need two more Do together statements. In the first one, have Jenna (go back up the object tree to select her) roll to the left 1 revolution. In the second have her arms go back to where they started by reversing what you did earlier. Methods – Playing Now click play. You should notice that nothing happens. Why is this? Look in the events editor, and find where it says when the world starts do. Notice that it says, do world.my first method. The method that you just wrote is called Jenna.cartwheel. Click on the arrow next to world.my first method. Select “Jenna” and then “cartwheel”. Now select Play Your Character should animate into a cartwheel This is a good way to test a method that you have just written. Methods Now lets create a slightly more complicated method. Click on the “Create New Method” button again and name this one “answercellphone”. Click on “Add Objects” and scroll down to the “objects” folder. There should be an object labeled “cell phone”. Add it to your world. Positioning Objects – Methods You can also position objects using the simple methods it already knows. This will simply position your object in your viewing screen, it will not change your code that you have written. If you right click on the cell phone in the object tree you can see all of its methods. Select move to, and have the phone move to Jenna. Positioning Objects – Methods Now use the object moving buttons to place the cellphone near the right back pocket of your character. First you will need to turn Jenna around to do this. This step is tricky and will take some patience. Since it is hard to tell in normal view, you should try using quad view and zoom in to make sure that the cellphone is very close to her pants. If you mess up, use the Undo button. Vehicle Property The vehicle property basically allows you to glue one object to another object. If you set the cell phone as a vehicle to the character, you can move your character around and the cell phone will follow. Now select the properties tab of “cellphone” and find the property called “vehicle”. Click on the down arrow next to vehicle = world and set it to Jenna’s Upper Body. Turn Jenna back around with your object moving buttons to see the cellphone move with him or her. Now we can code Jenna to take the cell phone out of her back pocket. Methods – Writing Click Done to go back to the main window. The first part is simply to code Jenna’s arm to reach down and grab her cell phone. Drag and drop in a Do together and then roll her RightUpperArm and RightUpperArm.RightForearm to the right .18 revolutions together. Now go back to your cellphone vehicle property and drag it into the method editor, below the Do together to set the cell phone as a vehicle to your Jenna’s RightHand.RightFingers. Jenna has now “grabbed hold of” the cell phone. Methods – Writing Now we code the arm to come up to your Jenna’s ear and have her say “hello”. Drop another Do together at the end of the code. Roll her RightUpperArm to the left .18 revolutions and her RightForearem to the left ½ (.5) revolutions together. At the very end, have Jenna say “hello”. Methods – Playing Now you can try out your answercellphone method by going back to when the world starts and changing it from Jenna.cartwheel to Jenna.answercellphone. Press play to see what it looks like. Methods – Fine Tuning Your cellphone method may still look a little bit wrong. You may need to turn the cellphone around so that the front is facing Jenna. If Jenna’s phone looks like it is floating in the air, you should go back into quad view to reposition it so that it is right on her pocket. It may look right from the front, but when you view it from the side, you may see that the phone is actually several meters away from Jenna. If your phone is not close enough to Jenna’s hand when she moves it up, for example if it is on her forearm, try using quad view to move the phone left and right to get the perfect position. Be patient and keep testing until you’re happy with it. Methods – Creation Now lets create a method for the other character and the horse. We want to get the guy to ride the horse. Click on your other character in the object tree (for us he is named Matt), and then click create new method. Label the method “RideHorse”. Lets break this down into steps: 1. First, we need the character to turn and face the horse 2. Then we need the character to get on the horse 3. Finally we need him to face forward again Methods – Writing For the first part we will simply write code to turn the character towards the horse and put his arms down. Have him turn to face horse1. Then drag in a Do together and have his Right and Left UpperArm roll to the right and left respectively .2 revolutions. Test this code by playing your world. If your characters arms do something other than moving down, you may have to try using a turn method instead of a roll method. This is because of the different sizes and shapes of the peoplebuilder objects. Methods – Playing Remember that in order to see your RideHorse method when you play your world, you need to change your when the world starts event again. Change it from answercellphone to RideHorse. Each time you add code to Ride Horse you should play your world to test it out. Methods – Writing To code the character walking towards the horse, you simply need to move his limbs and keep playing it until you are happy with his movements. Add code to the end of Ride Horse to make him do this. Play your world. Methods – Fine Tuning You may need to adjust these numbers according to the position of your character. If he does not go up high enough, make him move farther up. If he goes up too far, don’t make him move quite as much. If Matt looks like this, you may need to tell him to move up less than the suggested 1.2m. If Matt looks like this, you may need to tell him to move up more than 1.2m. Methods – Writing The final part will be to code our character to face the same direction as the horse. We can also tilt his shins back to look more realistic. Add this code to the end of Ride Horse. Your final product should look something like this when you play your world. Remember, your numbers may need to be different than the ones suggested here. Also remember to keep playing your world as you code. If you code something wrong it is easy to see when you play the animation. If that’s the case, the “Undo” button is your friend! Methods – Deleting Now that you know how to write a method for a specific object, we are going to put these methods together to make a story. Click on the world.my first method tab on your screen. You may have code in there already from when you were testing out the hebuilder/shebuilder methods. You can keep it if you like, or erase it and add it back in later. To delete a method, right click on the left side and select delete or drag it into the trash can at the top. These slides will start with a fresh, empty my first method. Methods – Writing This is where we will keep the parts of our story. First, we will use the cartwheel method that we taught to Jenna. Click on Jenna in the object tree on the left side of the screen, and then the methods tab to find cartwheel again. Drag cartwheel into my first method. Methods – Playing Go to the events editor, where it says when the world starts do, and change it from Matt.RideHorse back to my first method. This way whenever you play your world it will play the story we have written in my first method. Now play your world to see what it looks like so far. It should just show Jenna cartwheeling since that’s all we’ve written so far. Methods – Writing Now we want to make Jenna say something after she cartwheels. Look at her methods tab and scroll down until you see say. Now drag it into my first method under cartwheel. Click on other… , type in something like “I love cartwheels!” Play your world again to see the results. Methods – Loops Now we want to change it so that your character cartwheels twice in a row, to show just how much she loves cartwheels. To do this, we will use a loop. The loop button is located at the bottom of your method editor. Drag Loop into my first method above cartwheel. When you drop it select 2 times. Drag the cartwheel into the loop. Note: To drag lines of code you will need to click on the colored bumpy tab to the left of each line. Methods – Duration Play your world to see what happens. Jenna should now cartwheel and speak two times in a row. You may feel that your character’s speech bubble disappears too quickly. If this is true, there is a way to make it last longer. Click on more… at the end of the say command. Then click on duration. As you can see, it lasts 1 second. You can make this longer if you wish, maybe 2 or 3 seconds. Play your world to test out different durations until you find one you like. Methods – Comments Now we are going to add comments. These are descriptions that you put in your code so that you, or anyone else that reads your code, can see what it does. The comment button is located at the bottom right of the method editor. Drag a comment into the top of my first method, click on the down arrow next to “No comment” and select other… and type a quick description of what your code does. Methods – Writing Now we will make your character answer her phone. Find the answercellphone method (in Jenna’s methods) and drag it into my first method, at the end. Play your world again to see your changes. Methods – Writing Now we’ll add one more method to the story. Click on your other character (Matt), in the object tree, and look at his methods until you find the RideHorse method. Add it to the end of my first method. Then add another comment above answercellphone that describes the rest of your code. Test this by playing your world. Finishing Touches Congratulations on creating a great story! Now we are ready to move on to Part 3 to learn new things about changing the camera view.
